How to implement Live Agent on Saleforce?

Written by Medha Anand
Updated on December 6th, 2021
- Getting Started
- Bot Building
- Smart Agent Chat
- Conversation Design
-
Developer Guides
Code Step Integration Static Step Integration Shopify Integration SETU Integration Exotel Integration CIBIL integration Freshdesk KMS Integration PayU Integration Zendesk Guide Integration Twilio Integration Razorpay Integration LeadSquared Integration USU(Unymira) Integration Helo(VivaConnect) Integration Salesforce KMS Integration Stripe Integration PayPal Integration CleverTap Integration Fynd Integration HubSpot Integration Magento Integration WooCommerce Integration Microsoft Dynamics 365 Integration
- Deployment
- External Agent Tool Setup
- Analytics & Reporting
- Notifications
- Commerce Plus
- Troubleshooting Guides
- Release Notes
After completing the Setup on the Salesforce account and connection to the Haptik Platform, you can collect some user information and transfer the user's chat to an agent on the Salesforce account.
Stage 1: Create a New Bot
We will start by creating a new bot on the platform. Once you have logged in to Haptik platform, you will land on the Getting started page. Click on "Create New IVA" button as shown -

Stage 2. Create SkillSet and Skills
A Skill Set is a collection of skills that enable your IVA to handle queries that need a complex conversational journey. These skills help the user to resolve their queries. A Skill Set aligns with the overall goals of the IVA.
Click here to know more about SkillSet and Skills.
Stage 3: Create Steps
Steps are the interlinked building blocks of a bot. Each step acts like a gatekeeper that detects user inputs, sends out appropriate responses, and directs users to the next step.
Steps are composed of several important sub-components, which house important pieces of information - User Message, Bot Response, Entities, and APIs.
To know more about steps, click here.
Stage 4: Add User Message
User message are the inputs from the user that the agent needs to interpret the user’s goal. It is important to add and train the bot with a variety of different sample user messages for each step, so that the bot can identify the correct intents and extract entities from the user utterance.
Whenever a user sends a message, we try to understand what the user is trying to say using various Machine Learning algorithms and find the corresponding step. One of the key modules which is used for step identification is the Intent Detection module.
To know more about adding User Messages, click here.
Stage 5: Add Bot Response
Bot Response is where a Step stores the replies that are sent in response to the user's message.
To know more about Bot Response, click here
Using Chat Elements (HSLs)
Chat Elements are used to send different types of responses to the user.
Read more about chat elements, here.
Stage 6: Add Entities
An entity represents values that are collected from the user in a conversation. Depending on the context of the conversation, the required response can either be a single value or a group of specific values.
You can read more about entities here.
Stage 7: Create Connections
Connections represent the path a conversation takes from step to step. Depending on the response a user inputs to the bot, they traverse down a different connection to the appropriate next step. Bot builders must modify every connection they create to indicate which user inputs correspond to which steps.
You can read more about connections here.
Stage 8: Transfer the user to an agent
At all points of agent transfer within the bot flow, the following code should be sent as the final_response within the code step to transfer the chat to the Salesforce agent
 final_response = {
 'status': "Chat now",
 'user_details': user_details,
 'callback_ops': {
 'tract_atc': {
 'receiver': 'message_delivery_salesforce'
 }
 }
 }
Refer to the sample code to transfer the user to an agent on Salesforce.
def transferChatToAgent(user_name):
 url = "https://staging.hellohaptik.com" + "/integration/external/v1.0/send_chat_to_agent/"
 payload = {"team_name":"team_name_on_salesforce","user_name": user_name, "business_id": xxxx}
 header = {
 'Content-Type': 'application/json',
 'Authorization': f"<token>",
 'client-id': 'xxxxxx' # this is the consumer key
 }
 try:
 response = requests.request("POST", url, headers=header, json=payload)
 response.raise_for_status()
 print(f"[transferChatToAgent] API schematics headers: {header} payload:{payload} response {response.json()}")
 return True
 except Exception as e:
 print(f'[transferChatToAgent] API failed due to {e} request {header} response {response.json()}')
 return False
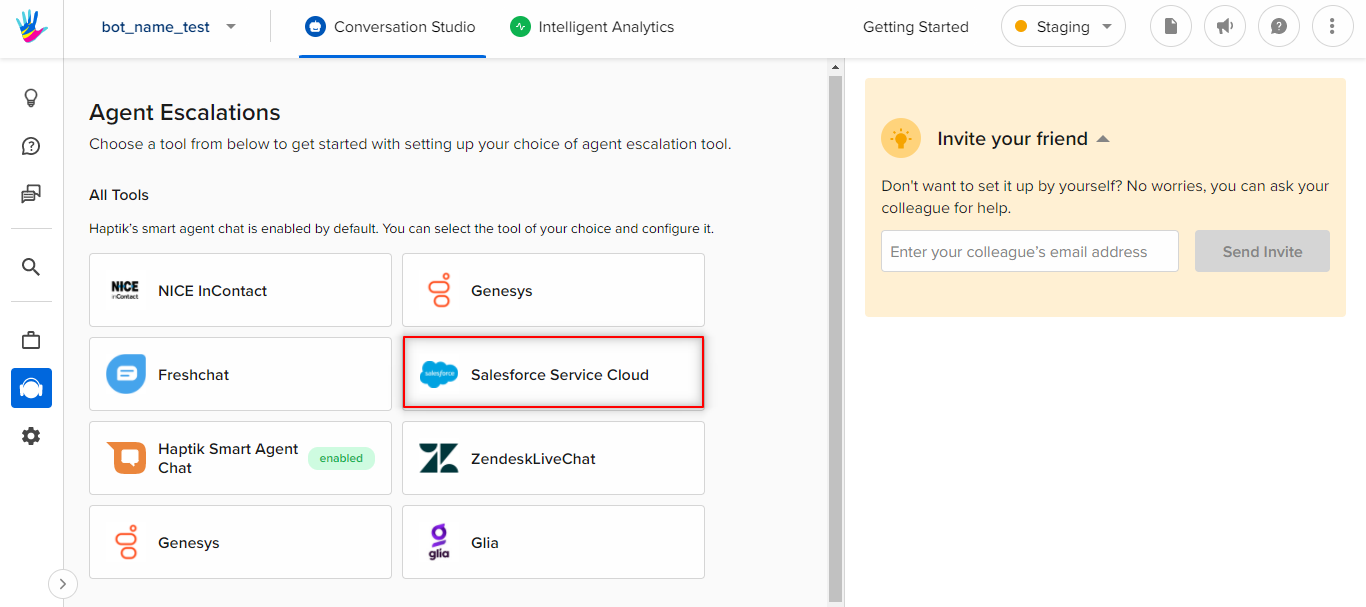
Stage 9: Configure the External Chat tool on Agent Escalation
Open the Agent Escalation from Conversation Studio of your bot, and navigate to Salesforce Service Cloud to configure Salesforce as the Chat tool.
Stage 10: Add Menu(optional)
You can add a Menu which provides a default option for the users to select from. The process to add a menu is mentioned here.
Stage 11: Test the connection
After the setup and configuration, you can test the connection between the bot and the agent.
Stage 12: Quality Assessment
Follow our Quality Assessment section to test the bot.
