When you enable the Payment Notifications for Razorpay, your users will be able to receive payment acknowledgment notifications easily and efficiently.
💡 Razorpay Payment Notifications are currently supported on WhatsApp and Facebook only.
You can follow the steps mentioned below in order to enable notifications for Razorpay Payments:
Step 1: You will have to get the Haptik callback URL, which is https://<MD_Base_URL>/razorpay_notifications/
Please reach out to your Haptik SPOC for MD_Base_URL.
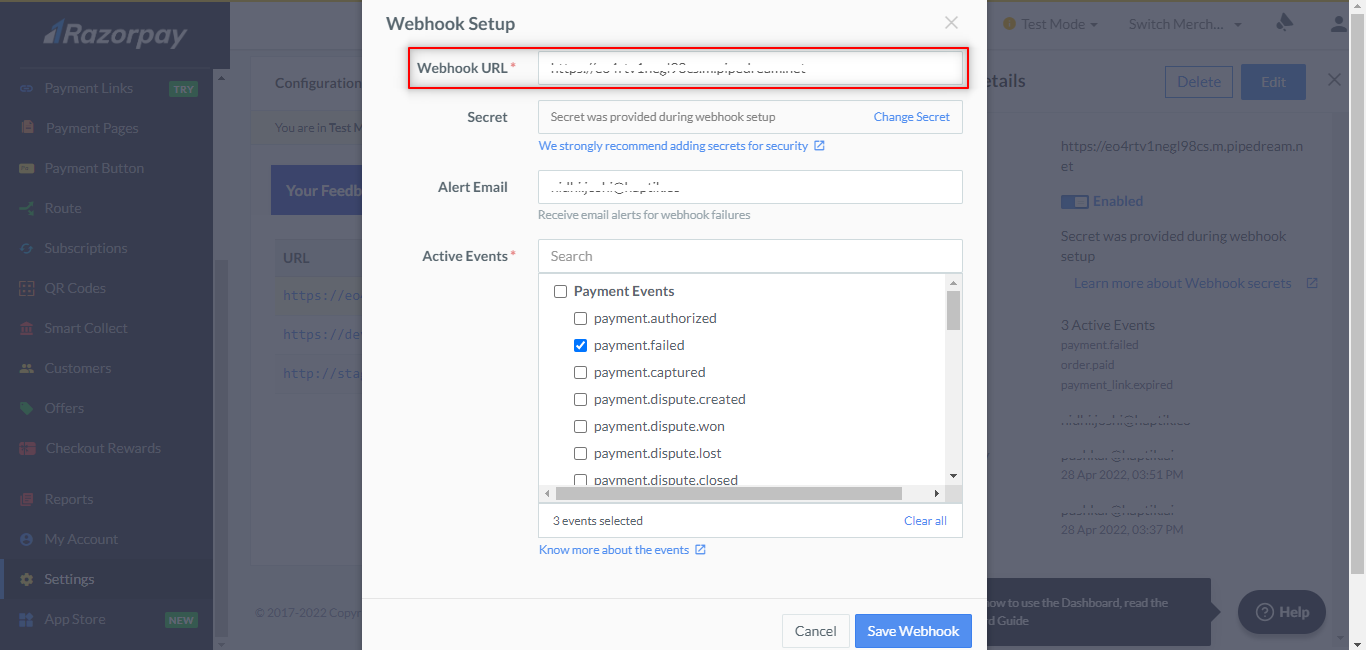
Step 2: Navigate to your Razorpay account > Settings > Webhooks, and select Webhook and Edit it. Here, you will have to add the Haptik Callback URL in the Webhook URL field, as shown.
Step 3: Next, you need to select these two events under Active Events field:
- payment.failed(for failed payment events)
- order.paid(for successful payment events)
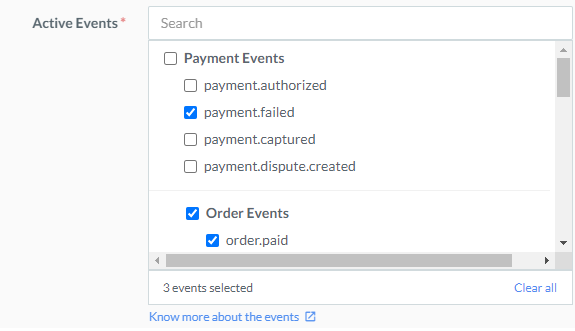
After you have selected the events, click on Save Webhook button.
Step 4: Navigate to your Haptik bot, and in the ‘Payments API integration’ Code Step, you will have to pass a few fields as part of the payment link API. This needs to be passed in the notes field of the payload as custom data, which will then be used at the backend for triggering notifications.
Of all the fields shown in the image, the message field is configurable. It is basically the notification message that will be shown to the user on successful payment.

Make sure to use the exact variables mentioned inside the curly braces while framing your message.
Once you are done with the above, you can now test out the flow.