Creating a Step
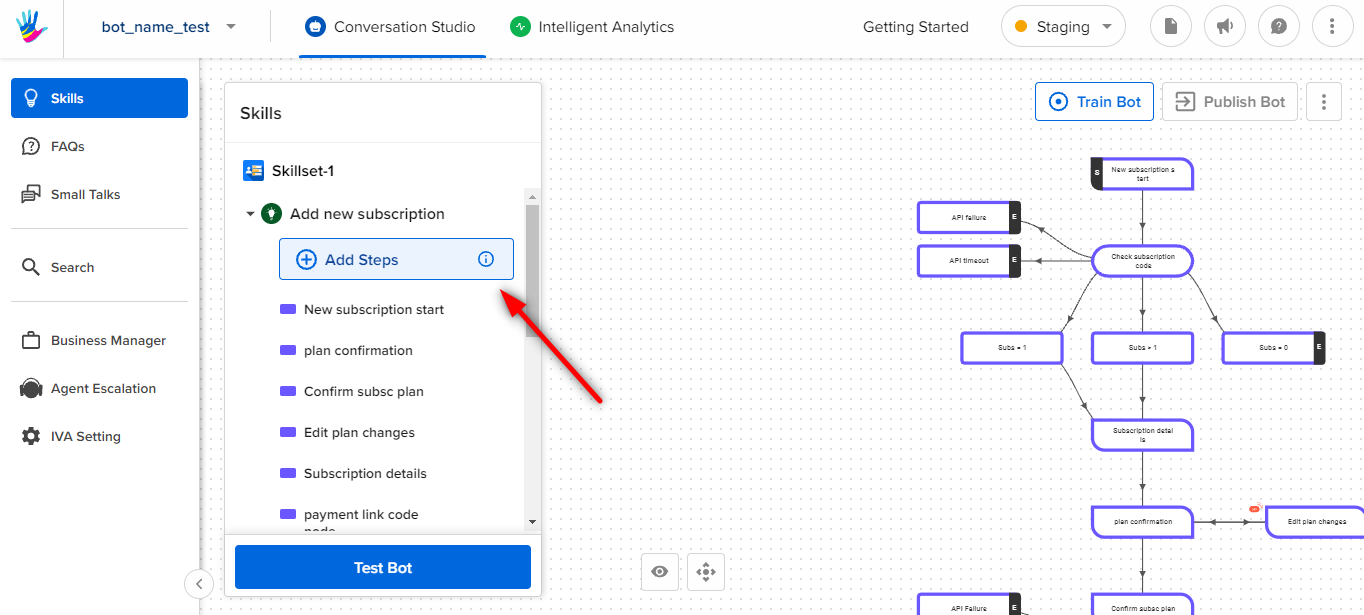
Once you have created a skillset, and have added the necessary skill, you can start adding steps in it. Select the Add Steps button as shown in the image.
This will open a sidebar, as shown below, on the left-hand side of the graph. You can drag and drop the step you want from this sidebar
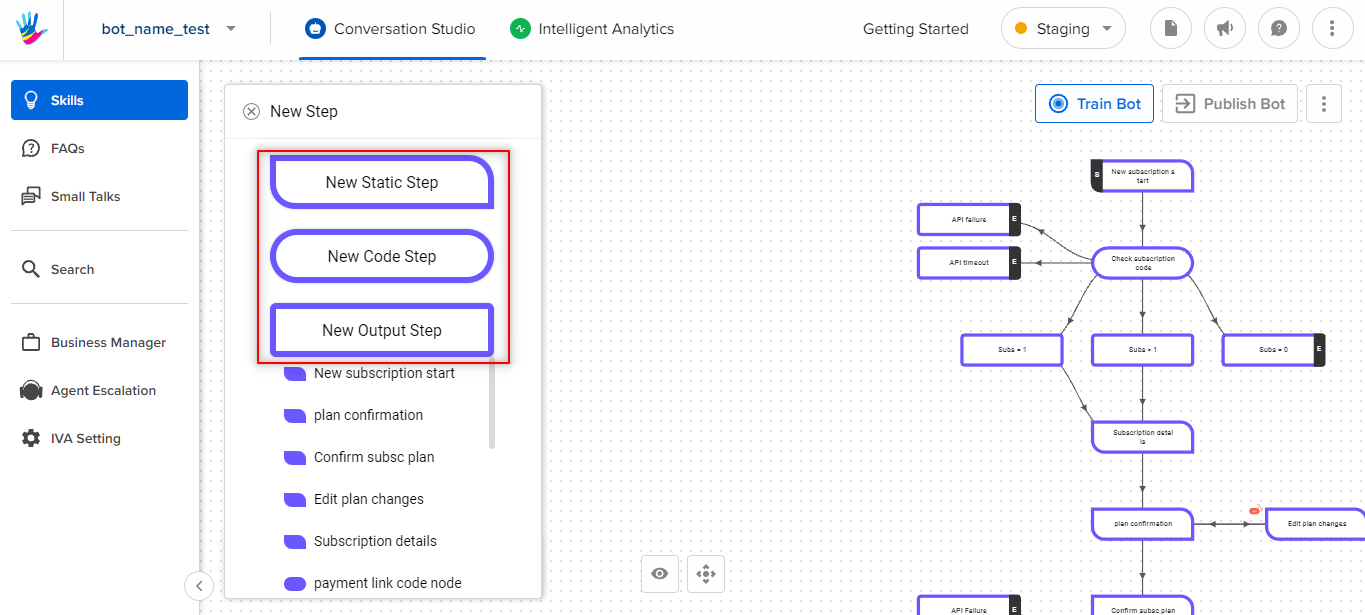
Once you drag and drop any of the step types from the sidebar, a new sidebar is opened with the RHS of the step type you selected. You will need to fill in some information about the step before saving it.
You'll need to add the following inputs:
Step Name: The label that will appear on the step on the graph.
System Name: The system name is used to uniquely identify the step in the backend. Only underscores and capital case alphanumeric characters are allowed in this field.
Step Type: Use step type to indicate if a step is a Start Step, End of Query or a Context Clear Step.
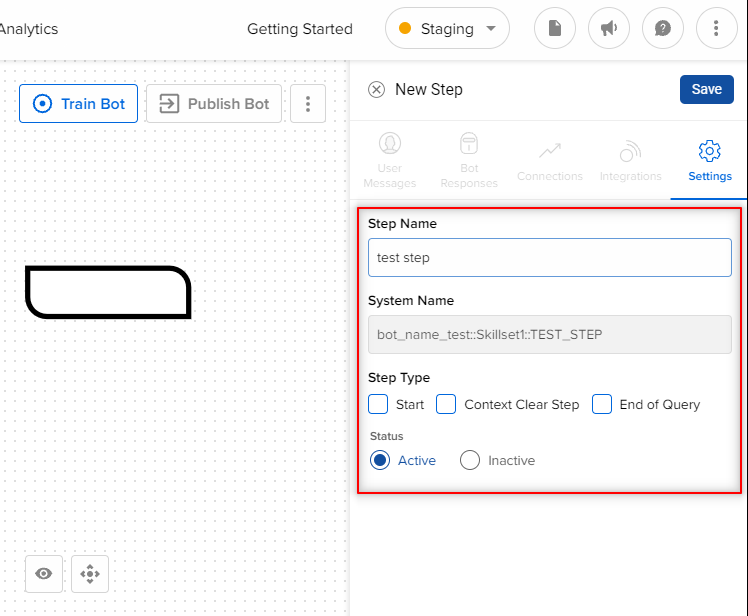
The Start Step indicates that this is the step that will initiate a new Query.
End of Query indicates that this is where the user's query gets resolved. It is usually the end of the conversational flow and also triggers Feedback flow.
The "Context Clear" flag clears the entities and other contextual data of the conversation. This context includes the current position in the conversational flow.
You can read more about it, here.
Info
When the user is in the middle of a query and the system cannot find a match to the connecting steps, our system will go over all the Start Steps to see if they can find a match to what the user said.
Status: Status indicates whether the step will be active or inactive. When you are first making a bot, we'll assume all the steps you create are active. Instances, when you will deactivate steps, will arise later on.
Click 'Save' when done.
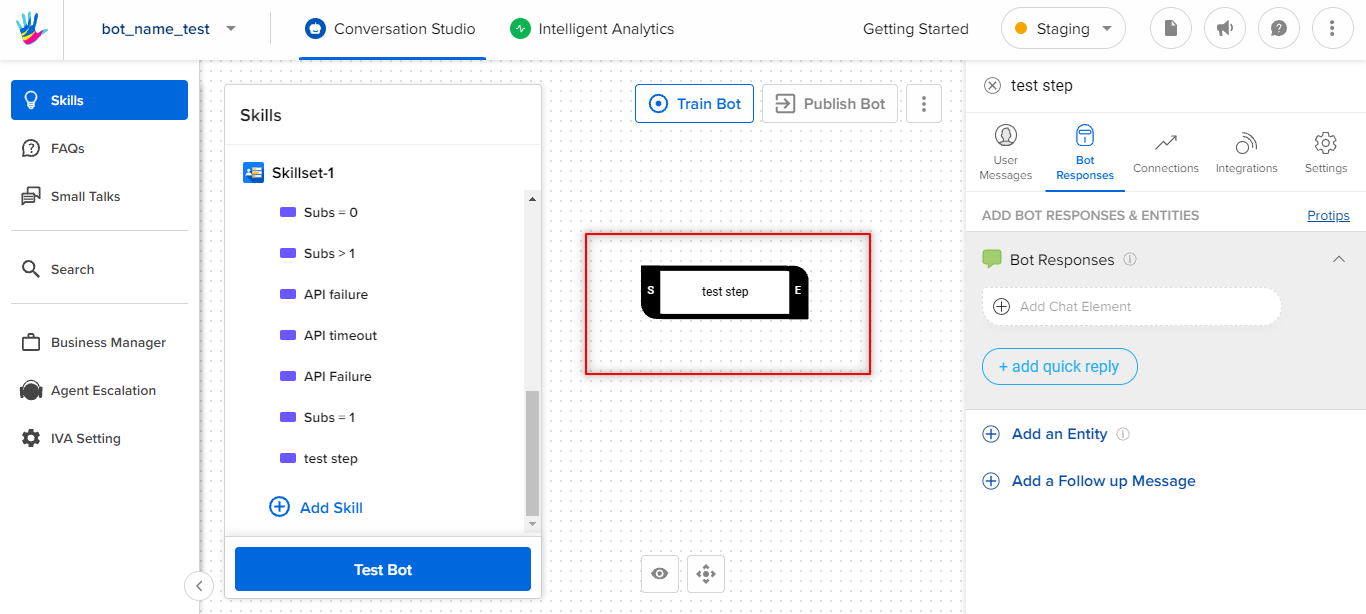
Post creation of a step, the step will be displayed as depicted below:
Multi Steps Selection
You can select multiple steps and move them on the graph. Steps can be selected using the ⌘ CMD + Click, and ⌘ CMD + Click + Drag to move on the graph, as below.
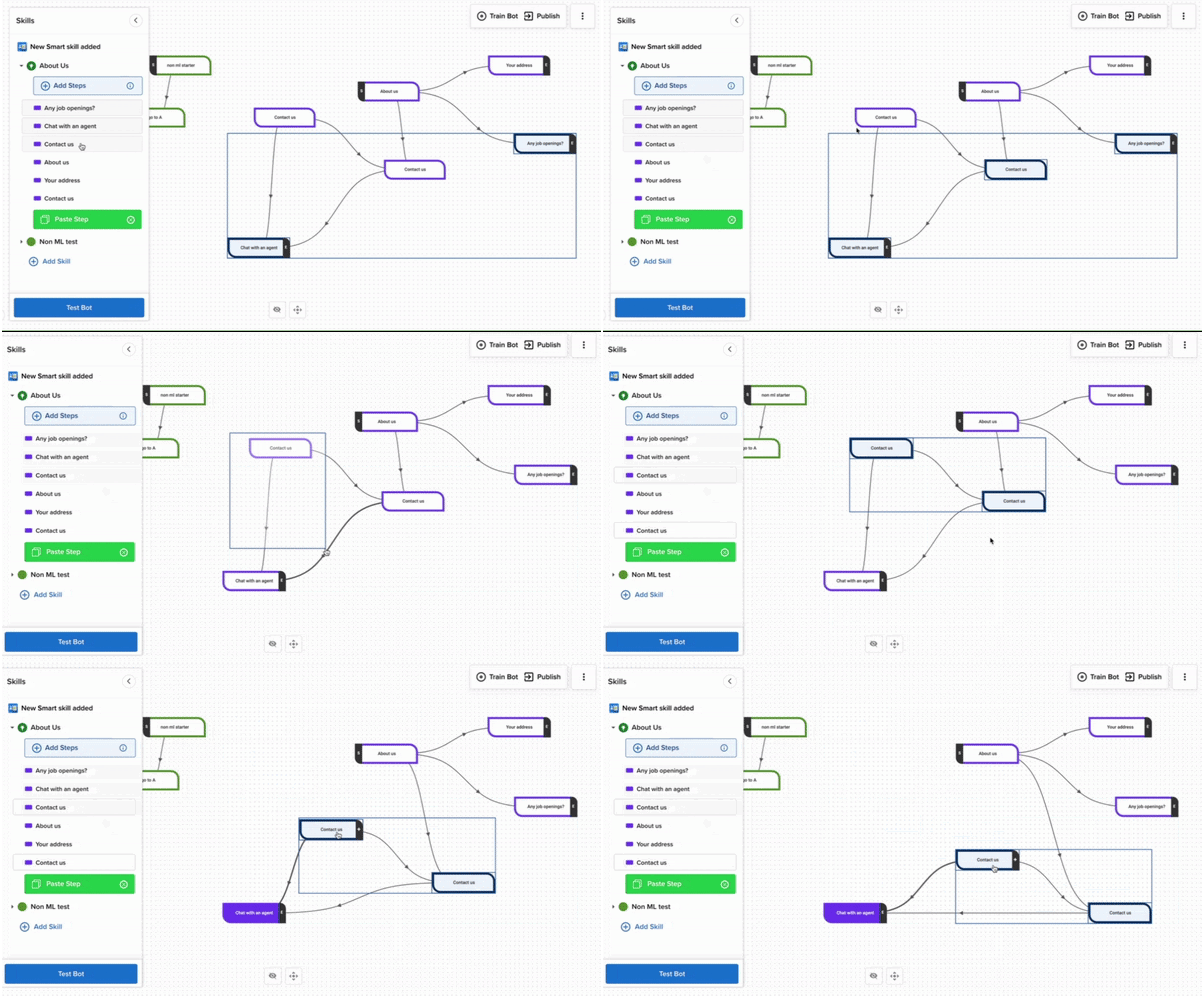
You can also select multiple steps using the same operation steps above on the Skills navigation bar available on the left hand side of the screen, as below.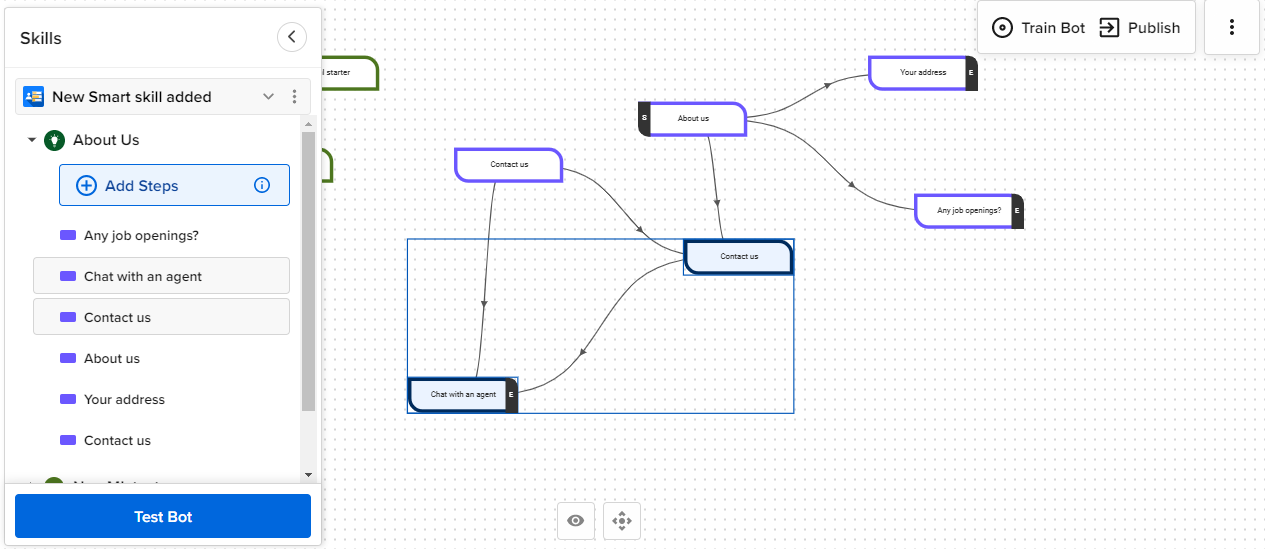
Info
Use the control button (ctrl) when using a Windows system instead of ⌘ CMD.
Press ‘esc’ to deselect the selected steps.
Apart from this, we have three icons at the bottom-middle of the screen as below.

- Click eye icon to show inactive steps on the screen.
- Click center icon to recenter the graph on the screen.
- Click keyboard icon to see keyboard shortcuts employed for creating a connection or multiple selection of steps.
Components of Steps
Depending on the type of step, you will be able to see all or a few of these components.
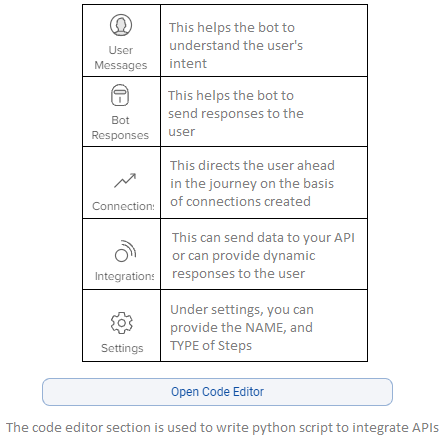
The following components constitute in creating a step-
- Add User Messages
- Add Bot Response
- Create Connections
- Create/Add Entities
- Integrate APIs
Uploading Steps
You can also create steps by uploading a CSV. You can read more about it here.
Instead of adding a new Step, you can also copy an existing Step. Learn more about it, here.