What are Omnichannel Widgets? How Do I Enable Omnichannel Widgets on my Web Bot?
- Getting Started
- Bot Building
- Smart Agent Chat
- Conversation Design
-
Developer Guides
Code Step Integration Static Step Integration Shopify Integration SETU Integration Exotel Integration CIBIL integration Freshdesk KMS Integration PayU Integration Zendesk Guide Integration Twilio Integration Razorpay Integration LeadSquared Integration USU(Unymira) Integration Helo(VivaConnect) Integration Salesforce KMS Integration Stripe Integration PayPal Integration CleverTap Integration Fynd Integration HubSpot Integration Magento Integration WooCommerce Integration Microsoft Dynamics 365 Integration
- Deployment
- External Agent Tool Setup
- Analytics & Reporting
- Notifications
- Commerce Plus
- Troubleshooting Guides
- Release Notes
Omnichannel Bot Building involves deploying your chatbot on various channels, giving your users the flexibility to choose the channel by which they want to engage with your brand/business.
With Omnichannel bot building, for example, a user who does not have an Instagram Account can chat with your bot on WhatsApp. If your user doesn't have a WhatsApp account, they can choose to chat with your bot on the website. The advantage for you is that you only have to create one bot that then applies to all of your customer channels, including your website, Facebook, Instagram, WhatsApp, etc. This increases your reach and caters to all types of customers. All you have to do is to configure Omnichannel Widget on your bot.
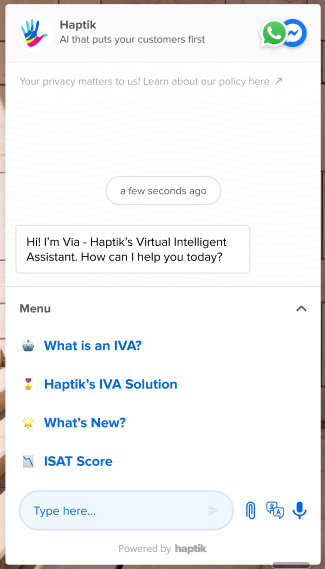
The Omnichannel Widget lets you add the channels option on your bot. Users can then select the channel of their choice to connect with your bot, as shown below.
How to enable Omnichannel Widget?
To enable this feature, go to the Conversation Studio tool on Haptik and open your bot. Next, navigate to Business Manager > Channels > SDK Configurations, and scroll down to Omnichannel Widget.
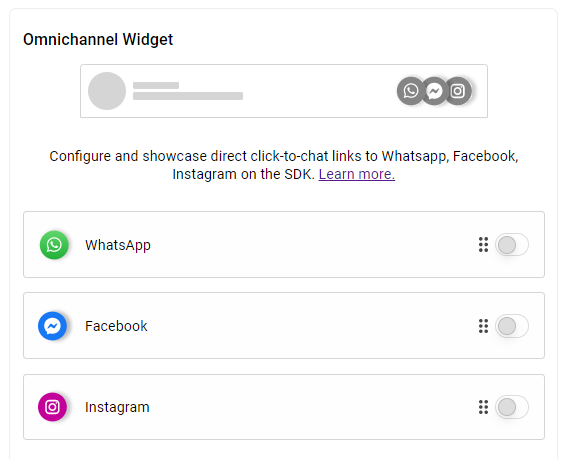
To add a Channel to your bot, simply enable the toggle button provided on the screen for that Channel, as shown.
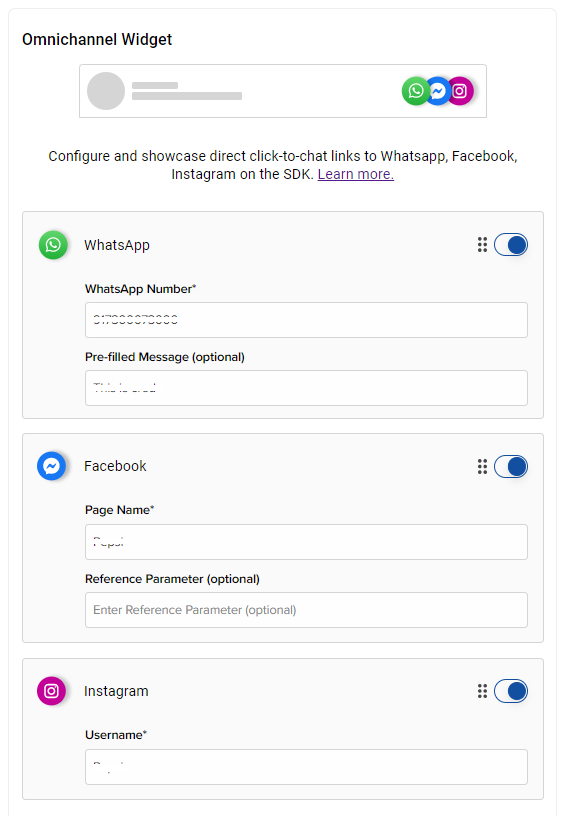
In addition to enabling the toggle button, you will also have to populate certain fields with required channel-specific information.
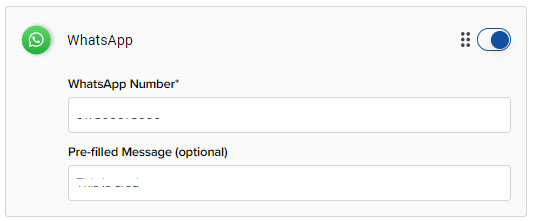
For WhatsApp, add your WhatsApp number. This is the number to which your users will be directed when they choose WhatsApp as a Channel.
You also have the option of adding a Pre-filled Message. The Pre-Filled Message will appear automatically in the WhatsApp chat window when the user clicks on the WhatsApp bot. You can learn more about it, here.
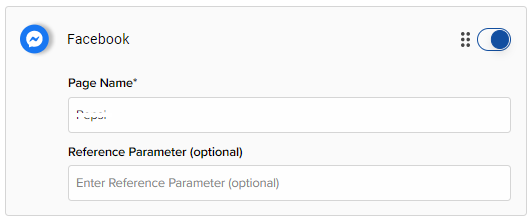
For Facebook, you will have to add a Page Name, which is your Business's Facebook page name. Your users will be directed to that page’s inbox once they select Facebook as the channel.
You can also add a Reference Parameter, which is an optional field. You can learn more about it, here.
For Instagram, you will have to add your Business's Instagram page username in the Username field. When the user selects Instagram as a Channel, they will be directed to the inbox of your Business's Instagram account. You can learn more about it, here.

Once you have enabled these toggles to meet your requirements, you can train and test your bot, after which the Channels option will be visible on the bot, as shown.
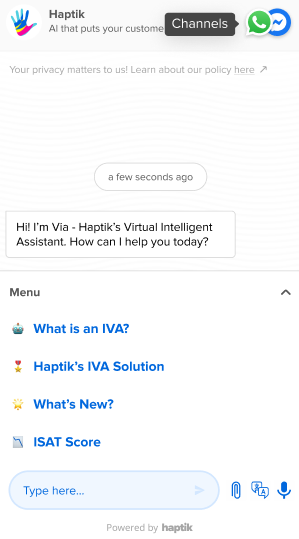
Your user will see all of the icons for the Channels you have selected when they use the bot. They can click on their preferred Channel’s icon to proceed with the conversation on the Channel of their choice.
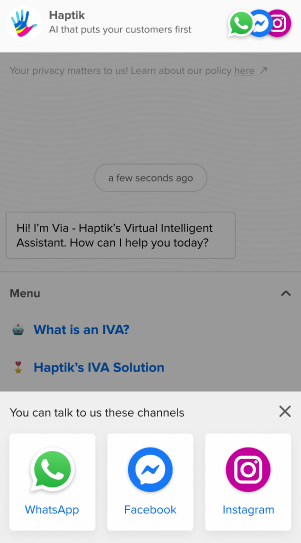
This is how you can enable the Omnichannel Widget on your bot.
