Installation of iOS SDK
- Getting Started
- Bot Building
- Smart Agent Chat
- Conversation Design
-
Developer Guides
Code Step Integration Static Step Integration Shopify Integration SETU Integration Exotel Integration CIBIL integration Freshdesk KMS Integration PayU Integration Zendesk Guide Integration Twilio Integration Razorpay Integration LeadSquared Integration USU(Unymira) Integration Helo(VivaConnect) Integration Salesforce KMS Integration Stripe Integration PayPal Integration CleverTap Integration Fynd Integration HubSpot Integration Magento Integration WooCommerce Integration Microsoft Dynamics 365 Integration
- Deployment
- External Agent Tool Setup
- Analytics & Reporting
- Notifications
- Commerce Plus
- Troubleshooting Guides
- Release Notes
Prerequisites
To Integrate Haptik iOS SDK, you must obtain the following credentials to get started -
- Client ID: Unique Haptik identification number associated with your account.
- Business ID: Unique business identification number.
- Base URL: Link pointing to the specific server environment. (Different for Staging and Production)
- Auth Type: authentication type to be used for user registration.
- Auth ID: authentication type to be used for user registration.
Delete
With the Haptik SDK for iOS, you can build apps that target native 64-bit devices running iOS 12.0 and later. Developing an application with the Haptik SDK requires the latest version of Xcode. The SDK works with the iPhone device family and supports the Portrait device orientation.
Installing Haptik SDK
Manual integration -
- Download the HPWebKit.zip file and unzip it.
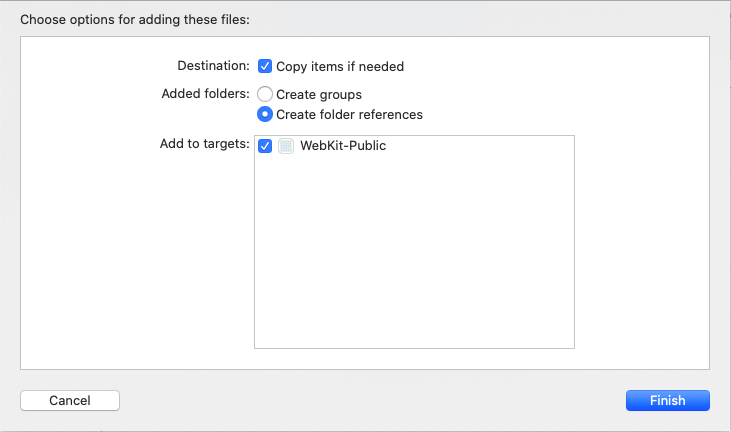
- Drag and drop the downloaded XCFramework into your Xcode project.
- If the framework’s symbols are unable to be loaded, navigate to the “General” pane of your target and find the “Frameworks, Libraries, and Embedded Content” dropdown.
- Switch HPWebKit.xcframework from “Do Not Embed” to “Embed and Sign”.

- You will also need to install an HPWebKit dependency pod 'SSZipArchive', '~> 2.2'
Cocoapods -
- If you haven’t already done so, install a recent version of CocoaPods.
- If you don’t have an existing Podfile, run the following command to create one -

- Add this line to your Podfile -
Always use the latest releaseuse_frameworks! target YourTargetName do pod 'HPWebKit' end
- Pinning it to a specific version (e.g. 0.1.0)
use_frameworks!
target YourTargetName do
    pod 'HPWebKit', '0.1.0'
end
- Run the following command -

- From now on, use the .xcworkspace file to open your project in Xcode, instead of the .xcodeproj file.
