What is Omnichannel Bot Building?

Written by Soham Amburle
Updated on July 6th, 2022
- Getting Started
- Bot Building
- Smart Agent Chat
- Conversation Design
-
Developer Guides
Code Step Integration Static Step Integration Shopify Integration SETU Integration Exotel Integration CIBIL integration Freshdesk KMS Integration PayU Integration Zendesk Guide Integration Twilio Integration Razorpay Integration LeadSquared Integration USU(Unymira) Integration Helo(VivaConnect) Integration Salesforce KMS Integration Stripe Integration PayPal Integration CleverTap Integration Fynd Integration HubSpot Integration Magento Integration WooCommerce Integration Microsoft Dynamics 365 Integration
- Deployment
- External Agent Tool Setup
- Analytics & Reporting
- Notifications
- Commerce Plus
- Troubleshooting Guides
- Release Notes
Table of Contents
Omnichannel Bot Building ideally means “Build Once Deploy Anywhere”. It thus states that as a bot builder, you need to develop your bot only once and then you can seamlessly deploy it on various other Channels as per your business requirements.
In the most simple terms, Omnichannel Bot Building defines the Web-SDK as the default channel and states that if the Bot Responses are added to Web-SDK, then they will automatically work for other Channels like WhatsApp, Facebook, Instagram, Google Business Messages, etc.
Omnichannel is thus a blanket term that encompasses 3 different functionalities:
- Auto-translations of messages from the default channel to the target channel
- Send specific Bot responses to specific target channel
- Auto-preview generation
1. Auto-translations of messages from the default channel to the target channel
This is the base level of Omnichannel, and Web-SDK is the default channel for Omnichannel Bot Building. With Auto-translations, every Bot Response added for Web-SDK will be auto-translated to best fit on other channels like WhatsApp, Facebook, Instagram, Google Business Messages, etc. These translations will be done by Haptik automatically, and the bot builder does not have to do anything in this case.
2. Send specific Bot responses to specific target channel
Now, we saw that Bot Responses added to Web-SDK will be auto-translated to best fit the other target platforms. In 80% of the cases, these auto-translations work well enough. However, in certain 20% of the cases, it might happen that you would want to customize a message when it is sent on a specific target channel.
For example, you might want to send Quick Replies on Web SDK, but on WhatsApp, you wish to send a List element.
With Omnichannel Bot Building, you can program your bot to send a specific response on the Web-SDK, but a completely different response on WhatsApp or Facebook, or any other Channel.
3. Auto-preview generation
As we saw that the Bot Responses added to Web-SDK (which is the default channel) are auto-translated to best fit the target channel. However, you do not get to see what those messages will look like on the target channel until they are actually sent on those Channels. Here, you might want to see a small preview of what a particular element on Web-SDK is going to look like on the target channel.
With Omnichannel Bot Building, if you switch to WhatsApp, you will now get to see a quick preview of what your Web-SDK responses are going to be translated into when they are sent on WhatsApp.
For example, you will be able to see that your 5 Quick Replies on Web-SDK are being sent as a List element on WhatsApp.
Moreover, a form added on Web SDK will be flagged as a RED alert which means it is NOT SUPPORTED on WhatsApp.
Adding specific Bot Responses for specific target Channels
As we saw in the earlier section for Omnichannel Bot building, the Default Channel is Web SDK. Now, what that means is, that if you enter your responses under the Web SDK channel, these responses will be auto-translated when the bot is deployed on other Channels. However, Omnichannel Bot Building also gives you the power to override these auto-translations and specify custom messages for certain or all Steps in the bot’s conversational flow.
In order to add specific responses for Target channels you can follow these steps:
- Click on the Step for which you would like to configure a channel-specific Bot Response.
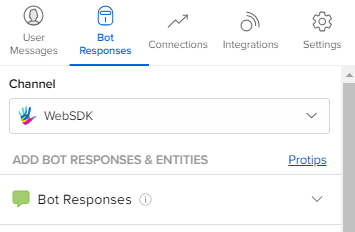
- Next, move to the Bot Responses section of that Step.
- You will now see a dropdown as shown in the figure below.
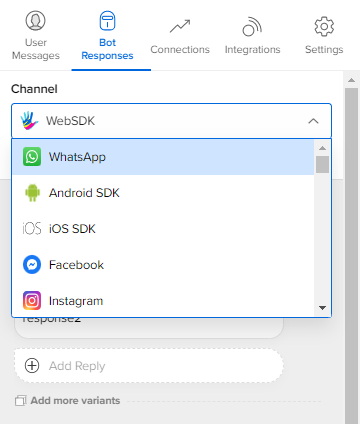
- Click on the drop-down and select the Channel for which you would like to set a specific Bot Response.
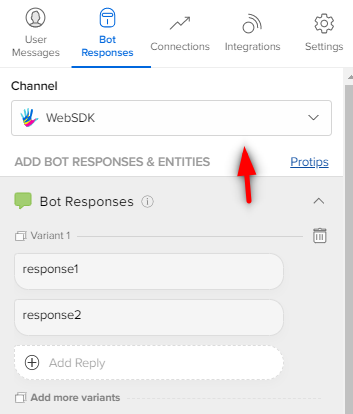
- Once you are in the Bot Responses section for that Channel, you can now add specific responses for this Channel.
- Thus, any response you add for this Channel will be sent to the user as a response, instead of the Web-SDK response on this Step.
Understanding “Auto-synced” and “No longer Auto-synced” messages
Auto-sync
- Whenever you use the channel-switcher dropdown to go to the Bot Responses section of a particular Channel, you will see this message, as shown in the image below.
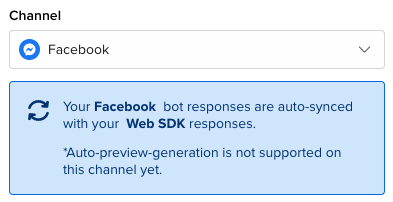
- What this means is, though you see this section as blank, this section is in fact in complete sync with the Bot Responses added in the Web-SDK section.
- Thus, when this bot will be deployed to this particular Channel, as in this example - Facebook, the Web-SDK’s responses will be auto-translated to best fit Facebook’s formatting.
No longer Auto-synced
- Now, sticking to the above example, if you edit Facebook’s Bot Responses, then that means you are overriding the auto-translations of this Channel, which is why the Haptik platform will no longer translate the Web-SDK Bot Responses of this Step for Facebook and rather it will use the messages you have added here for all sections of this Step, and thus you will see this message, as shown in the image below.
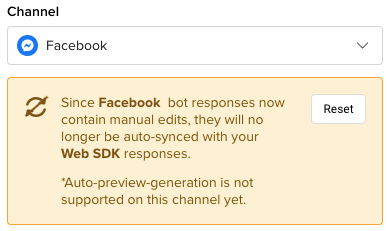
- As shown in the above image, you will see a Reset button as well. So, when you manually add specific responses for a particular Channel, then from that point onwards, you own the Bot Responsesof all the different sections of that Channel, such as:
- Bot responses
- Entity prompts
- Final responses
- Follow-up messages
- Now in this case, if you would like to re-establish your sync with the Web-SDK as it was before, then you can use the Reset button for it.
