Canned Responses
- Getting Started
- Bot Building
- Smart Agent Chat
- Conversation Design
-
Developer Guides
Code Step Integration Static Step Integration Shopify Integration SETU Integration Exotel Integration CIBIL integration Freshdesk KMS Integration PayU Integration Zendesk Guide Integration Twilio Integration Razorpay Integration LeadSquared Integration USU(Unymira) Integration Helo(VivaConnect) Integration Salesforce KMS Integration Stripe Integration PayPal Integration CleverTap Integration Fynd Integration HubSpot Integration Magento Integration WooCommerce Integration Microsoft Dynamics 365 Integration
- Deployment
- External Agent Tool Setup
- Analytics & Reporting
- Notifications
- Commerce Plus
- Troubleshooting Guides
- Release Notes
Table of Contents
How to add Canned Responses?Add single Canned ResponseUpload Multiple Canned ResponsesDelete Canned ResponsesCanned Responses help agents send rapid and apt responses to the users. The Team Leader can upload the Canned Responses for the team from the Canned Responses section.
How to add Canned Responses?
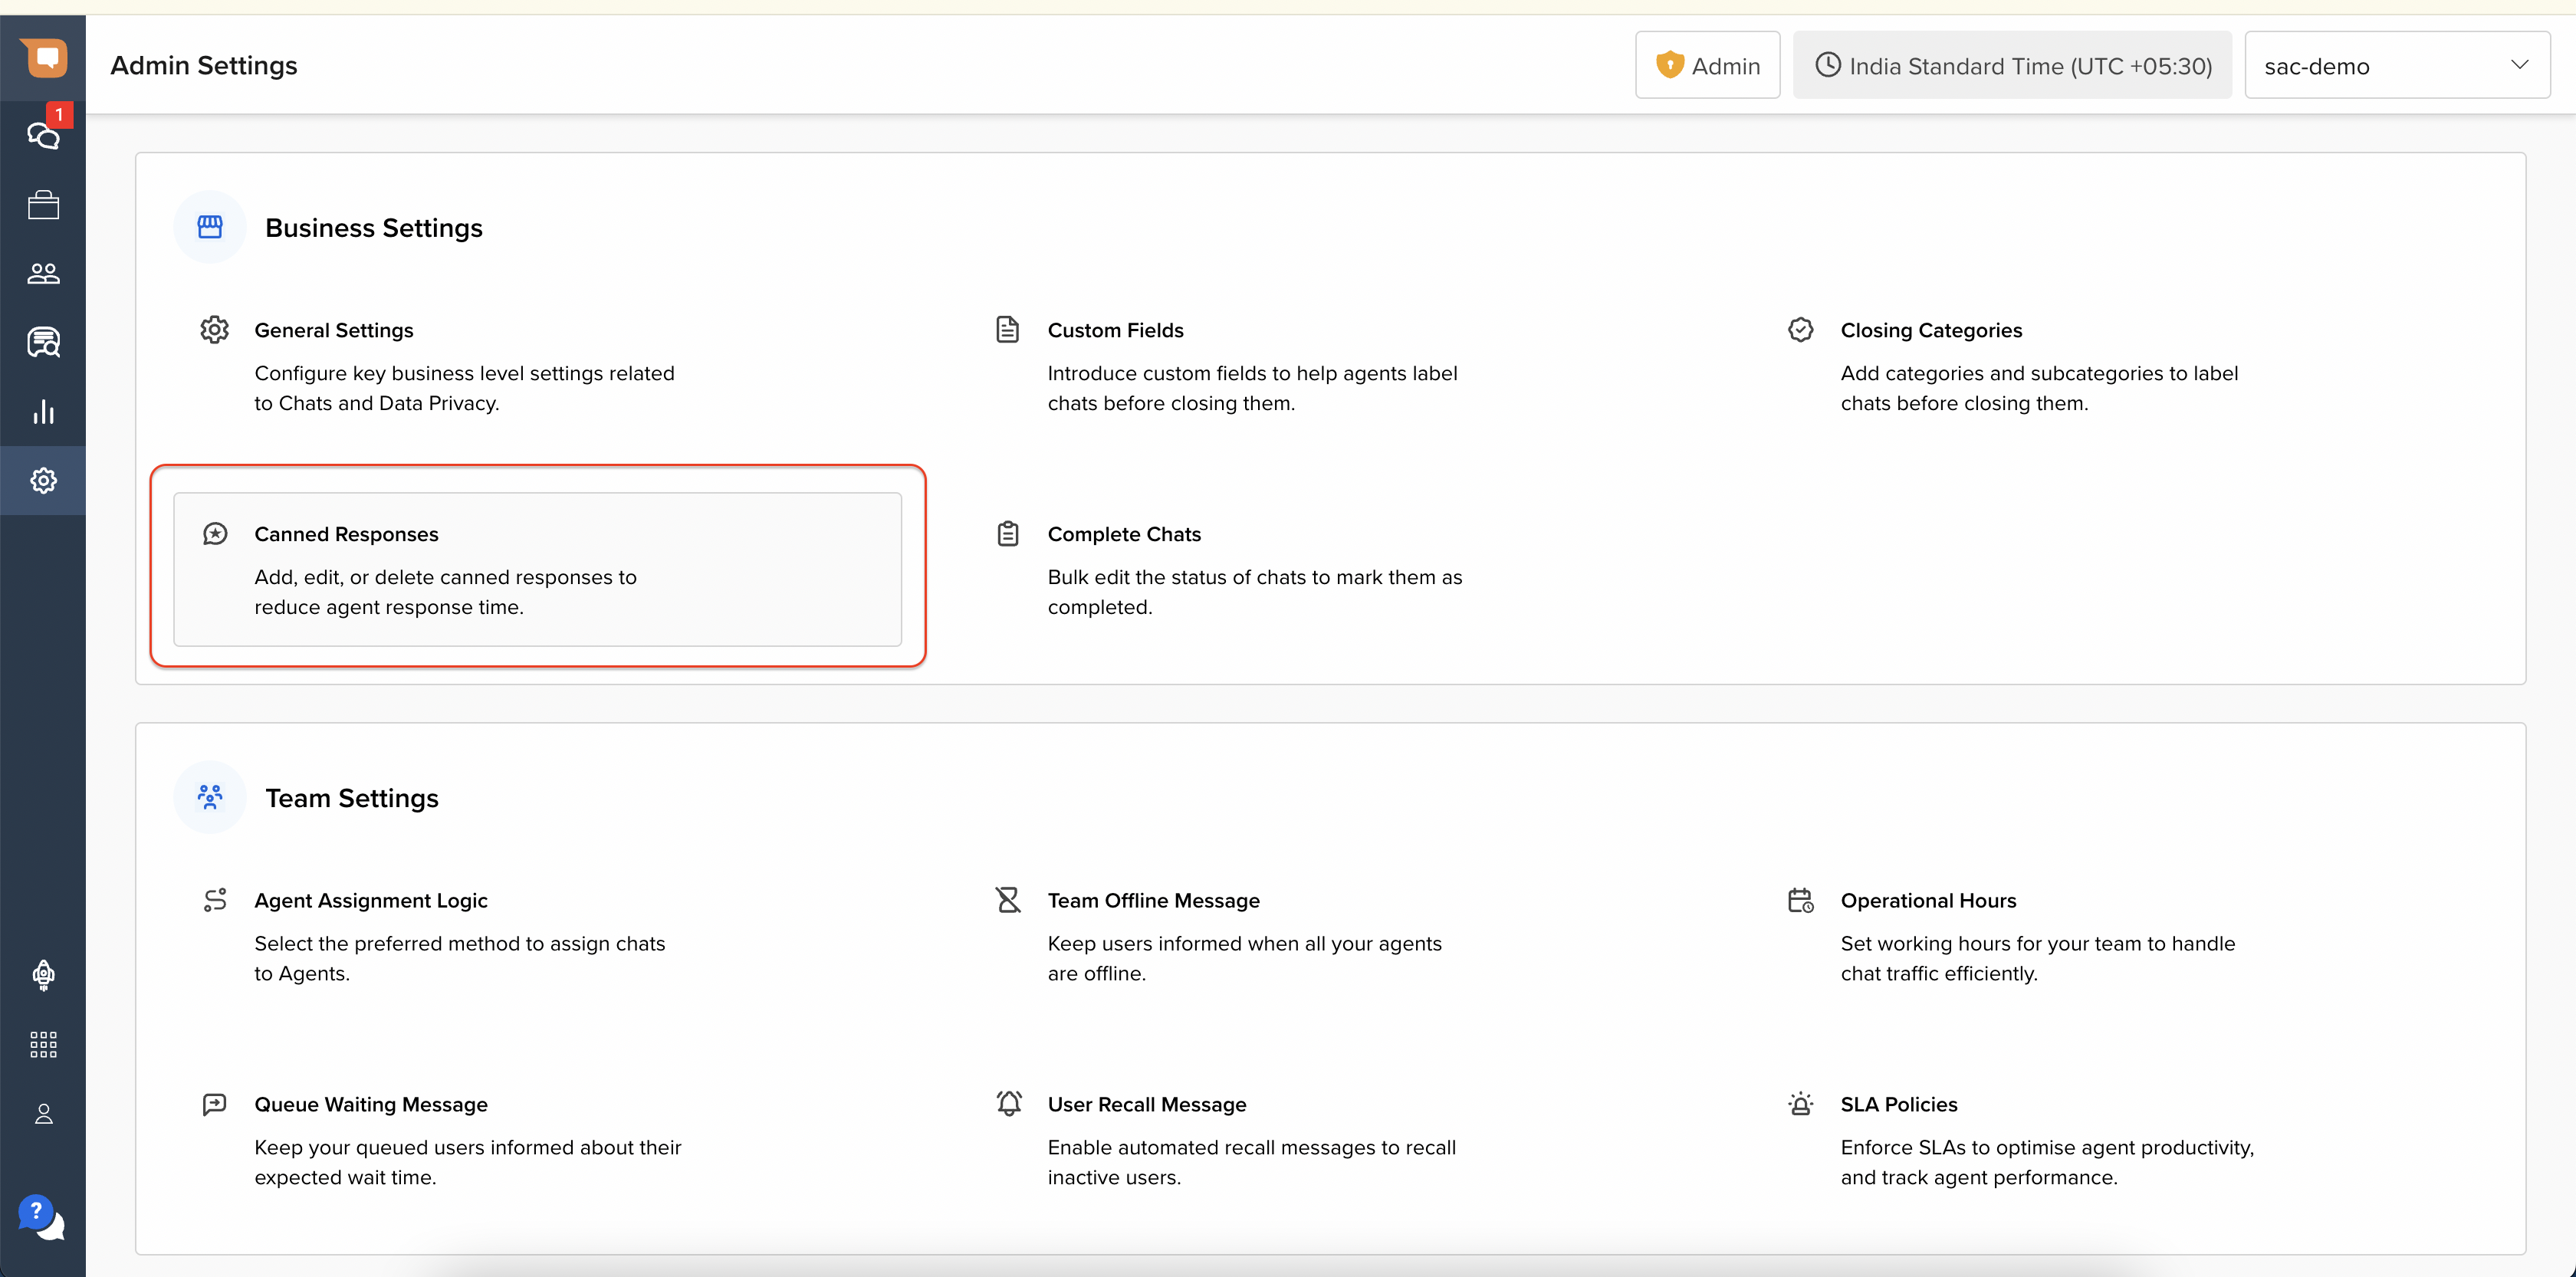
Click on Admin Settings and go to Canned Responses as shown below:

Add single Canned Response
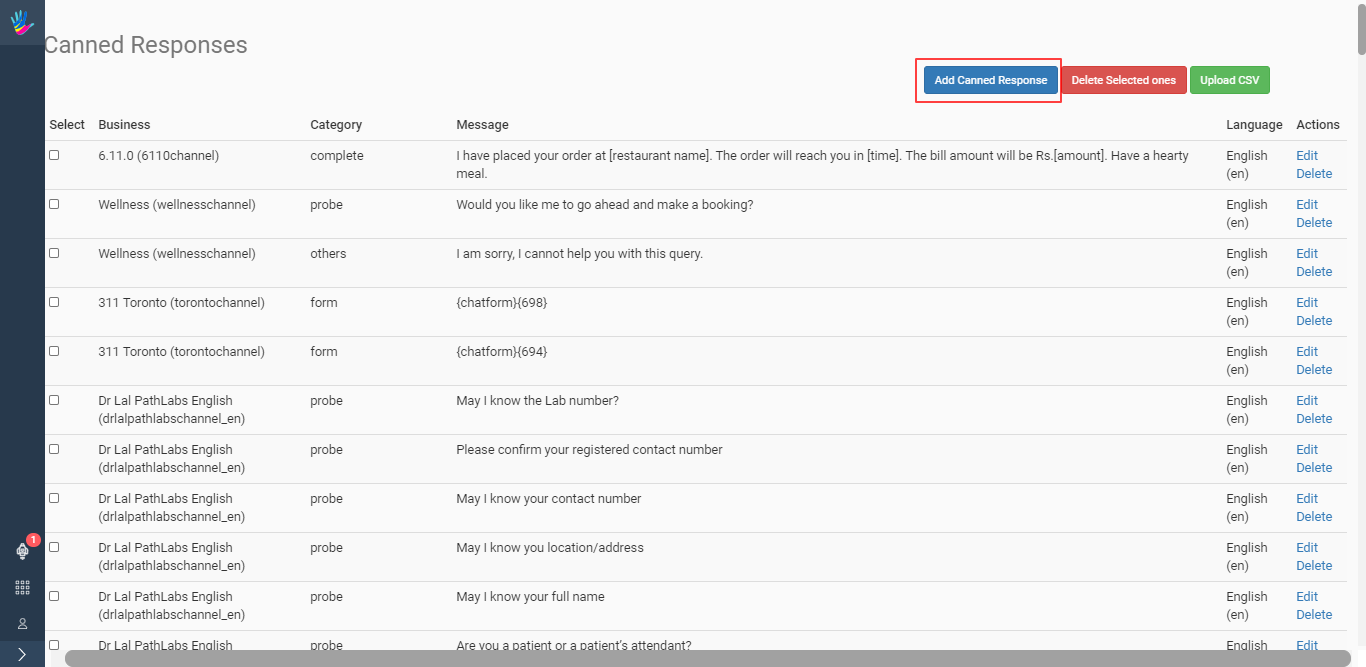
Click on the Add Canned Response button

Provide the following details

- Business Name: Select your business name from the dropdown.
- Language: Select the language you want to set the Canned Response in.
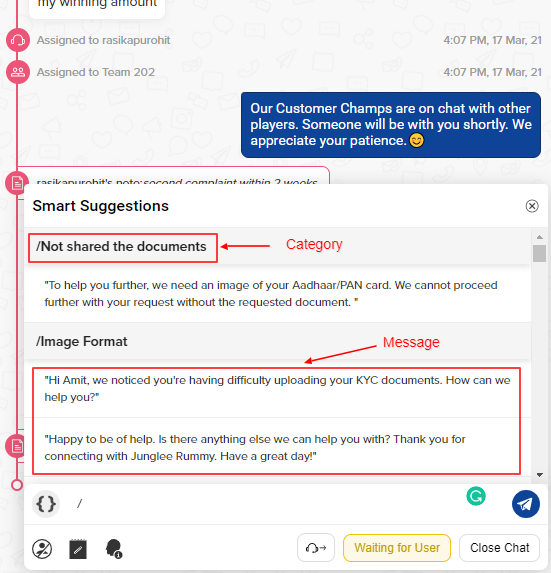
- Category: Set the Category to which the Message will belong to.
- Message: Set the actual response which the agent can send to the user.

Upload Multiple Canned Responses
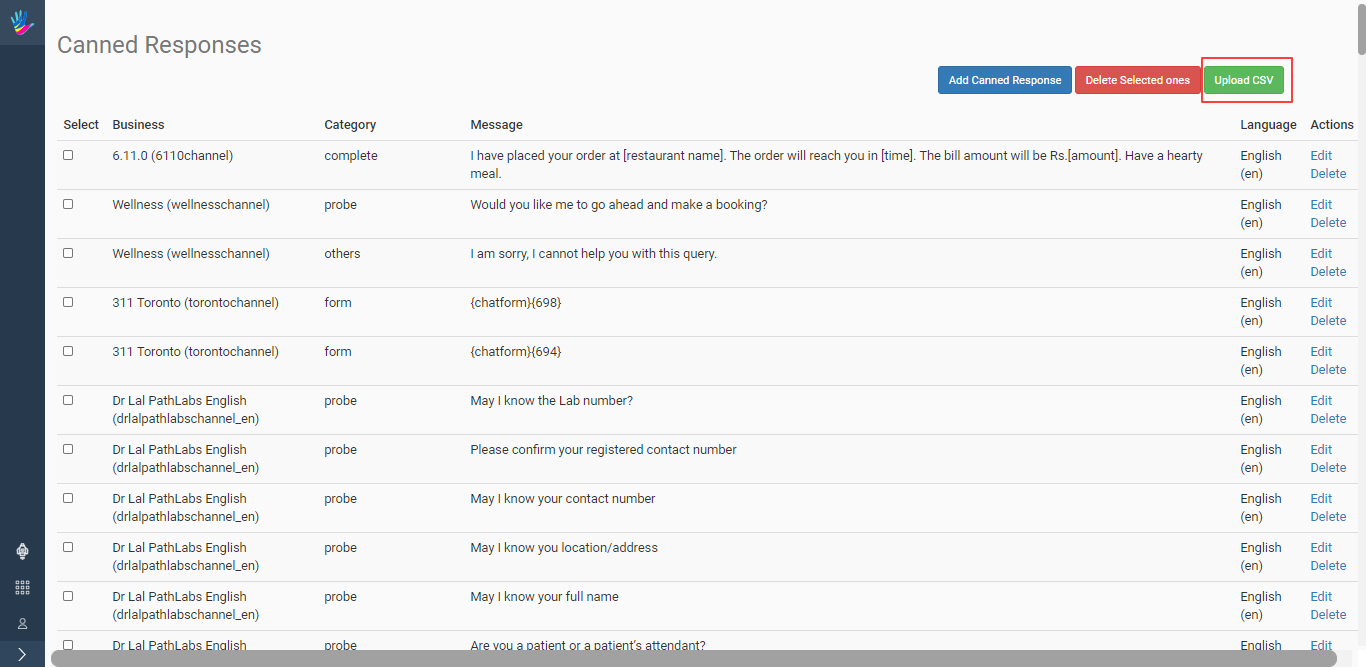
You can upload a CSV file to make a bulk upload for all the Canned Responses.

Delete Canned Responses
To delete Canned Responses, select the response(s) from the Select column and then click on the Delete Selected one's button.

