What is Freshchat Integration? How to Set up Haptik and Freshchat Integration?

Written by Soham Amburle
Updated on May 31st, 2023
- Getting Started
- Bot Building
- Smart Agent Chat
- Conversation Design
-
Developer Guides
Code Step Integration Static Step Integration Shopify Integration SETU Integration Exotel Integration CIBIL integration Freshdesk KMS Integration PayU Integration Zendesk Guide Integration Twilio Integration Razorpay Integration LeadSquared Integration USU(Unymira) Integration Helo(VivaConnect) Integration Salesforce KMS Integration Stripe Integration PayPal Integration CleverTap Integration Fynd Integration HubSpot Integration Magento Integration WooCommerce Integration Microsoft Dynamics 365 Integration
- Deployment
- External Agent Tool Setup
- Analytics & Reporting
- Notifications
- Commerce Plus
- Troubleshooting Guides
- Release Notes
Table of Contents
Table of Contents
Prerequisites for having a bot with Freshchat integrationHow to set up Freshchat + Haptik Integration?1. Adding details in the Configure Freshchat section on Haptik2. Configuring Chat with an Agent on the Haptik bot3. Configure the Webhook Connection4. Enable IntelliAssign5. TRACT EnablementFreshchat is Freshwork's customer messaging solution. This is a solution geared towards making conversations with leads and customers much easier. This is also one of the solutions Freshworks offers its customers that’s built specifically to use with other products. Businesses can live chat with their customers as well as set up chatbots to automate the entire process.
The Businesses that use Freshchat for providing live chat support can leverage Haptik IVA’s integration with Freshchat. It would provide a unified automated support experience in one interface itself.
Click here, to know more about the features of Freshchat.
Prerequisites for having a bot with Freshchat integration
Following are the prerequisites:
- A bot on Haptik. You can read this article to build your own bot.
- A registered account on Freshdesk in order to use Freshchat, along with the license mentioned here.
How to set up Freshchat + Haptik Integration?
The steps for Setup are divided into different sections.
- Adding details in the Configure Freshchat section on Haptik.
- Configuring Chat with an Agent on the Haptik bot.
- Configure the Webhook Connection.
- Enable IntelliAssign.
- TRACT Enablement
1. Adding details in the Configure Freshchat section on Haptik
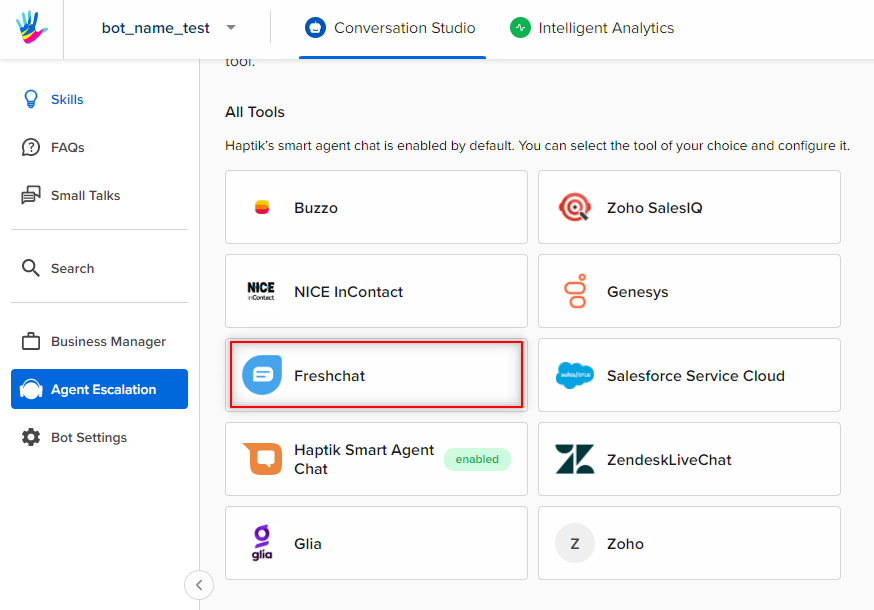
Step 1: Since you have created a bot on Haptik, open your bot and navigate to Agent Escalation > Freshchat, as shown below.
Step 2: After selecting Freshchat, you will land on the Configure Freshchat page, as shown below.
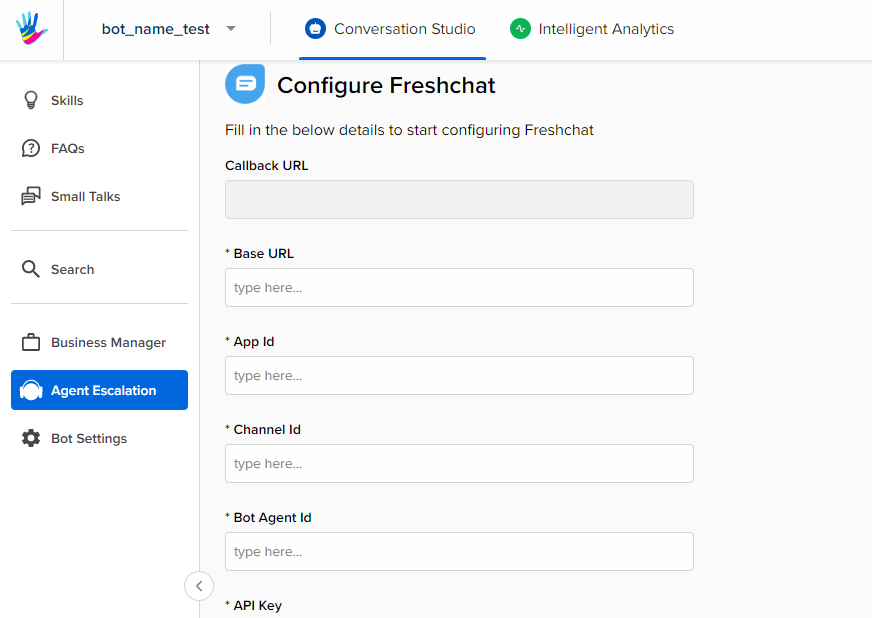
Step 3: Here, you will have to populate the following mandatory fields, with appropriate data,
-
Base URL: For the Base URL, navigate to your Freshchat account, and you will get it from the page URL. The Base URL will be in the following format -
https://accountname.freshchat.com/version_name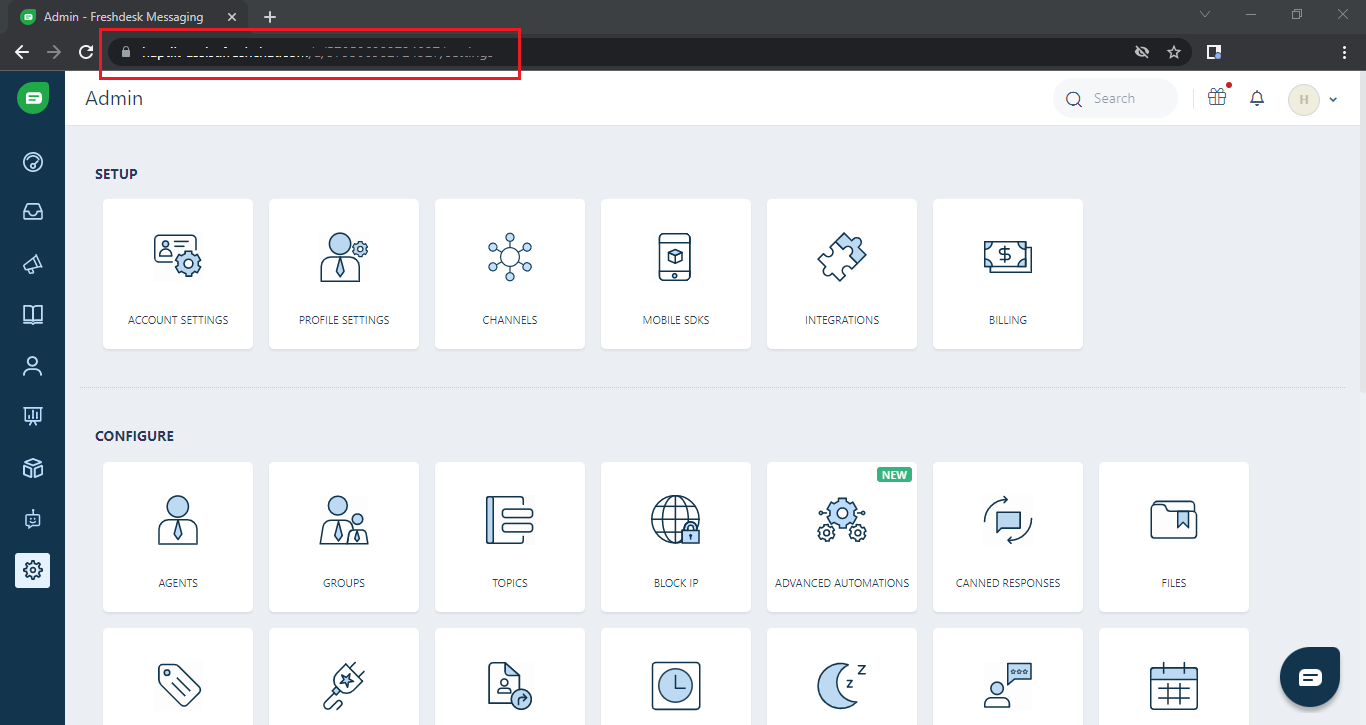
-
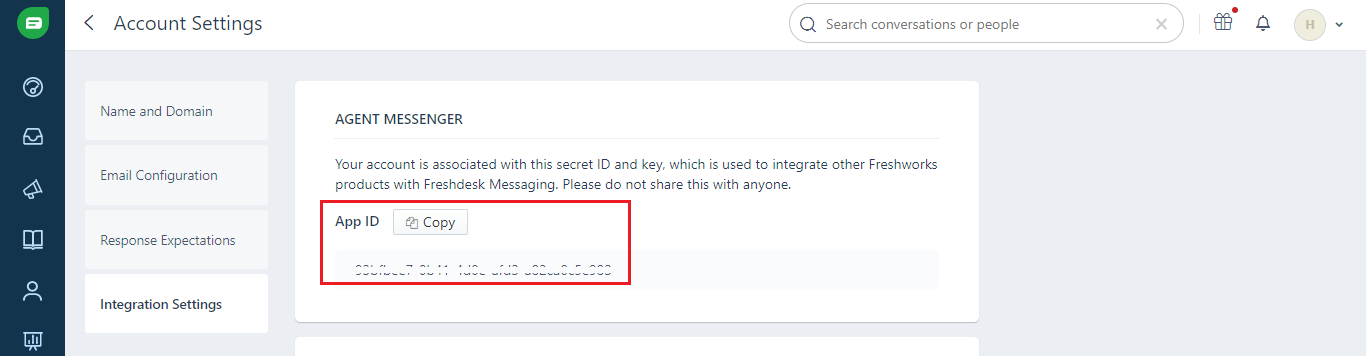
App Id: For App Id, navigate to Freshchat dashboard > Admin >Account Settings > Integration Settings, and you will get the App Id. You can simply tap on the Copy button and the Id will get copied.
-
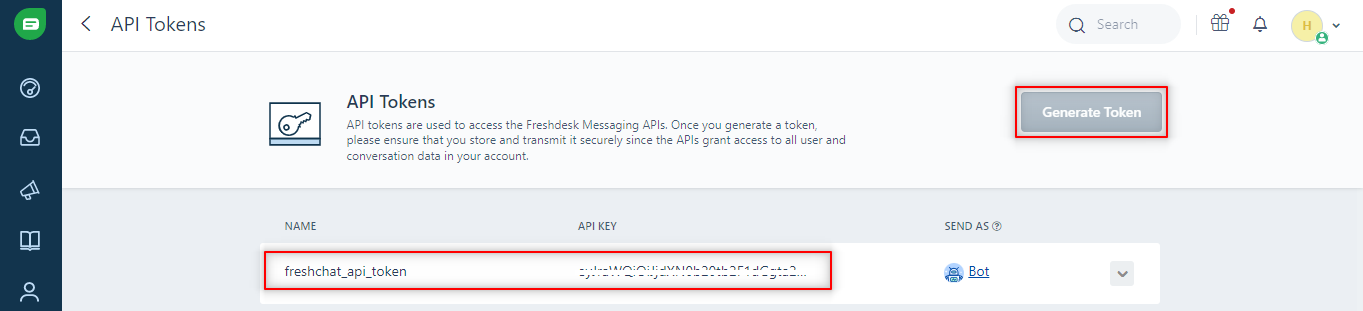
API Key: For API Key, move to your Freshchat dashboard, and navigate to Admin > Configure > API Tokens, and here you will have to tap on the Generate Token button, after which a token will be generated, and that will be the API Key.
-
Channel Id: For Channel Id, you will have to call an API on Postman. Navigate to Postman, and follow the further steps,
- Add the Base URL in the GET section, followed by /channels.
- Next, select the Headers tab, and select the Authorization, Content-Type, and Accept keys.
- In the Authorization key, you will have to add Bearer, followed by the API Key.
-
In Content-Type and Accept, simply select application/json.
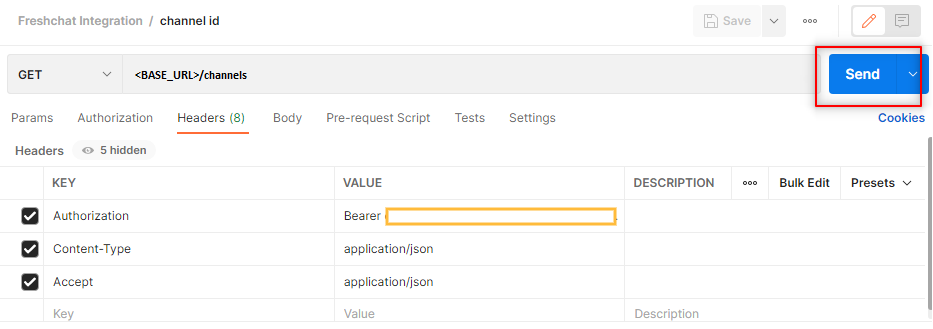
-
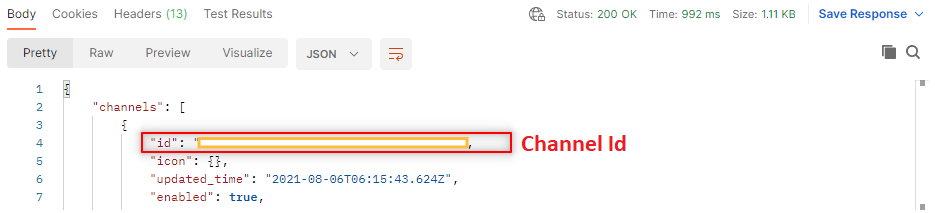
Once you have done the above, tap on the Send button, and you will get the Channel Id in the response section of the page, as shown.
-
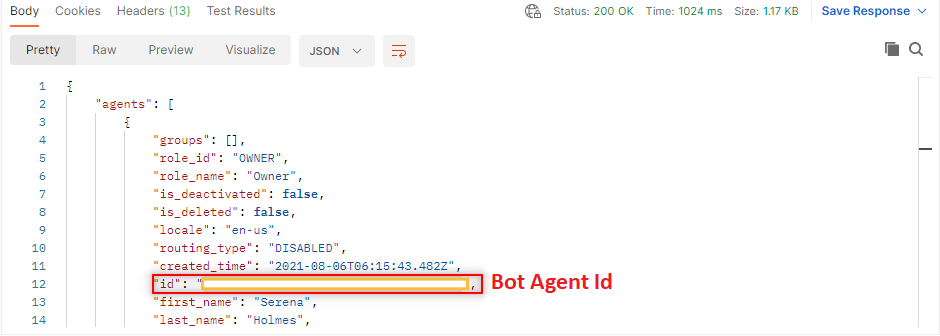
Bot Agent Id: For Bot Agent Id, you will have to call an API on Postman, just like we did for the Channel Id. Navigate to Postman, and follow the further steps,
- Add the Base URL in the GET section, and it would be followed by /agents.
- Next, select the Headers tab, and select the Authorization, Content-Type, and Accept keys.
- In the Authorization key, you will have to add Bearer, followed by the API Key.
-
In Content-Type and Accept, simply select application/json.
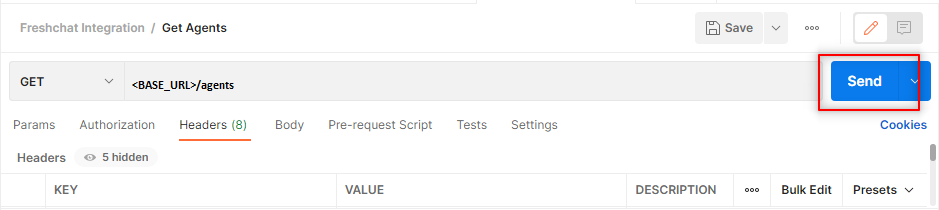
-
Once you have done the above, tap on the Send button, and you will get the Bot Agent Id in the response section of the page, as shown.
-
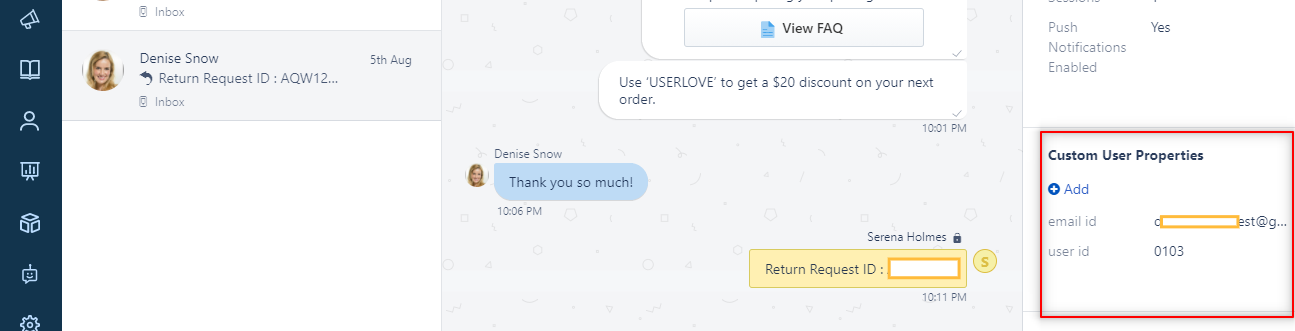
Custom Keys: Custom keys are the additional keys that can be added as per your requirements. Any key added under Custom Keys will reflect on the Agent Dashboard, in Custom User Properties, as shown.
- You can add the Custom Keys in the following way:
- If you are adding more than one Custom Key, make sure you use a 'Pipe' to separate two keys from each other. The vertical line '|' denotes a Pipe.
- Example: If you have to add the following two keys, phone number, and email, you need to write them as phone_number|email.
- Once you have added Custom Keys, every time the user enters the response in the bot, the bot would store the Custom Key-related data and when the chat is transferred to the agent. This data will be visible to the agent on his dashboard.
- Make sure you pass the same Custom Keys in the user_details section of the Code Step, which will be explained in the next section.
Now that you have populated all the fields in the Configure Freshchat section of Agent Escalation, you can move to the next section, which is configuring Chat with an Agent on the Haptik bot.
2. Configuring Chat with an Agent on the Haptik bot
You need to configure the Code Step in your bot, which will enable the transfer of the chat from the bot to an agent when the user requests to chat with an agent.
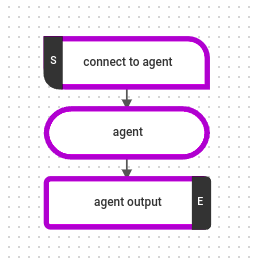
Step 1: Here, along with the user journeys you have built on your bot, you will have to create a Static Step, and connect it to a Code Step, as shown.
Step 2: Copy and paste the below code in the Code Step.
import json
import requests
import json
import hashlib
import base64
import string
import time
import logging
import random
import hmac
from pytz import timezone
import datetime
import logging
logger = logging.getLogger()
logger.setLevel(logging.DEBUG)
def main(event, context):
    """
   event['body'] is a string dict with the following keys:
   node, event, user, entities.
   Currently, we pass user_id, user_name, full_name, device_platform and language_code in the user dictionary.
   Args:
       event (dict): Data corresponding to this event
       context
   Returns
       (dict): response with statusCode and the response for the User
   """
    body = json.loads(event['body'])
    print(body)
    entities = body.get("entities", {})
    user_data = body.get('user')
    user_details = body.get('user_details')
    user_name = body["user"]["user_name"]
    name = user_data.get('full_name', 'Guest User')
    mobile_no = user_data.get('auth_id', '9999999999').split('-')[0]
    user_details = {
        "name": name,
        "mobile_no": str(mobile_no),
        "haptik_user_name": user_name,
    }
    final_response = {
        'status': True,
        'user_details': user_details,
        "callback_ops":
        {
            "tract_atc":
            {
                "receiver": "message_delivery_freshdesk",
            },
        }
    }
    response = {'statusCode': 200, 'body': json.dumps(final_response), 'headers': {'Content-Type': 'application/json'}}
    print(response)
    return response
Once you are done adding the code, you can save it, after which you can train your bot with all the updates made to it. Next, you need to Configure the Webhook connection, which is explained in the following section.
3. Configure the Webhook Connection
When a user starts a conversation on the bot, at any point when the user wants to chat with an agent, he would request the same from the bot. An event occurs here, which is Chat with an agent. Webhooks here captures it and notifies it to Freshchat since the agents are deployed on Freshchat. Webhooks here works as a mediator.
Step 1: To configure Webhooks, you need to move to your Freshchat account page, and navigate to Admin > Configure > Webhooks, as shown.

Step 2: You will have to add a URL in the Webhook text box. This URL is the Callback URL, which you will get from the Configure Freshchat section of your bot. Navigate to your Bot > Agent Escalation > Freshchat, and you will get the Callback URL. 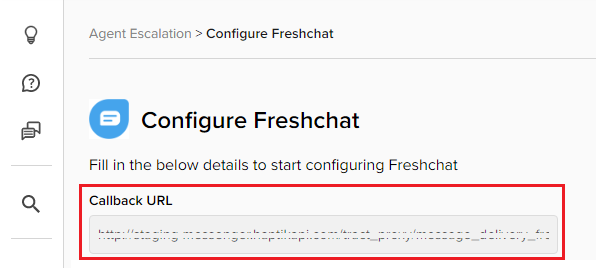
Now that you have configured Webhook, your integration is almost done. Next, you need to enable IntelliAssign on Freshchat, which is covered in the next section.
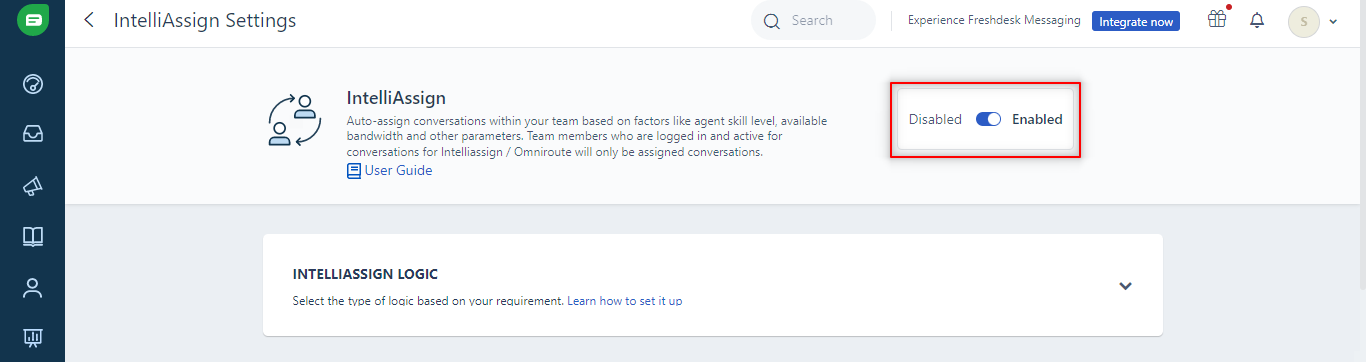
4. Enable IntelliAssign
You will have to enable IntelliAssign so that when the user requests to chat with an agent, the chat is assigned to an agent automatically.
Step 1: Open your Freshchat dashboard, navigate to Admin > Configure > IntelliAssign, and enable the toggle, as shown.
Now that you have enabled IntelliAssign, the last step that is left is the TRACT Enablement.
5. TRACT Enablement
Every business needs to register its Webhooks with TRACT.
Once you perform the above steps for setup, you can now test your integration to see if everything is working as expected. You can know more about it, here.
