How to configure Facebook Credentials for a bot?

Written by Medha Anand
Updated on August 26th, 2022
- Getting Started
- Bot Building
- Smart Agent Chat
- Conversation Design
-
Developer Guides
Code Step Integration Static Step Integration Shopify Integration SETU Integration Exotel Integration CIBIL integration Freshdesk KMS Integration PayU Integration Zendesk Guide Integration Twilio Integration Razorpay Integration LeadSquared Integration USU(Unymira) Integration Helo(VivaConnect) Integration Salesforce KMS Integration Stripe Integration PayPal Integration CleverTap Integration Fynd Integration HubSpot Integration Magento Integration WooCommerce Integration Microsoft Dynamics 365 Integration
- Deployment
- External Agent Tool Setup
- Analytics & Reporting
- Notifications
- Commerce Plus
- Troubleshooting Guides
- Release Notes
Table of Contents
Table of Contents
Step 1: Create a PageStep 2: Generate Access TokenStep 3: Setting up credentials on Haptik PlatformStep 4: Connect the Facebook App to Haptik PlatformStep 5: Subscribe to eventsStep 6: Setup a Primary ReceiverStep 7: Business VerificationStep 8: App ReviewHow to set up the persistent menu? (optional)How to set up the Get Started button? (optional)After an Admin has been added to the app, they will have to continue with certain configurations.
Step 1: Create a Page
If a Facebook page has not been created yet, Admin can create the page where the bot will be live.
On the left sidebar, under Products, there will be a Messenger option. Go to the Settings page and when you scroll down, you will be able to see the following screen -

Click on Add or Remove Pages button.
Step 2: Generate Access Token
The access token from Facebook will be required on the Haptik Platform for the setup of bot.
You will be able to generate an access token for a Page if:
- You are one of the Page admins, and
- The app has been granted the Page's permission to manage and access Page conversations in Messenger.

Click on the Generate Token button. Facebook will ask to accept the terms. Once you click on I Understand checkbox, the Access Token will be available for use.

Step 3: Setting up credentials on Haptik Platform
Setting up the credentials will connect the Haptik bot to the required Facebook page. These credentials will need to be set up in the Business Manager section of the Haptik Platform.
On the Production Environment, navigate to Business Manager. Search for your business name and click on it.
Under the Channels section, there is a Platform Deployment tab. Select the Platform as Facebook to set up the following credentials.
The credentials required are -
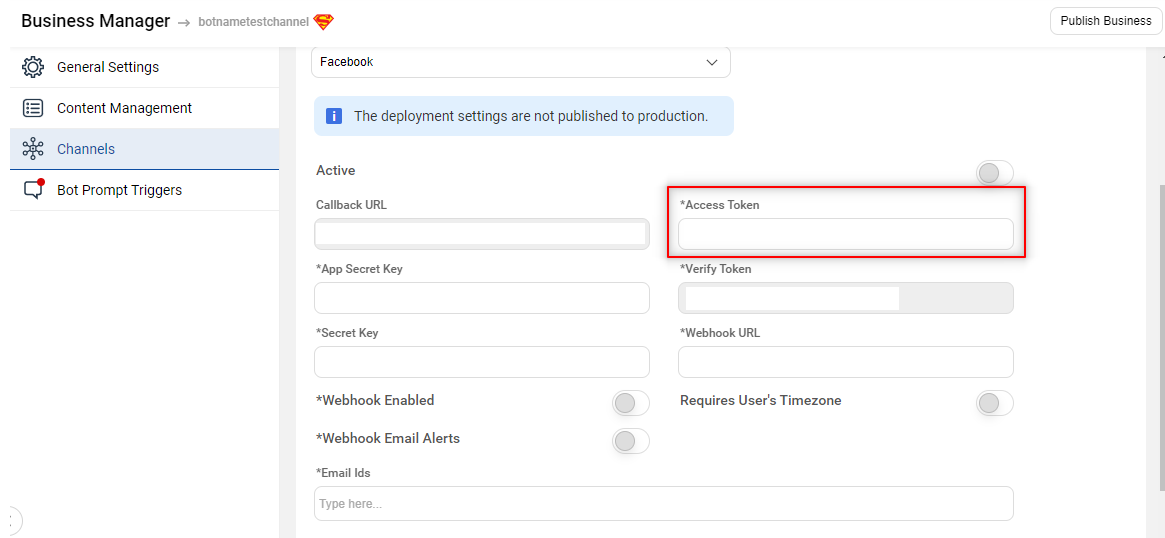
1. Access Token from Facebook
This is the Access Token generated in Step 2.
Paste the Access Token in the Access Token field, as shown below -
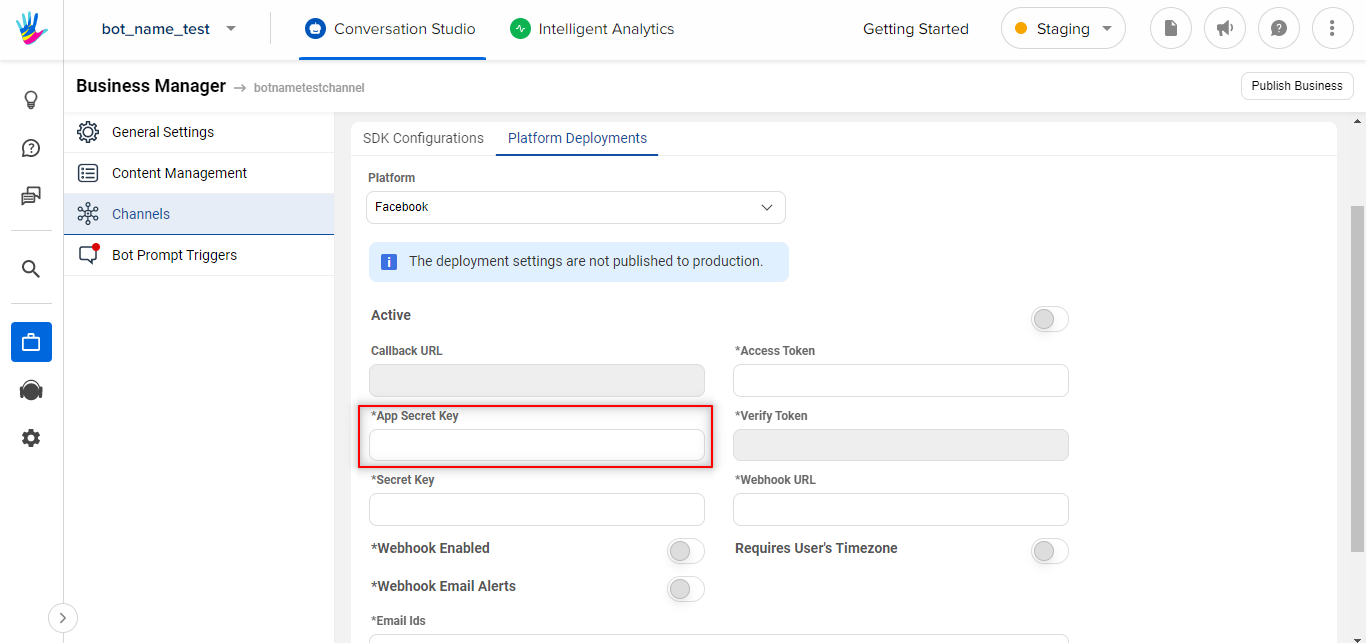
2. App secret key from Facebook
The is an already generated key for the Facebook app. You can find the App Secret key from the Settings page of the app, as shown below -

Paste the App Secret Key in the App Secret Key field, as shown below -
3. Callback URL
The Callback URL is already present on the Haptik Platform.
In the Platform Deployment tab, find the Callback URL as shown below -
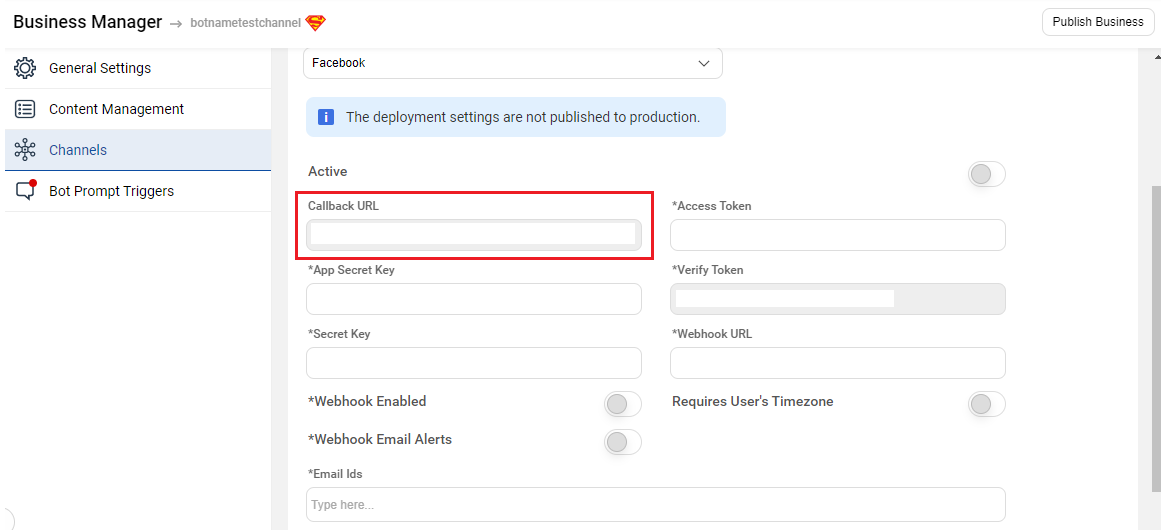
Copy this Callback URL. This Callback URL will be used in the Facebook App.
4. Verify Token
The token is already present on the Haptik platform.
In the Platform Deployment tab, find the token as shown below -
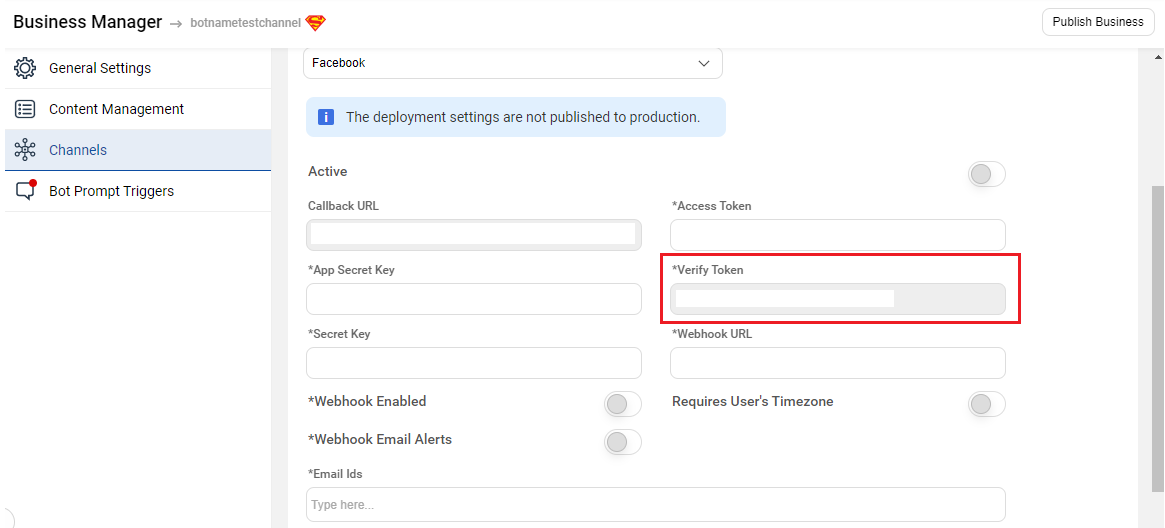
Copy this token. This token will be used in the Facebook App.
Step 4: Connect the Facebook App to Haptik Platform
You will have to connect the Facebook App to the Haptik Platform to receive messages and other events sent by the Messenger users.
To create the connection, go to the Settings page of Messenger and scroll down a bit to find the Webhooks section, as shown below -

Click on Add Callback URL button.
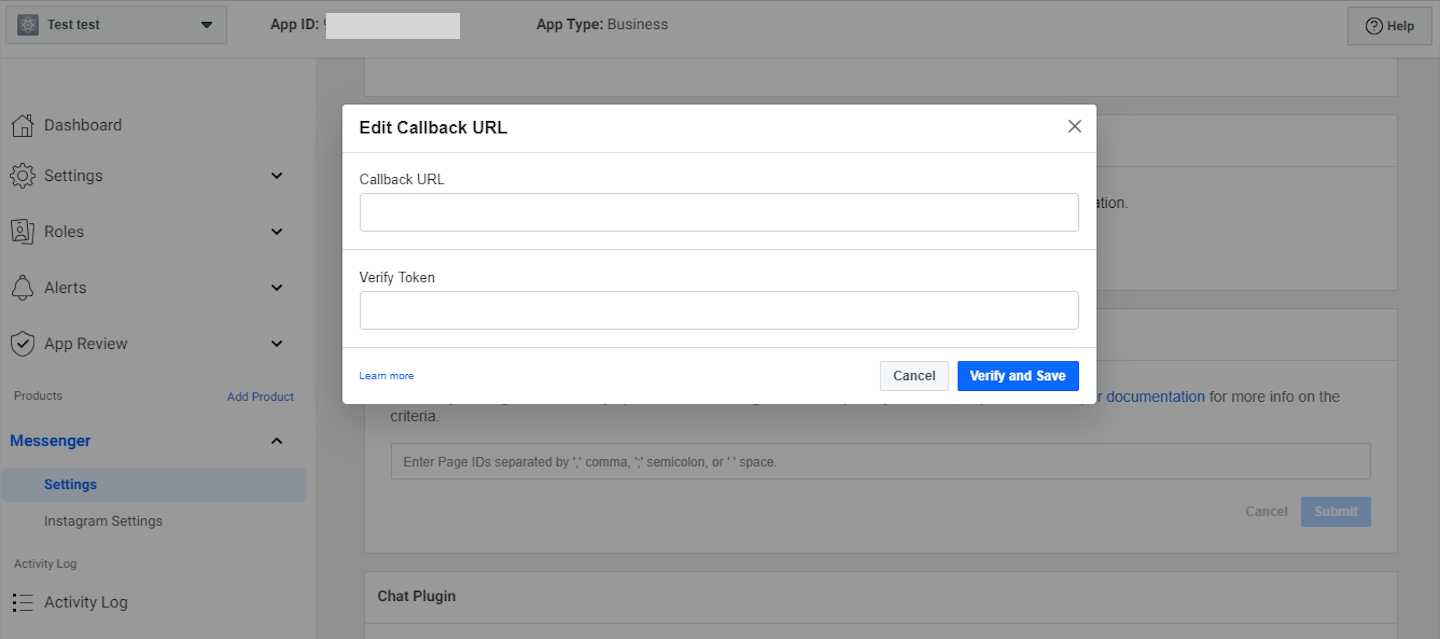
Paste the Callback URL which you copied from the Business Manager section of Haptik Platform and paste the token in the Verify Token field which you copied from the Verify Token field of the Business Manager section of the Haptik platform.
Click on Verify and Save button.
Step 5: Subscribe to events
After adding the Callback URL you will need to Subscribe for the various events to get logs.
In the same Webhooks section, once the Callback URL is added, an Add Subscription button will appear.

Select the required events that you want to subscribe to and click on Save.

Step 6: Setup a Primary Receiver
You need to enable the App as the Primary Receiver for the Page.
Go to the Page Settings. This is the Page (not the App) where the bot will be live.

Click on the Configure button.
Select the App name from the dropdown besides Primary Receiver.

Step 7: Business Verification
If you are a developer for a business, you'll need to complete Business Verification in addition to App Review before you can access live data.
Navigate to App Settings and look for the Verification section.

Click on the Start Verification button and select the type Business Verification. Create a Facebook Business Manager account (if you don't have already) by providing your Business name, your name, and email address.
Provide the Business details and complete the verification process.
Step 8: App Review
In order to submit the App for an App review, you will have to request Advanced Access. The basic permissions that you can request are messages and messages_postbacks. Click here to read more about App Review.
- Here, Facebook will manually do an app review. You will have to inform them how to access your bot, which flows can be tried so that they can understand the bot's working in a better way. Along with that, you will also have to inform them what data are you collecting from the users during the conversation. Basically, you need to give all the required details, such that they can go through it, and review the app.
- Once you have provided Facebook with all the required information, you can submit the app for app review.
- If all the details provided by you are accurate, your app will get reviewed by Facebook, and the bot will be able to send responses to the user's messages.
How to set up the persistent menu? (optional)
The persistent menu allows users to have an always-on user interface element inside Messenger conversations. This is an easy way to help people discover and access the core functionality of your Messenger bot at any point in the conversation.
URL: https://graph.facebook.com/v10.0/me/messenger_profile?access_token=<ACCESS TOKEN>
The request body to set up a persistent menu (in JSON) -
Here,
title is the text which appears on the Messenger screen.
payload: is the text which will be sent once the user clicks on the menu item.
{
 "persistent_menu": [
 {
 "locale": "default",
 "composer_input_disabled": false,
 "call_to_actions": [
 {
 "type": "postback",
 "title": "Menu 1",
 "payload": "Menu 1{task}"
 },
 {
 "type": "postback",
 "title": "Menu 2",
 "payload": "Menu 2{task}"
 },
 {
 "type": "postback",
 "title": "Menu 3",
 "payload": "Menu 3{task}"
 }
 ]
 }
 ]
}
How to set up the Get Started button? (optional)
For a better user experience, Facebook allows us to add a Get Started button which enables the user to start a conversation with the bot.

To enable the Get Started button, you will need to send a POST request as demonstrated below -
URL: https://graph.facebook.com/v10.0/me/messenger_profile?access_token=<ACCESS TOKEN>
The request body to send to the above URL (in JSON) -
Here,
payload: is the text which will be sent to the bot when the user clicks on the Get Started button.
{
 "get_started":{
 "payload":"Get started"
 }
}
Voila! You have now successfully set up your Facebook Page and the bot to reach your consumers.
