What is NICE CXone Integration? How to Set Up Haptik and NICE CXone Integration

Written by Soham Amburle
Updated on June 27th, 2022
- Getting Started
- Bot Building
- Smart Agent Chat
- Conversation Design
-
Developer Guides
Code Step Integration Static Step Integration Shopify Integration SETU Integration Exotel Integration CIBIL integration Freshdesk KMS Integration PayU Integration Zendesk Guide Integration Twilio Integration Razorpay Integration LeadSquared Integration USU(Unymira) Integration Helo(VivaConnect) Integration Salesforce KMS Integration Stripe Integration PayPal Integration CleverTap Integration Fynd Integration HubSpot Integration Magento Integration WooCommerce Integration Microsoft Dynamics 365 Integration
- Deployment
- External Agent Tool Setup
- Analytics & Reporting
- Notifications
- Commerce Plus
- Troubleshooting Guides
- Release Notes
Leveraging NICE CXOne Integration with a Haptik bot will allow you to provide finer customer service. Using Haptik, you can build AI-powered user journeys which help your users to get their queries resolved faster.
MAX stands for My Agent eXperience, which is an agent console developed by NICE CXone. It is designed to be a simple, efficient, and complete way for agents to interact with customers and manage their work. It increases productivity by enabling agents to concurrently handle multiple interactions in different digital channels with different customers. Elevating contacts by switching or adding interaction channels facilitates fast contact resolution.
Prerequisites for having a bot with NICE CXone integration
Following are the prerequisites:
- A bot on Haptik. You can read this article to build your own bot.
- A registered account on Nice CXone and access to the MAX agent tool. You can read more about it here.
How to set up NICE CXone + Haptik Integration?
The steps for Setup are divided into different sections:
- Noting down Keys from NICE CXone.
- Configuring NICE CXone on Haptik.
- Setting up Webhooks.
- Configuring Chat with an Agent on Haptik Bot.
1. Noting down Keys from NICE CXone
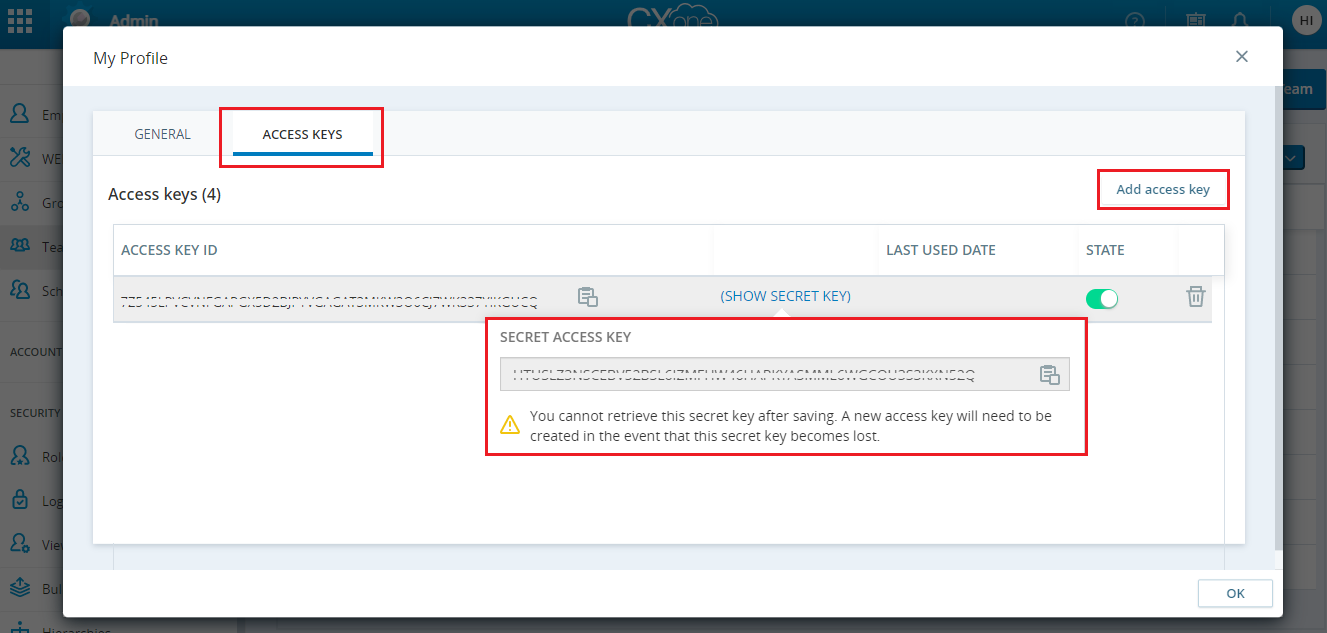
Once you have registered on NICE CXone, you need to first note down the Access Key and Secret Key from the NICE CXone dashboard, as they are displayed only once at the time of adding an Access Key.
Step 1: Navigate to NICE CXone dashboard, and click on Profile as shown.

Step 2: Next, tap on the add access key button under ACCESS KEYS. Here, an Access Key and a Secret Key will be generated, as shown. Copy the Access Key as well as the Secret Key and store them.
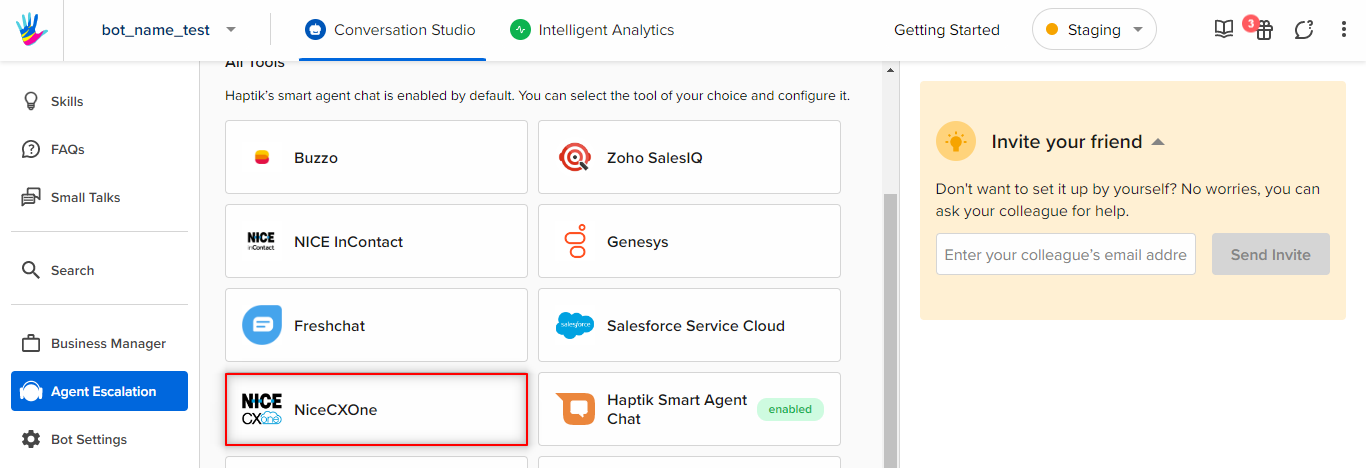
2. Configuring NICE CXone on Haptik
Once you have created a bot on Haptik, you need to configure NICE CXone in order to do this integration.
Step 1: Open your bot on Haptik, and navigate to Agent Escalation > NICE CXone, as shown.
Step 2: Here, you will have to populate all these fields under the Configure NICE CXone section.
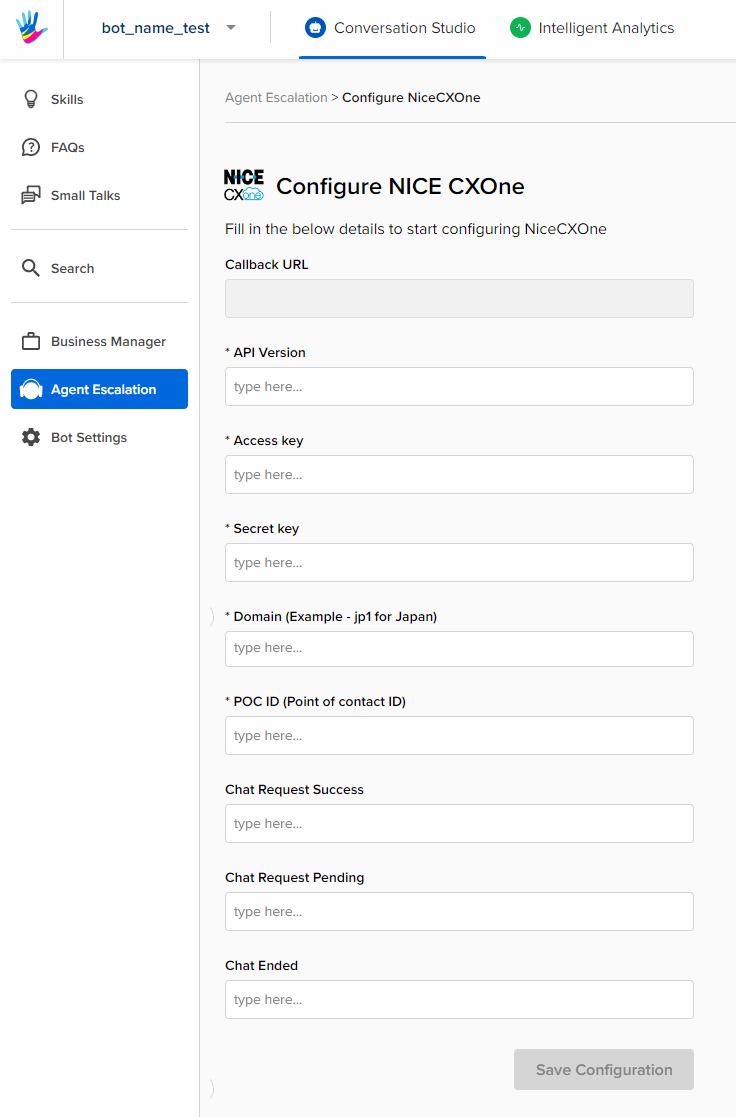
Step 3: In order to acquire the fields mentioned in the above image, you will have to navigate to the NICE CXone dashboard. Let us understand how to acquire each of the above fields.
- API Version: The API version will be v24.0. It is subject to change if the NICE CXone team upgrades its APIs and changes its version.
- Access Key: The Access Key is the one that you generated in Section 1 of this document. (1. Noting down Keys from NICE CXone)
- Secret key: The Secret Key is the one that you generated in Section 1 of this document. (1. Noting down Keys from NICE CXone)
-
Domain: Domain will be the one that you would have selected at the time of creating an account on NICE CXone. For this, you can also check your NICE CXone account's URL, and you will get the Domain there, as shown. Here, jp1 stands for Japan.

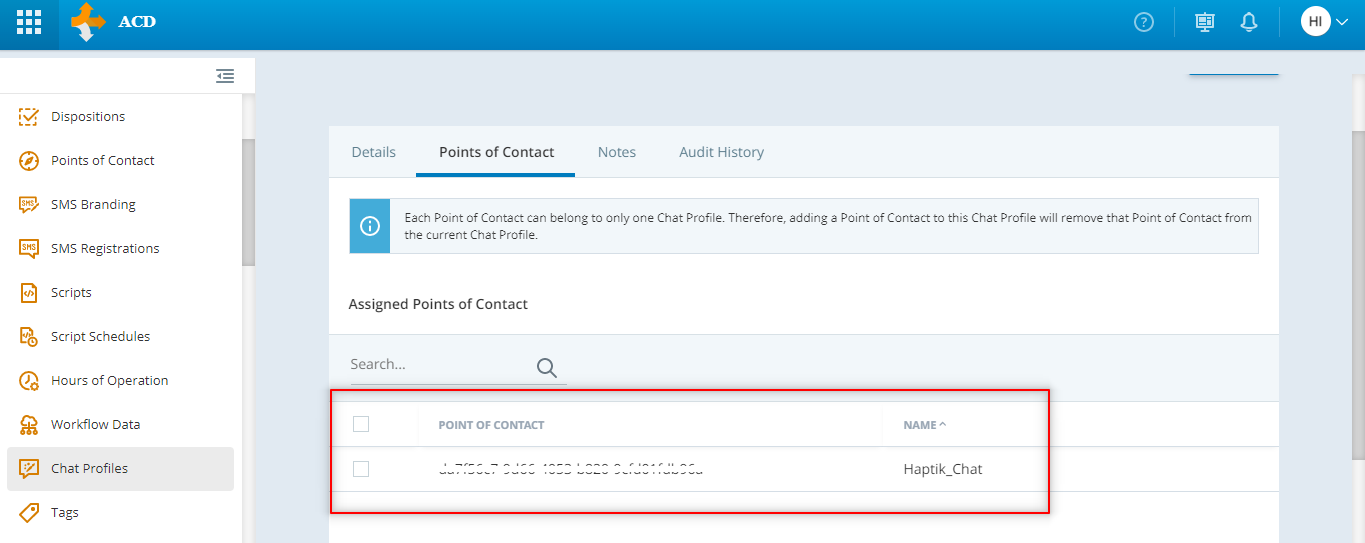
- POC ID (Point of contact ID): For POC ID (Point of contact ID), navigate to your NICE CXone account, and from the left navigation bar, select ACD under Applications, and then move to Chat Profiles > Select Chat Profile > Point of Contact, as shown.
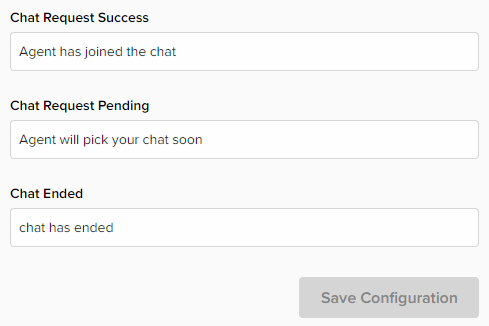
- For the following non-mandatory fields, you can add the following messages or similar ones, as shown.
Once you have added all the required details, you can move to the next section which is Setting up Webhooks.
3. Setting up Webhooks
We need to configure webhooks on Haptik to start receiving bot events. These events will contain the user responses which are then sent to the agent using APIs at the backend.
4. Configuring Chat with an Agent on Haptik Bot
You need to configure the Agent setup on your bot. This will enable the transfer of the user's chat from the bot to an agent when the user requests to chat with an agent.
Step 1: Along with the user journeys you have built on your bot, you will have to create a Static Step, where you need to add relevant entities to it in order to collect user details like the user's name, phone number, and email, etc.
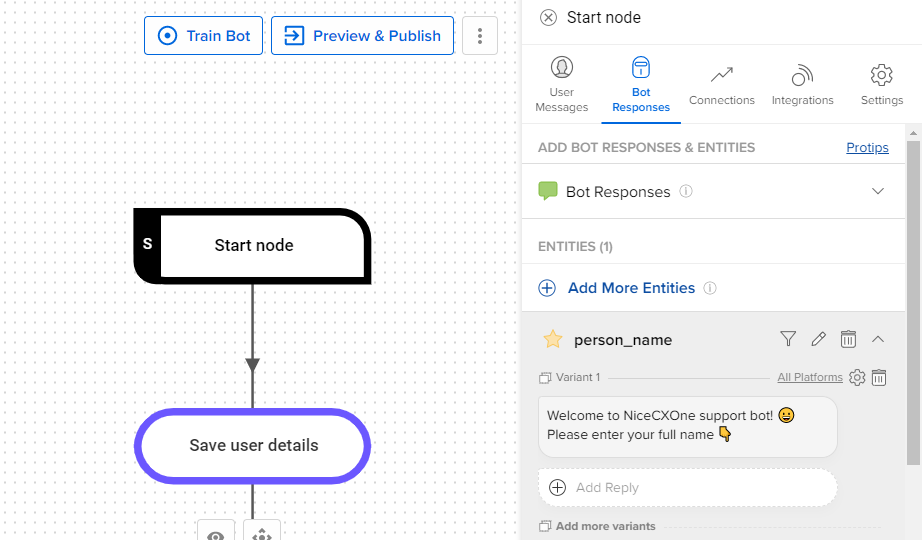
Step 2: Now you need to connect this Static Step to a Code Step, as shown in the above image.
Step 3: You need to copy and paste the below-mentioned code in the code editor section of the Code Step.
import  json
def main(event, context):
    """
  event['body'] is a string dict with the following keys:
  node, event, user, entities.
  Currently, we pass user_id, user_name, full_name, device_platform and language_code in the user dictionary.
  Args:
      event (dict): Data corresponding to this event
      context
  Returns
      (dict): response with statusCode and the response for the User
  """
    body = json.loads(event['body'])
    entities = body.get('entities')
    user_data = body.get('user')
    user_details = body.get("user_details")

    conversation_details = body.get('conversation_details')
    person_name = entities.get('person_name')[0].get('entity_value')
    user_name = user_data.get('user_name', '')

    final_response = connect_chat_to_agent(user_name)
    print("final_response--------------->", final_response)

    response = {'statusCode': 200, 'body': json.dumps(final_response), 'headers': {'Content-Type': 'application/json'}}
    return response

def connect_chat_to_agent(user_name):
    """
        Transfers chat to an agent in NiceCXO
    """
    user_details = {
        "name": person_name,
        "user_name": user_name
    }

    final_response = {
        'status': True,
        'user_details': user_details,
        'callback_ops': {
            'tract_atc': {
                'receiver': 'message_delivery_NiceCXO'
            }
        }
    }
    return final_response
This code changes the receiver thread from Haptik to NICE CXone whenever the user requests to chat with an agent. This way the chat is handed over to a live agent on NICE CXone.
Once you have followed all the above steps, you are done with the integration, and now you can train and test your bot to check its behavior, and if everything is working as expected.
You can check this article, which will give you an understanding of how this integration actually works when a user requests to chat with an agent.
