How to Deploy Haptik's Bot on Telegram
- Getting Started
- Bot Building
- Smart Agent Chat
- Conversation Design
-
Developer Guides
Code Step Integration Static Step Integration Shopify Integration SETU Integration Exotel Integration CIBIL integration Freshdesk KMS Integration PayU Integration Zendesk Guide Integration Twilio Integration Razorpay Integration LeadSquared Integration USU(Unymira) Integration Helo(VivaConnect) Integration Salesforce KMS Integration Stripe Integration PayPal Integration CleverTap Integration Fynd Integration HubSpot Integration Magento Integration WooCommerce Integration Microsoft Dynamics 365 Integration
- Deployment
- External Agent Tool Setup
- Analytics & Reporting
- Notifications
- Commerce Plus
- Troubleshooting Guides
- Release Notes
Table of Contents
Table of Contents
Prerequisites for having a Telegram botHow to set up an Instagram bot?Setting up the Telegram bot with BotFatherCreating a bot on HaptikAdding deployment details on HaptikRegistering webhooks for the botTesting the Telegram botTelegram is a fast and secure messaging platform, used by millions of people around the globe. Telegram Bots are special accounts that do not require an additional phone number to set up.
There are multiple perks of using the Telegram bot. Telegram provides multiple types of UI elements for users to communicate with the bot such as different types of keyboards and so on.
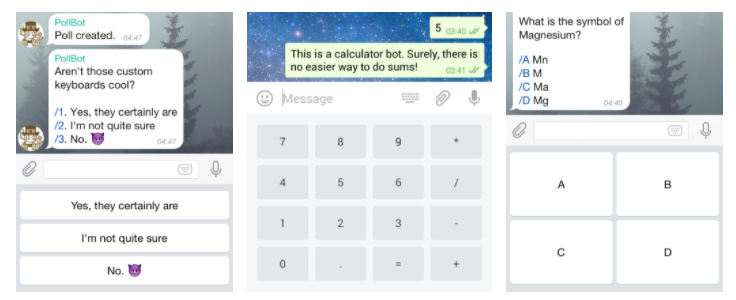
Click here to know the different benefits of using the Telegram bot.
Haptik can help you elevate the user experience by adding NLP capabilities using conversational flows on your Telegram bot. Using the Conversation Studio tool of Haptik, you can build user journeys to resolve user queries faster. You can create conversational user journeys, connect the user to an agent if any human intervention is required, and so on.
To get started with a Telegram bot, you can simply start to create a new bot on Telegram, as Telegram does not require any additional phone number.
You can know more about the UI elements supported on Telegram, here.
Prerequisites for having a Telegram bot
The prerequisites include:
- A registered account on Telegram. Click here to log in.
How to set up an Instagram bot?
The steps for Setup are divided into five different sections:
- Setting up the Telegram bot with BotFather.
- Creating a bot on Haptik.
- Adding deployment details on Haptik.
- Registering webhooks for the bot.
- Testing the Telegram bot.
Setting up the Telegram bot with BotFather
Setting up a Telegram bot is a simple process. Let us understand it step by step.
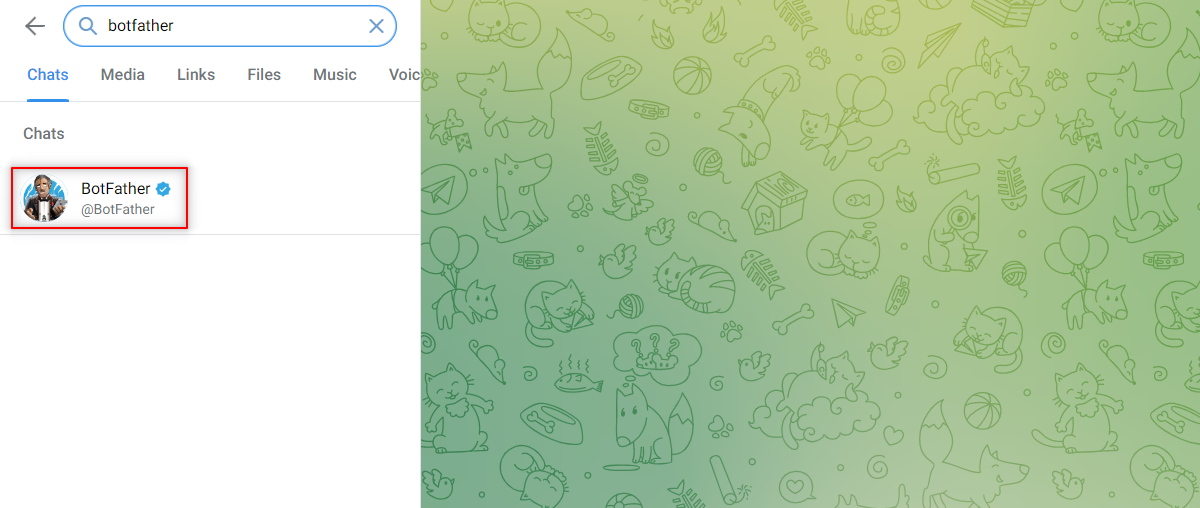
Step 1: Navigate to your Telegram account, search for BotFather and click on it and click on Start to start a conversation, as shown.
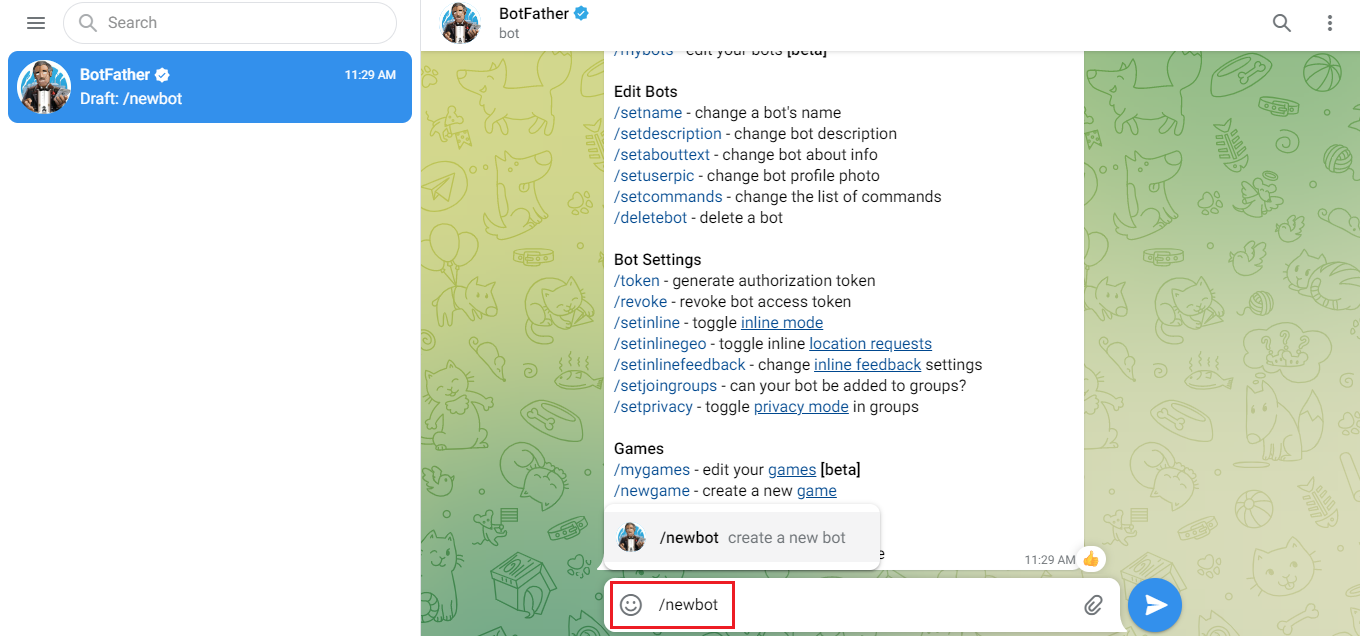
Step 2: Next, you need to type /newbot in the text bar of the chat window with BotFather, as this will be used to create a new bot on Telegram, as shown.
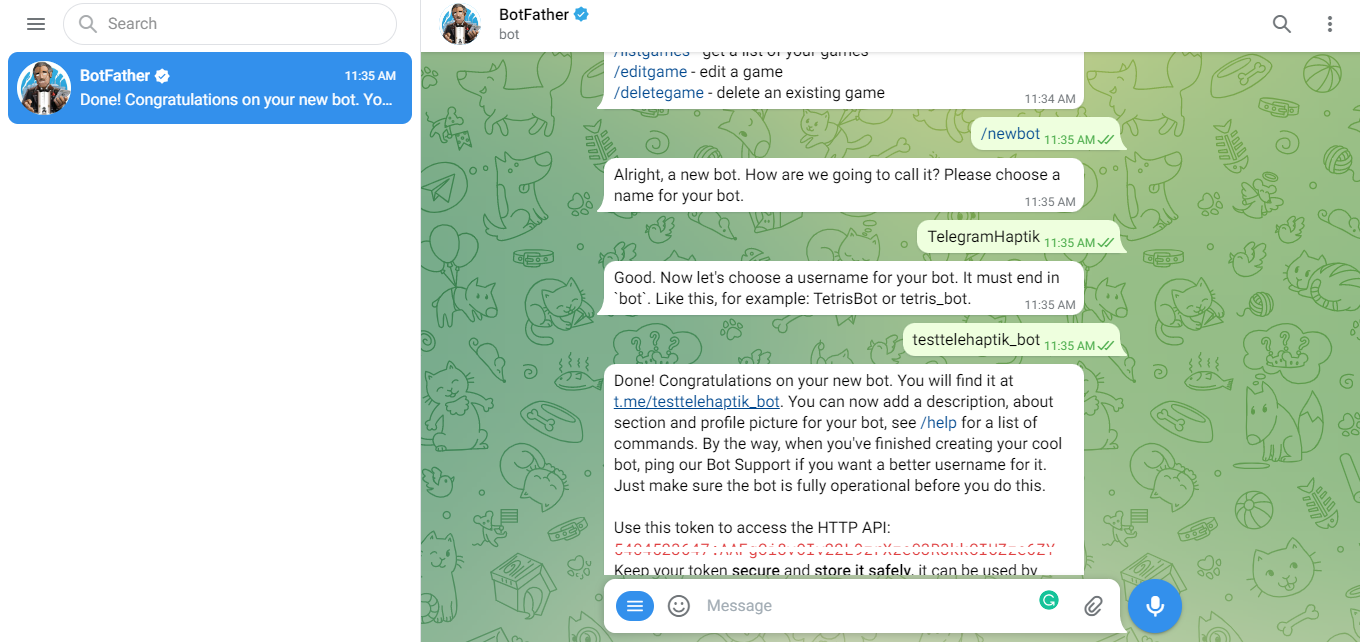
Step 3: The BotFather will then ask you to give a name to your bot, followed by a username. After you have entered the username, the bot will be created. You will also receive an API Access Token as shown below, which you will have to copy and store, as you will need this further.
.Now that your Telegram bot is created, you need to create a bot on Haptik.
Creating a bot on Haptik
You will have to set up a bot on Haptik, and once you have done that you will have to configure the Telegram bot with your Haptik bot. You can learn more about creating a Haptik bot, here.
Once you have created a bot on Haptik, you will have to add deployment details on Haptik, in order to integrate the Telegram bot with the Haptik bot.
Adding deployment details on Haptik
For configuring Telegram as a channel, you will have to open your Haptik bot, and navigate to Business Manager > Channels > Platform Deployments.
Step 1: Select Telegram from the Platform dropdown, as shown. Also, make the Active toggle on.
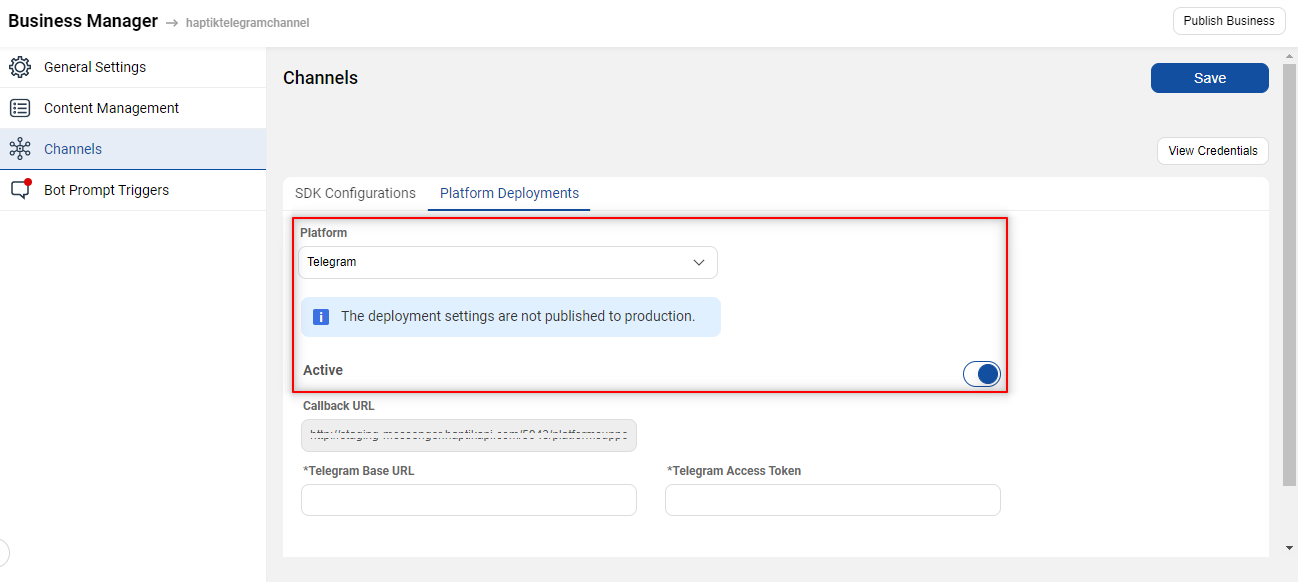
Step 2: Next, you will have to populate the following fields:
- Telegram Base URL: Add https://api.telegram.org/ as Telegram Base URL.
- Telegram Access Token: Add the API Access Token that you received when you made the Telegram bot.
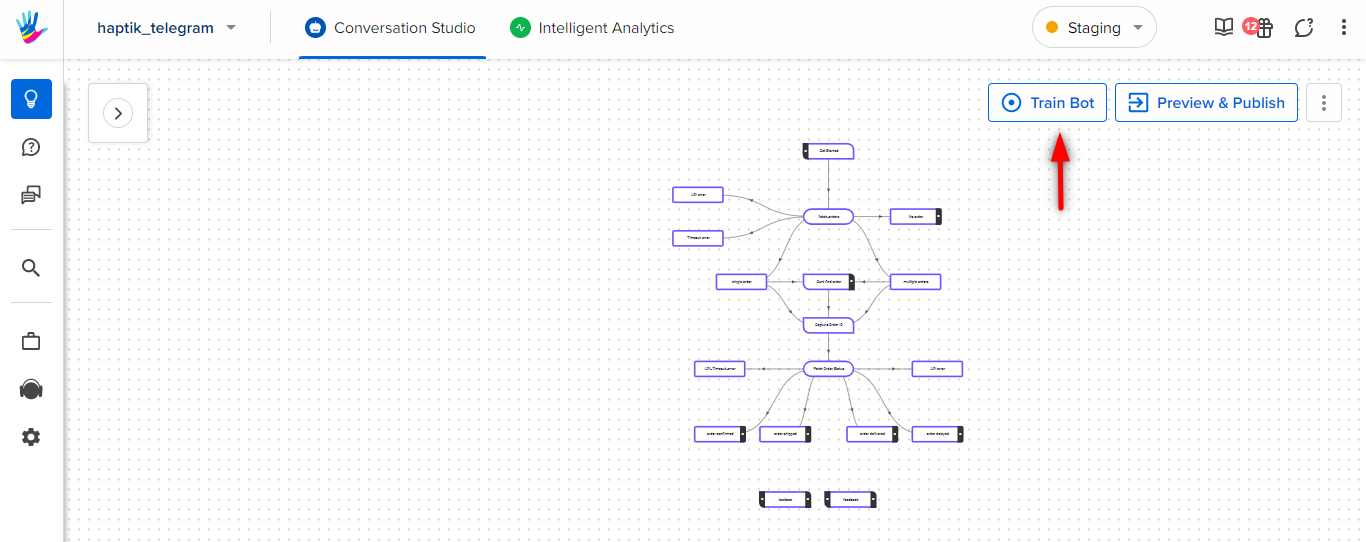
Step 3: After adding the deployment details, make sure you Train your bot.
Registering webhooks for the bot
Now that you are done with most of the integration, the final thing that you need to do is set up Webhooks. After setting up Webhooks, your Haptik bot connected to the Telegram bot will be able to listen to events, as and when they occur on your bot deployed on Telegram. This allows the bot to respond to user queries efficiently and quickly.
In order to register webhooks, you need to follow a few steps:
Step 1: Navigate to the Postman app, run the given command, and make sure you get the response as Webhook was set, as shown in the image.
<Telegram Base URL>/bot<Telegram Access Token>/setWebhook?url=<Callback URL>
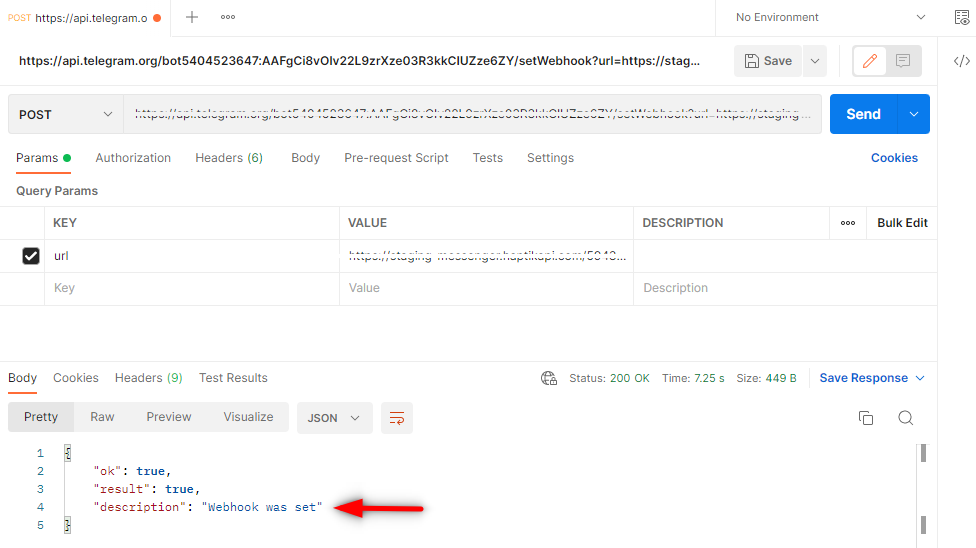
Once you are done with this step, your integration is successful, and now you can test the bot.
Testing the Telegram bot
In order to test the Telegram bot, navigate to Telegram and search for the username you had set for your Telegram bot, and click on Start to start a conversation.
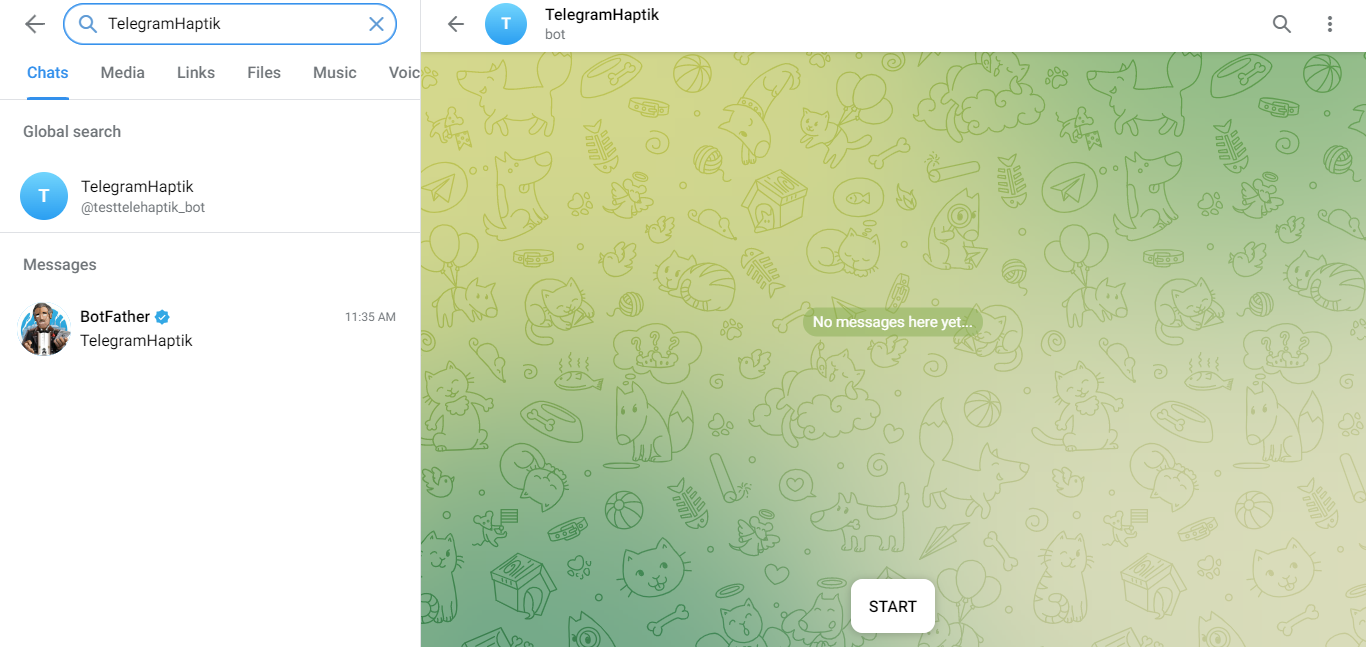
Next, you can test your bot with the flows that you have added, and see how the bot responds.
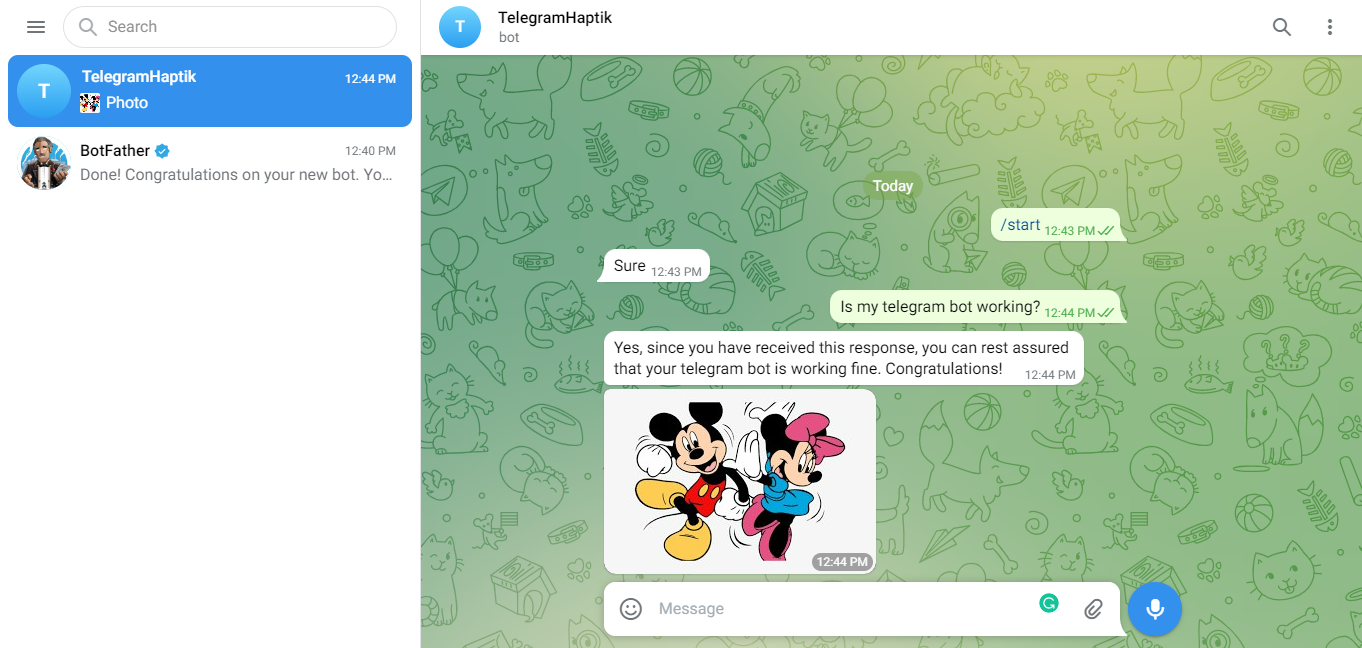
Well, if your bot works as expected, your integration is successful. Congratulations!
