Under Menu option, you can enable
- First Message on the bot
- Menu on the bot
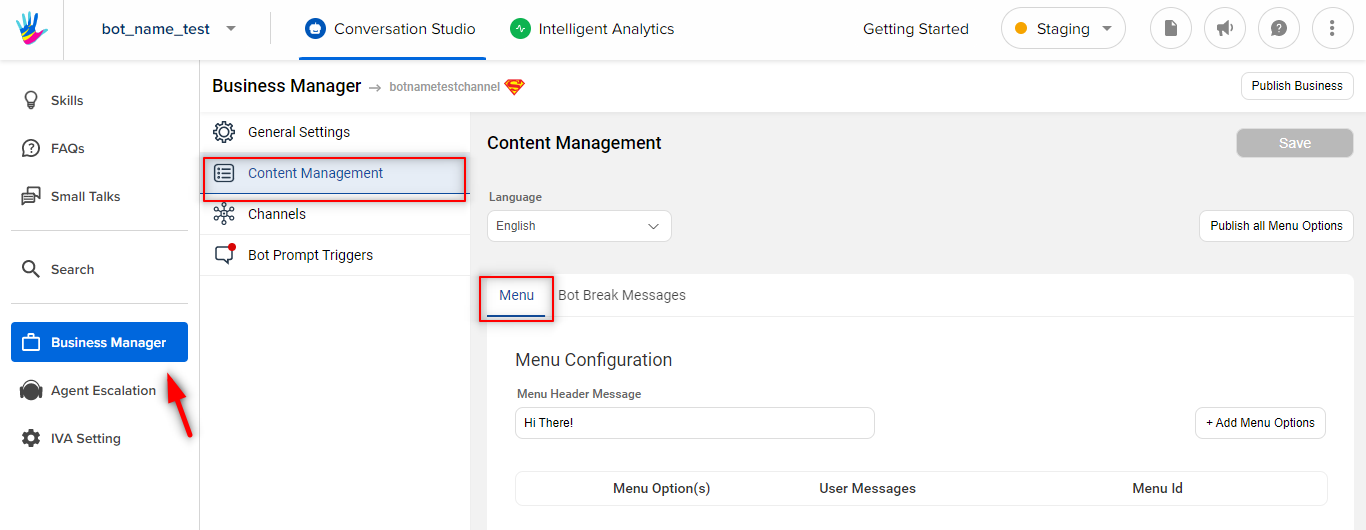
You can navigate to Menu, by selecting Business Manager, and further selecting Content Management, as shown below -
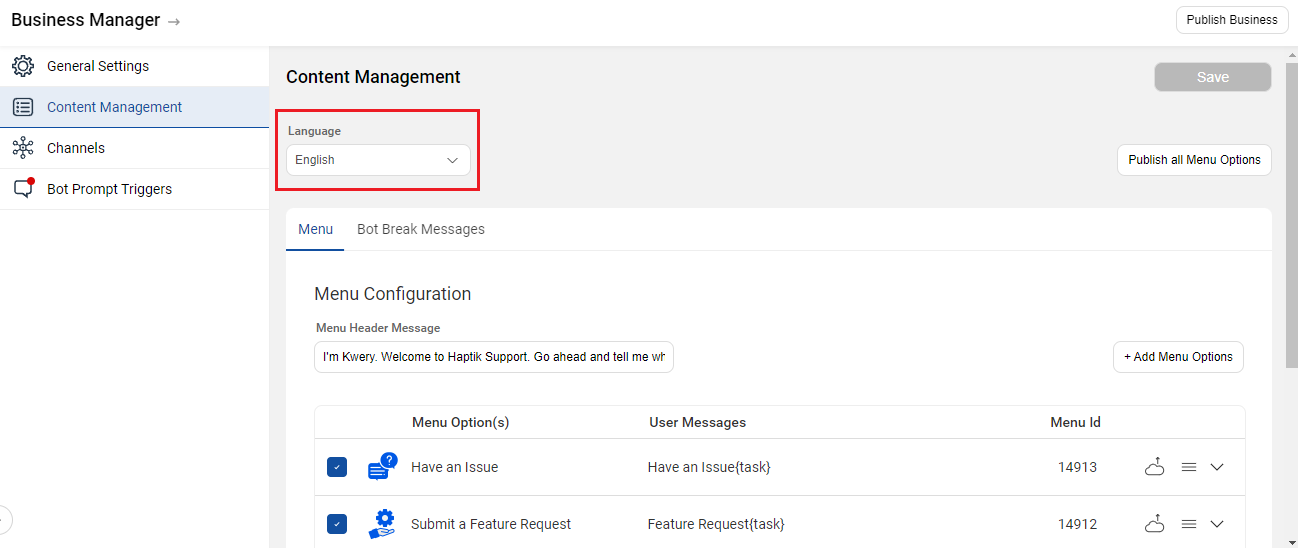
This can be made language-specific for each language chosen on the top.
The menu is nothing but the main menu item which can be accessed anytime on the bot using the menu button present at the bottom of the bot. The menu will appear for each Business. Select Add menus to start adding menus to the Business’s menu. A modal with a list of all the menus associated with the Business will appear; select the menus you want to make live. Exit the modal.
Bot builders can define Menus that help to guide the users to initiate conversations that the chatbot can handle most effectively.
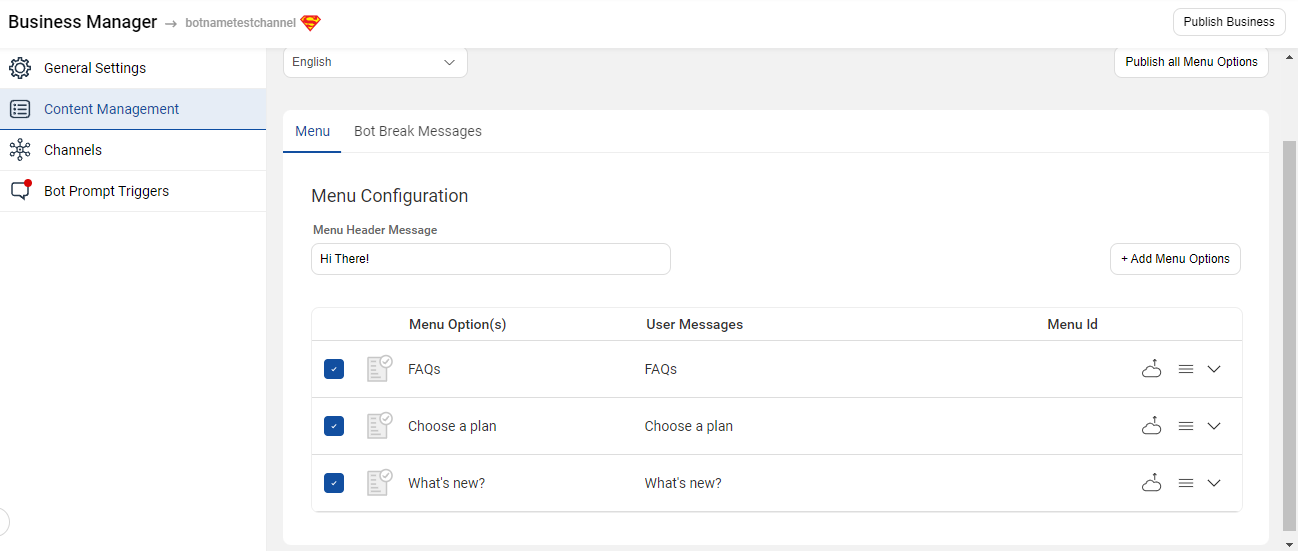
As you can see in the image below, there are 3 Menus that users can initiate - What’s new?, Choose a plan, FAQs.
How to add the Menu option?
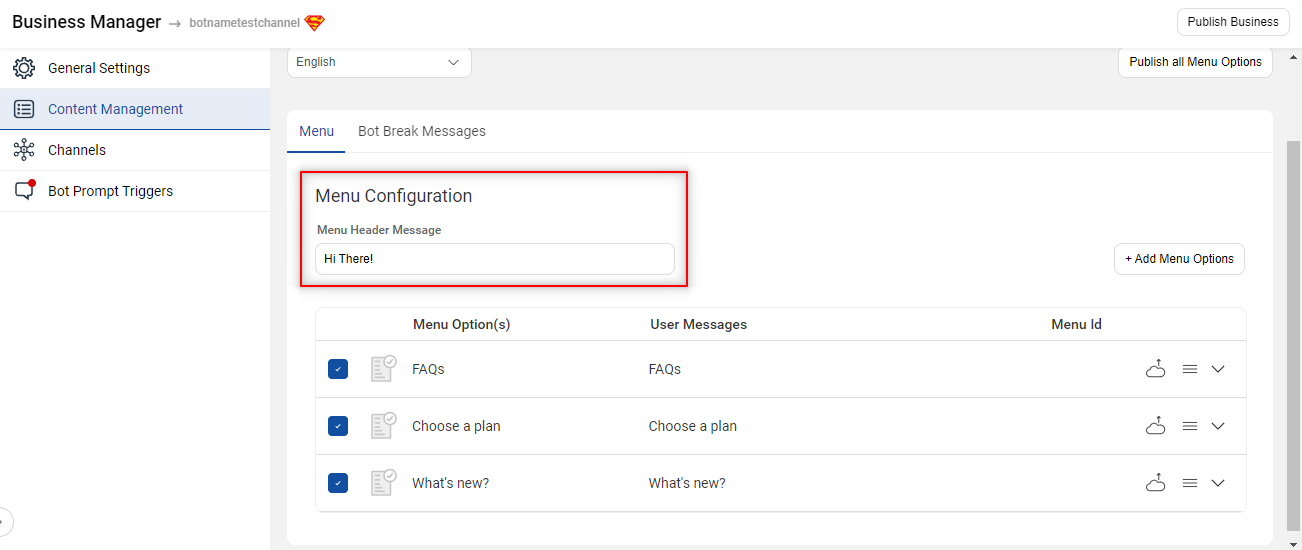
- Add the Menu Header Message. This header will be shown to users to explain how to use the menu. In the sample menu above, the header is the text above the menus that can say, “Hi there! How can I help you?” or “Hi! Tap below to get started.” Refer to the above image to view this header message.
- Create a new Menu option.
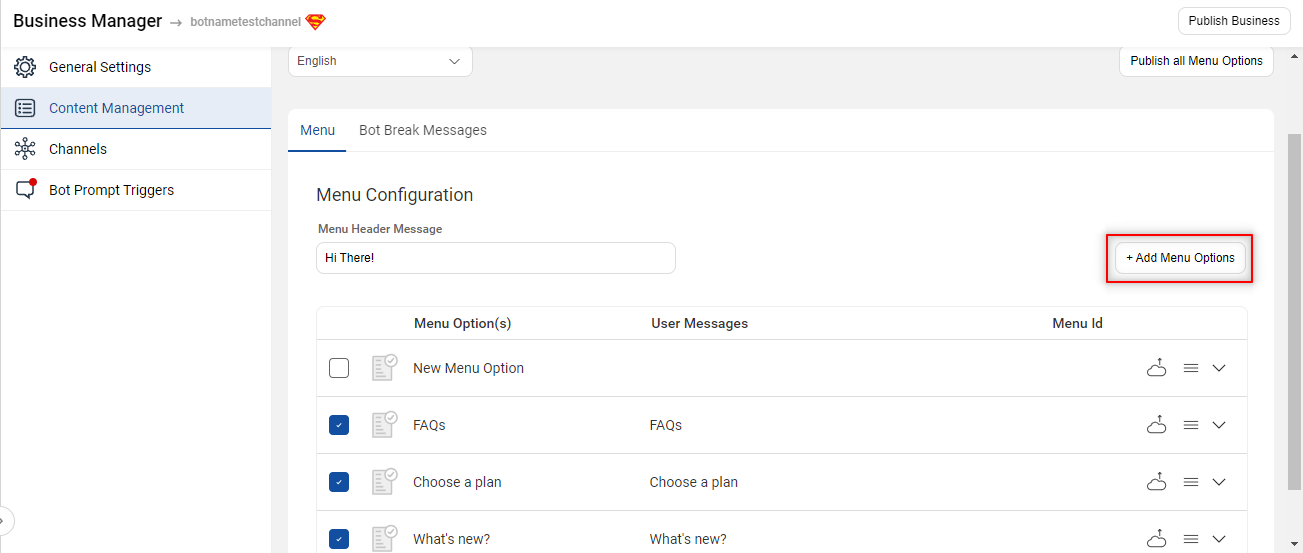
- When you click this box, a new menu will appear to fill out the following details:
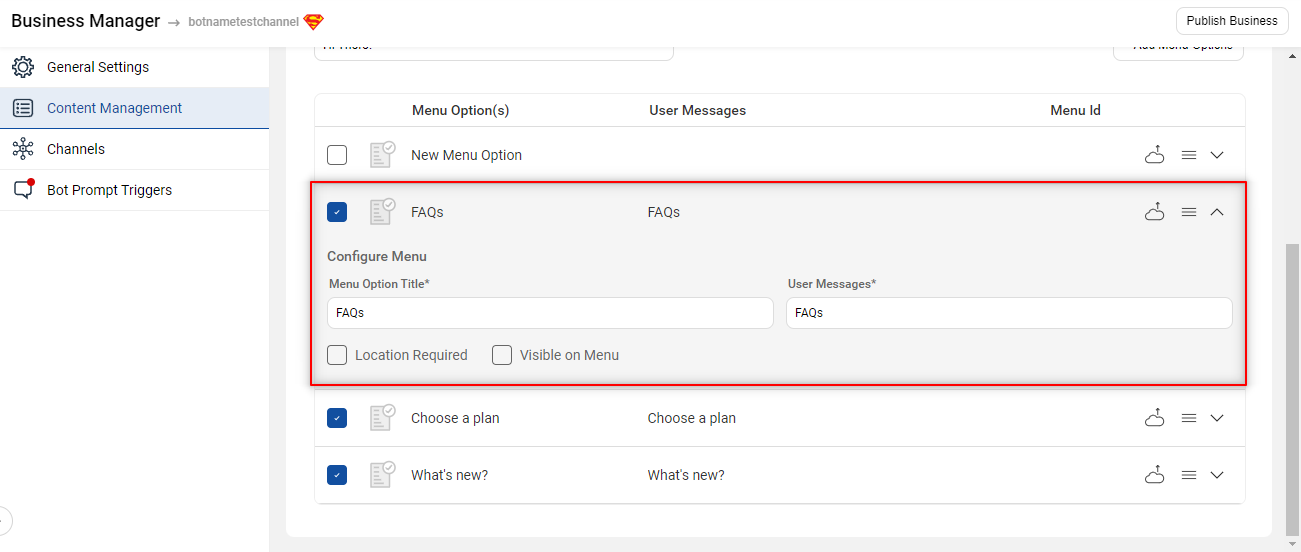
- Menu Option Title: This will be the menu that you want to add to the bot and display on the main menu. Example - Choose a plan as shown in the Netflix menu above.
- User Messages: This will be the content that you want as a user text to be sent on the bot once the user clicks on the Menu title. Example - If User Message is given as I want to choose a plan for the above Menu title Choose a plan, the text will go as I want to choose a plan once the user clicks on Choose a plan menu.
-
Upload the icon: You can set the icon for each menu by clicking the icon image present beside the “New Menu” text. You can always change the image for the existing menu by clicking the same image.
There are various resources to find the menu icons, for example, flaticon. - Visible on Menu Box: Check this box to make this menu active on the menu box associated with this channel. If you want to deactivate a menu at any point, uncheck this box, and it will be removed from the menu box.
- Location Required: You can ignore this option.
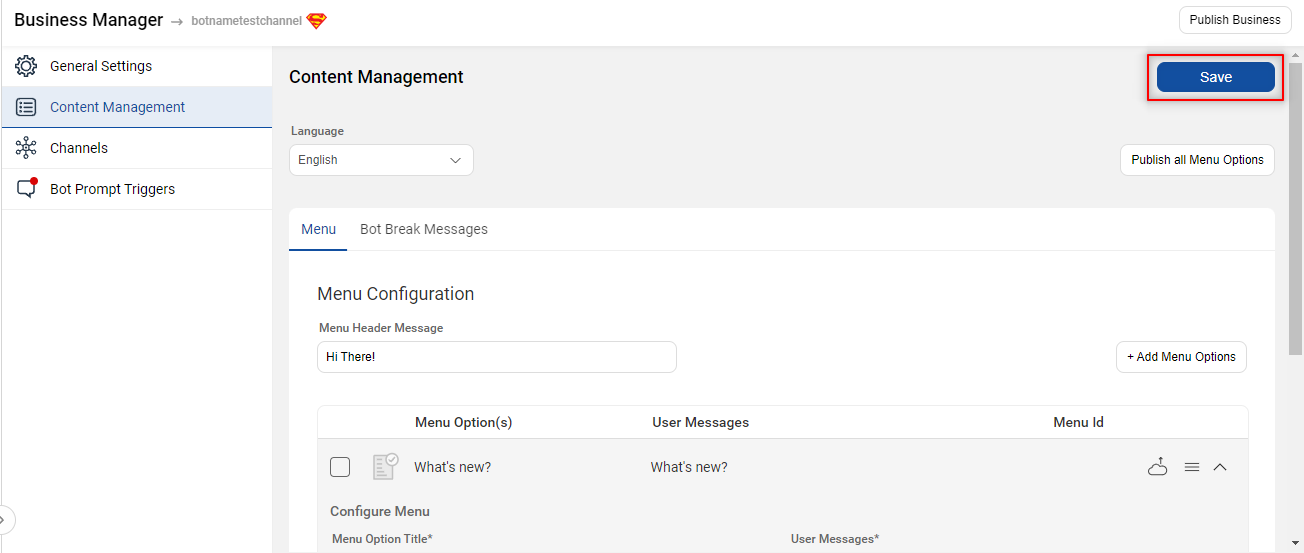
- Click Save. You’ve created a menu!
Note:
If you make any changes in menus, it will take from 30 to 60 minutes to reflect the changes. Also, a menu can't be deleted, but you can deactivate it.
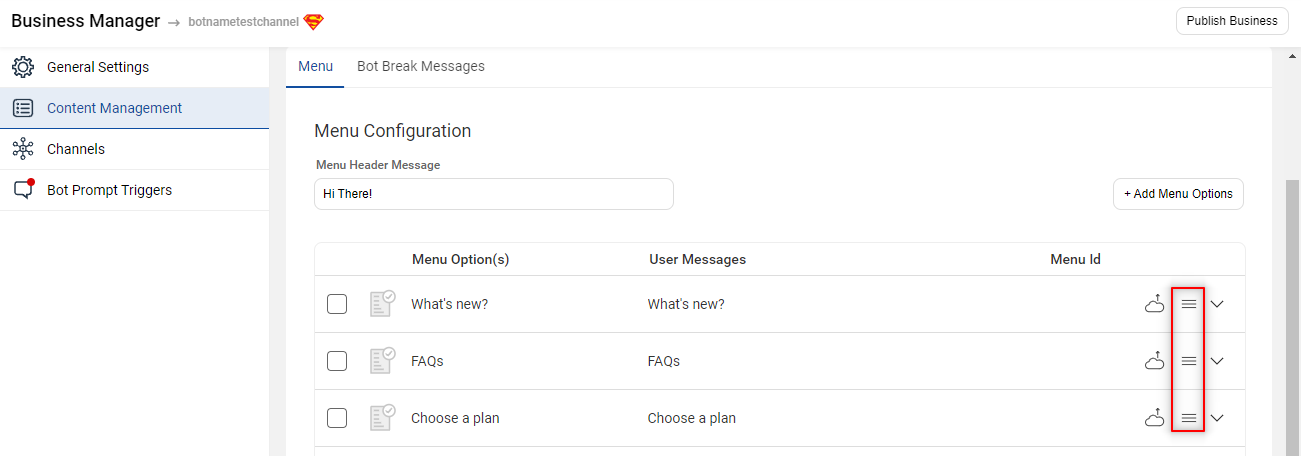
After creating your menu items you can always rearrange them using the Hamburger option available on the right-hand side of each menu.
You can also edit the Menus by selecting them individually, and making necessary changes to them.
Point to note:
When the user requests to "chat with an agent", the chat goes in the Agent State. In this scenario, the Menu will be disabled from the user's conversation screen.
As soon as the chat is out of the Agent State, the Menu will be back again on the user's conversation screen.
Also, if a user clicks on a menu item, previous entities will be flushed.
We don't support dynamic menus for the time being.