How to Configure General Settings?
- Getting Started
- Bot Building
- Smart Agent Chat
- Conversation Design
-
Developer Guides
Code Step Integration Static Step Integration Shopify Integration SETU Integration Exotel Integration CIBIL integration Freshdesk KMS Integration PayU Integration Zendesk Guide Integration Twilio Integration Razorpay Integration LeadSquared Integration USU(Unymira) Integration Helo(VivaConnect) Integration Salesforce KMS Integration Stripe Integration PayPal Integration CleverTap Integration Fynd Integration HubSpot Integration Magento Integration WooCommerce Integration Microsoft Dynamics 365 Integration
- Deployment
- External Agent Tool Setup
- Analytics & Reporting
- Notifications
- Commerce Plus
- Troubleshooting Guides
- Release Notes
Table of Contents
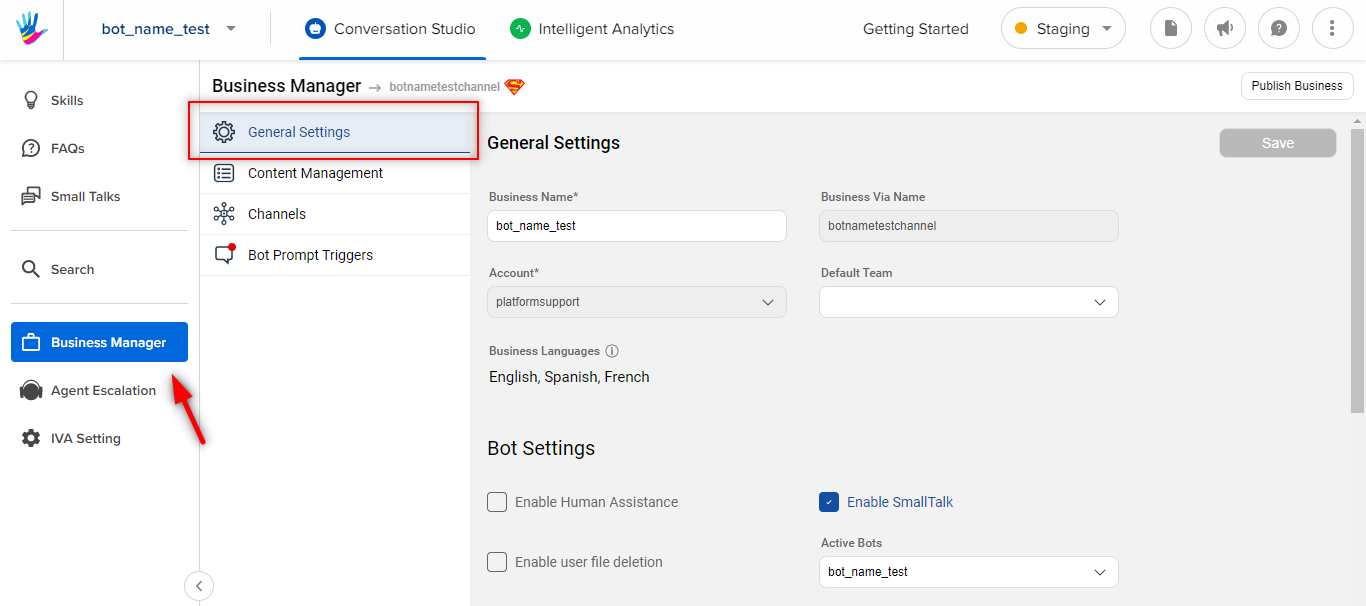
General Settings is the page where you can do some basic changes to your bot like making changes to business name, enabling human assistance, or enabling user feedback, and so on. You can navigate to the General Settings page as shown below:
General Settings
-
Business Name: This refers to the overarching topic of its conversational capabilities. For example, a Business Name called Flights would have a Flight booking, Flight cancellation and Flight Offers bots covering broad user intents.
You can change the Business name once you’ve saved it. Business Via Name: You need to add a Business Via Name as it's an editable field.
Account: Businesses can be activated or deactivated for a account, as per what you select here.
Default Team: You can configure the default team for this bot here. The team is a group of agents who get assigned chats from this bot. You can read about Teams on our Smart Agent tool documentation link.
Business Languages: You can add languages from the drop-down if it's a multilingual bot.
Bot Settings
- Enable Human Assistance: This will make it possible for human chat assistants to intervene when bots break. This is helpful if you have a bot + human solution or a human-only solution. The way we enable Human assistance on our Business Manager, similarly, you'd be able to choose the Live agent chat tool for setup. Click on the drop-down to select your preferred tool.
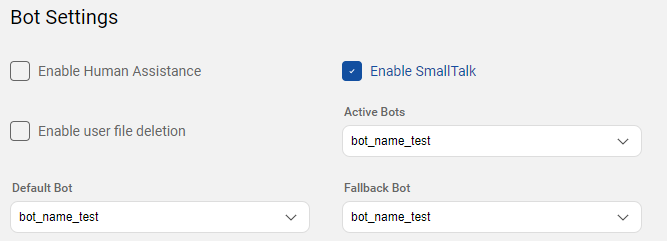
Enable Small Talk: This allows certain common phrases to be understood and replied to by the bot. Say, the user types “Hi” or “Good morning”, when Small Talk is enabled, the bot will greet the user and respond back with an apt greeting (ex: “Good afternoon” detecting the time of the day). You can read more about it here.
Enable user file deletion: When enabled for a business, all the files uploaded by the user for that business will be deleted from Haptik's Storage after 72 hrs, from the time of upload for the file.
Active Bots: When a user sends a message while conversing with this Business, Active Bots will be the bots whose User Message(combinations of predicted user inputs we add in bot builder) will be searched for a relevant match to the user’s input.
Default Bots: When a user adds an input, this is the first bot whose User Message will be searched for a relevant match to the user’s input. Set the default bot to the conversation most relevant to the Business.
Fallback Bots: When user input doesn’t match the User Message of any of the active bots, the Bot response will be automatically sent from the fallback bot.
User Feedback
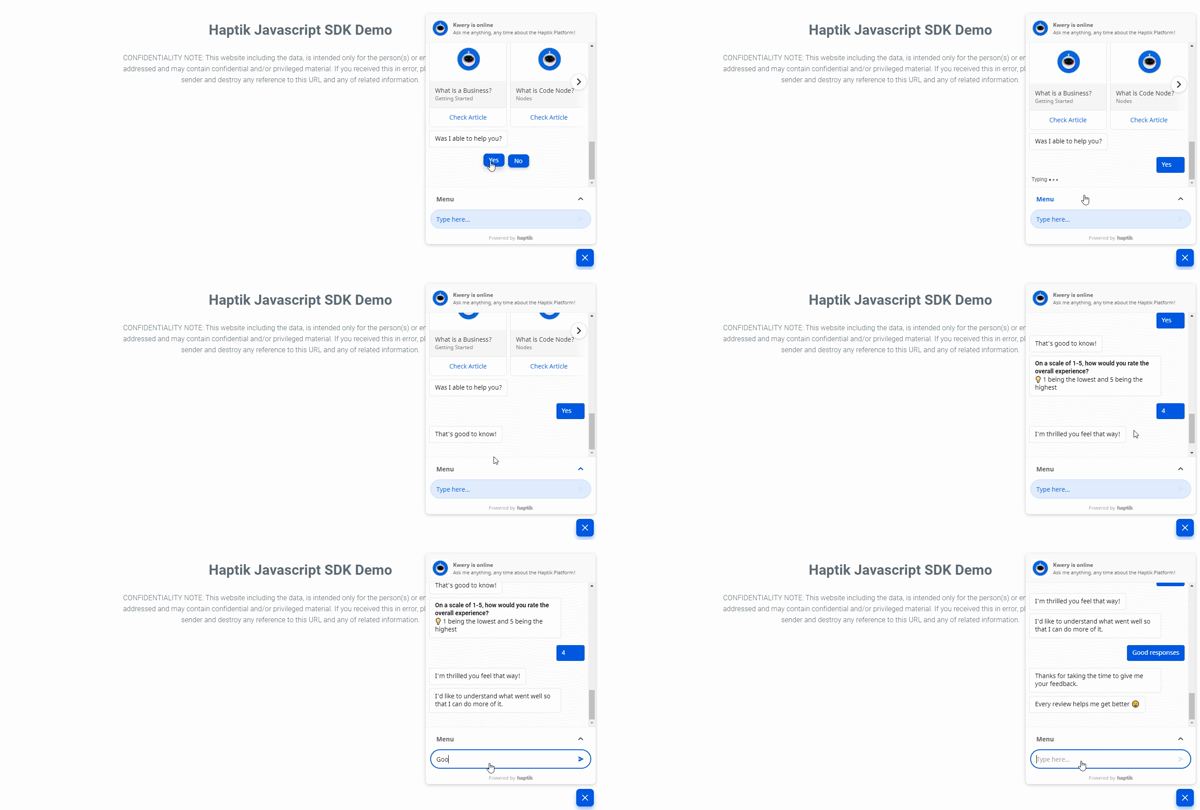
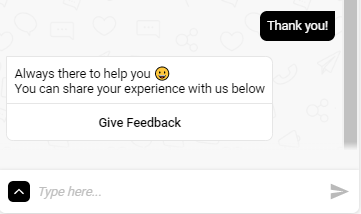
The Feedback module gets triggered when the user reaches a Context Clear step in the user journey. It is the smart action where the users can provide their feedback in text & ratings as shown below
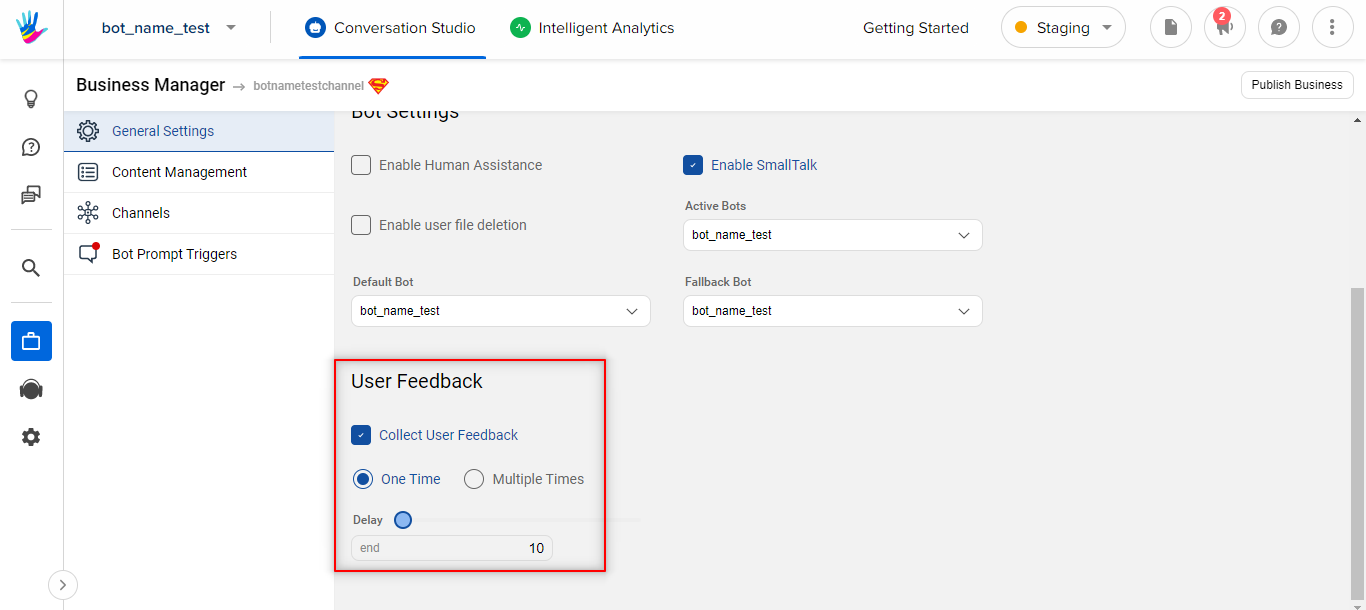
Tick the Collect User Feedback checkbox on the screen to set up a collection of user feedback within a business. You can choose to ask for feedback once or multiple times (configurable) within a conversation and also set a delay period (waiting period) after which the bot sends the feedback message to the user. You can access this feedback data from our analytics tool.
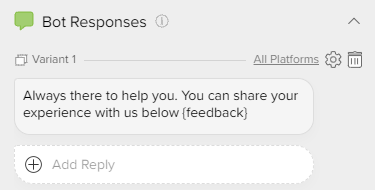
You can also trigger a feedback module for a particular step on the bot by using {feedback} in the Bot Response as shown below.
On Bot Response:
On Bot:
File Uploads
This section allows you to configure how the user-uploaded files should be handled by the bot i.e. it gives you the ability to choose to continue with the default setup or go with a custom setup for handling the user/agent uploaded files.
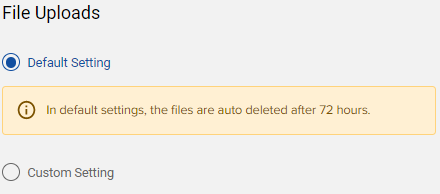
Default Setting: As the name suggests, this is the default option. All files will be uploaded in the Haptik’s bucket. Note that in this setting, the files are auto deleted after 72 hours.
Custom Setting: Choose this option to customize your way of handling user/agent uploaded files. It lets the client setup a custom AWS S3 bucket where the files will be uploaded. Clicking this option displays other configurational fields as below:
- Bucket ARN: This is the ARN Number of the client’s AWS S3 Bucket.
- S3 Bucket Name: This is the actual name of the Client’s S3 Bucket.
- Directory: This is an optional field. If the client wishes that all files uploaded by Haptik to the S3 Bucket should be inside a particular directory, then this is where you can provide the path. You can provide an entire path like this: Directory/sub-directory/sub-sb-directory
- Bucket Region: This is the region where the S3 bucket resides on the AWS network.
- Storage Type: This determines whether the files that are uploaded to this bucket should be stored as Private or Public. One cannot store a Public file in a Private Bucket.
- URL Expiry Time: This is the time (in seconds) after which the pre-signed link will expire. This setting is only available for Private files. This is because Private files get a pre-signed URL and we can use this field to set the expiry time for these URLs.
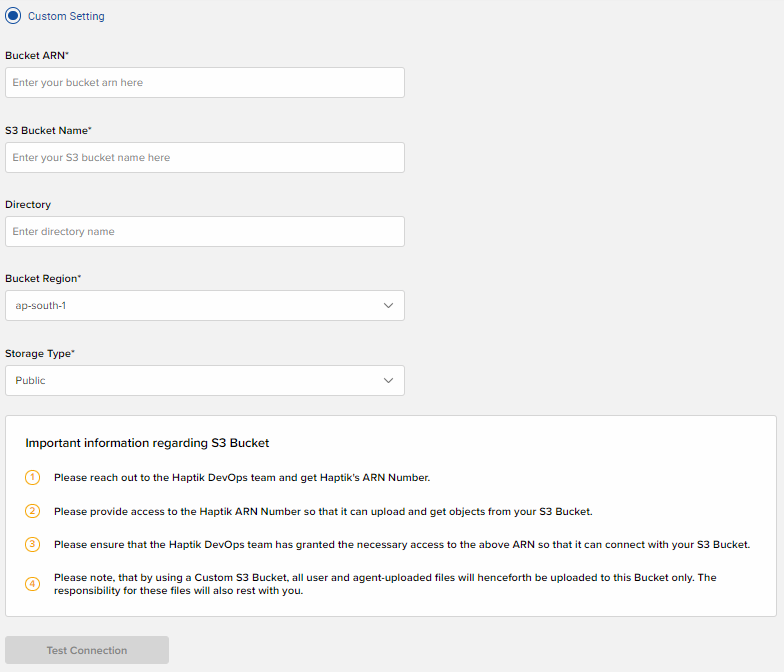
The Test Connection button lets you test whether the values added above are valid or not. If the values are proper and the configuration is correct, you get a success message as below,
else a failure message as below.
