How to Set Up Twilio Integration on Haptik bot
- Getting Started
- Bot Building
- Smart Agent Chat
- Conversation Design
-
Developer Guides
Code Step Integration Static Step Integration Shopify Integration SETU Integration Exotel Integration CIBIL integration Freshdesk KMS Integration PayU Integration Zendesk Guide Integration Twilio Integration Razorpay Integration LeadSquared Integration USU(Unymira) Integration Helo(VivaConnect) Integration Salesforce KMS Integration Stripe Integration PayPal Integration CleverTap Integration Fynd Integration HubSpot Integration Magento Integration WooCommerce Integration Microsoft Dynamics 365 Integration
- Deployment
- External Agent Tool Setup
- Analytics & Reporting
- Notifications
- Commerce Plus
- Troubleshooting Guides
- Release Notes
Twilio
Twilio is a Customer Engagement Platform that helps businesses with communication solutions. It provides a lot of Communication APIs like SMS, voice, video, IP calls, etc. It makes sending and receiving SMS easy. You can send and receive text messages with APIs powering more than 100 billion messages a year.
With Haptik-Twilio integration, you can build SMS and MMS bots.
Prerequisites for using Twilio Integration
- A registered account on Twilio Cloud Communications. You can check the pricing here. The signup process includes adding a phone number and getting it verified, after which you will be issued another phone number from Twilio.
- A bot on Haptik. You can learn more about creating a bot here.
How to set up?
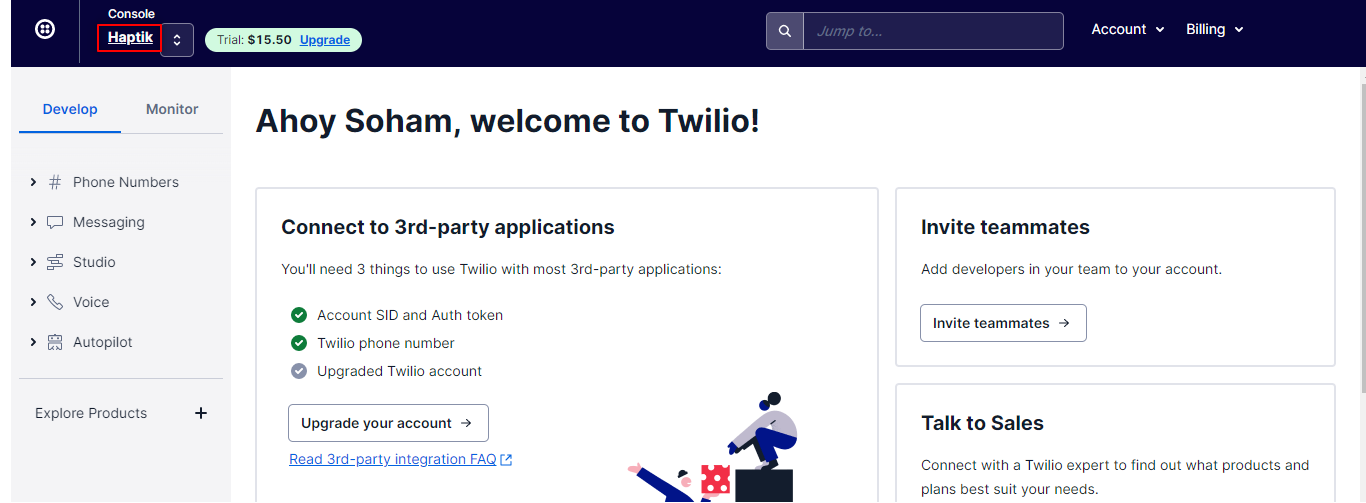
Step 1: Log in to Twilio Console, and select your account, as shown below.
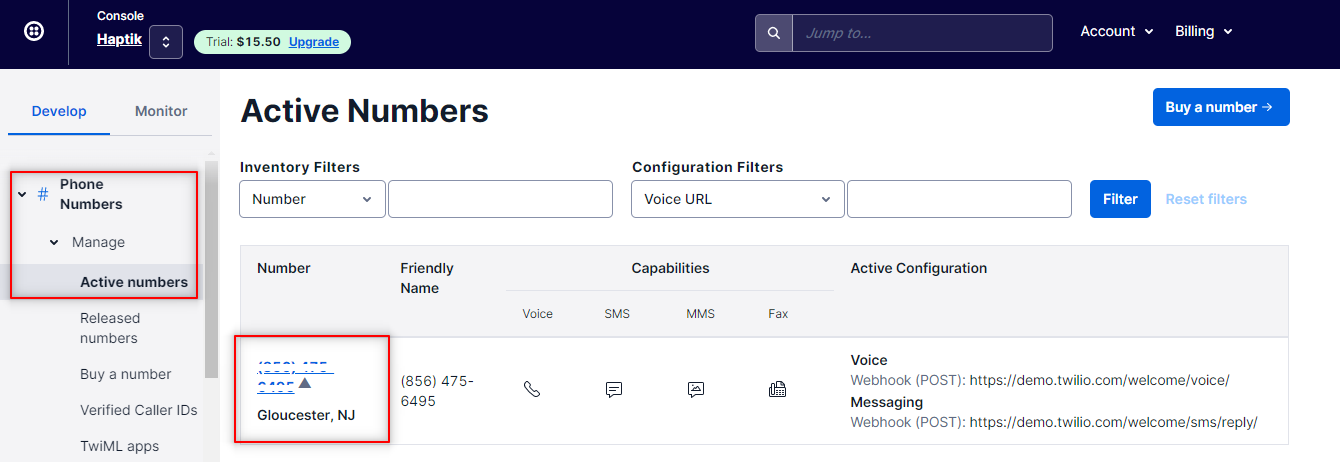
Step 2: Next, select Phone Numbers > Manage > Active Numbers, from the left navigation bar. In Active Numbers, click on the active phone number, as shown.
Step 3: Once you have clicked on the active phone number, navigate to Configure > Messaging as shown.
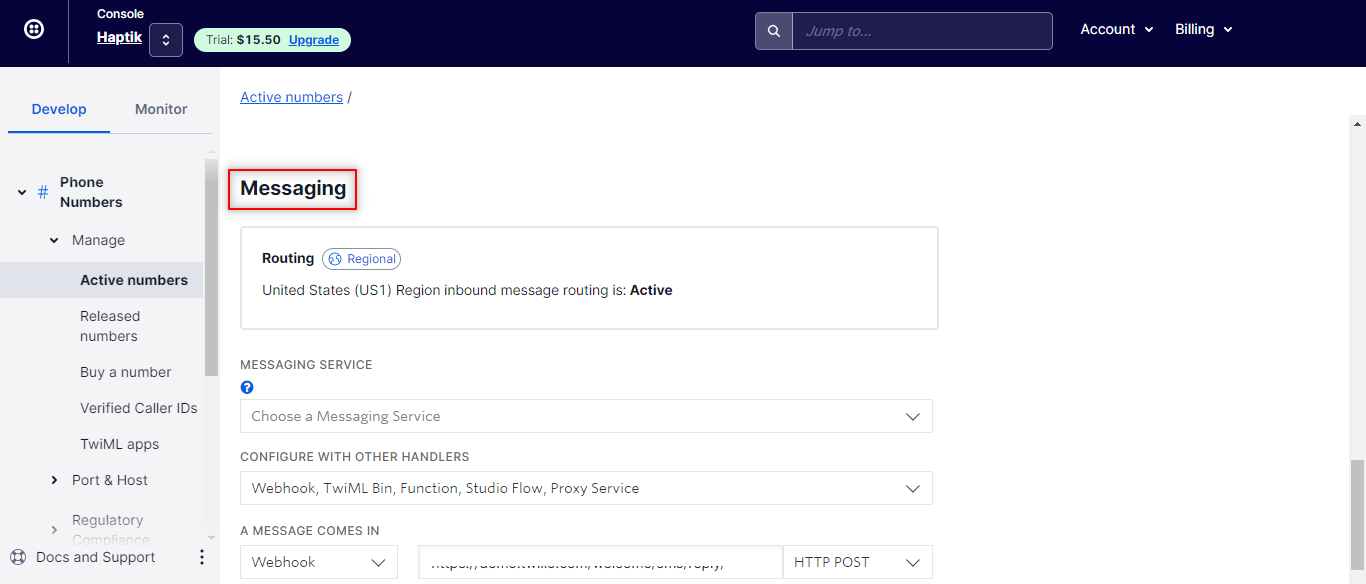
Step 4: Under Messaging, you will have to make certain changes.
- In CONFIGURE WITH OTHER HANDLERS, select Webhooks as shown.

- In A MESSAGE COMES IN section, select Webhooks, then you need to add the Haptik Callback URL in the text box, and select HTTP POST from the dropdown, as shown.

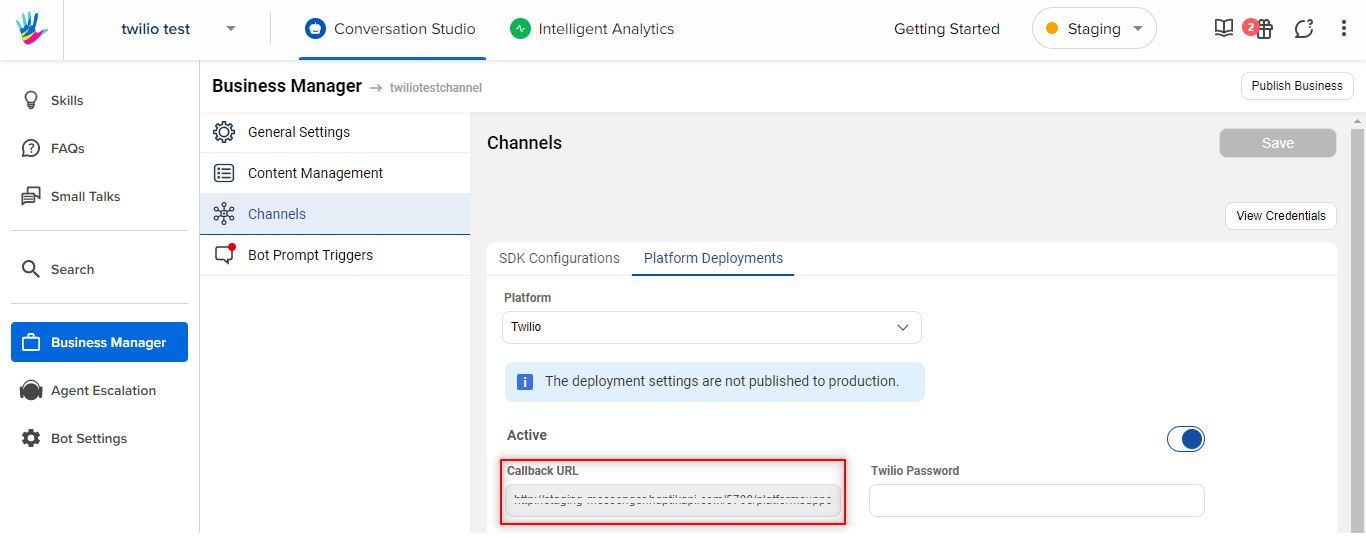
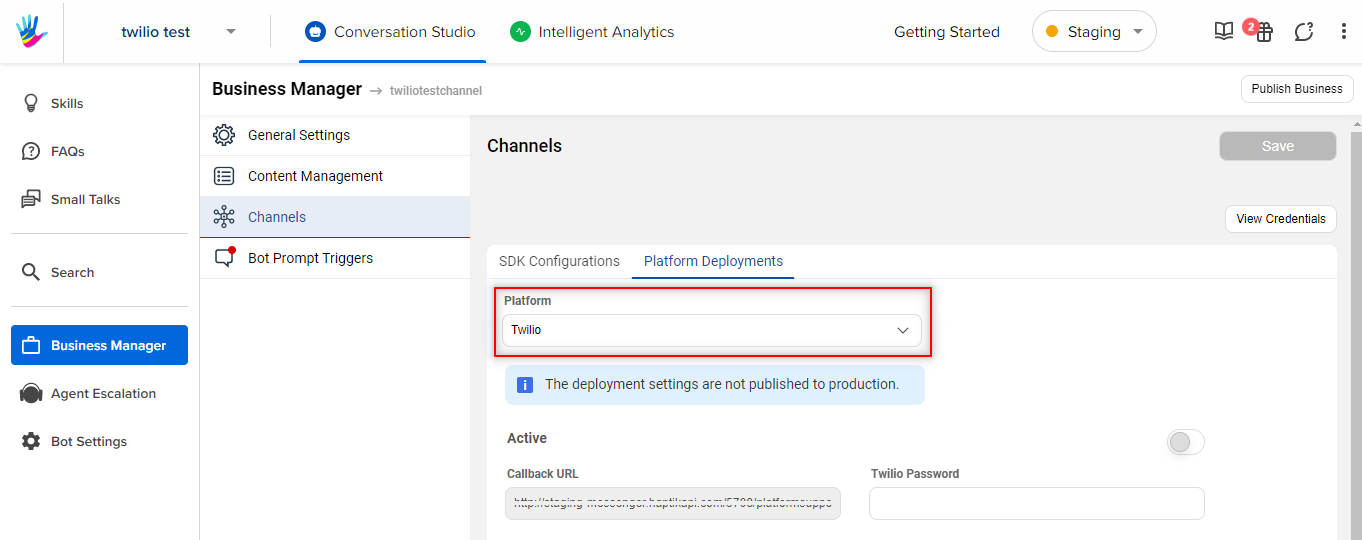
Step 5: Once you are done with the above settings, you need to open your bot on Haptik. Here, navigate to Business Manager > Channels > Platform Deployments, and under Platform dropdown select Twilio, as shown.
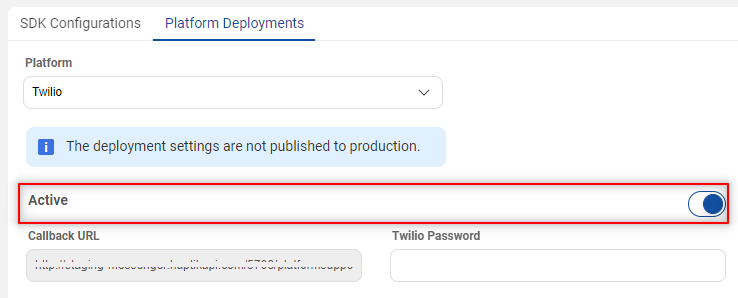
Step 6: Next, you need to turn the Active toggle button on, as shown.
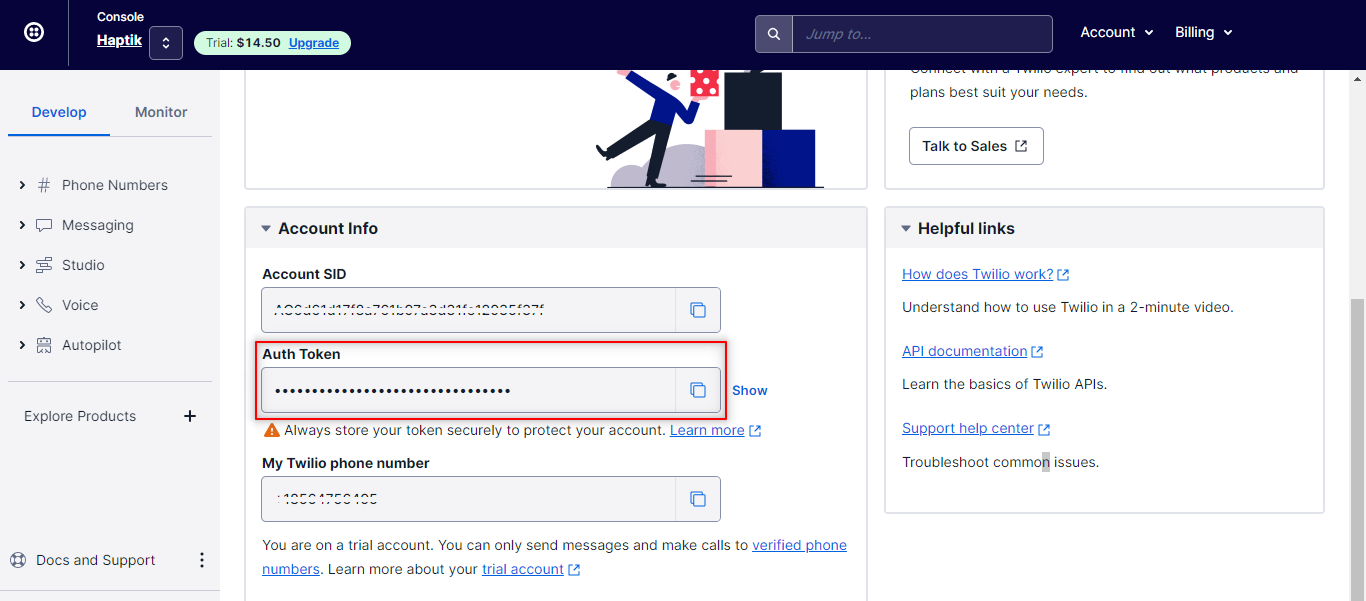
Step 7: You need to populate the Twilio Password field with appropriate data. For this, navigate to Twilio Console, and copy the Auth Token, as shown.
Step 8: Paste the Auth Token in the Twilio Password field, and Save it.
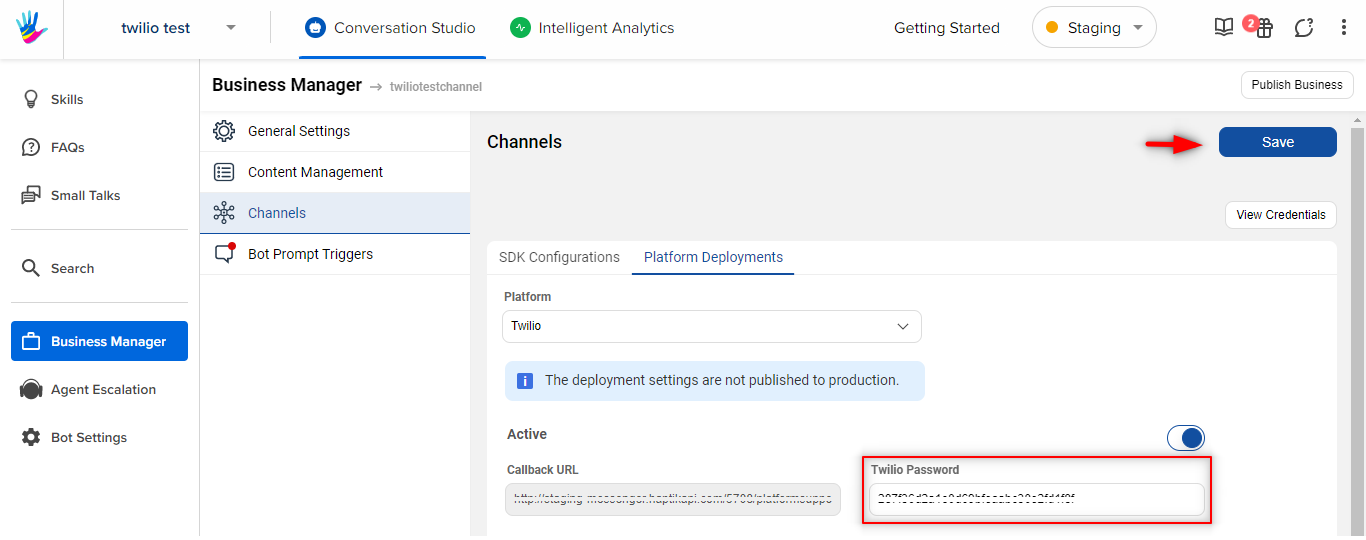
Once you have reached here, your Integration is complete, and you can test your bot.
