How to ensure Zendesk Chat integration is working properly?
- Getting Started
- Bot Building
- Smart Agent Chat
- Conversation Design
-
Developer Guides
Code Step Integration Static Step Integration Shopify Integration SETU Integration Exotel Integration CIBIL integration Freshdesk KMS Integration PayU Integration Zendesk Guide Integration Twilio Integration Razorpay Integration LeadSquared Integration USU(Unymira) Integration Helo(VivaConnect) Integration Salesforce KMS Integration Stripe Integration PayPal Integration CleverTap Integration Fynd Integration HubSpot Integration Magento Integration WooCommerce Integration Microsoft Dynamics 365 Integration
- Deployment
- External Agent Tool Setup
- Analytics & Reporting
- Notifications
- Commerce Plus
- Troubleshooting Guides
- Release Notes
Table of Contents
How a new chat is assigned to an agent?How does the chat between user and agent end?How can an agent, transfer his chat to another agent?How files could be shared?Once you have done the integration, it is time to check if it has been done properly. You can check it by going through the following -
- How a new chat is assigned to an agent?
- How does the chat between user and agent end?
- How can an agent, transfer his chat to another agent?
- How files could be shared?
Consider, a user has initiated a conversation with the bot, and it is going well so far.
At any instance where the user wishes to chat with an agent to get his queries resolved, he would be directed to the Agent.
How a new chat is assigned to an agent?
- When the user initiates his conversation on the bot, he would be asked to enter few details, as shown.
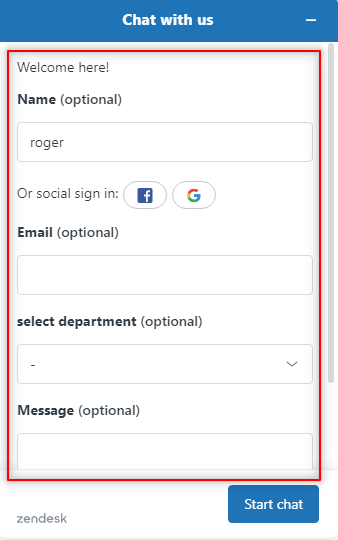
- The above details are optional, the user can either enter his details or can choose to skip and select Start Chat.
- As shown in the above image, the user can select the department too, and the chat would be transferred to the agent of that particular department.
- On Zendesk Agent dashboard, you can check the departments and the agents assigned in those departments.
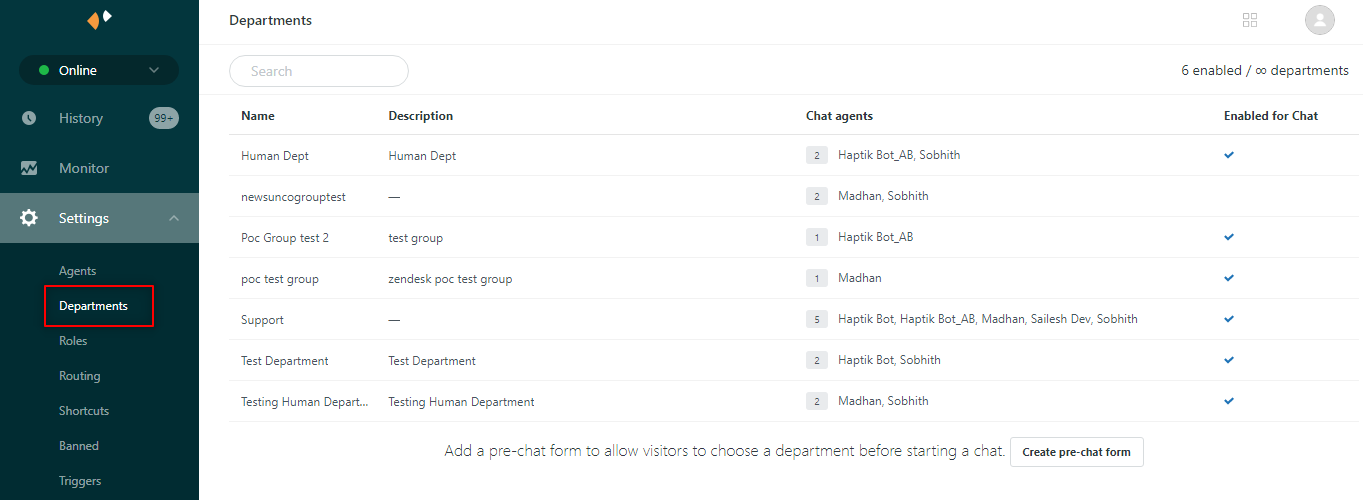
- When the user requests to chat with an agent, he would receive the following response.
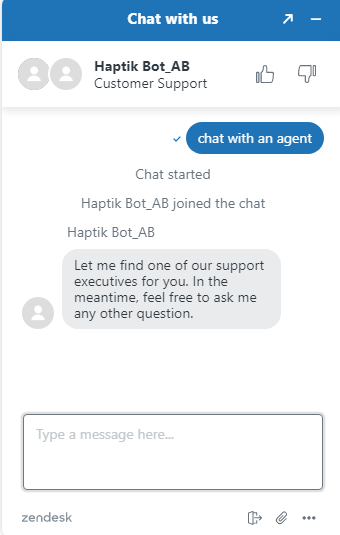
- On the Agent dashboard, the agent would receive a notification, and he can begin chatting with the user.
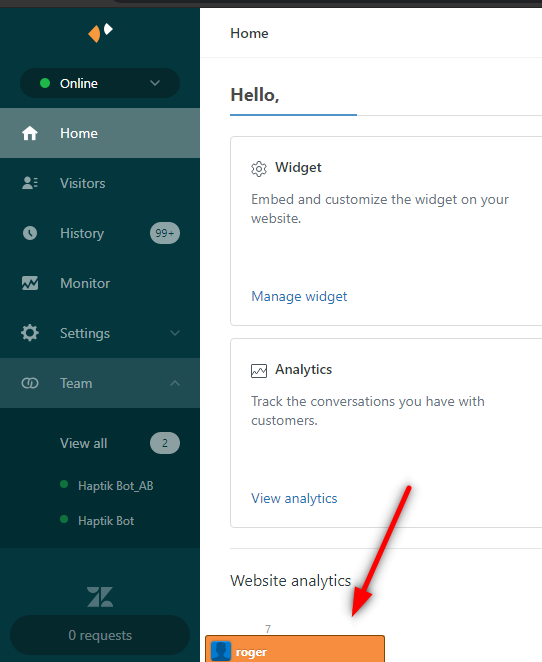
- When the agent opens the chat, he receives the user's text, and can now start the conversation.
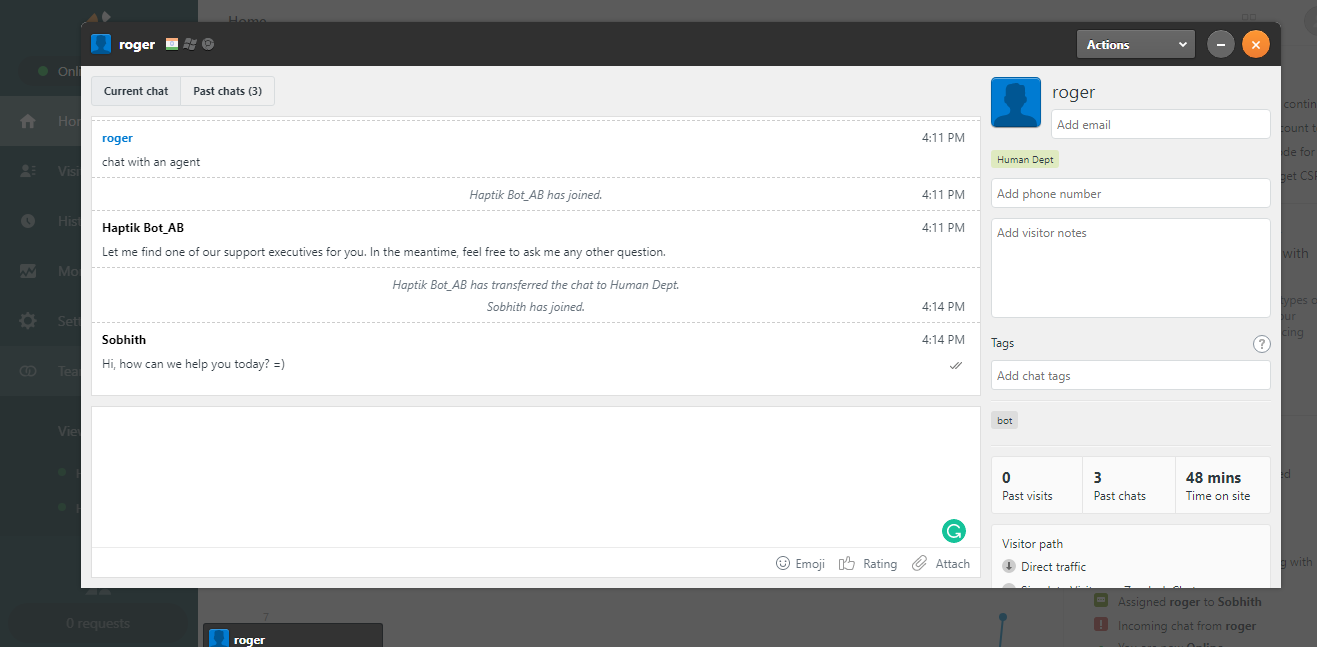
- The user would receive the reply on his chat screen. He would also receive an additional response, that says that the Agent has joined the chat, as shown below.
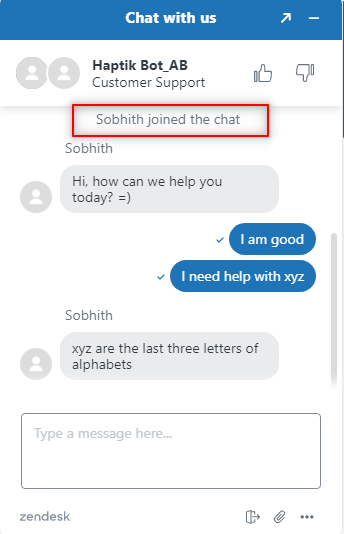
- This representation above clearly shows that the bot to agent transfer has been successful.
How does the chat between user and agent end?
- There are two ways that a chat between the user and agent would end.
- Agent ends the chat
- User ends the chat
-
Agent ends the chat -
- The agent can end the chat by just closing the chat window.
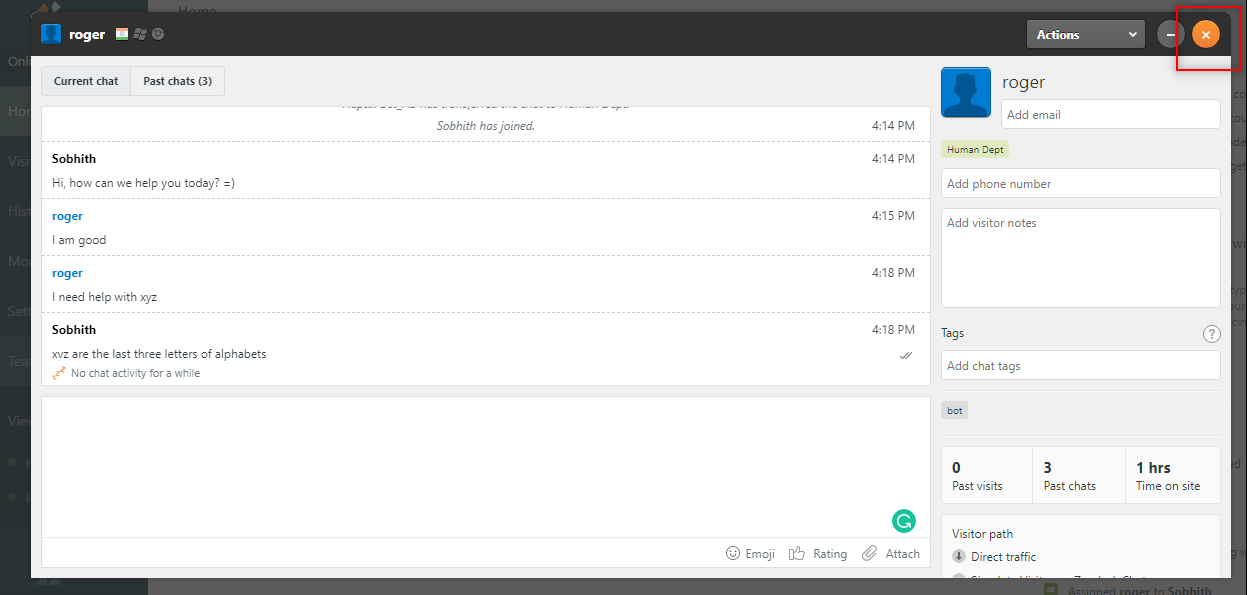
- He would receive the following prompt.
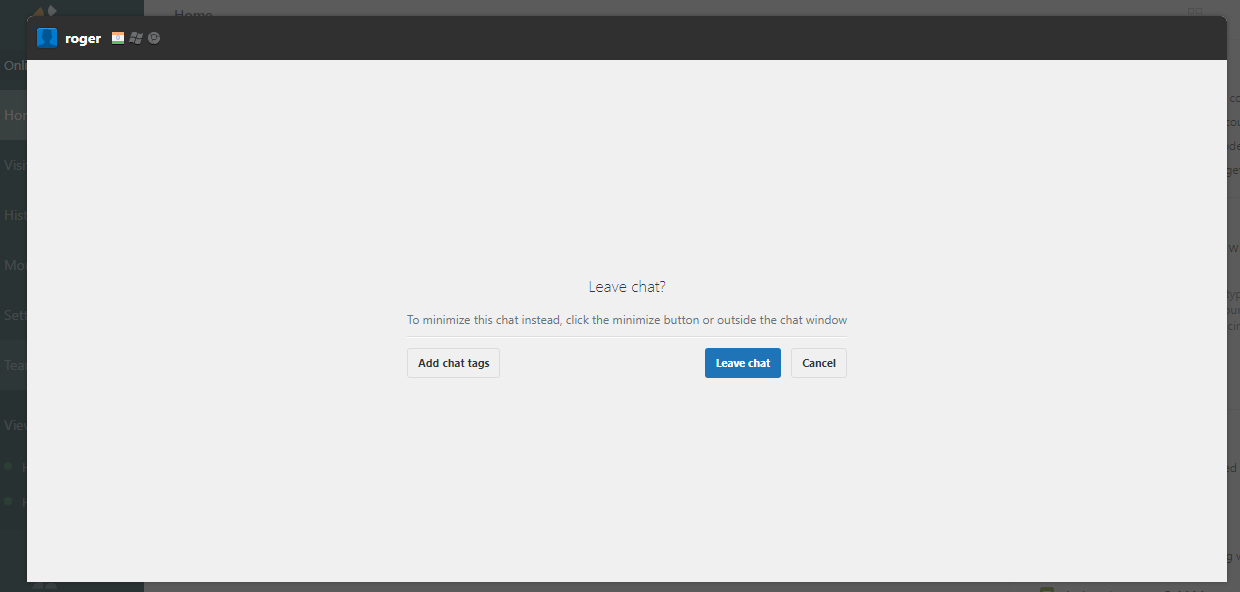
- Once the agent has left the chat, the user would receive a response on the bot.
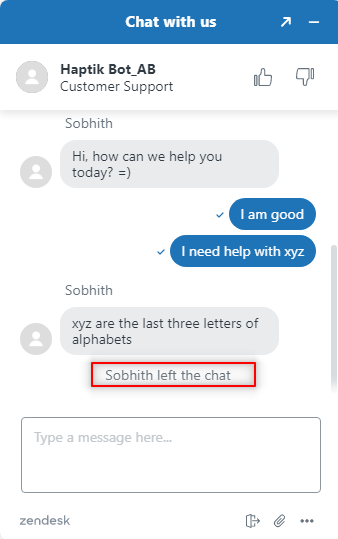
- This marks the end of the chat by the agent.
- The agent can end the chat by just closing the chat window.
-
User ends the chat -
- The user can end the chat by tapping on the three dots at the bottom right of his chat screen, as shown.
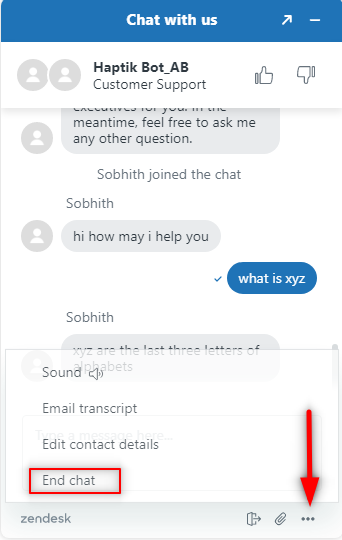
- The user would receive a prompt, confirming to end the chat.
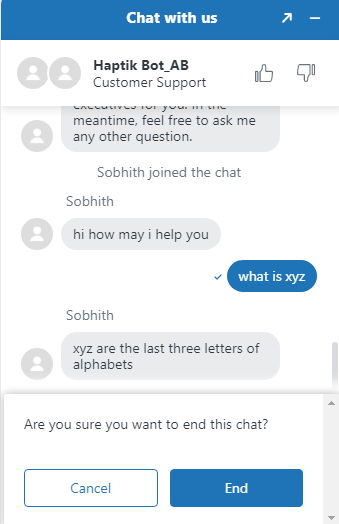
- Once the user selects End, the chat would end.
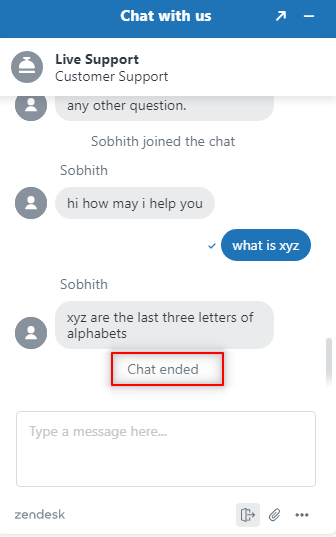
- The user can end the chat by tapping on the three dots at the bottom right of his chat screen, as shown.
How can an agent, transfer his chat to another agent?
- An agent can transfer his chat to another agent, by using these options as shown below.

- An agent can transfer to an agent from his department, or from another department.
- Consider, there are two agents, and a query has been asked to an agent, and the agent is unsure about the resolution. In this case, he can choose to transfer his chat to another agent, by selecting Transfer to agent.
- The agent will have to enter the email id of another agent, to whom the chat would be transferred.
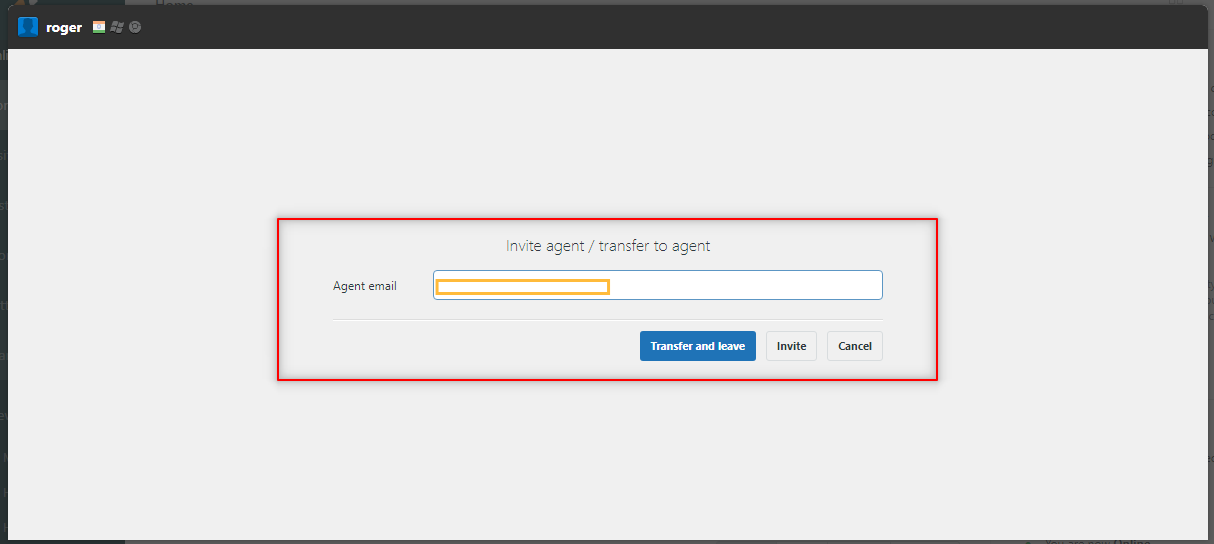
- When the agent transfers the chat, he leaves the chat and another agent gets the handover.
- Similar is reflected on the User's chat window.
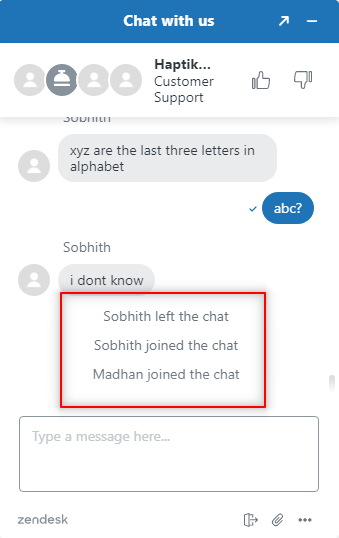
- Another agent takes the handover, and resumes the conversation with the user.
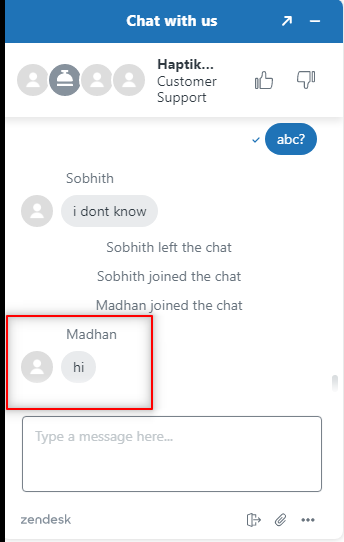
- This is how a successful transfer is done.
How files could be shared?
- Agent, as well as a user, can send files to each other.
- By default, sharing is enabled for the following file types:
- PDF (.pdf)
- PNG (.png)
- JPEG (.jpeg)
- GIF (.gif)
- Text (.txt)
- The agent can send a file, by selecting the Attach icon, as shown.
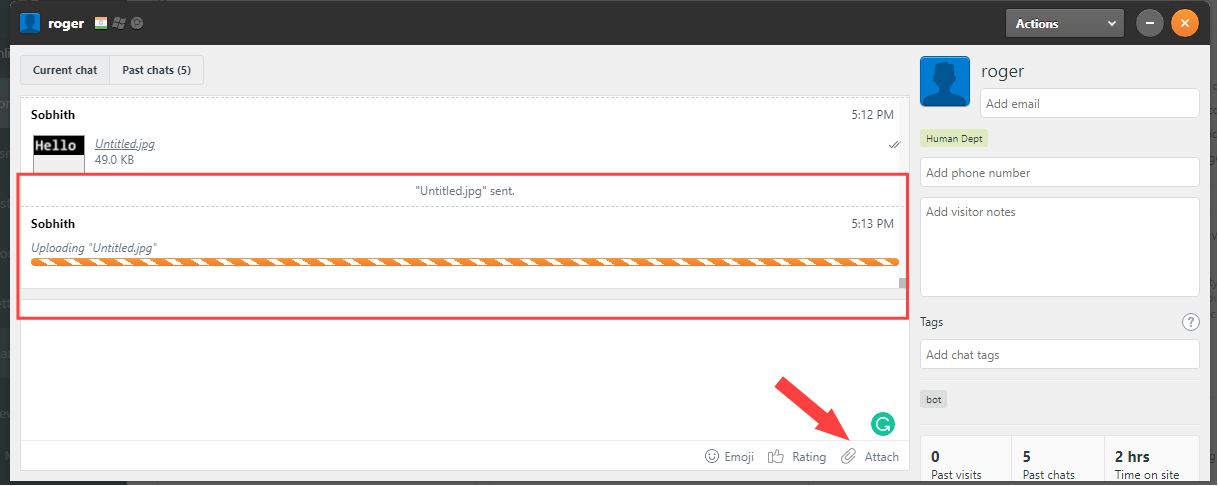
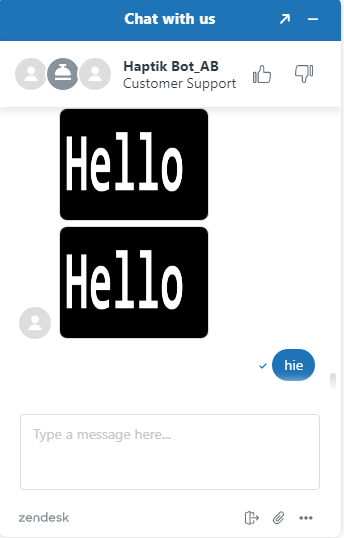
- The image file that was sent by the agent, would reflect in the following way on the user's screen.
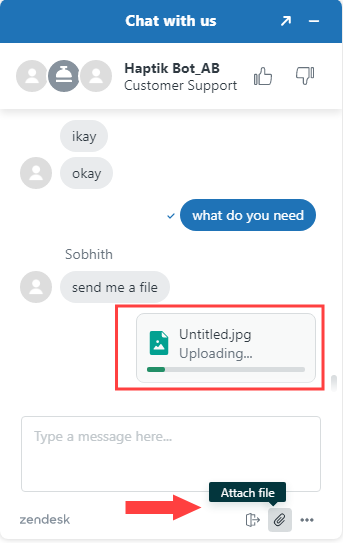
- Similarly, even the user can send files to the agent, by selecting Attach icon, as shown.
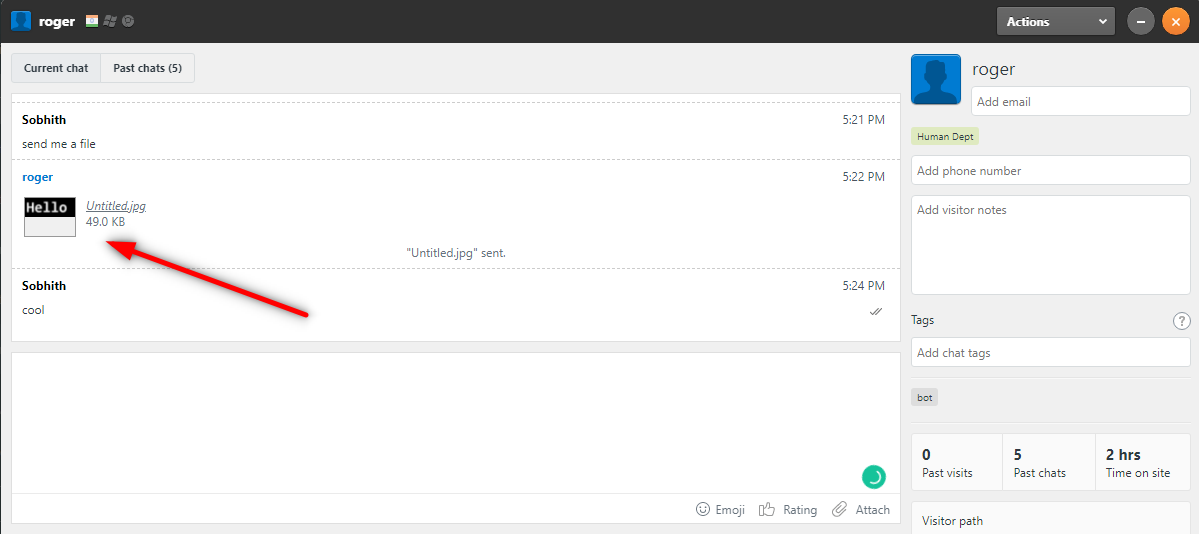
- It would reflect on the agent's chat, in the following way.
So, if you are able to perform the above process, you can rest assured. Your integration is successful. Congratulations!
