How do users add image in the bot?
- Getting Started
- Bot Building
- Smart Agent Chat
- Conversation Design
-
Developer Guides
Code Step Integration Static Step Integration Shopify Integration SETU Integration Exotel Integration CIBIL integration Freshdesk KMS Integration PayU Integration Zendesk Guide Integration Twilio Integration Razorpay Integration LeadSquared Integration USU(Unymira) Integration Helo(VivaConnect) Integration Salesforce KMS Integration Stripe Integration PayPal Integration CleverTap Integration Fynd Integration HubSpot Integration Magento Integration WooCommerce Integration Microsoft Dynamics 365 Integration
- Deployment
- External Agent Tool Setup
- Analytics & Reporting
- Notifications
- Commerce Plus
- Troubleshooting Guides
- Release Notes
In order to enable the users to add images to the conversation, you need to navigate to your bot, and to the Step that requires an image to be uploaded by the users.
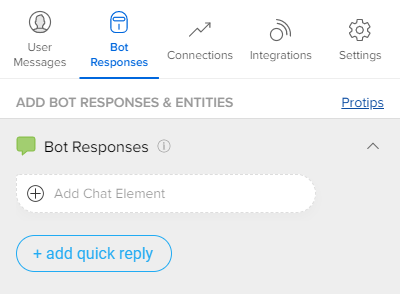
Once you have opened the Step, navigate to the Bot Responses and select Add Chat Element.

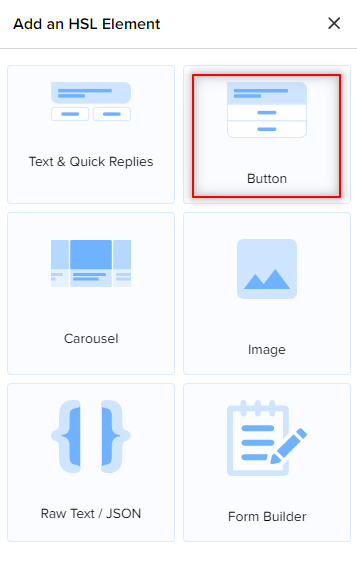
From the list of HSL Elements available, select Button, as shown.

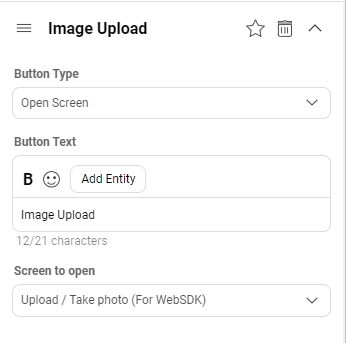
Once you have added the Button, select the Button Type as Open Screen, add a Button Text, and select Upload/Take photo (For WebSDK) option from the Screen to open dropdown, as shown.

Once you have done the above, simply save the changes, and also make sure you have added appropriate User Messages, and train your bot.
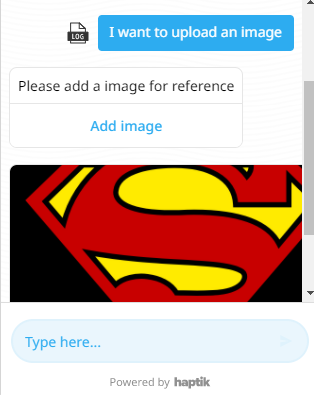
Once you have trained your bot, you can test it. The users will be able to add an image in the chat in the following way -

