Custom Fields (Chat Disposition)
- Getting Started
- Bot Building
- Smart Agent Chat
- Conversation Design
-
Developer Guides
Code Step Integration Static Step Integration Shopify Integration SETU Integration Exotel Integration CIBIL integration Freshdesk KMS Integration PayU Integration Zendesk Guide Integration Twilio Integration Razorpay Integration LeadSquared Integration USU(Unymira) Integration Helo(VivaConnect) Integration Salesforce KMS Integration Stripe Integration PayPal Integration CleverTap Integration Fynd Integration HubSpot Integration Magento Integration WooCommerce Integration Microsoft Dynamics 365 Integration
- Deployment
- External Agent Tool Setup
- Analytics & Reporting
- Notifications
- Commerce Plus
- Troubleshooting Guides
- Release Notes
Table of Contents
Overview
Every chat offers crucial insights that brands should record to improve products and services according to customers’ expectations. With Haptik, you can create custom fields so that your chat support team never fails to save important information.
Please note a maximum of 4 custom fields can be created per account.
Steps to Create Custom Fields on Smart Agent Chat
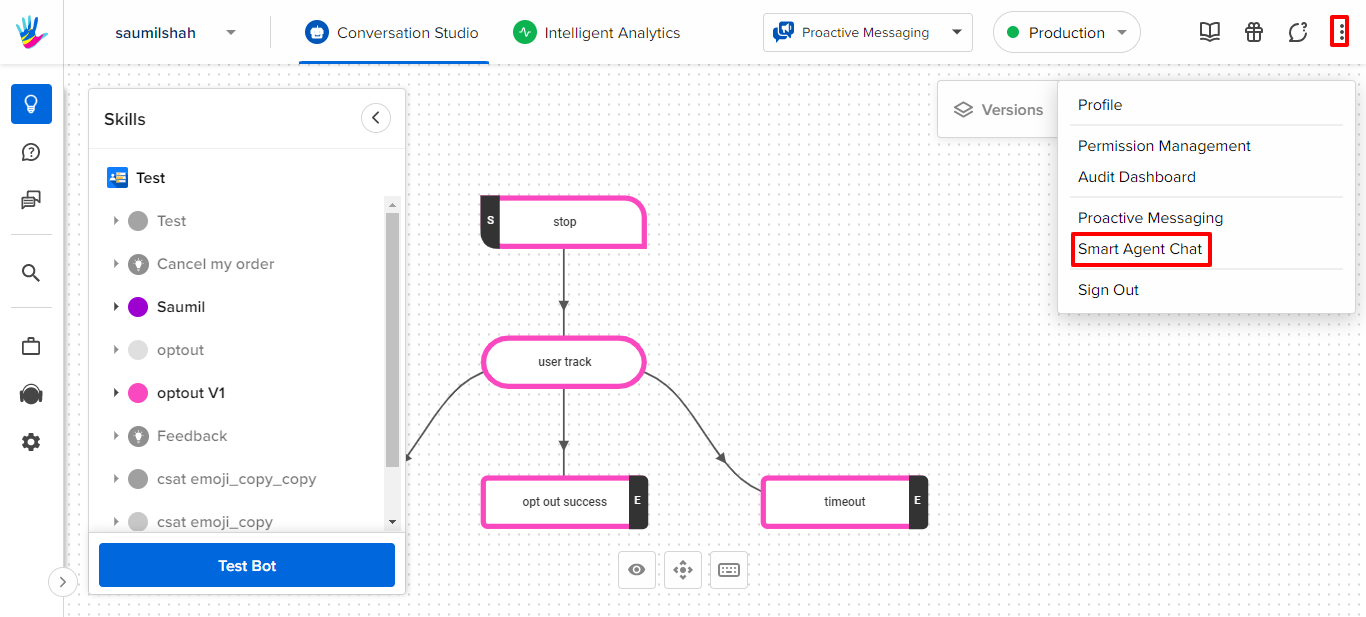
Log in to your Haptik account and click on the three horizontal dots to see the Smart Agent Chat option. Click on it to proceed further.
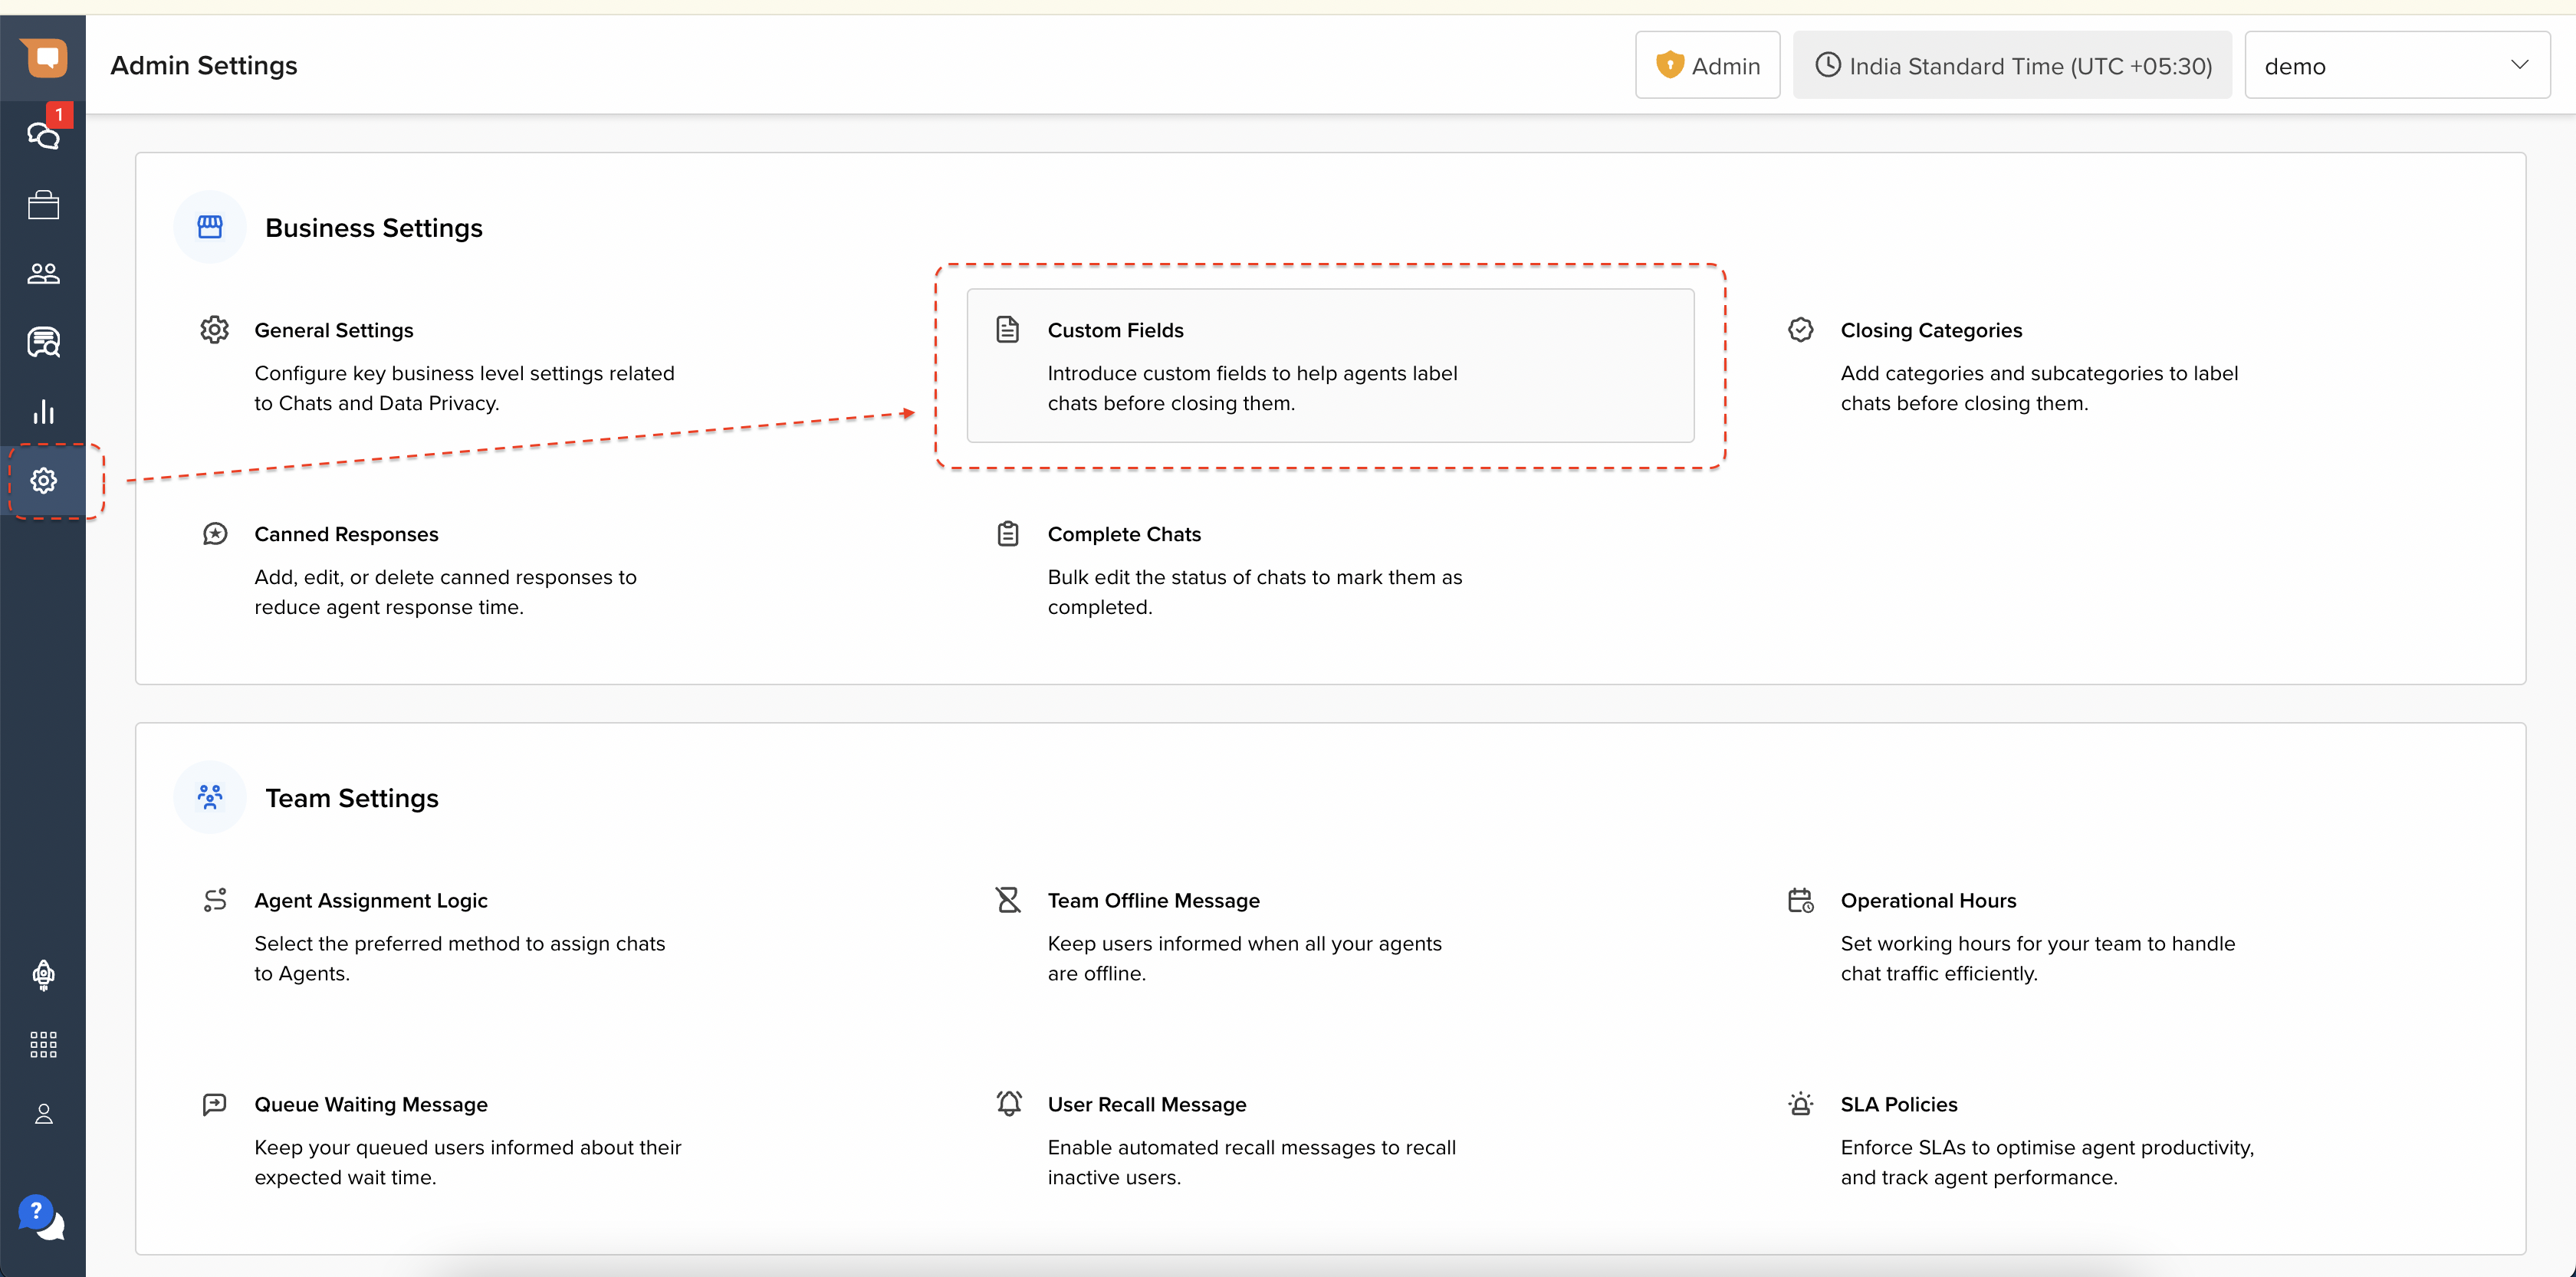
On the left side of the panel, you need to select the Admin Settings icon and then choose the Custom Fields card.
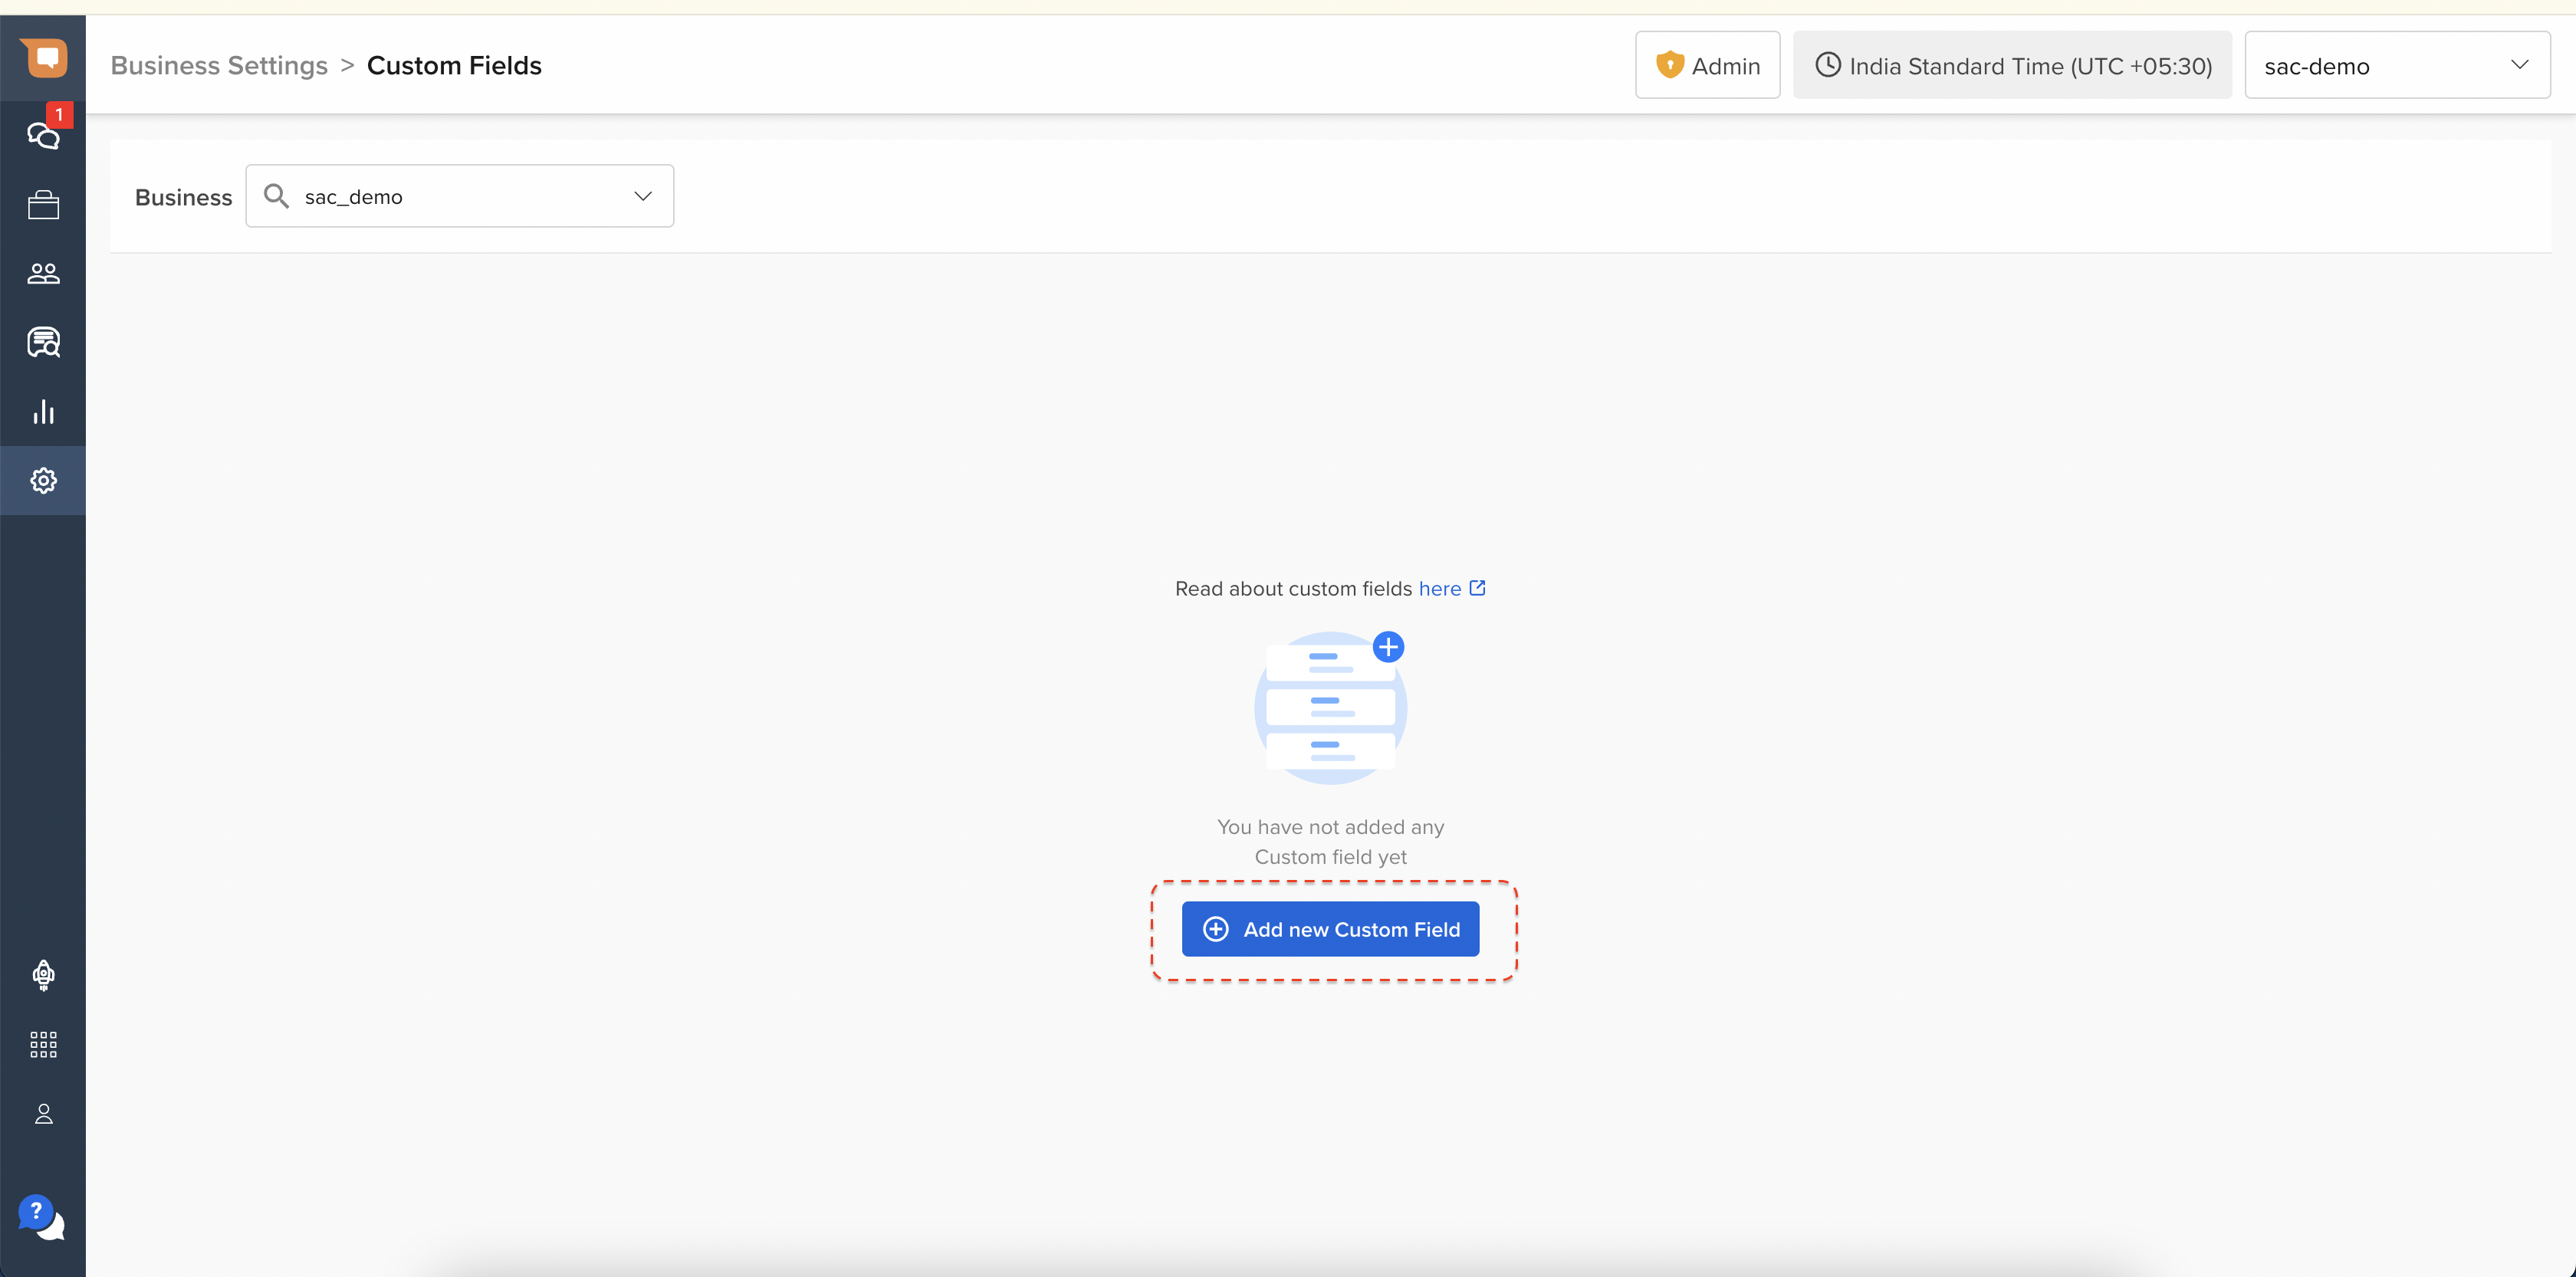
Once done, click on the Add new custom field button.
Give your custom field a name. Please note that you can change the name at any time by simply clicking on the pen/edit icon.
After giving a name to your custom field, decide whether its selection type should be single or multi. 
In addition, turn on the toggle if you want this custom field to be filled compulsorily.

At last, enter the values your agents will most likely use for your custom field and then click Save.

Each value must be separated by a comma. Also, you can delete a created custom field by simply clicking on the Trash icon available on the right side of the field name.
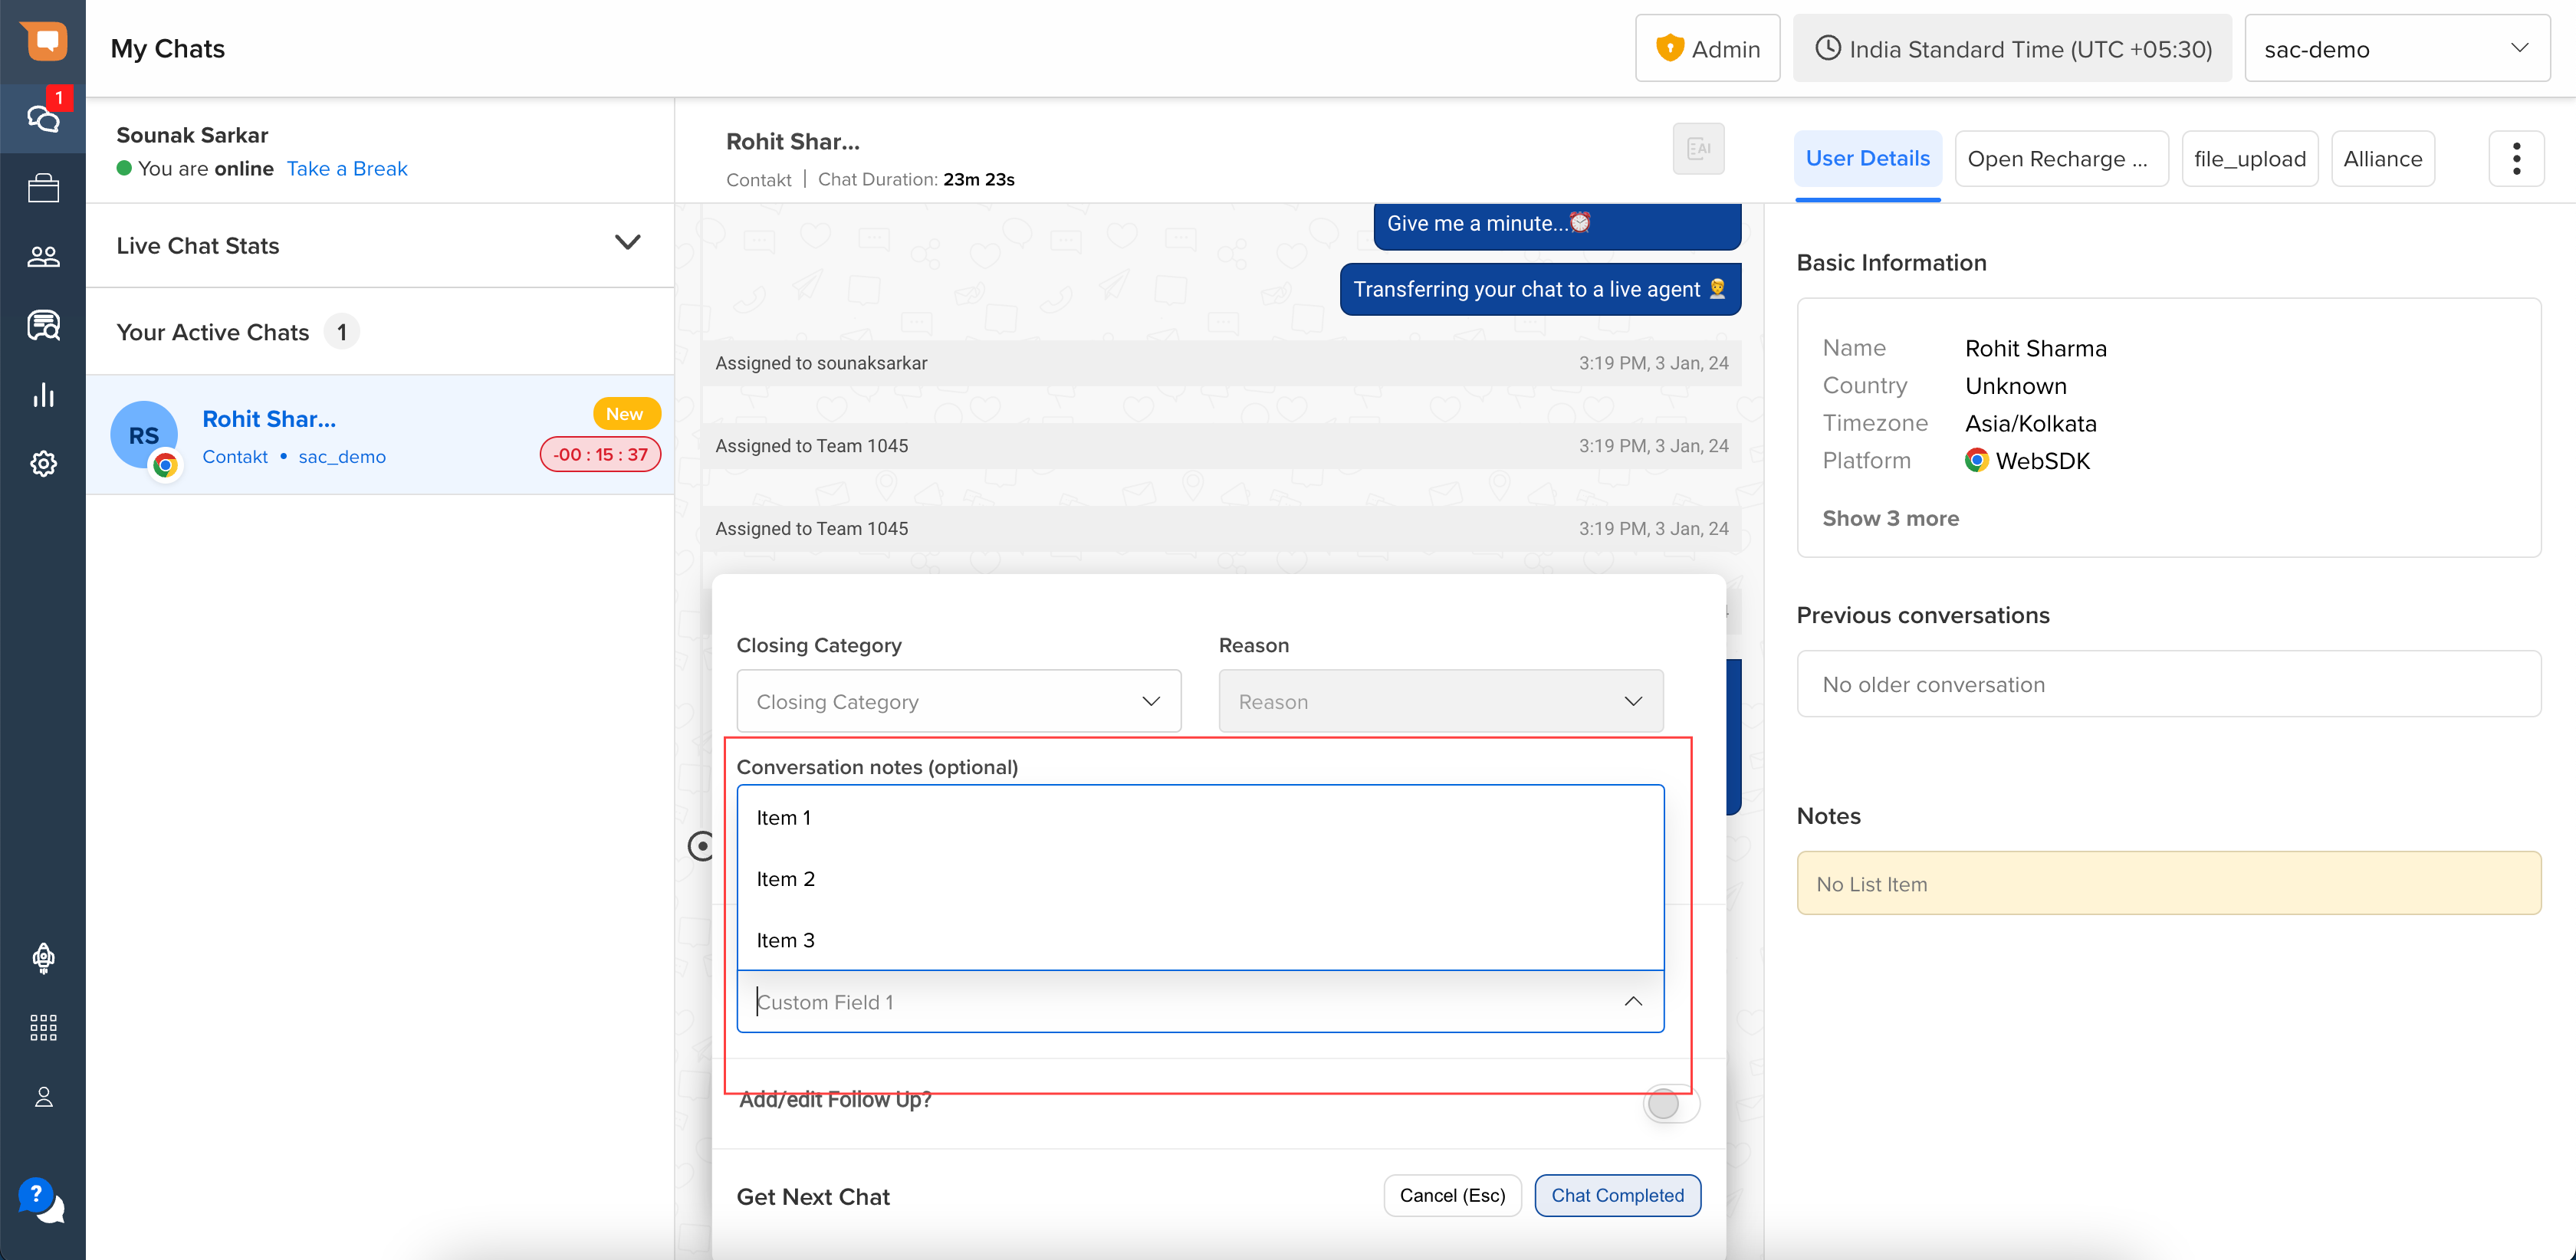
Now, your chat support team will see your defined custom fields when closing a chat. For example:

In case you have some doubts about this feature, your Haptik SPOC will help you here.
