Hourly Analytics
- Getting Started
- Bot Building
- Smart Agent Chat
- Conversation Design
-
Developer Guides
Code Step Integration Static Step Integration Shopify Integration SETU Integration Exotel Integration CIBIL integration Freshdesk KMS Integration PayU Integration Zendesk Guide Integration Twilio Integration Razorpay Integration LeadSquared Integration USU(Unymira) Integration Helo(VivaConnect) Integration Salesforce KMS Integration Stripe Integration PayPal Integration CleverTap Integration Fynd Integration HubSpot Integration Magento Integration WooCommerce Integration Microsoft Dynamics 365 Integration
- Deployment
- External Agent Tool Setup
- Analytics & Reporting
- Notifications
- Commerce Plus
- Troubleshooting Guides
- Release Notes
Table of Contents
Overview
Currently, in Intelligent Analytics, the users have access to data on a daily basis. What they now really need is the ability to get the details as well but on an hourly basis that would keep them ahead in this fast-paced world. We have a solution now.
Hourly Analytics can provide important insights for the marketing and commerce industries by allowing them to track and analyze customer behavior in real-time. This information can be used to make quick and informed decisions about marketing campaigns, promotions, inventory management, and other critical business operations.
It can help identify trends and patterns, providing actionable insights to optimize sales and improve customer engagement to a larger extent. Its Hour Range Selector feature can be used to identify the conversations that were created, or completed, or were even active during a particular time range.
So how do we use this?
Steps to Use Hour Range Selector
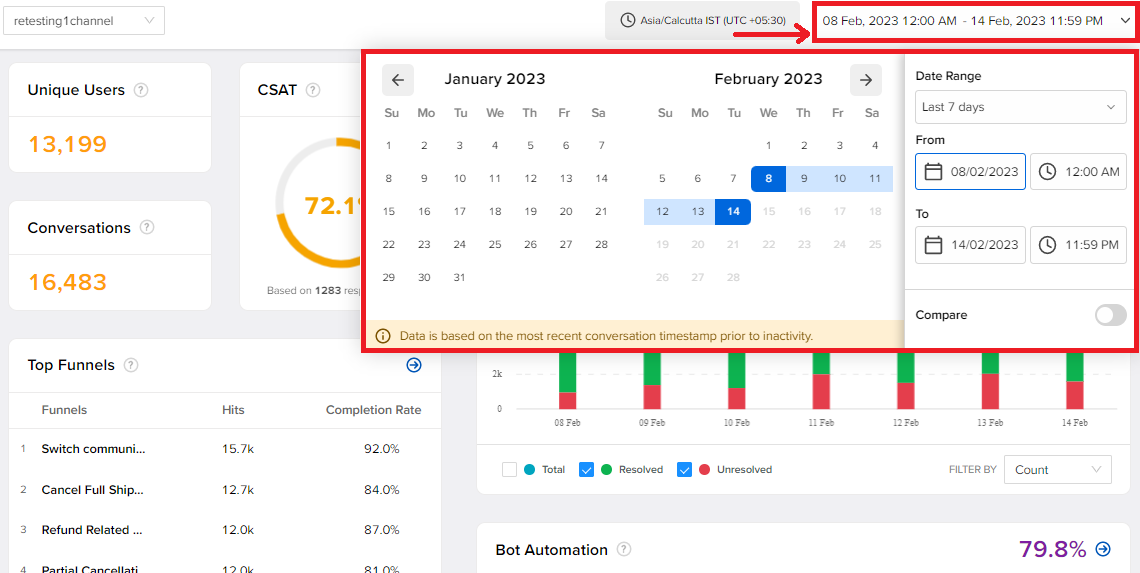
- Click on the timestamp drop-down on the right, top most side of the Intelligent Analytics screen. The calendar along with other additional options appear.

- Choose the days for which you need the analytics data. You can choose the interval of days as well from the Date Range drop-down.
- For configuring hourly analytics, choose the date and time from From and To fields and click anywhere on the background.
You can now see the hourly analytics on this screen based on the timestamp chosen.
.
