How to use Message Analysis on Intelligent Analytics?

Written by Medha Anand
Updated on March 16th, 2023
- Getting Started
- Bot Building
- Smart Agent Chat
- Conversation Design
-
Developer Guides
Code Step Integration Static Step Integration Shopify Integration SETU Integration Exotel Integration CIBIL integration Freshdesk KMS Integration PayU Integration Zendesk Guide Integration Twilio Integration Razorpay Integration LeadSquared Integration USU(Unymira) Integration Helo(VivaConnect) Integration Salesforce KMS Integration Stripe Integration PayPal Integration CleverTap Integration Fynd Integration HubSpot Integration Magento Integration WooCommerce Integration Microsoft Dynamics 365 Integration
- Deployment
- External Agent Tool Setup
- Analytics & Reporting
- Notifications
- Commerce Plus
- Troubleshooting Guides
- Release Notes
Table of Contents
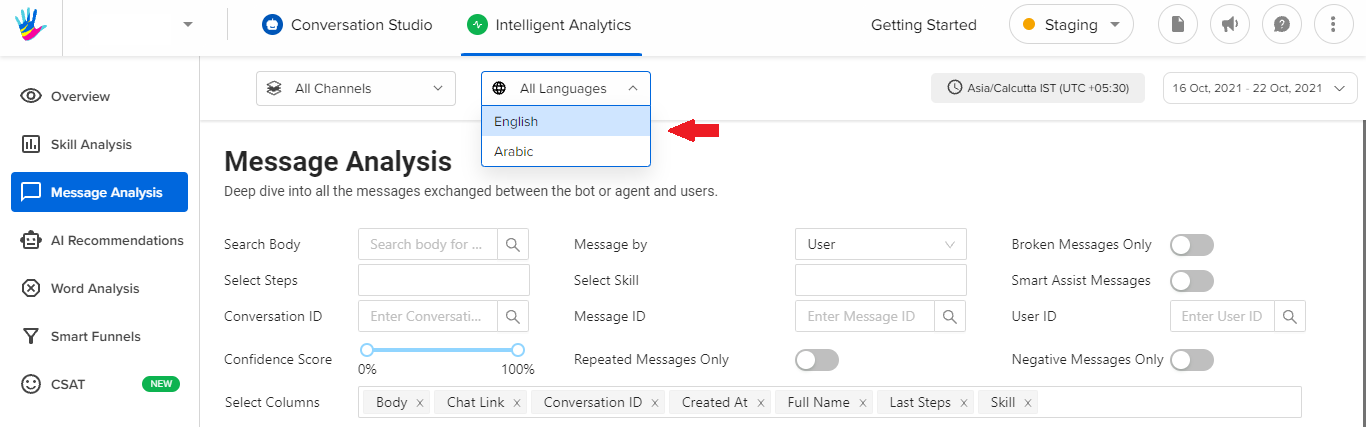
In the Intelligent Analytics tool, you can go to the "Message Analysis" section to analyze the bot performance at a message level.
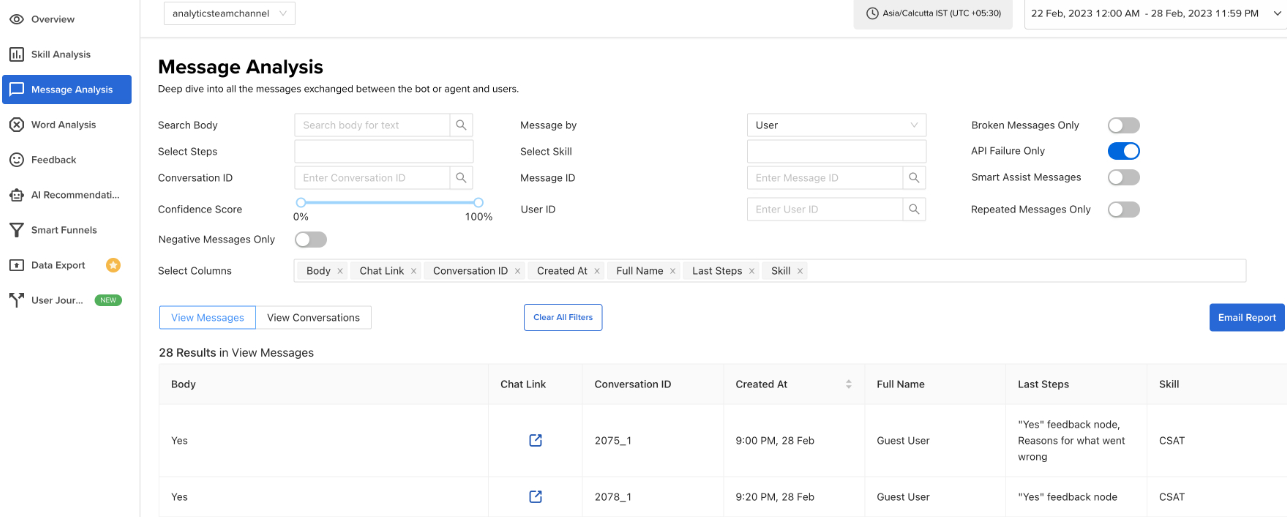
You can start by selecting a specific channel or bot and then setting the date and time period. And then you should see a page with options to filter and analyze the messages sent and received by your bot.
The top half of the page consists of multiple filters. We will go through each of these filters and understand how they can be used later in this document.
Below the filters, you have a table of data where you can see the messages processed by clicking on the View Messages link. Or you can choose to see the conversations of your bot by clicking on the View Conversations link.
The data in the tables are paginated and you can scroll to different pages of the table by using the navigation icons below the table.

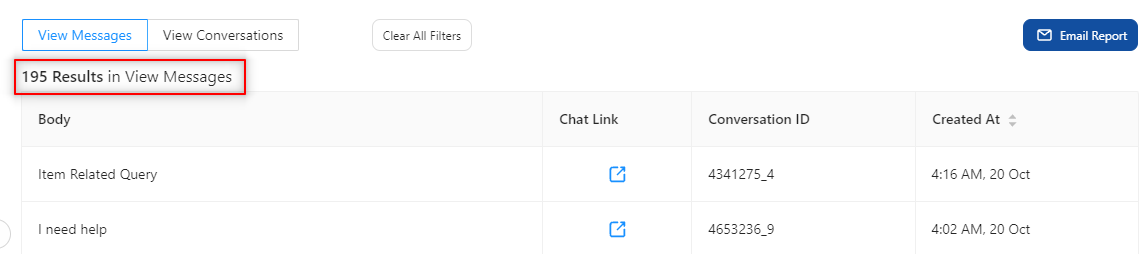
In View Message mode, you can see the count of messages above the table. When you select a filter, this count will change according to the number of messages that were found.
In the View Conversation mode, the tool will show the total number of conversations.

View Messages
The View Messages section of the page can be accessed by clicking on the View Messages link above the table. The table shows data about the messages processed by your bot.
The columns of the table can be configured by you in the case of viewing messages. We will discuss these configurations in a later section. But by default, the tool selects a few columns for you.
These columns are:
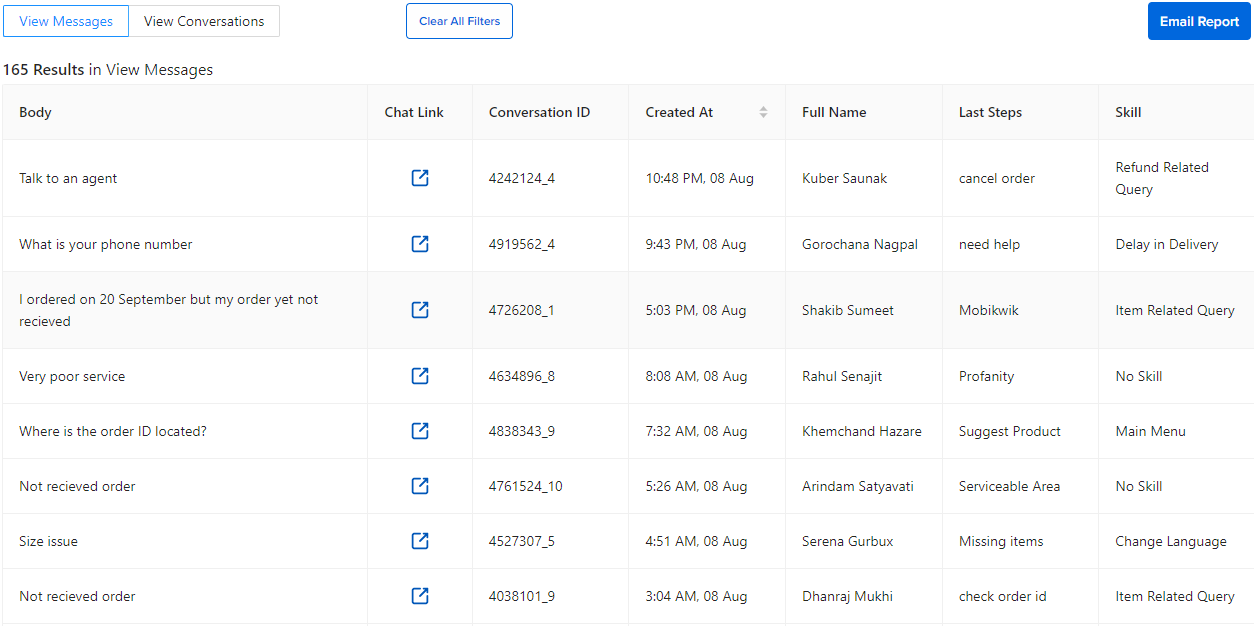
- Body - This column shows you the actual message that was sent.
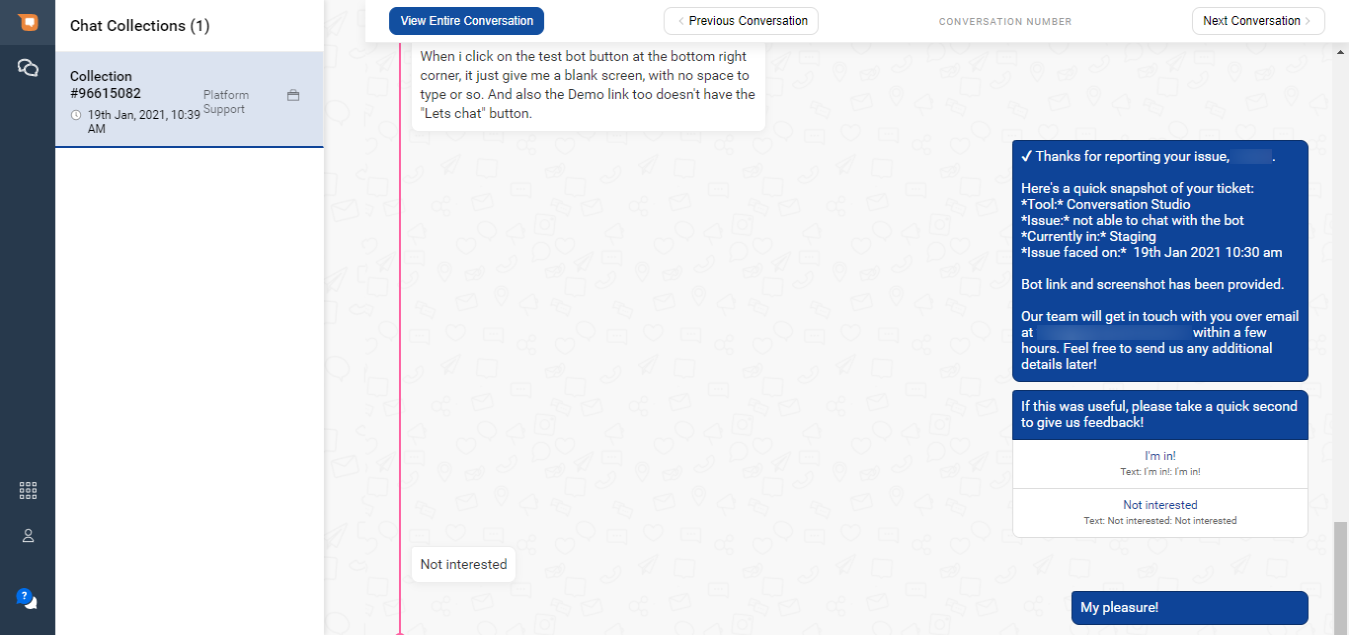
- Chat Link - This column provides a link to open and view the entire conversation related to the message.
Clicking on the link will open a page that shows the conversation as well as the user details which were collected on the bot. There is a Previous Conversation and Next Conversation button to help you navigate throughout the various conversations of the user. If you have access to both Smart Agent Chat and Intelligent Analytics, you will be able to the chat link as shown below -
- Conversation ID - This is a unique ID every conversation has.
- Created At - This column tells you when the message was received by the bot.
- Full Name - This column shows the full name of the user who sent the message.
- Last Steps - This column shows the last step that the user was on before sending this message. This information can be useful to understand what the context was for the user sending the current message.
- Skill - This column shows to which skill does the step from the Last Steps column belong to. If the feedback is captured manually, this skill would be empty displaying No Skill.
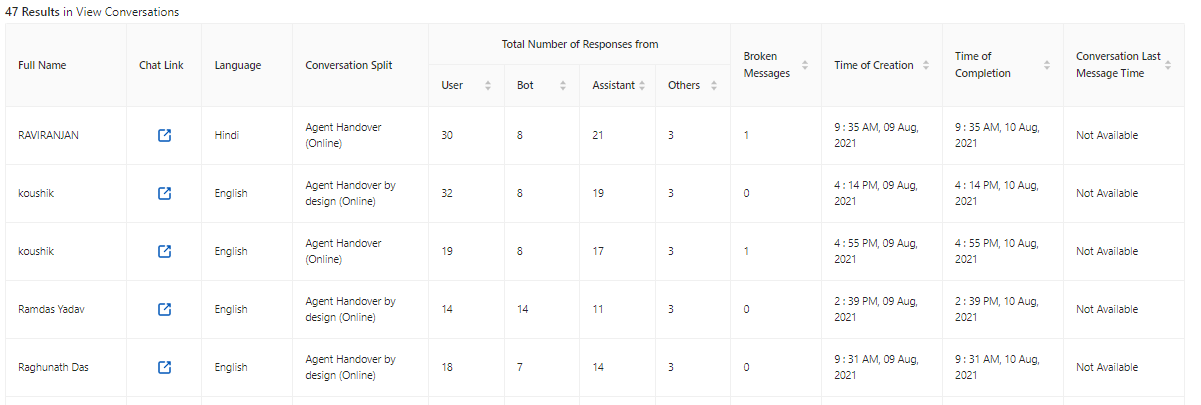
View Conversations
The View Conversations section of the page can be accessed by clicking on the View Conversations link above the table. The table shows data at a conversation level, rather than at a message level. You will be able to see at the most 10,000 records when you click on View Conversations. Below is a brief explanation of some columns in this section.
- Full Name - This column provides the full name of the user who was part of the conversation.
- Chat Link - This column provides a link to open and view the complete conversation. This is similar to the chat link in the View Messages table.
-
Total Number of Responses From - This column provides an overview of the sources of the different messages in the conversation.
- User - This section tells you how many messages of the conversation came from the user.
- Bot - This section tells you how many messages of the conversation came from the bot.
- Assistant - This section tells you how many messages of the conversation came from a human agent.
- Others - This section tells you how many messages came from other sources. These could include notifications, reminders, feedback messages, etc.
- Broken Messages - This column gives you information about how many messages broke in the conversation. A message is considered to be broken if the bot cannot respond to it.
- Time of Creation - This column provides information about when the conversation started.
- Time of Completion - This column provides information about when the conversation got completed.
- Conversation Last Message Time - This column provides information about when the conversation was last active.
Downloading the report
There is an option to email the Message or Conversation data in CSV format if needed. This can be done by clicking on the Email Report the button above the table showing the data.
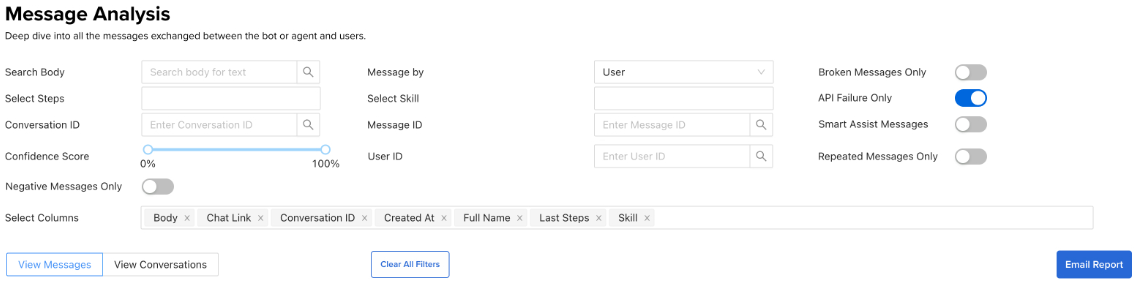
The CSV file will be sent to you at the Email address registered with your account.
Filters
As mentioned above, the Message Analysis page provides you with many filter options. You can use these filters to select what data you see in the Conversation/Message table on the page.
In this section of the document, we will go over each of these filter options. We will see how you can use one or a combination of these options to select the data you view in the tables.
Search Body
The first filter option is Search Body. You can use this option to filter the table based on the message body.
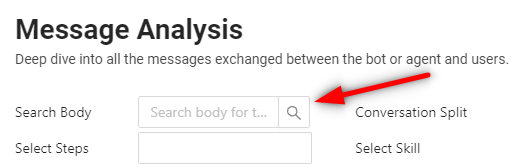
For example, you can filter for all messages containing the words I want to book a Ticket by entering it in the Search Body input field and then clicking on the magnifying glass icon inside the input field.
The above will give you all the messages similar to the phrase you searched for. For example, results with "I want a ticket", "I want to book a flight ticket" etc. will also be shown in the results.
However, if you are interested in the exact match only, then you can enclose your phrase within double quotes ". For example, "I want to book a flight ticket" will show only those messages with the exact string being present.
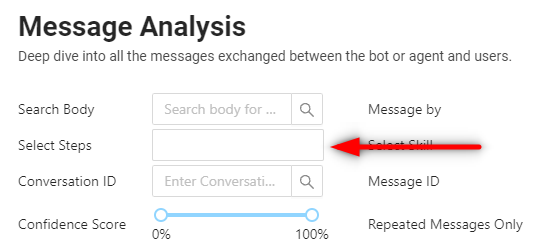
Select Steps
The next filter option is Select Steps. This option allows you to filter by the steps (static and output steps).
This is a dropdown field. You can click on the field and the dropdown options would show the different steps in the bot. You can pick one of the steps from the list and the table will show the data relevant to only that step, which is messages that had triggered that particular Step.
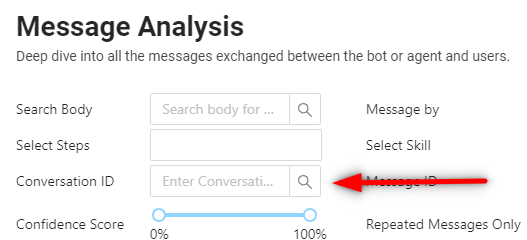
Conversation ID
The next filter is Conversation ID. This filter lets you see data related to a particular conversation. You can enter the conversation id of the conversation you want to view the data for in the input field and click on the magnifying glass icon to filter the data.
Confidence Score
The next filter we will look at is Confidence Score. This option lets you filter messages that the AI was able to categorize by the degree of confidence configured by you.
The Confidence Score is a draggable option where you can set a range of confidence scores rather than a specific confidence score.
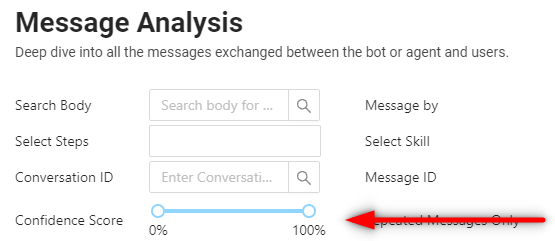
The Confidence Score is calculated in the Message Analysis section of the Intelligent Analytics tool. You need to select your bot, and you can see the Confidence Score for every query that the user has sent. You can toggle between 0 to 100%, to see which query had what Confidence Score.
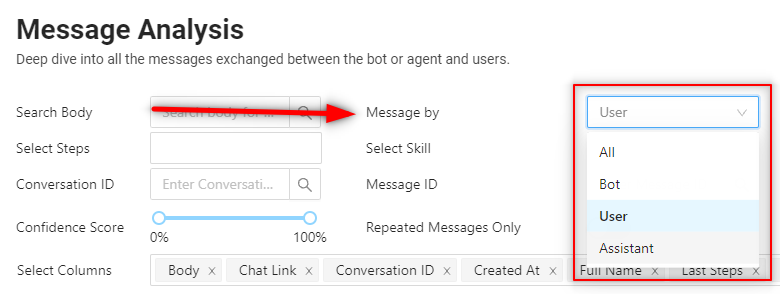
Message By
The message analysis page also lets you filter the data in the table based on the source of the message. You can use the dropdown option to select the source which can be one of:
- All - Shows all messages.
- Bot - Only shows messages sent by the bot.
- User - Only shows messages sent by the user.
- Assistant - Only shows messages sent by the chat agent.
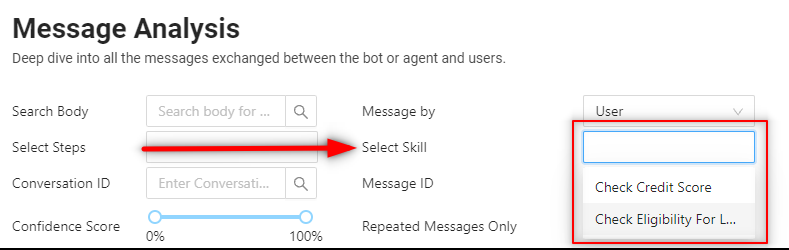
Select Skill
This option lets you filter the data based on which sub-skill on the bot builder the conversation or message belongs to.
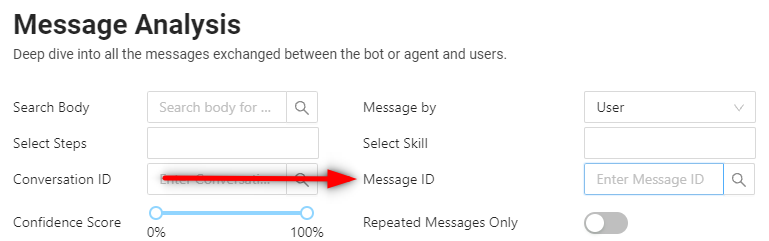
Message ID
This option lets you filter based on the Message ID. You can enter the Message ID of the message you want to see in the input field. Then on clicking the magnifying glass icon in the input box the data should get filtered.
Broken Messages Only
This option lets you switch between seeing only all the messages that lead to a bot break.

API Failure Only
This option lets you filter the messages based on API failures identified in them.

Smart Assist Messages
Intelligent Virtual Assistants are always trained to cater to user queries that fall within a fixed scope. However, at times, customers might ask queries that don’t fall within the scope of the IVA. This tends to prevent the IVA from answering the User’s queries.
A key component in Haptik’s conversational experience is SMART ASSIST. The objective of the component is to respond back to the user smartly when the IVA is not able to completely understand the User’s query. This should open up the pathways for the users to reformulate or redirect their queries, so that appropriate response can be given. To know more about Smart Assist click here.
This option lets you see those messages that triggered the Smart Assist layer.

Filter By
This option appears when we click on View Conversations and is used to filter the conversations with respect to the three options available in this drop-down.
- Time of Creation: Choosing this option shows all the conversations whose created time is falling in the selected date/time window. These conversations may contain the conversation last message time but the time of completion will remain empty.
- Time of Completion: Choosing this option shows all the conversations whose completion time is falling within the selected date/time window. These conversations may contain the conversation last message time and the time of creation information as well.
- Conversation Last Message Time: Choosing this option shows all the conversations that are not completed yet but has registered the conversation last message time and is falling within the selected date/time window. These conversations may contain the conversation complete time and the time of creation information as well.
User ID

Referral Source
This refers to the source of the conversation from which the conversation was initiated.1. Ad: If the conversation was initiated after an ad was clicked.
2. ProM: If the conversation was initiated to reply a Proactive Messaging (ProM) notification. 
Referral Source ID
Referral Source ID tells you:
1. Ad Id: If the souce of conversation is Ads.
2. Campaign Name: If the conversation was initiated to reply a Proactive Messaging (ProM) notification campaign. In case there is no Campaign name available, the field will reflect the Notification Template ID.
Referral Source Template ID
The notification template ID in case the source of the conversation is Proactive message (ProM)

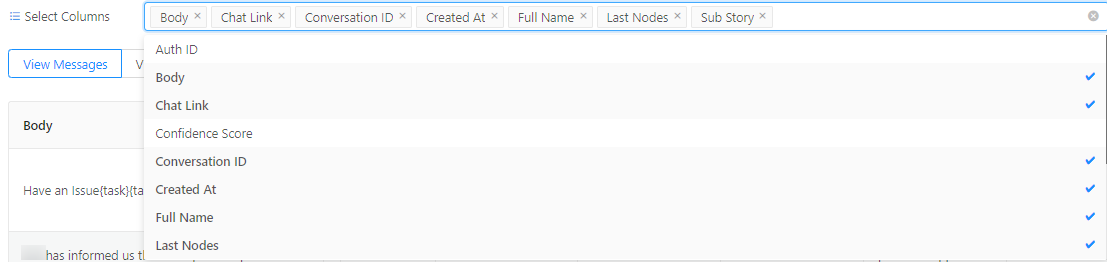
Select Columns
The final option we will be looking at is the Select Columns an option that lets you filter what columns are shown in the View Messages table.
The columns that you can select from are:
- Confidence Score
- Conversation ID
- Created At
- Full Name
- Last Steps
- Message ID
- Source Language
- Sub Skill
- Total User Messages
- Translated Messages
- Time of Creation
- Time of Completion
- Conversation Last Message Time
- User ID
Clear Filters
Apart from the filter options, you also have a button to clear all filters you have applied.

Data Masking
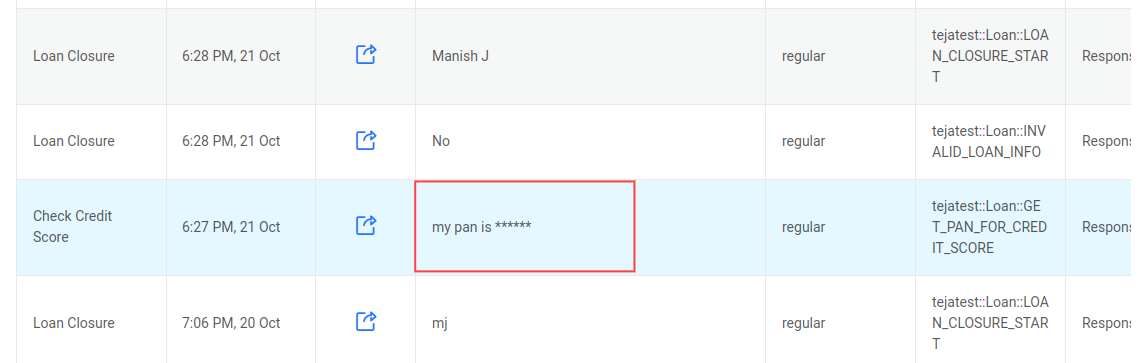
Personal information in a conversation needs to be protected when a conversation is marked as complete. This includes User Messages, Bot responses, Agent Messages, Media, etc. We mask or encrypt this personal information in order to protect it. Data masking is the practice of intentionally randomizing anonymizing specific data/information to secure it.
Data on the Message Analysis screen will show up in the masked format. If you download the Message Analysis report, then that will also show up with the masked version. However, chat links will show up in their original form.
The masked data is shown as 6 asterisks in a message as shown below -
What all gets masked?
Not everything needs to be protected but sensitive data like phone number, email-id, account number, date-of-birth, etc. needs to be protected. In most cases, these values are inserted as entities. So we essentially need to mask these sensitive entities.
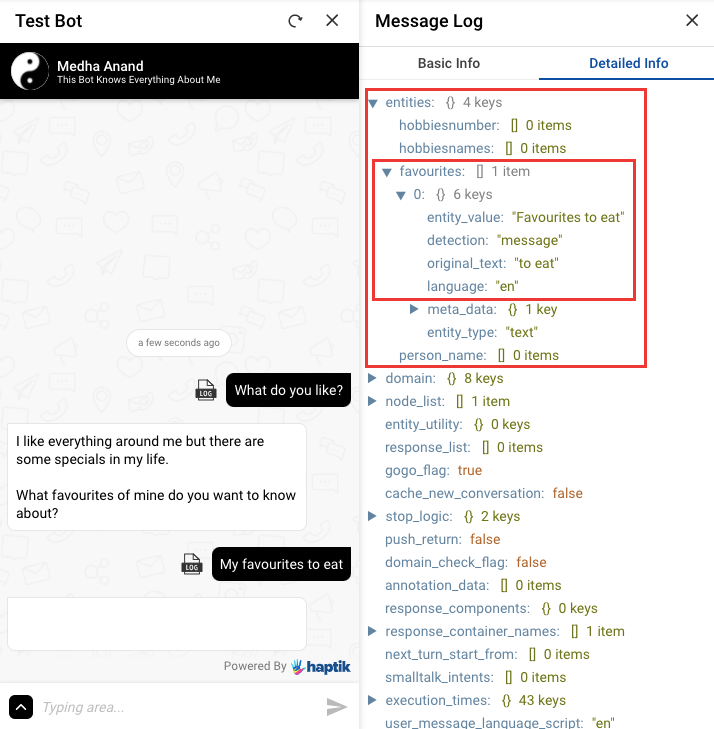
We mask the original_text, not entity_value. In a few scenarios, the original_text and entity values are different. The current masking rules consider only the original_text. In the below image, it is shown how original_text and entity_value can be different -
The following policies, in order of priority, are triggered sequentially.
- Personal Entities
- Predefined Masked Entities on the platform
- Predefined Regex Patterns on the platform
Personal Entities
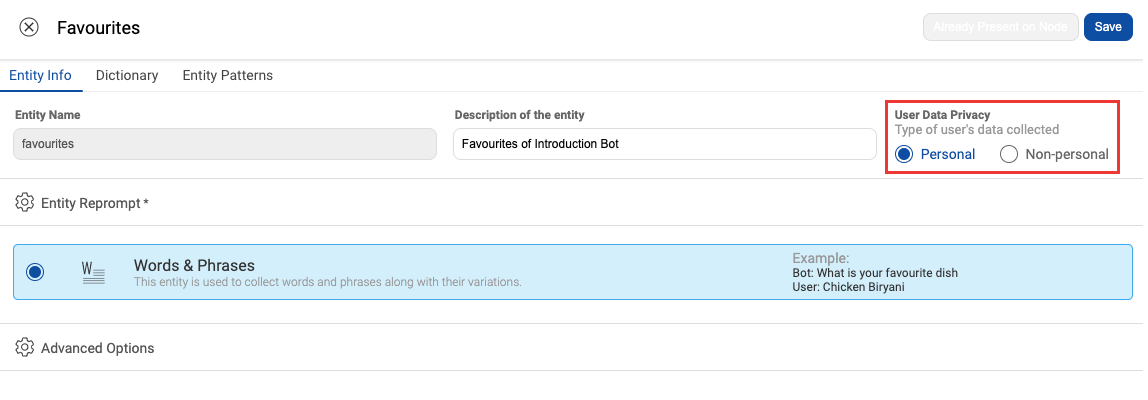
Entities that are marked as Personal on the Conversation Studio tool are masked in the conversation. It is shown in the below image where you can mark an entity as Personal -
Predefined Masked Entities on the platform
Few entities are considered personal at the platform level. Once they are detected in conversations, they are automatically masked. This list is not editable and is defined at the platform level. The following public entities are also masked automatically -
- Phone Number (phone_number)
- Name (person_name)
- Age (age)
Predefined Regex Patterns on the platform
Some data is considered as personal using Regex Patterns. Once they are detected in conversations, they are automatically masked. This list is not editable and is defined at a Platform level. Currently, the below regex patterns are used for this -
- r_email - \b[A-Za-z0-9.+-]+@[A-Za-z0-9.-]+.[a-zA-Z]+\b
- r_numbers - \b\d{6,16}\b
- r_pancard - \b[A-Za-z]{5}\d{4}[A-Za-z]\b
- r_creditcard - \b(?:\d{4}\s){4}\s\b
- ipv4_address - \b\d{1,3}[.]\d{1,3}[.]\d{1,3}[.]\d{1,3}\b
- r_us_zip_code - \b(?:(?:\d{5}-\d{4})|(?:\d{5})|(?:[A-Z]\d[A-Z]\s\d[A-Z]\d))\b
- r_us_social_security_number - \b\d{3}\d{2}\d{4}\b
- r_date - \b(?:[1][12]|[0]?[1-9])[/](?:[3][01]|[12]\d| , [0]?[1-9])/\b
Enable Data Masking
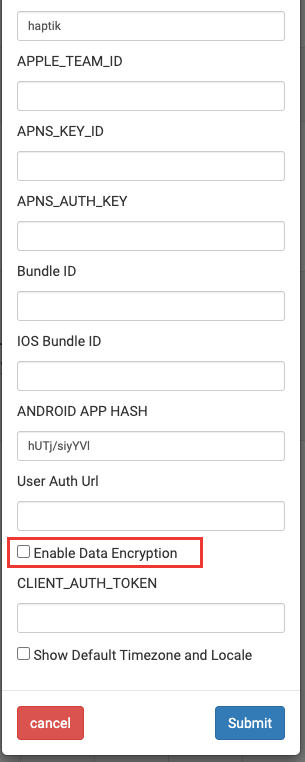
Data masking will be enabled by default for all new accounts being created. If you wish to switch off the Data Masking (Data Encryption) flag, you can do the same from the Accounts List under Admin Tools as shown below
We do not recommend disabling Data Masking. If you do, then please explicitly inform the same among all stakeholders.
