How to ensure Salesforce Integration is working properly?

Written by Soham Amburle
Updated on October 26th, 2021
- Getting Started
- Bot Building
- Smart Agent Chat
- Conversation Design
-
Developer Guides
Code Step Integration Static Step Integration Shopify Integration SETU Integration Exotel Integration CIBIL integration Freshdesk KMS Integration PayU Integration Zendesk Guide Integration Twilio Integration Razorpay Integration LeadSquared Integration USU(Unymira) Integration Helo(VivaConnect) Integration Salesforce KMS Integration Stripe Integration PayPal Integration CleverTap Integration Fynd Integration HubSpot Integration Magento Integration WooCommerce Integration Microsoft Dynamics 365 Integration
- Deployment
- External Agent Tool Setup
- Analytics & Reporting
- Notifications
- Commerce Plus
- Troubleshooting Guides
- Release Notes
Table of Contents
How a new chat is assigned to an agent?What if the Agent is on break, and no other Agent is online?How does the chat between User and Agent end?How can an agent transfer his chat, to another agent?What is the Classic version of the Agent dashboard?Once you have done the integration, it is time to check if it has been done properly. You can check it by going through the following -
- How a new chat is assigned to an agent?
- What if the agent is on break, and no other agent is online?
- How does the chat between user and agent end?
- How can an agent, transfer his chat to another agent?
- What is the classic version of the agent dashboard?
Consider, a user has initiated a conversation with the bot, and it is going well so far.
At any instance where the user wishes to chat with an agent to get his queries resolved, he would be directed to the Agent.
How a new chat is assigned to an agent?
- When the user requests for chatting with an agent he would receive a response as shown below.
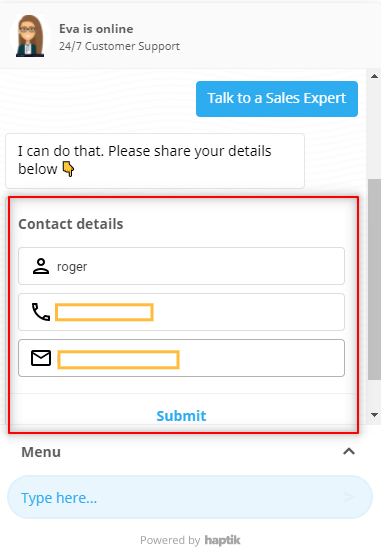
- As shown in the above image, the user will have to enter his name, phone number, and email address and Submit.
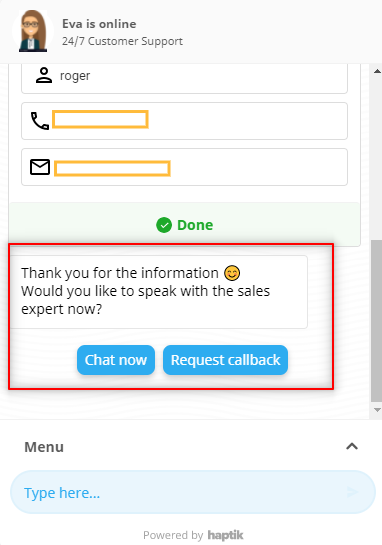
- After submitting, the user receives the following response as shown below, where the user has to select Chat now.
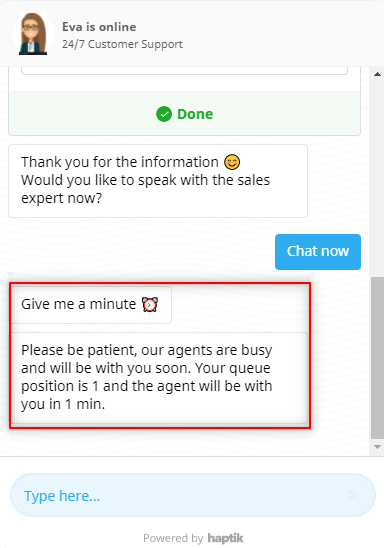
- When the user selects Chat now, he would receive the following response from the bot.
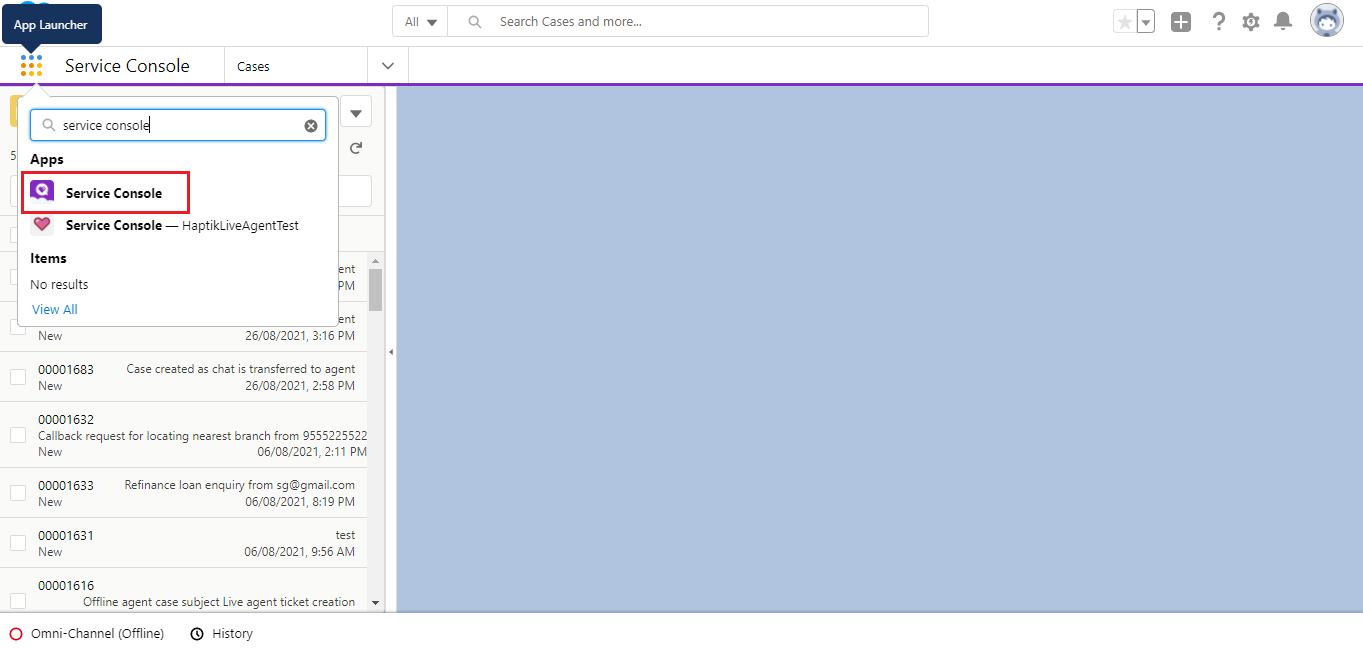
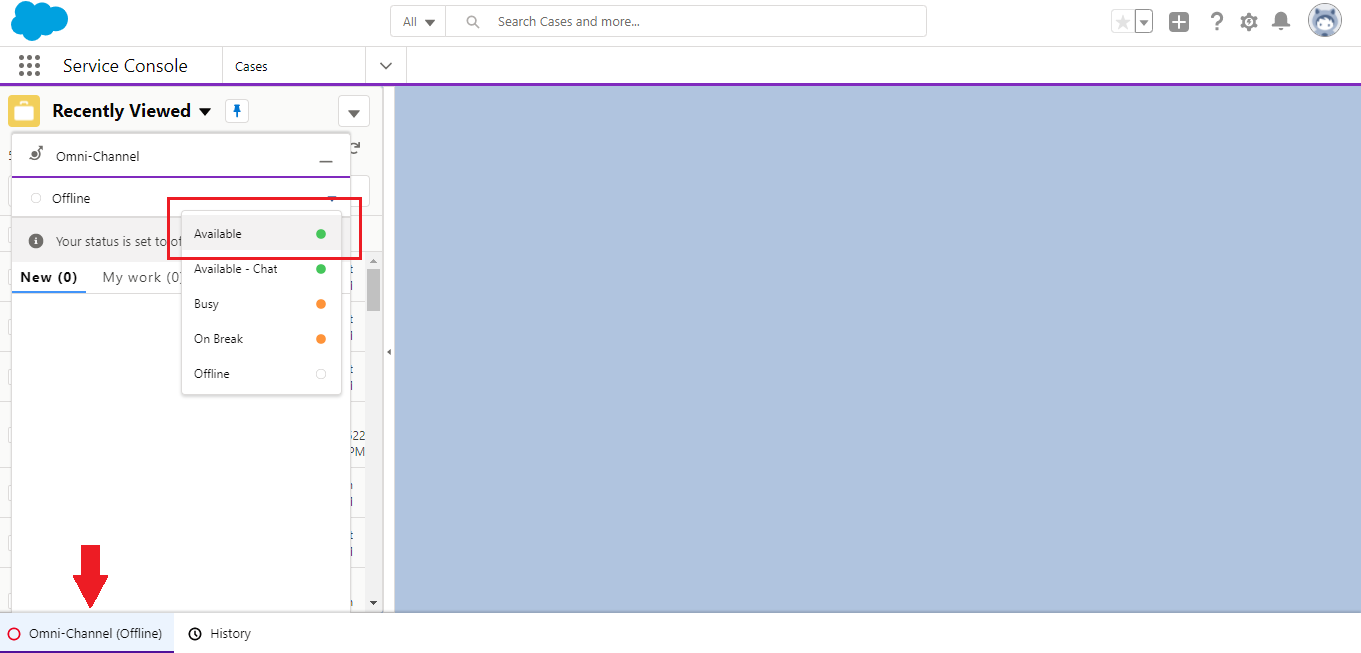
- On the Agent dashboard, the agent needs to perform some required processes, so as to start receiving the chats from the users. The agent needs to select App launcher and look for Service Console.
- The next process would be to select Omni-Channel, at the left bottom of the page, and select Online, as shown below.
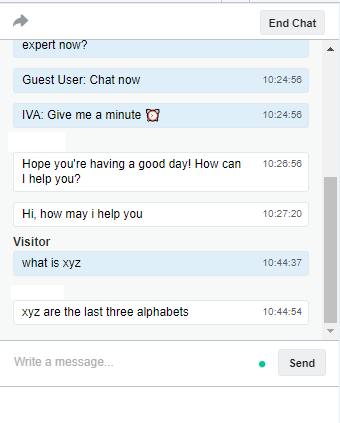
- When the user requests a Chat with an agent, the agent will receive the chat from the user, and now the agent needs to accept the chat by clicking on the tickmark. It means the Agent has accepted the chat handover from the bot.
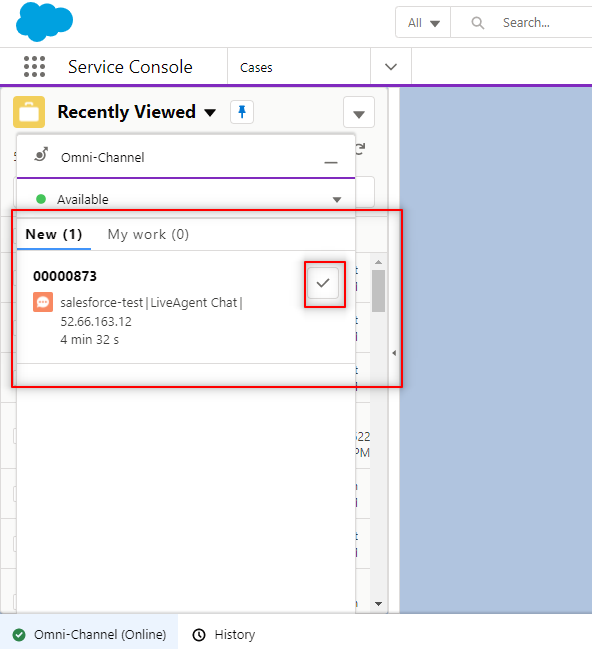
- The agent will receive the chat from the user, as well as the details that user had entered when he requested for an Agent escalation.
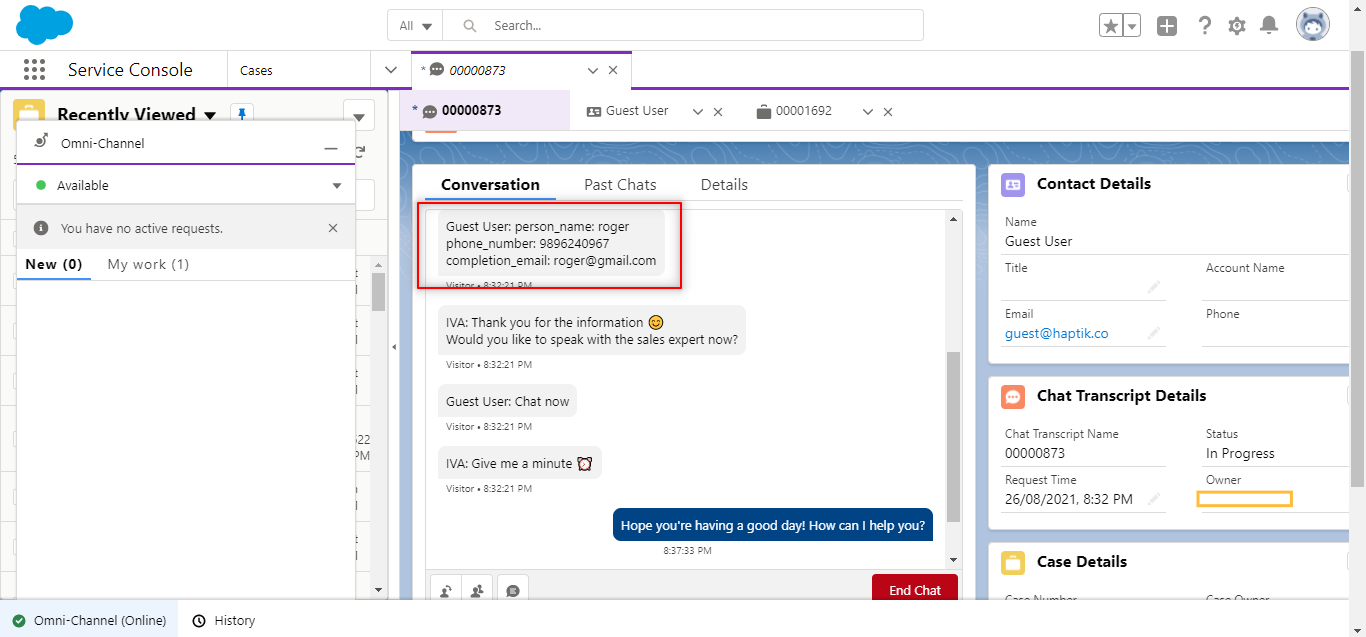
- Now, when the agent sends a response to the user, that response will reflect on the bot, in the user's chat screen.
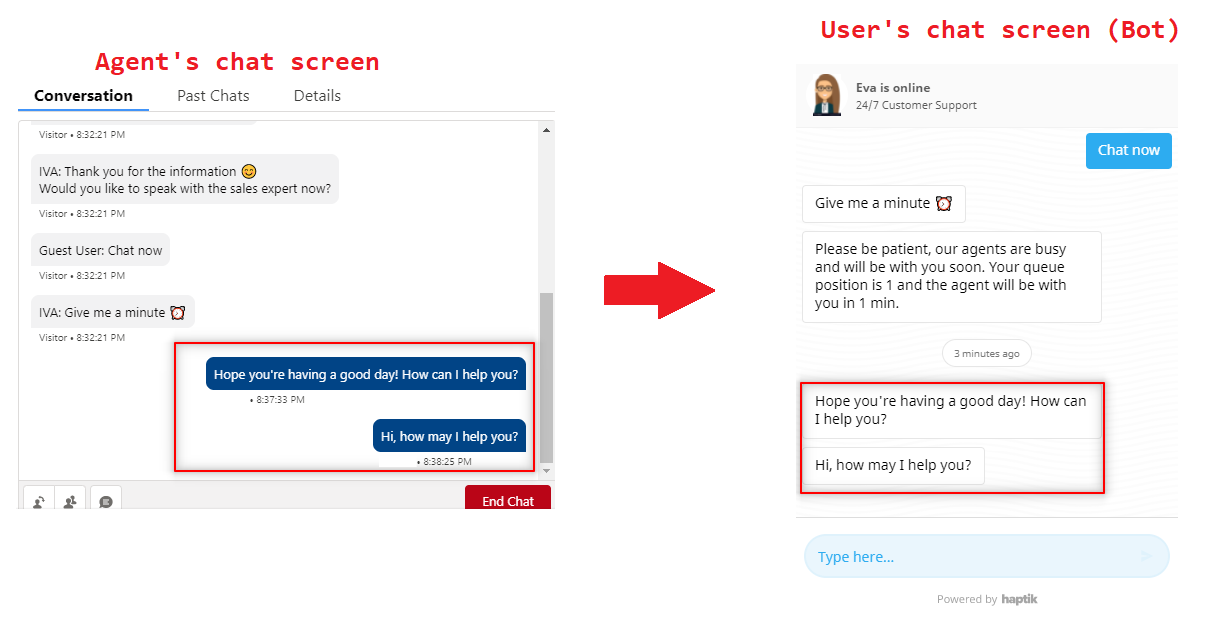
- Here, you see a successful Bot to Agent transfer.
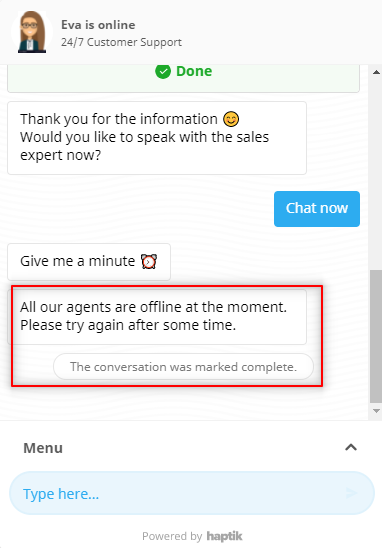
What if the Agent is on break, and no other Agent is online?
- The agent can go on a break, by selecting Omni-Channel and selecting the option On-break.

- When the Agent's status is On Break, and the user requests for chatting with an agent, he would receive the following response.
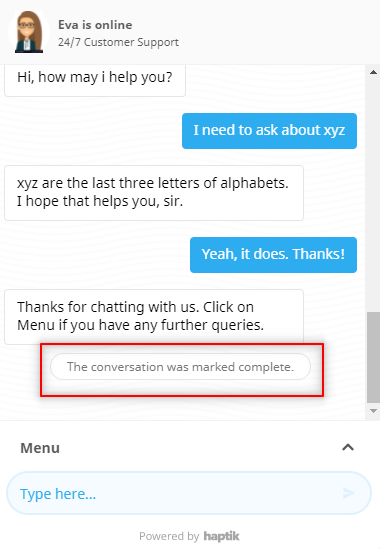
How does the chat between User and Agent end?
- When the Agent resolves the user's query, he can End the chat by selecting the End Chat option, as shown below.
- On the User's chat screen, following response would be sent, marking the end of the chat.
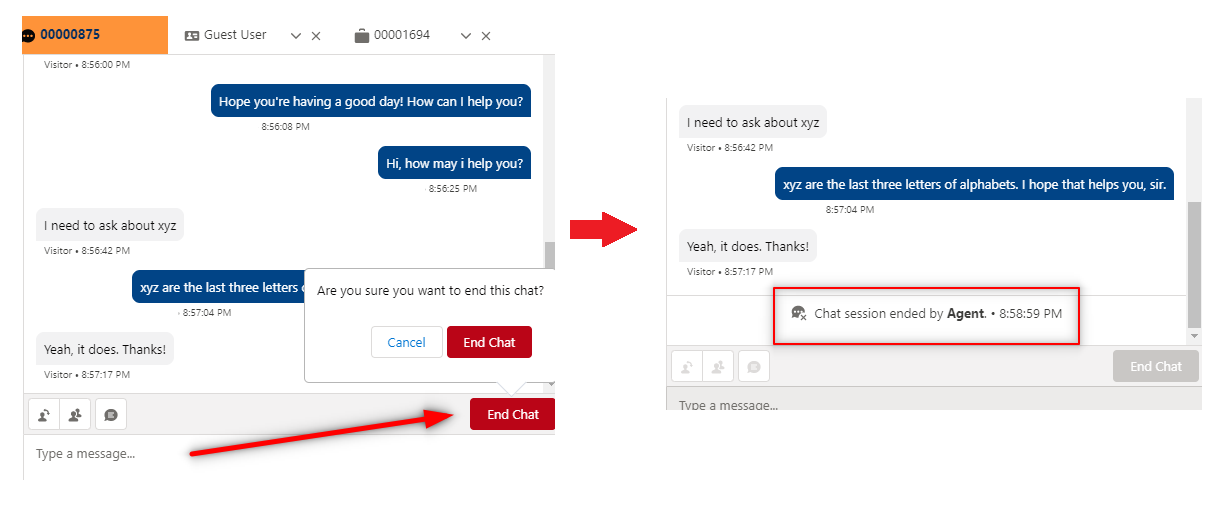
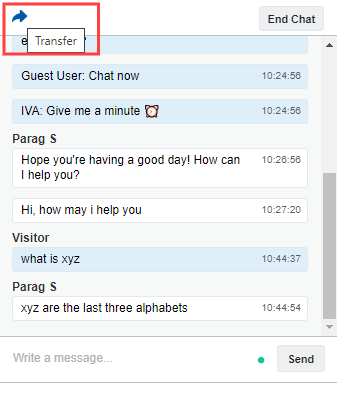
How can an agent transfer his chat, to another agent?
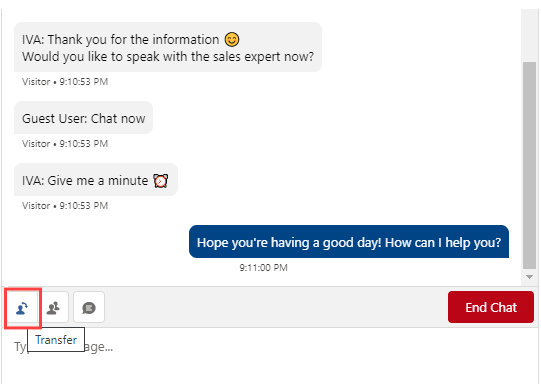
- When an agent is unable to solve the user's query or for any reason, he can choose to transfer the chat to another agent, by selecting the Transfer button, as shown.
- There are two outcomes when an agent chooses to transfer the chats to another agent.
- Consider, there are two agents, Agent A and Agent B.
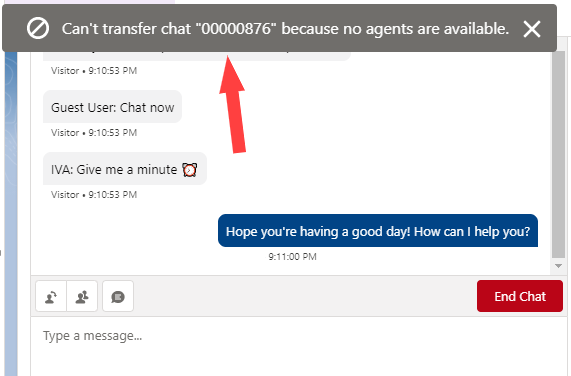
- When Agent A tries to transfer chats to Agent B, and If Agent B is not online, the following message will be displayed.
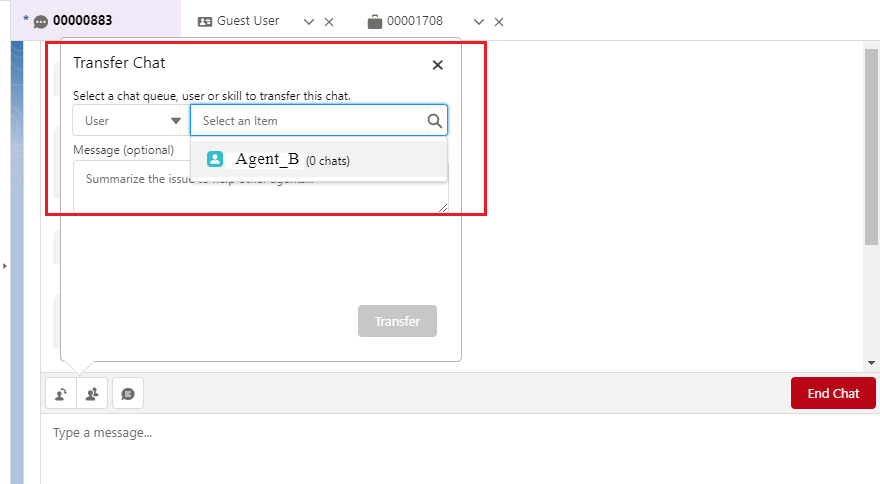
- When both the Agents are online, and Agent A transfers the chat to Agent B, the following pop-up would appear.
- Here, User dropdown is basically the user. If there are multiple users, the agent can select which user's chat to transfer.
- Select an Item is an Agent here. Agent A can select the Agent name here. In this case Agent B, to whom he wants to transfer the chat.
- The Agent can also add a summary prior to transferring the chat.
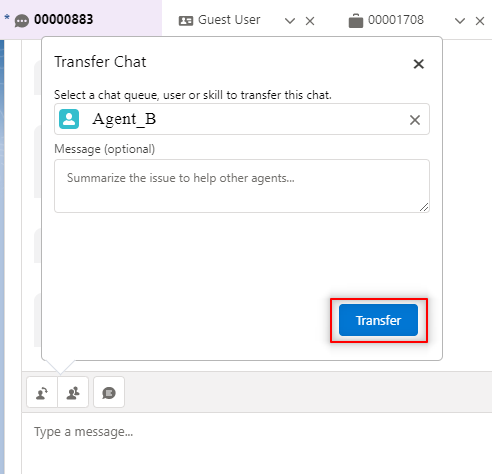
- Once Agent A has added all their details, he can select the Transfer button and the chat will be transferred to Agent B.
- On Agent B's dashboard, he would receive a notification like this.
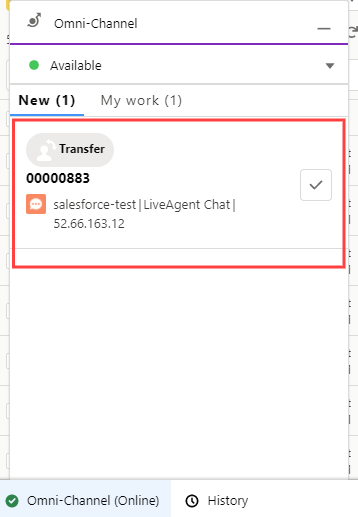
- Agent B needs to accept the transfer by tapping on the tickmark, and the transfer would be successful.
- On Agent A's dashboard, he would receive a confirmation pop-up, as shown below.

- Agent B can start the conversation with the user, and the user won't even know that his chat was transferred from one agent to another. It is that smooth.
- This would ensure there is no break or disturbance in the conversation flow.
- When Agent A tries to transfer chats to Agent B, and If Agent B is not online, the following message will be displayed.
What is the Classic version of the Agent dashboard?
- The classic version is basically a change in the UI(User Interface) of the Agent dashboard.
- The image shown below is the regular version of the dashboard, which is called the Lightning Experience.

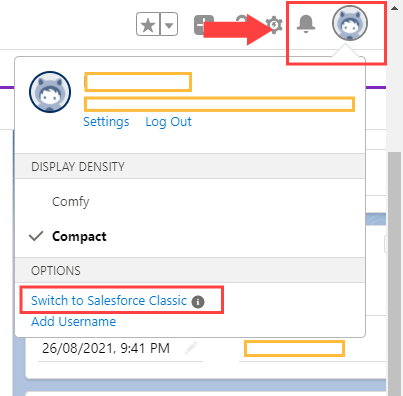
- In order to switch to the Classic version, you need to tap on the User icon at the top right of your dashboard, and select Switch to Salesforce Classic.
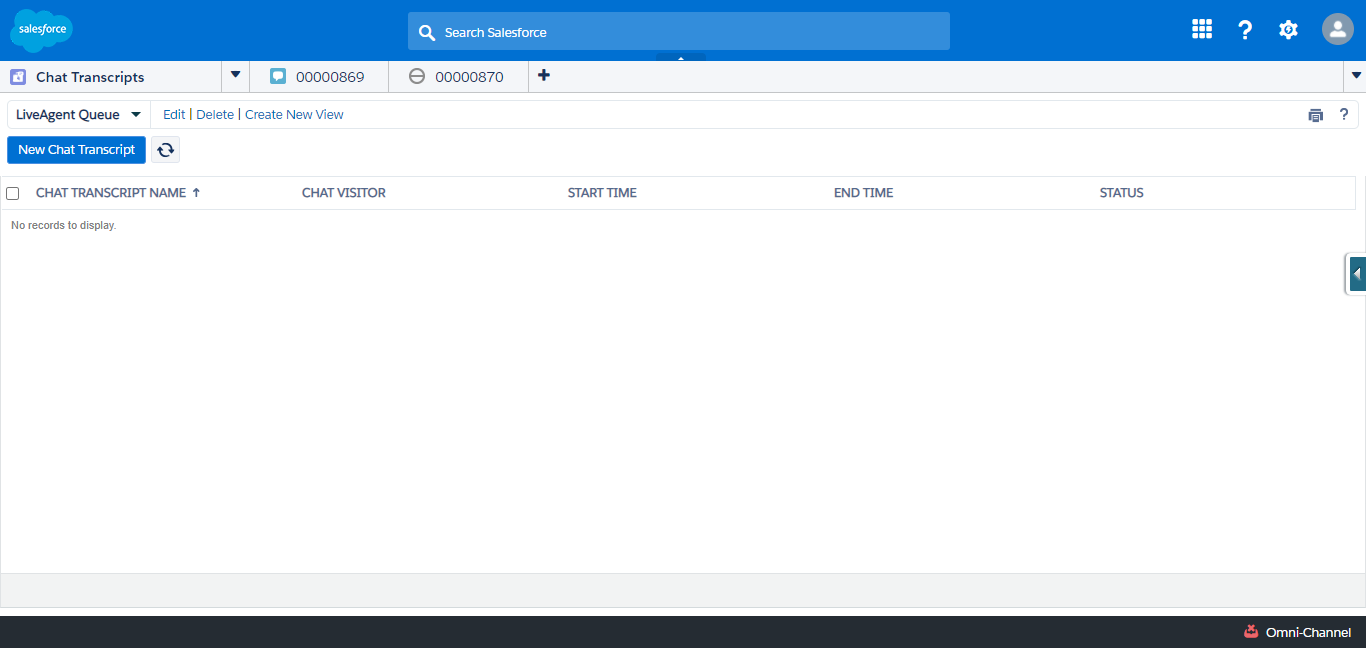
- The image shown below is the representation of the Classic dashboard.
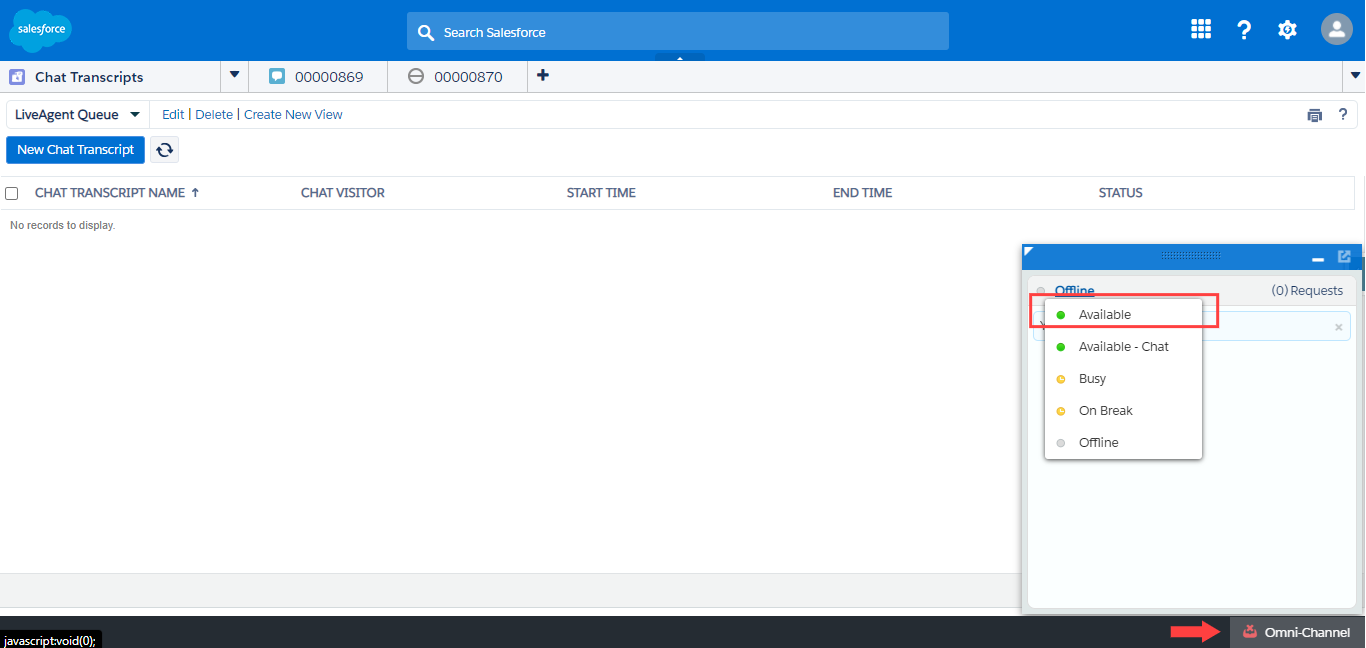
- The Omni-Channel is at the bottom right of the dashboard, and the agent can select Available, by selecting it, as shown below.
- Every time the user requests to chat with an agent, the Agent would receive it in the following way. The Agent needs to tap on the Active button to accept the handover.

- The chat with the user will be reflected on the left-hand side of the Agent dashboard, as shown below.
- The agent can choose to end the chat with the user, by selecting End chat on the chat screen.

- The agent can transfer his chat to another agent, by tapping on the transfer icon as shown below.
So, if you are able to perform the above processes, you can rest assured. Your integration is successful. Congratulations!!
