How to Set Up Helo (VivaConnect) Integration on Haptik Bot
- Getting Started
- Bot Building
- Smart Agent Chat
- Conversation Design
-
Developer Guides
Code Step Integration Static Step Integration Shopify Integration SETU Integration Exotel Integration CIBIL integration Freshdesk KMS Integration PayU Integration Zendesk Guide Integration Twilio Integration Razorpay Integration LeadSquared Integration USU(Unymira) Integration Helo(VivaConnect) Integration Salesforce KMS Integration Stripe Integration PayPal Integration CleverTap Integration Fynd Integration HubSpot Integration Magento Integration WooCommerce Integration Microsoft Dynamics 365 Integration
- Deployment
- External Agent Tool Setup
- Analytics & Reporting
- Notifications
- Commerce Plus
- Troubleshooting Guides
- Release Notes
Table of Contents
VivaConnect is a WhatsApp Business Service Provider, using which businesses can send and receive WhatsApp messages to their users. A Haptik Bot can be connected to Helo (VivaConnect) WhatsApp Services to leverage the bot's conversational capabilities which will help you in creating better engagement with your users, and will definitely affect your sales in a positive manner.
Prerequisites for integrating VivaConnect with Haptik
- A registered account on Helo (VivaConnect), with a WhatsApp number configured. Click here to register.
- A bot on Haptik. You can learn more about creating a bot here.
How to set up?
Once you have all the prerequisites ready with you, all you need to do is integrate VivaConnect with Haptik. For connecting them, you would need to add integration details to the Platform Deployments section on Haptik.
Step 1: Log in to Haptik, open your bot and navigate to Conversation Studio > Business Manager > Channels > Platform Deployments, and select Helo (VivaConnect) from the Platform dropdown, as shown.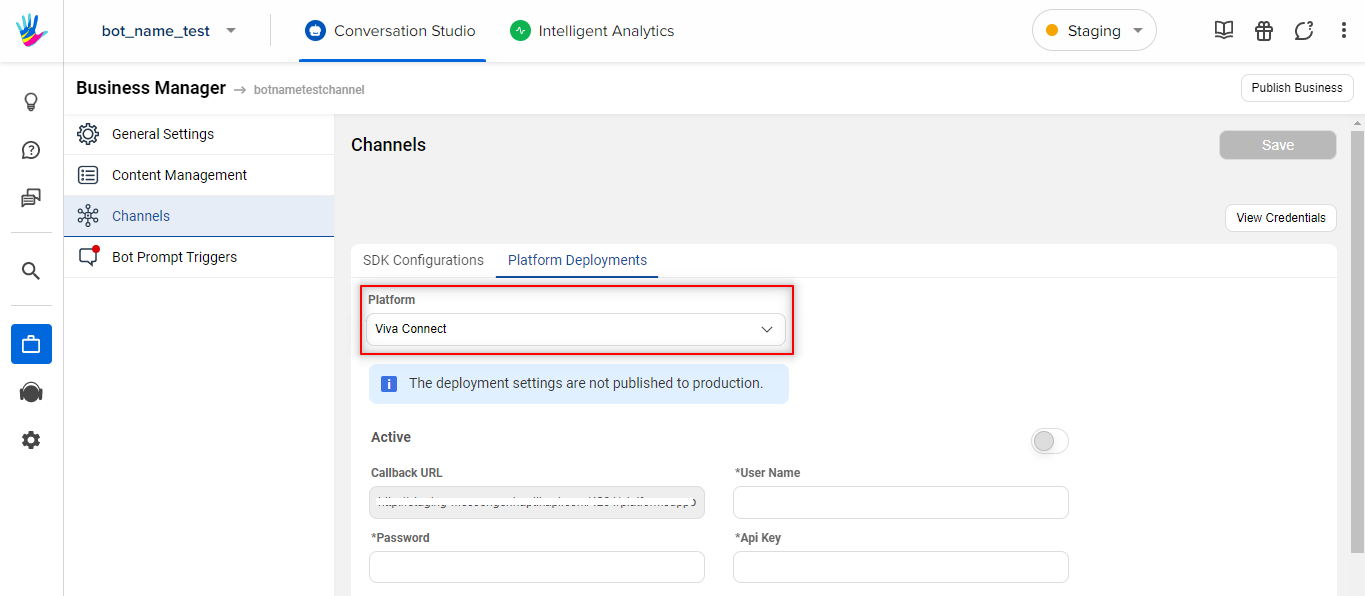
Step 2: Next, you will have to add a User Name and Password. Here, the User Name is the email id, and the password is the password value that you used for registering and logging into Helo (VivaConnect) panel here.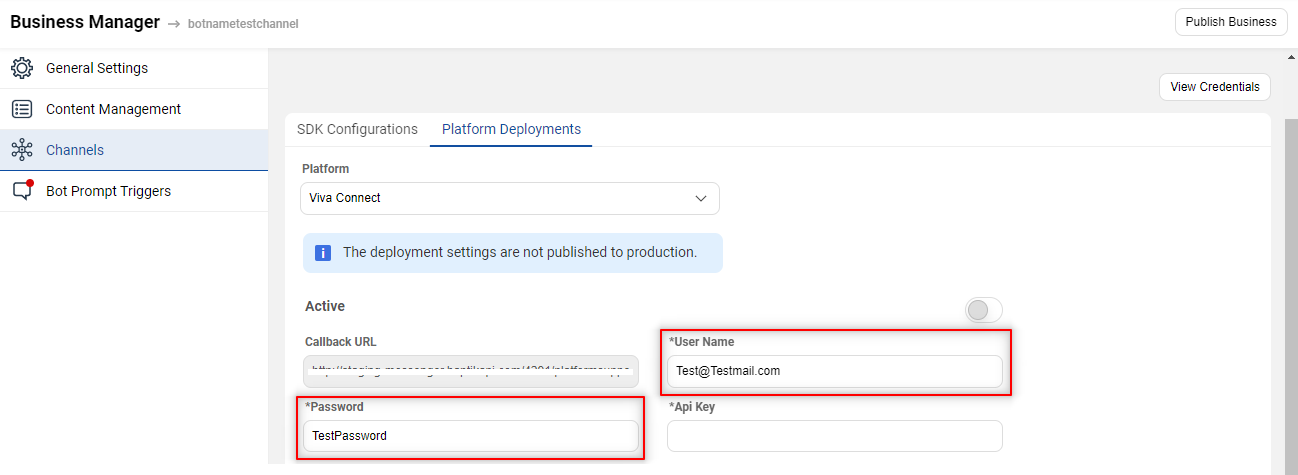
Step 3: You will then have to add an API Key.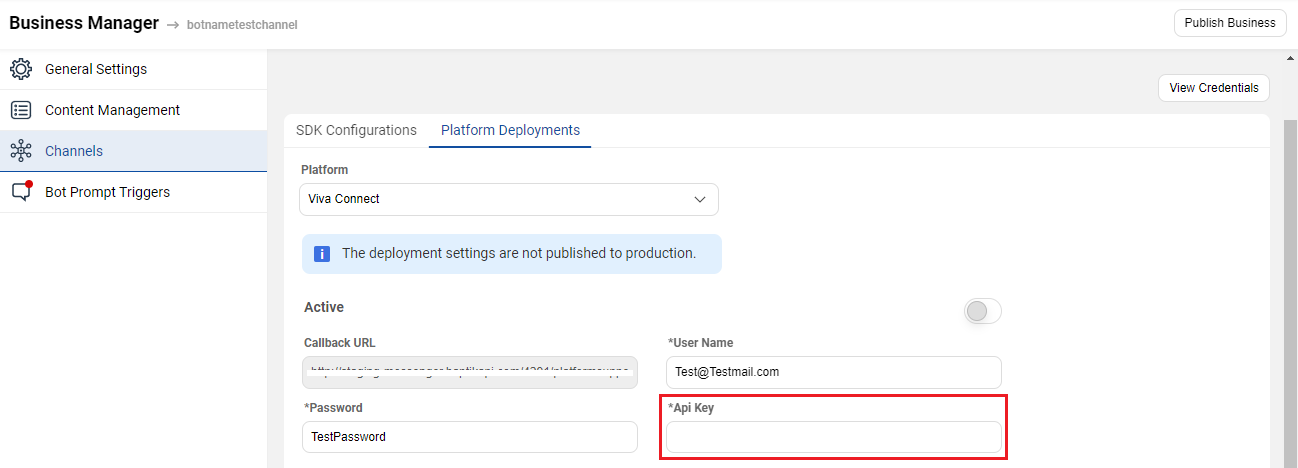 For the API Key, open your Helo (VivaConnect) account, and navigate to the dashboard. You will get the API Key at the top right, as shown.
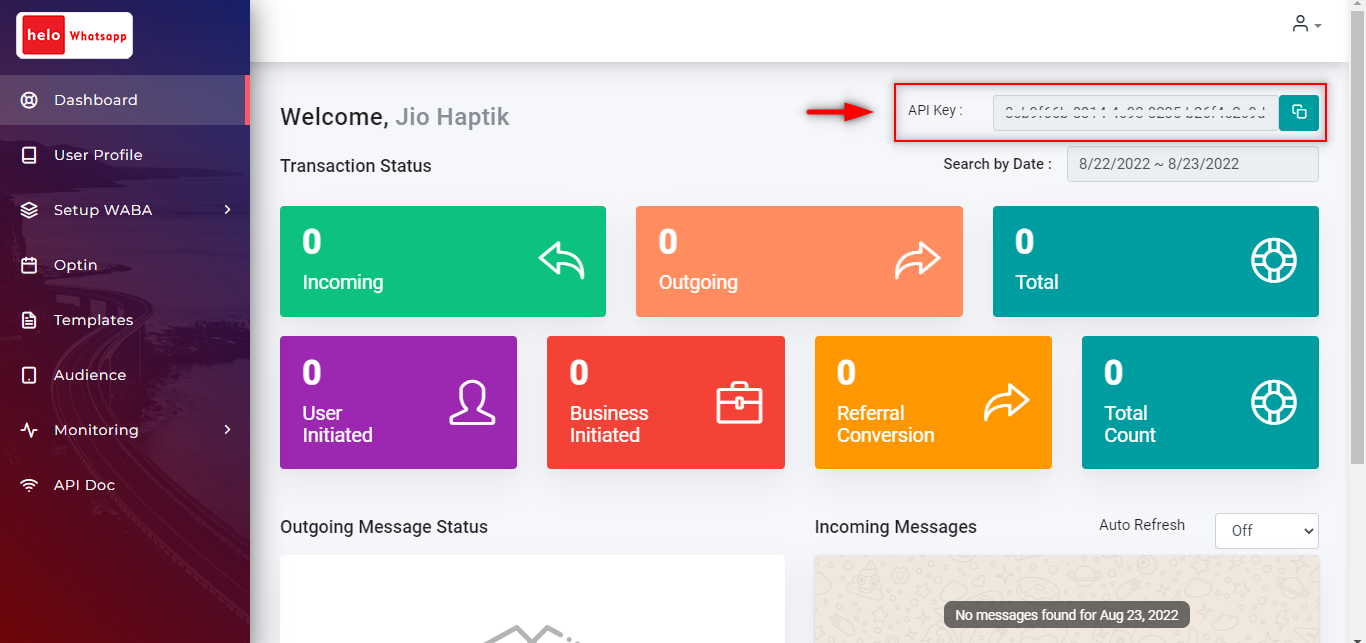
Step 4: Finally, you need to switch the Active toggle on, as shown.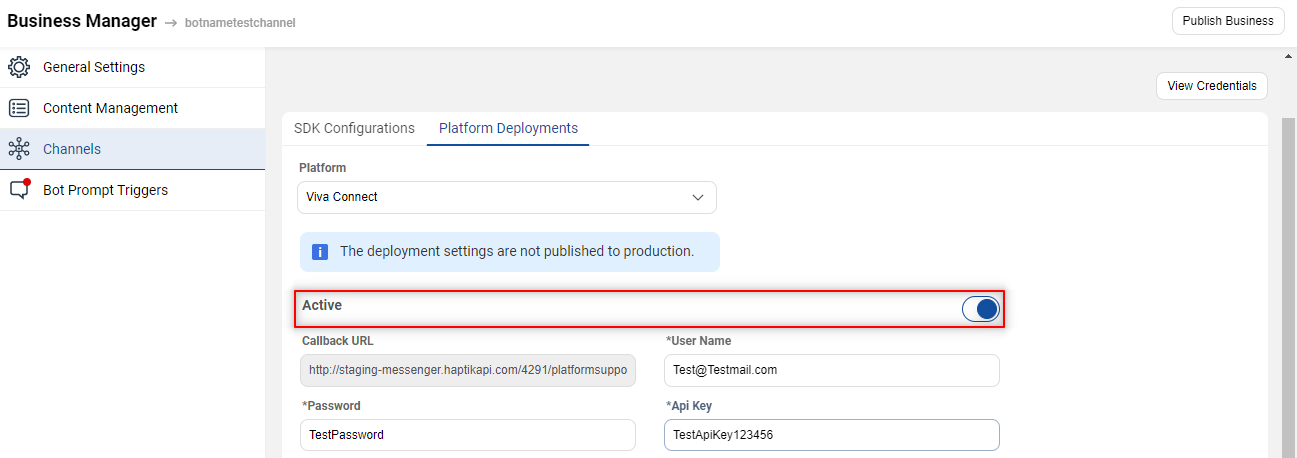
Step 5: Once you are done with the above steps, you are partly done with setting up this integration. Next, you need to copy the Callback URL from the Platform Deployment section of your bot on Haptik.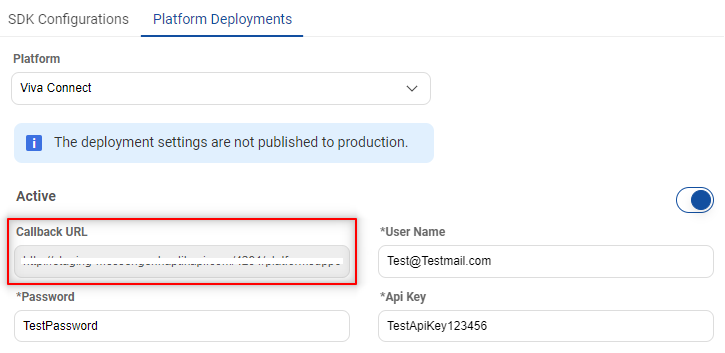
Once copied, move to the Helo (VivaConnect) dashboard, and navigate to Setup WABA > Configure. Here, switch the Message Webhook toggle on, and paste the Callback URL in the Webhook URL section, as shown.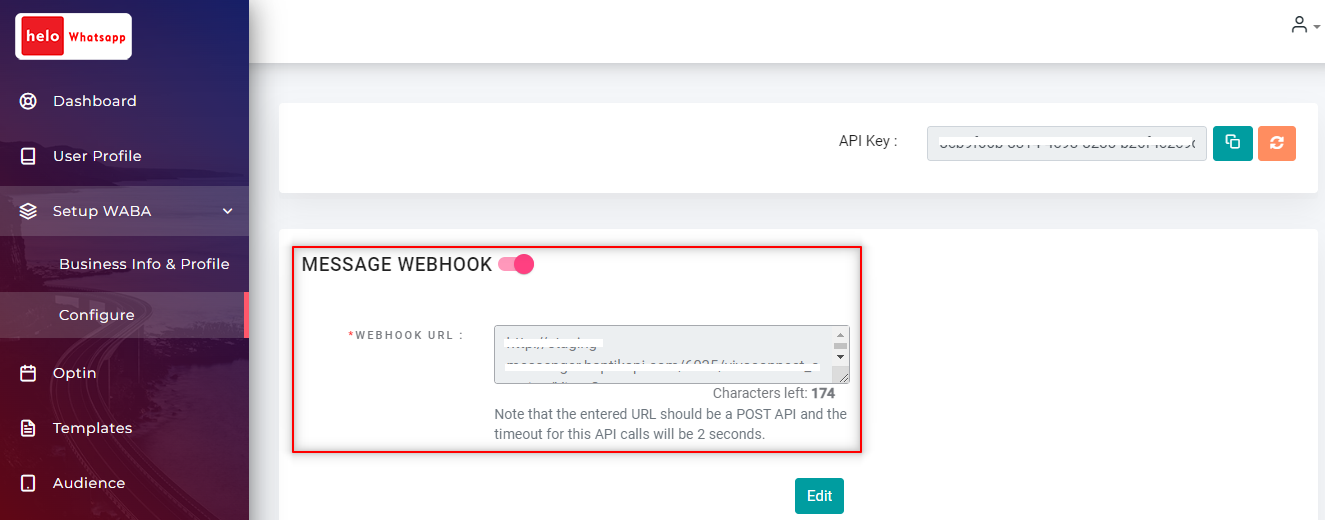
Once you are done with all the above steps, your integration is complete and you can then move your bot to production after testing it.
Congratulations!
