What are SDK Configurations?
- Getting Started
- Bot Building
- Smart Agent Chat
- Conversation Design
-
Developer Guides
Code Step Integration Static Step Integration Shopify Integration SETU Integration Exotel Integration CIBIL integration Freshdesk KMS Integration PayU Integration Zendesk Guide Integration Twilio Integration Razorpay Integration LeadSquared Integration USU(Unymira) Integration Helo(VivaConnect) Integration Salesforce KMS Integration Stripe Integration PayPal Integration CleverTap Integration Fynd Integration HubSpot Integration Magento Integration WooCommerce Integration Microsoft Dynamics 365 Integration
- Deployment
- External Agent Tool Setup
- Analytics & Reporting
- Notifications
- Commerce Plus
- Troubleshooting Guides
- Release Notes
Table of Contents
SDK Configurations
SDK Configurations is where you can make changes to your bot, as explained below.
You can navigate to SDK Configurations by selecting Business Manager, and further selecting Channels, as shown below:
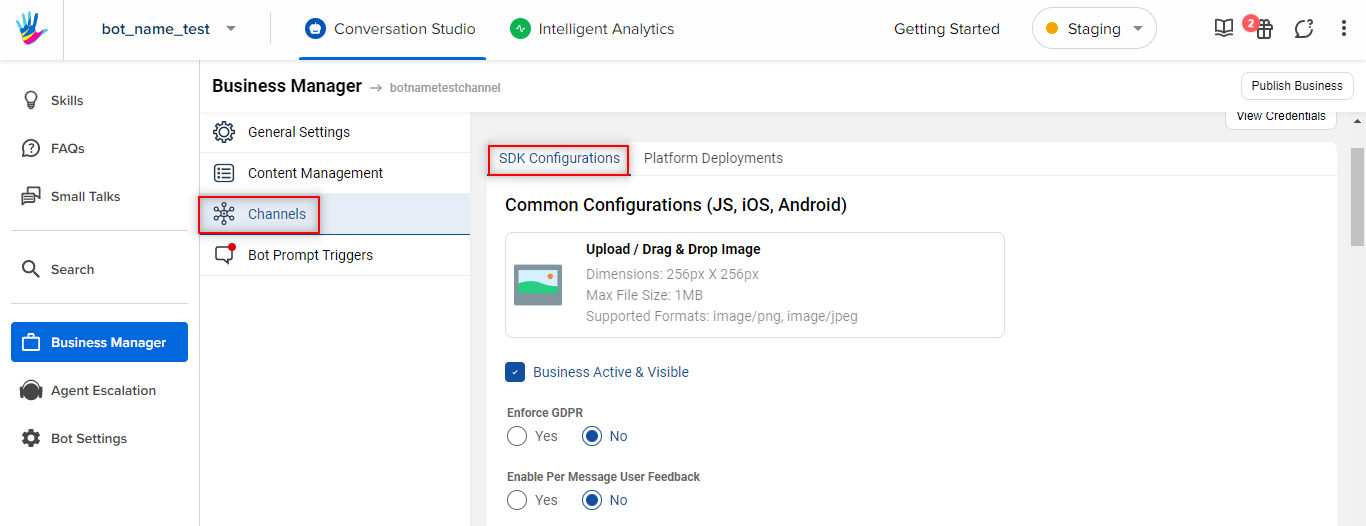
- Upload Business Icon: When there are multiple Businesses clustered together in an account in a home screen, you can assign each business an icon. Upload that icon here.
-
Enforce GDPR: You can get the banner of the privacy policy on your bot by enabling this toggle. You can specify the privacy policy URL. Read more about it here.
Please note that after a user sends three messages to the bot, the Enforce GDPR banner will disappear. - Enforce Per Message User Feedback: You can get the per-message level feedback by enabling this toggle. You can also provide customized questions and tags for the same.
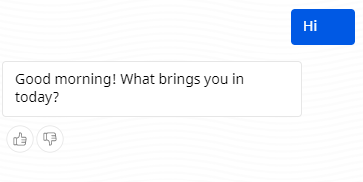 All bot responses to free form user messages will have a rating icon. Users can click on the thumbs up or down rating icon. After this click, the user would get a comment icon, via which the user could now add tags and provide comments for feedback. The tags and feedback question copy is configurable.
-
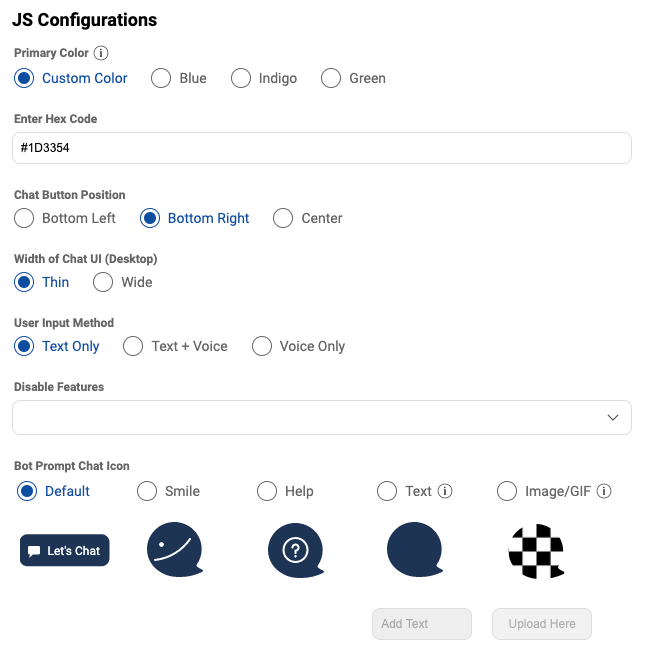
JS Configurations: You can change the look and feel of your bot using these options the GDPR pop-up on your bot by enabling this toggle.
The Let's chat button has 5 options -- The Let's Chat icon (default): Currently this is default chat button.
- The Smile icon: This icon has a smile animation, it changes when you hover over it.
- The Help icon: It is a simple icon to represent Help.
- The Custom text icon: You can set any custom text here.
- The Image/GIF icon: You can have custom image icons or GIF which will keep animating within the chat icon.
- Language Specific SDK Configurations: You can make your SDK basic configurations like Chat Icon, Typing Box text, etc.
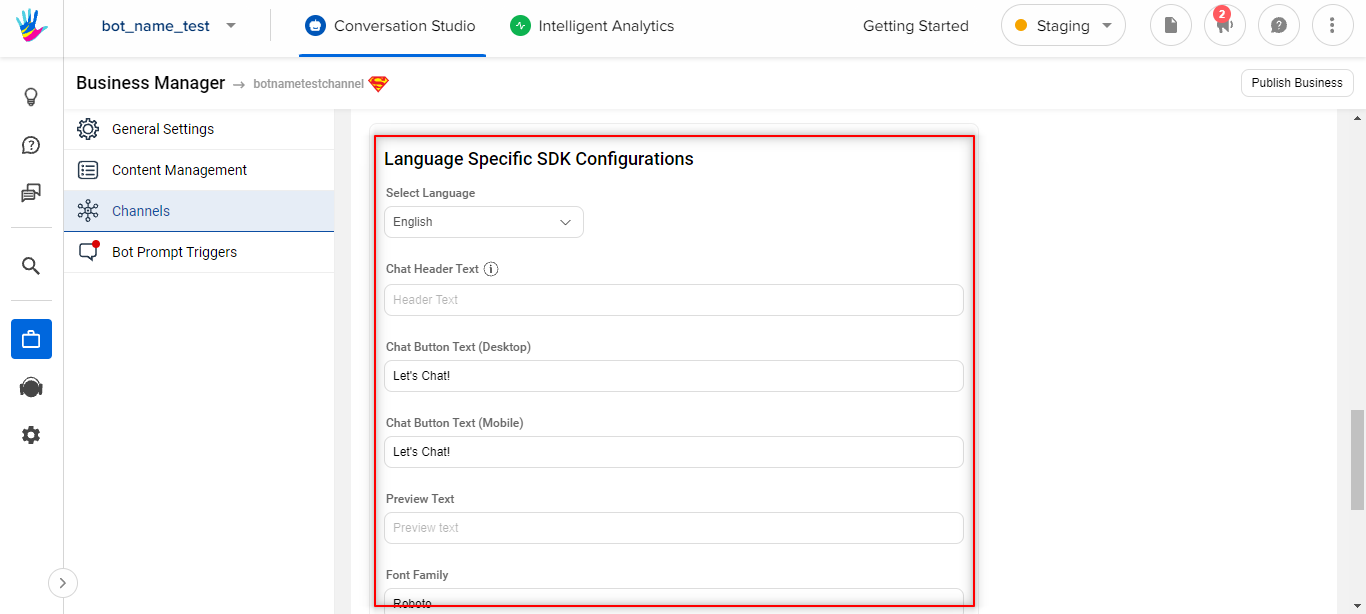
You can alter the text visible on the bot from the Language-Specific SDK Configurations section. Select the language from the drop-down to set the text in different languages.
Font Family - All the languages listed in the Google Fonts list are supported for the bot. Refer to the list here.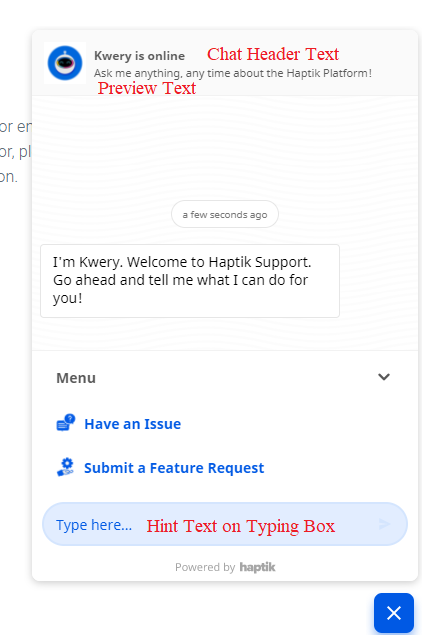
- Show Typing Suggestions: This is a very unique feature enabled in this configuration.

As users start typing, Menu will show auto-complete suggestions (refer to the image below).
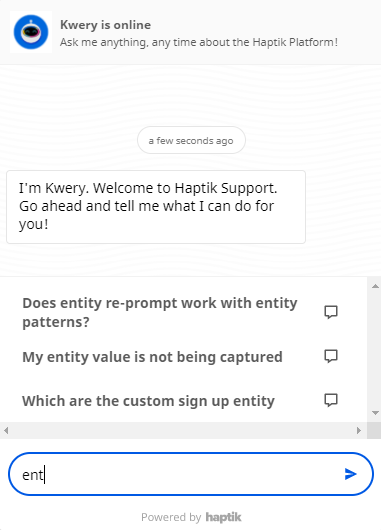
The Show Typing Suggestions setting has 3 different options to choose from:
- Always: The typing suggestions will be shown every time when something is typed in the composer.
- Only when Menu is shown: The typing suggestions will be shown only when the Menu (TaskBox) is expanded.
- Never: The typing suggestions will never be shown.
The user's message is matched with the keywords present in sentences which the bot has been trained to understand (User Messages). This feature helps in the following ways:
- Help users discover the scope of the bot while a user starts typing
- Avoid bot breaks as the user selects our suggestion v/s a random free-form message
- Disable previous buttons as the conversation proceeds: On clicking Yes against this setting, whenever a conversation moves forward, the older buttons in the conversation will be deactivated.

The default value for this setting is Yes.
- Show timestamp: The radio button is set to Yes by default. It shows the time when the user drops a message. If you feel timestamps are of no use for your team, modify the default settings.

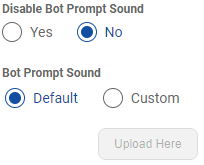
- Disable Bot Prompt Sound: Click Yes against this setting to disable the bot prompt sound. By default the value is No. If you are not disabling the bot prompt sound, you get an additional setting named Bot Prompt Sound which lets you set a Default sound, or a Custom sound where you can upload a max 1 MB audio file.
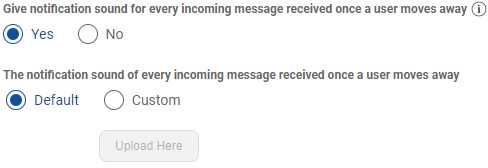
- Give notification sound for every incoming message received once a user moves away: By default, the value is No. On clicking Yes, the bot will start chiming a notification sound for every incoming message that is received once the user moves away from the SDK. You also get a setting below it that lets you add a custom notification sound. The file limit for the same is 1 MB.
