How to Set Up Fynd Integration
- Getting Started
- Bot Building
- Smart Agent Chat
- Conversation Design
-
Developer Guides
Code Step Integration Static Step Integration Shopify Integration SETU Integration Exotel Integration CIBIL integration Freshdesk KMS Integration PayU Integration Zendesk Guide Integration Twilio Integration Razorpay Integration LeadSquared Integration USU(Unymira) Integration Helo(VivaConnect) Integration Salesforce KMS Integration Stripe Integration PayPal Integration CleverTap Integration Fynd Integration HubSpot Integration Magento Integration WooCommerce Integration Microsoft Dynamics 365 Integration
- Deployment
- External Agent Tool Setup
- Analytics & Reporting
- Notifications
- Commerce Plus
- Troubleshooting Guides
- Release Notes
Table of Contents
Overview
Fynd is a platform on which businesses can establish their online store to boost the sales of their offerings. However, being available 24/7 is also imperative to earn customer loyalty. With Haptik bot, you can make your businesses accessible round-the-clock. What if these two maestros are clubbed together?
Below is a proper guide that can help you integrate your Fynd account with Haptik.
Prerequisites for Fynd Integration with Haptik
- A registered Fynd Platform account
- A Haptik bot. Click here if you haven’t created one yet
Step 1: Make Fynd Integration Active
- Log in to your Haptik account and choose the bot you want to connect with Fynd.
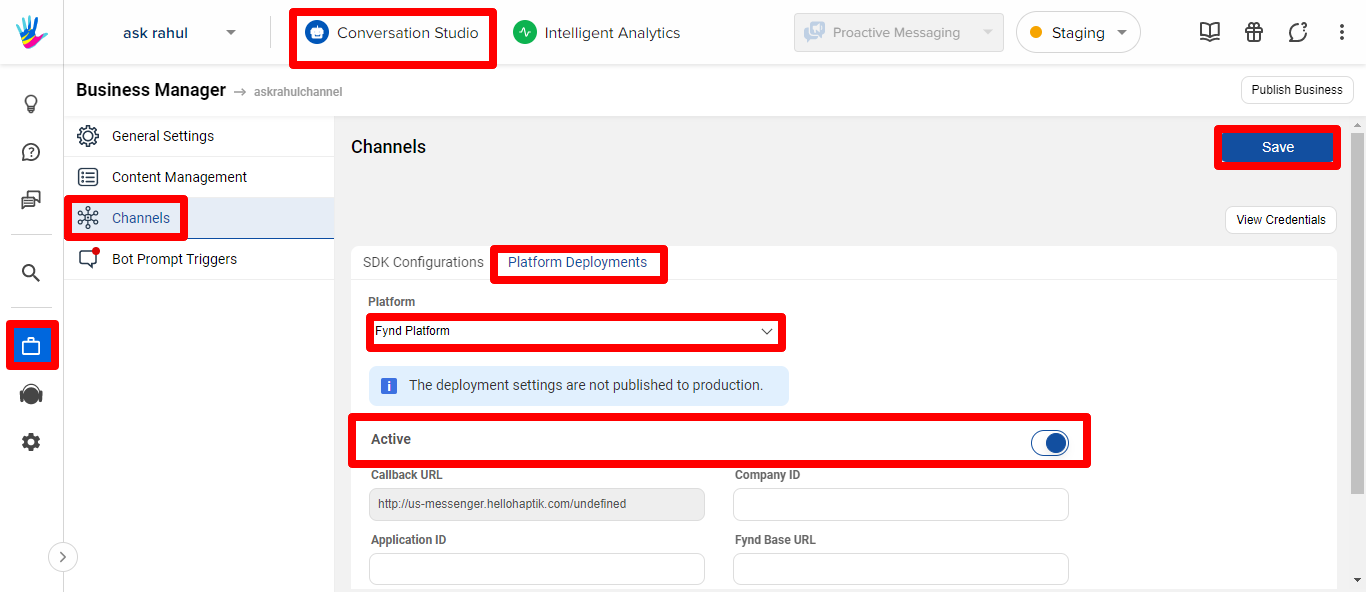
- Navigate to Conversation Studio > Business Manager > Channels > Platform Deployments and select Fynd Platform from the Platform drop-down.
- Turn on the Active toggle button and click Save.
Step 2: Modify Settings of Fynd Store
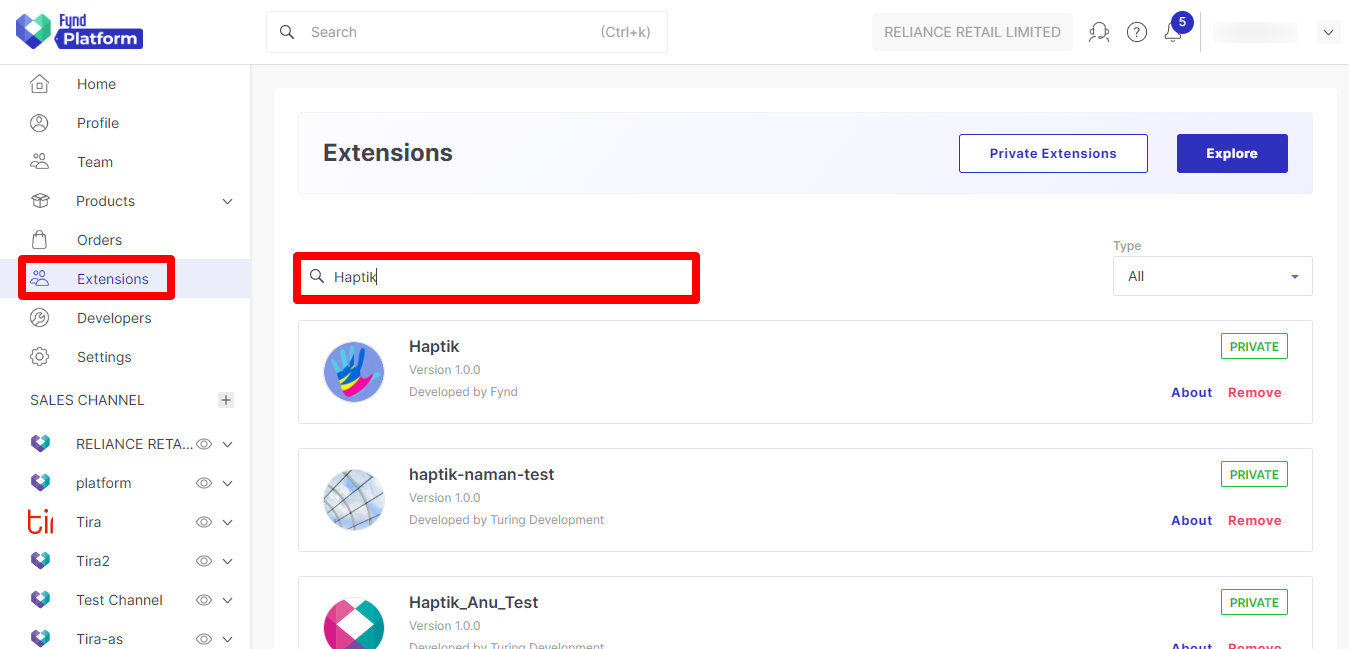
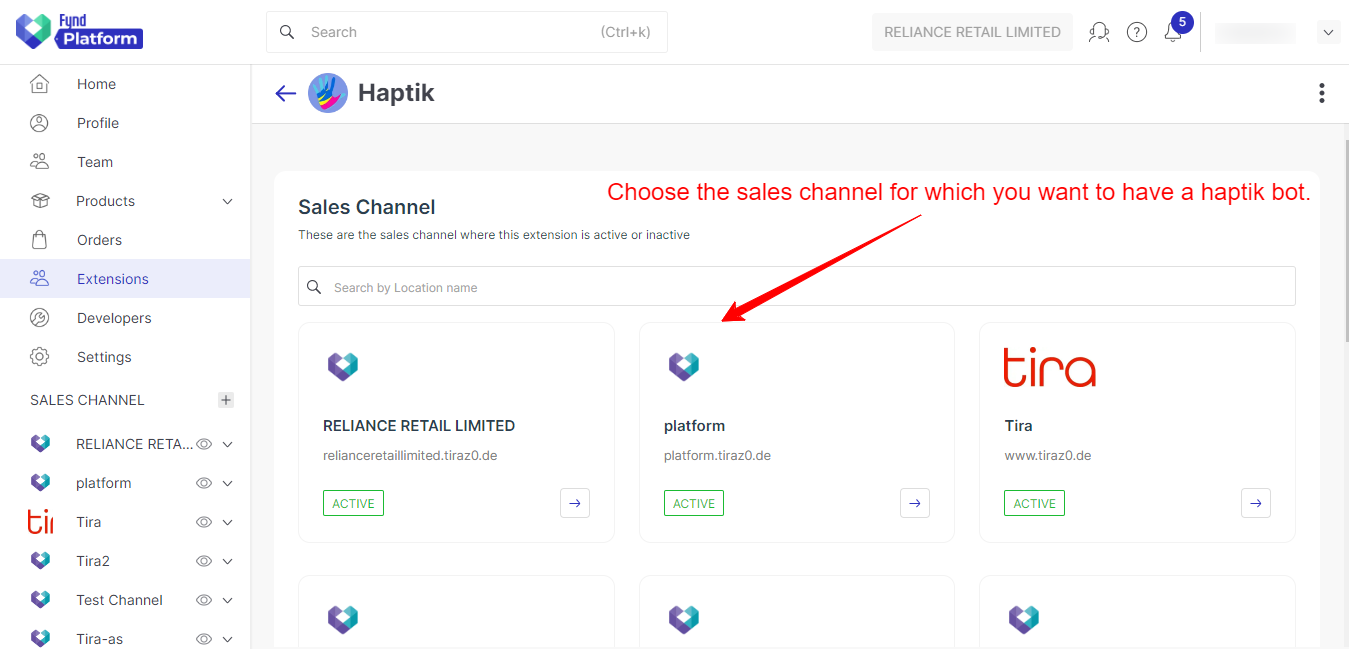
- Access your Fynd Platform account and go to Extensions available in the side navigation bar. Search for the Haptik extension and click on it.
- The Sales Channel screen appears. Select the specific sales channel to connect your bot with.
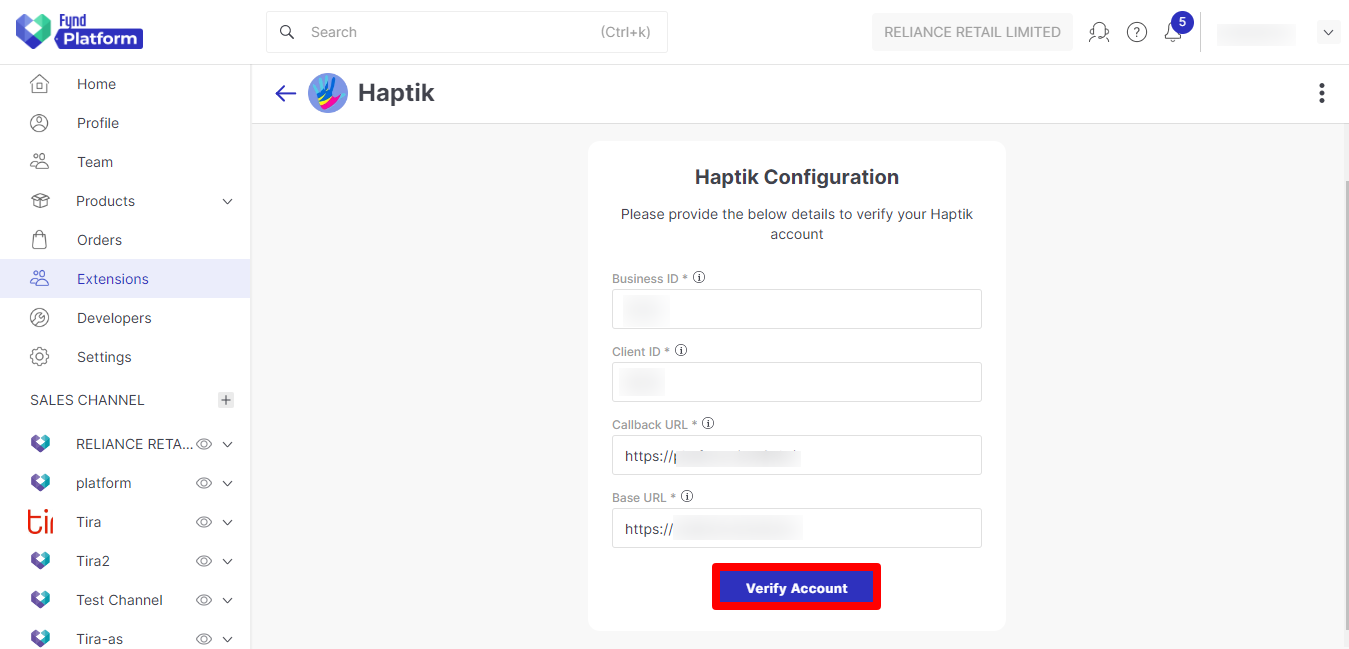
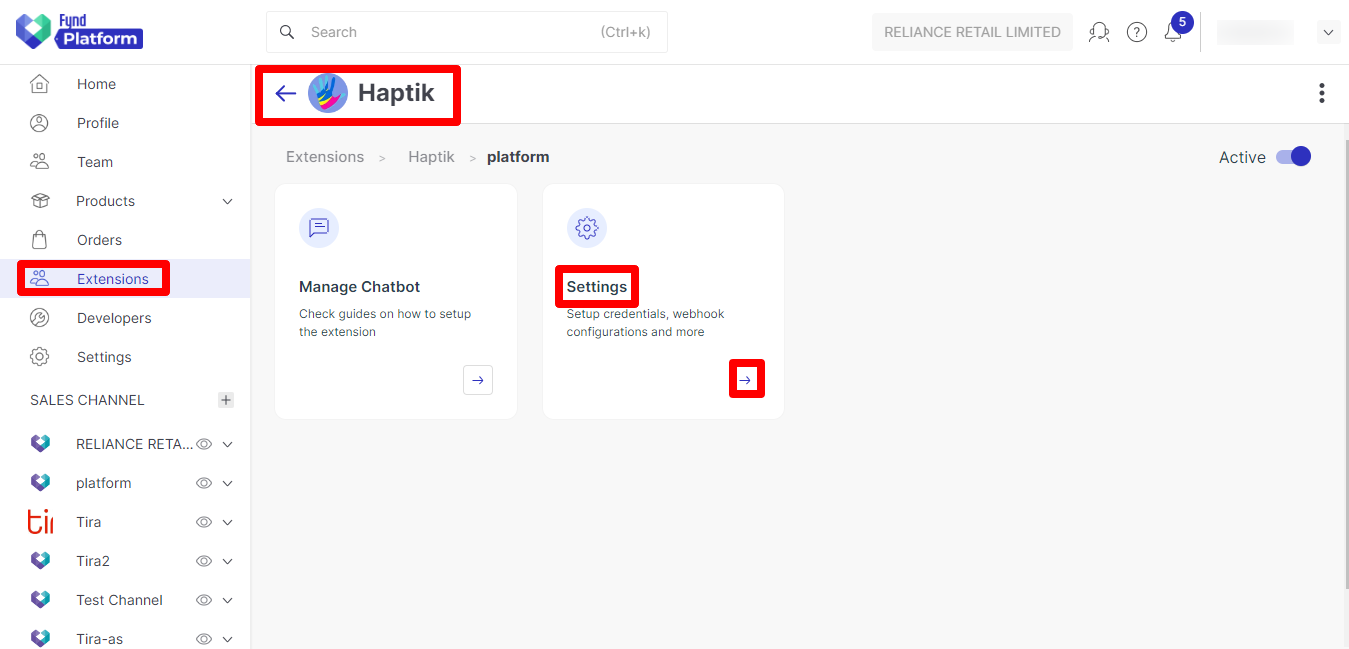
- Click the right arrow (➡️) icon available in the Settings box to edit the Haptik configuration. You can gather the required information from the View Credentials section available on Haptik site.
- Once all the details are added, click Verify Account to verify the details added. You will get a successful activation message, and details related to Fynd deployment on the Haptik platform will be filled in automatically.
Step 3: Decide Bot’s Appearance
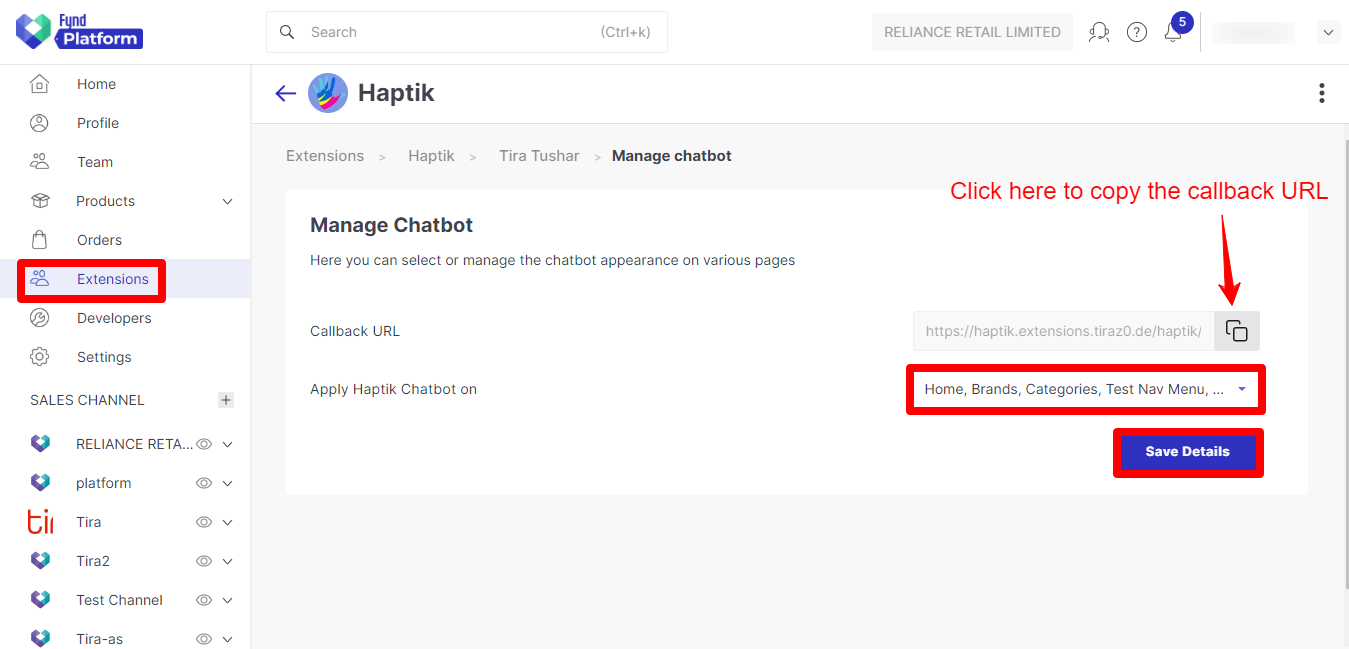
- Click the right arrow (➡️) icon of the Manage Chatbot box after selecting Haptik as your extension and your sales channel on the Fynd platform.
- Click the ‘Apply Haptik Chatbot on’ drop-down and select the checkboxes for the pages on which your Haptik bot widget needs to be displayed. This applies the Haptik bot to the selected locations on the channel website.
- Once done, click Save Details to save the details added. Also, copy the callback URL here and keep handy.
Step 4: Update Permission Settings
You need to add the Modified callback URL for your Haptik account.
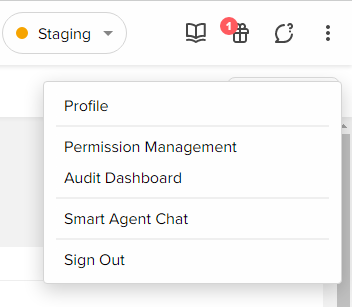
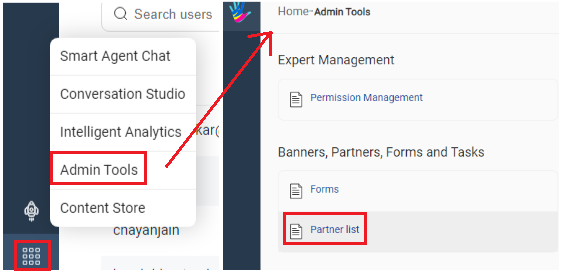
- Click on the three horizontal dots (⋮) placed in the upper right corner and choose Permission Management.
- Click Admin Tools and look for the Partner List option available under the Banners, Partners, Forms and Tasks section.
- Look for the account you’ve used for the integration. Click Edit to edit its details. Scroll down to the User Auth URL field and paste the modified callback URL.
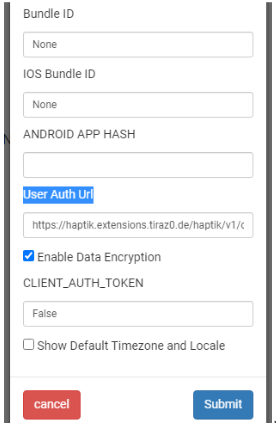
- Click Submit to update your account’s permission settings
After all these steps are done, update the Fynd platform credentials with the key fynd_token and value as token ID that you will get from the Haptik SPOC.
Step 5: Update Bot Skill Set
- Add Fynd Track Order Smart Skill to your bot.
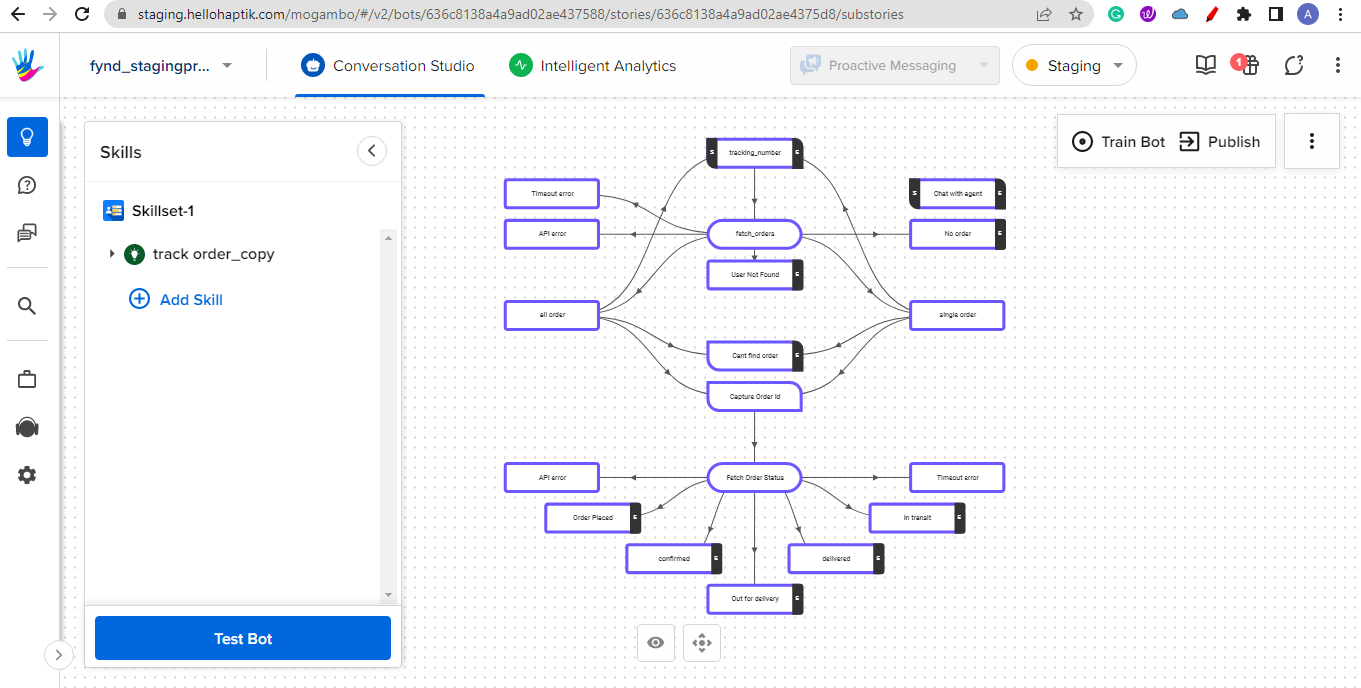
- Click a code node and select Open Code Editor.
- Go to More and choose Variables. Update BUSINESSID and MD_BASE_URL (Get these details from Haptik SPOC).
- Click Train Bot.
Ta-da! It’s done. Your bot will handle customers’ queries on your Fynd store now.
