Setting up Instagram bot via App Review

Written by Soham Amburle
Updated on September 12th, 2022
- Getting Started
- Bot Building
- Smart Agent Chat
- Conversation Design
-
Developer Guides
Code Step Integration Static Step Integration Shopify Integration SETU Integration Exotel Integration CIBIL integration Freshdesk KMS Integration PayU Integration Zendesk Guide Integration Twilio Integration Razorpay Integration LeadSquared Integration USU(Unymira) Integration Helo(VivaConnect) Integration Salesforce KMS Integration Stripe Integration PayPal Integration CleverTap Integration Fynd Integration HubSpot Integration Magento Integration WooCommerce Integration Microsoft Dynamics 365 Integration
- Deployment
- External Agent Tool Setup
- Analytics & Reporting
- Notifications
- Commerce Plus
- Troubleshooting Guides
- Release Notes
Table of Contents
Prerequisites for having an Instagram bot
The prerequisites include:
- An Instagram Business Account or an Instagram Creator Account. You can read more about it, here.
- Facebook Page connected to the same account.
- Registered Facebook App.
- A Facebook Developer account that can perform Tasks with at least "Moderate" level access. Click here, to know more about Tasks.
- A registered Facebook App with Basic settings configured, which means you will have to click on the Create App button and create an App on the dashboard by following the instructions on the dashboard. You can read more about it, here.
Setting up an Instagram bot
The steps for Setup are divided into five different sections.
- Setting up the Instagram account
- Creating a bot on Haptik
- Adding deployment details on Haptik
- Registering webhooks for the bot
- Completing the App Review
1. Setting up the Instagram account
Step 1: Navigate to your app, from this link.
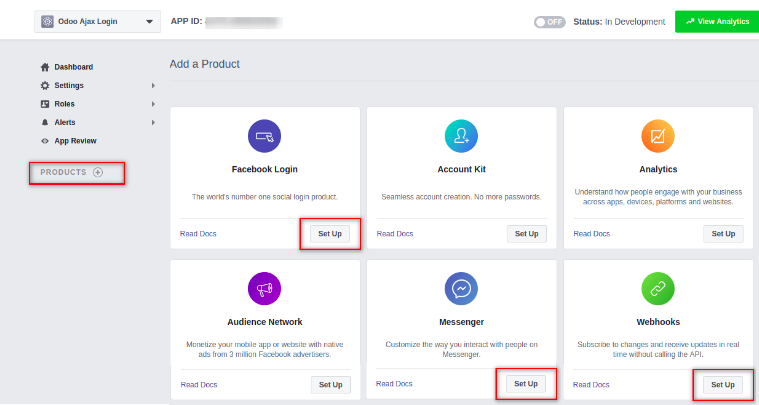
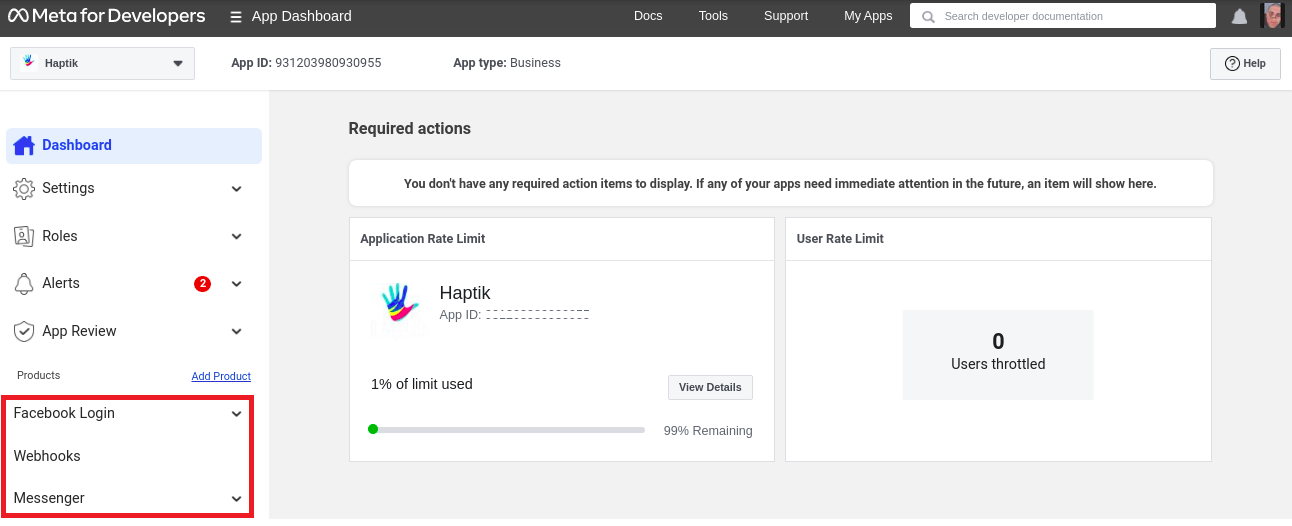
Step 2: Next, you need to click on Products from the left panel, and add Facebook Login, Webhooks, and Messenger from there.
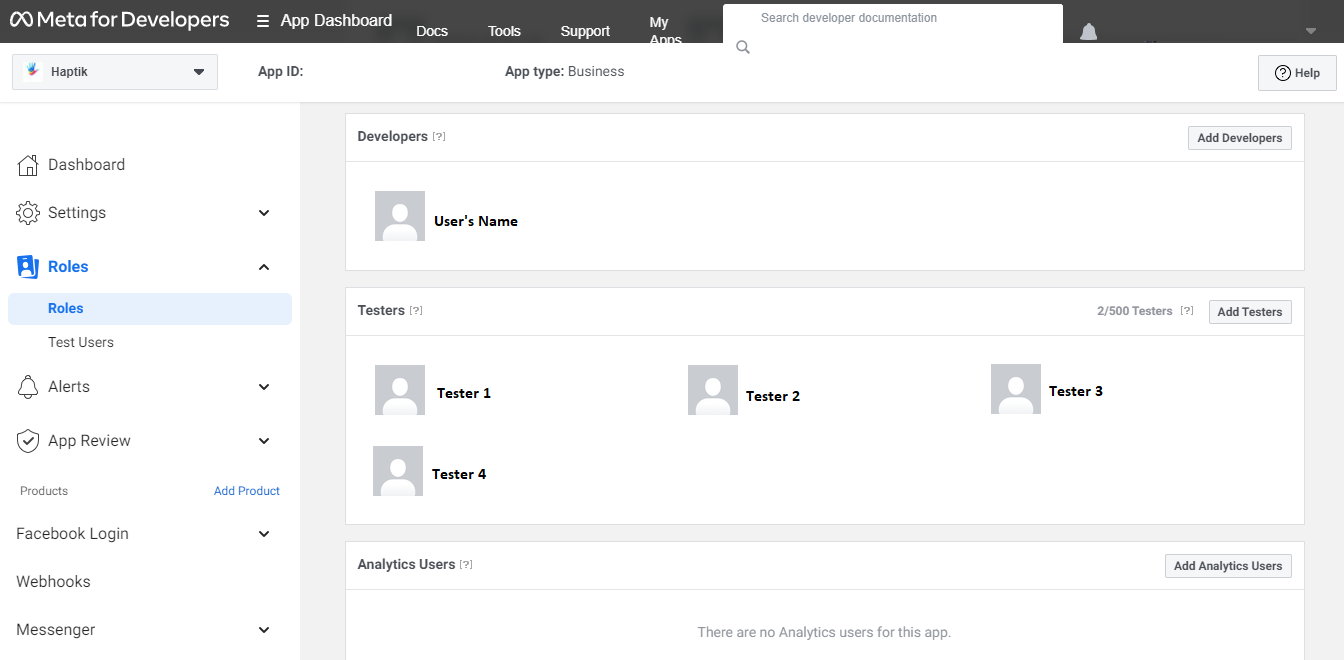
Step 3: Once you have added these products, they will appear on the left panel, as shown.
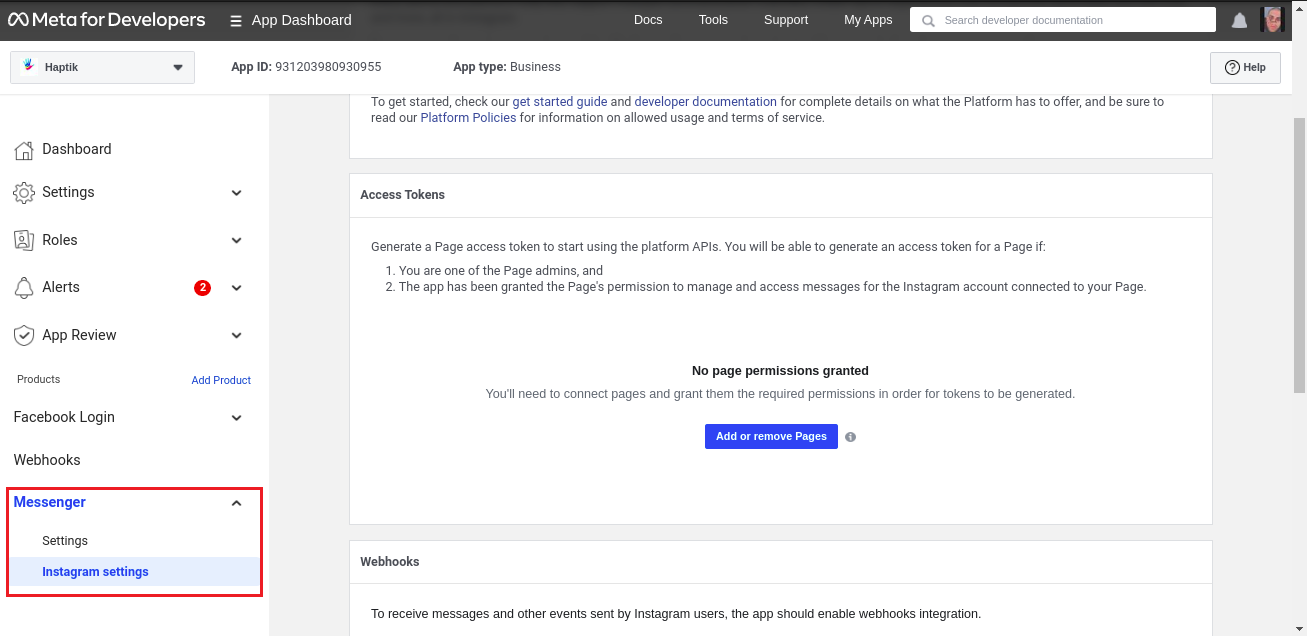
Step 4: Click on Messenger from the left navigation bar, select Instagram Settings, and scroll down to “Add or remove pages”
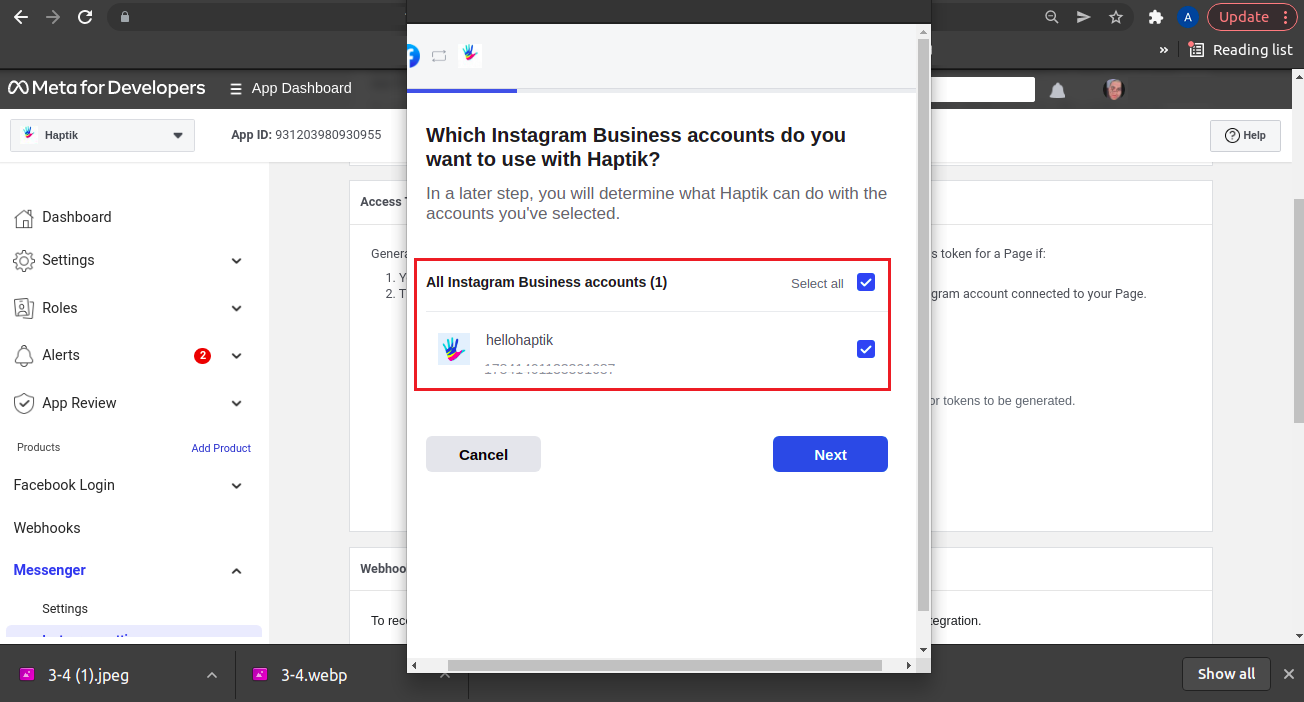
Step 5: Add your Facebook page here. You must have admin access to the Instagram and Facebook page, for this step.
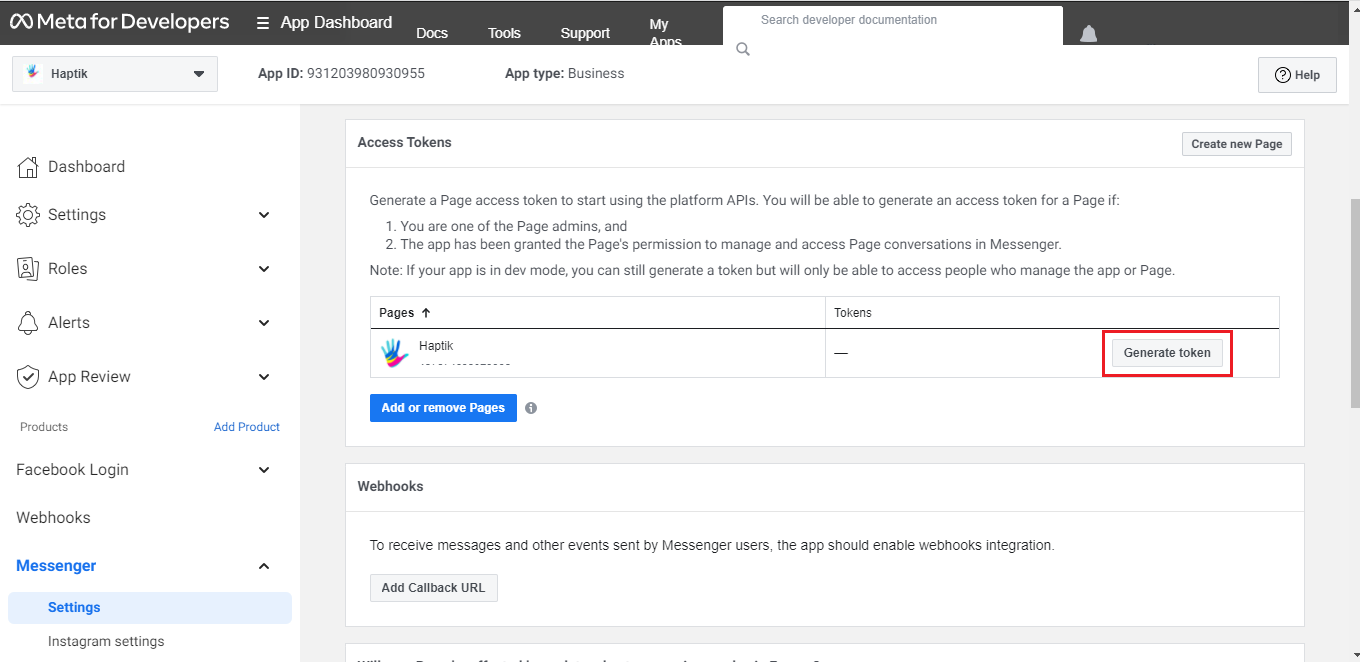
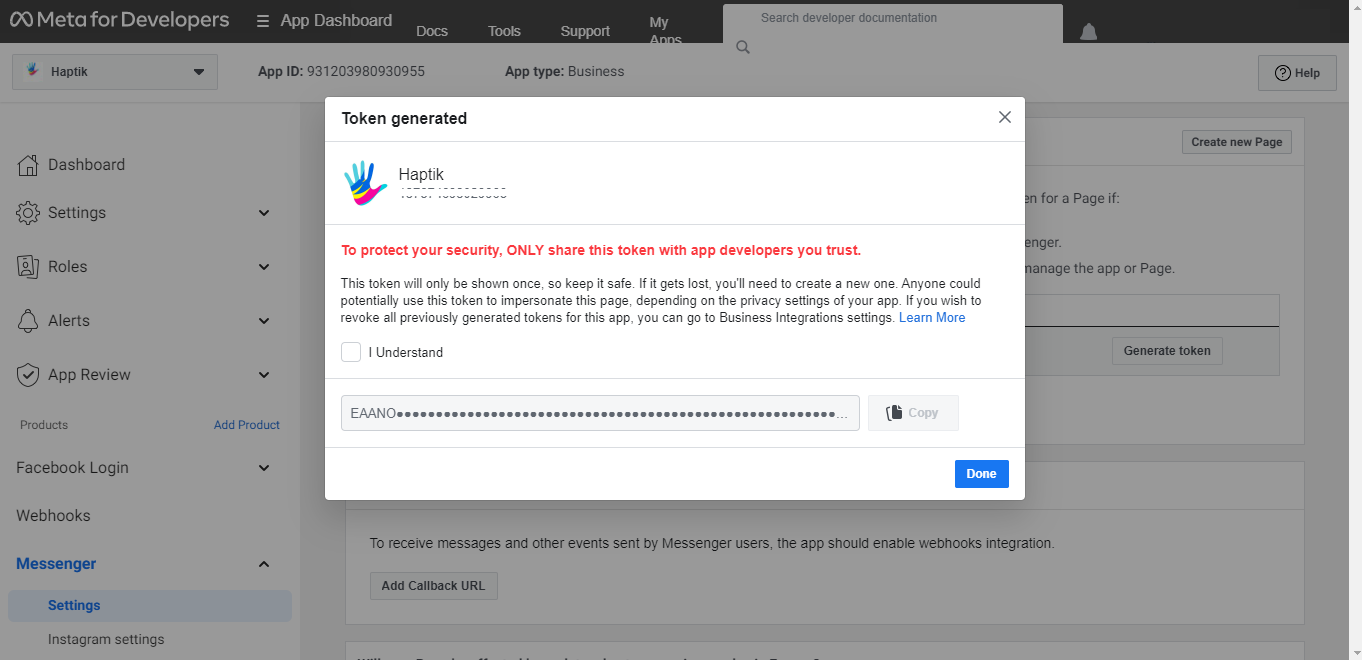
Step 6: Once you have added your Facebook page, you will get a Generate token button right beside it. You need to click that.
Step 7: After clicking the Generate token button, you will receive the token.
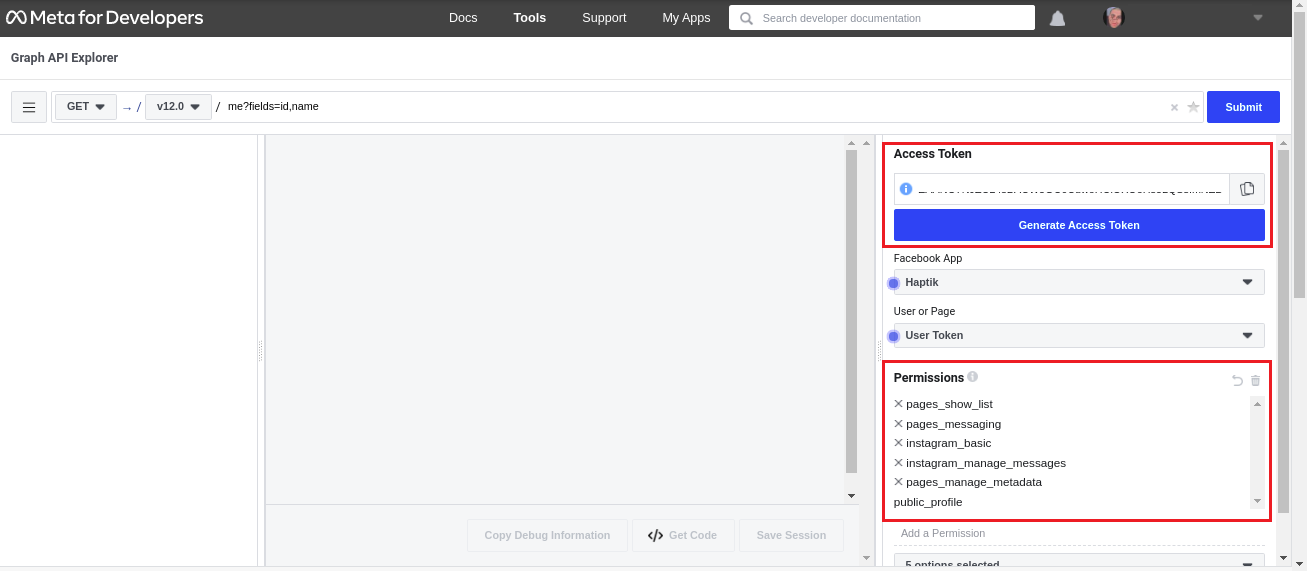
Step 8: Once you have received the token, you will be taken to Graph API Explorer. Here, you need to at least add the below permissions. This will work only for the first time, and the next time you want to make any change to this, you can navigate to Graph API Explorer, by clicking on the Tools section on the top bar.
- instagram_basic
- instagram_manage_messages
- pages_manage_metadata
And then click on Generate Access Token. This token is a User Access Token.
 Step 9: Once you have received the User Access Token, you will have to call the following cURL, in order to fetch the Page ID. (This can be called over Graph API Explorer)
Request:
curl -i -X GET \
"https://graph.facebook.com/v9.0/me/accounts?access_token={access-token}"
Response:

You can fetch the Page ID from the response, as shown in the above image.
Step 10: The User Access Token that we have is a short-lived token, and we need a long-lived token. You will have to call this cURL, to get the long-lived User Access Token, in the response.
Request -
curl -i -X GET
"https://graph.facebook.com/{graph-api-version}/oauth/access_token?grant_type=fb_exchange_token&client_id={app-id}&client_secret={app-secret}&fb_exchange_token={your-access-token}"
Response -

You can capture the long-lived User Access Token from the response, shown above.
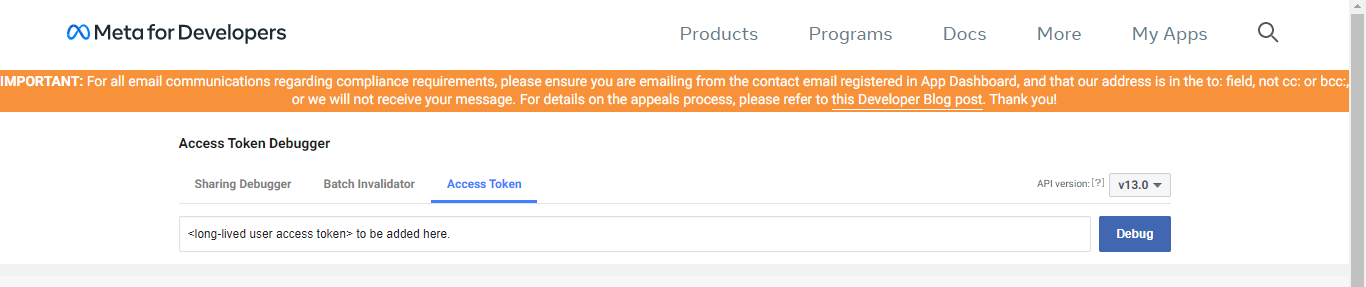
Step 11: Once you have received the long-lived User Access Token, navigate to this tool, paste your new token as shown, and click on Debug. This will help us to get a long-lived User Access Token, that has no expiry.
Step 12: Now, we have to generate a Page Access Token. For that, we will call this cURL, and we will also use the Page ID and the long-lived User Access Token that we have generated in the above steps.
Request -
curl -i -X GET
"https://graph.facebook.com/{page-id}?fields=access_token&access_token={user-access-token}"
Response -

You can capture the Page Access Token from the response, shown above.
2. Creating a bot on Haptik
Once you have completed all the above steps, you are good to move to the next part which is Creating a bot on Haptik. You can learn about creating a bot here.
Once you have created your bot, you can move to the next section, which is adding deployment details to the Platform Deployments section on Haptik.
3. Adding deployment details on Haptik
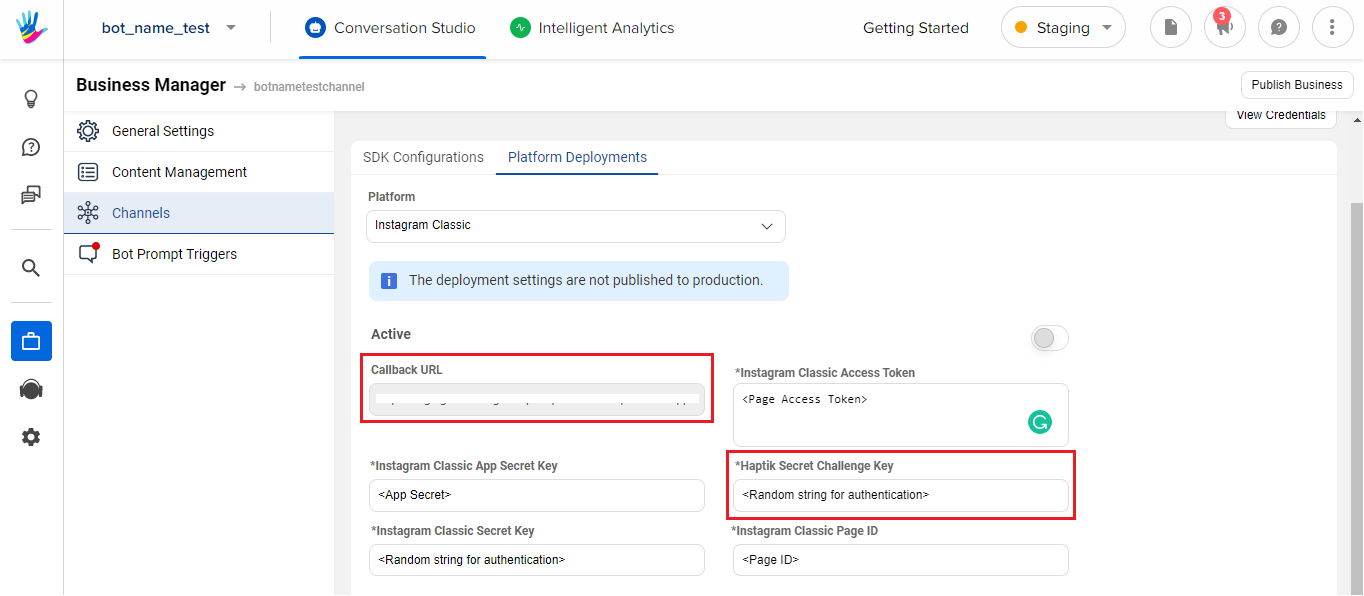
Step 1: Log in to Haptik, navigate to Conversation Studio > Business Manager > Channels > Platform Deployments, and select Instagram Classic from the Platform drop-down, as shown.
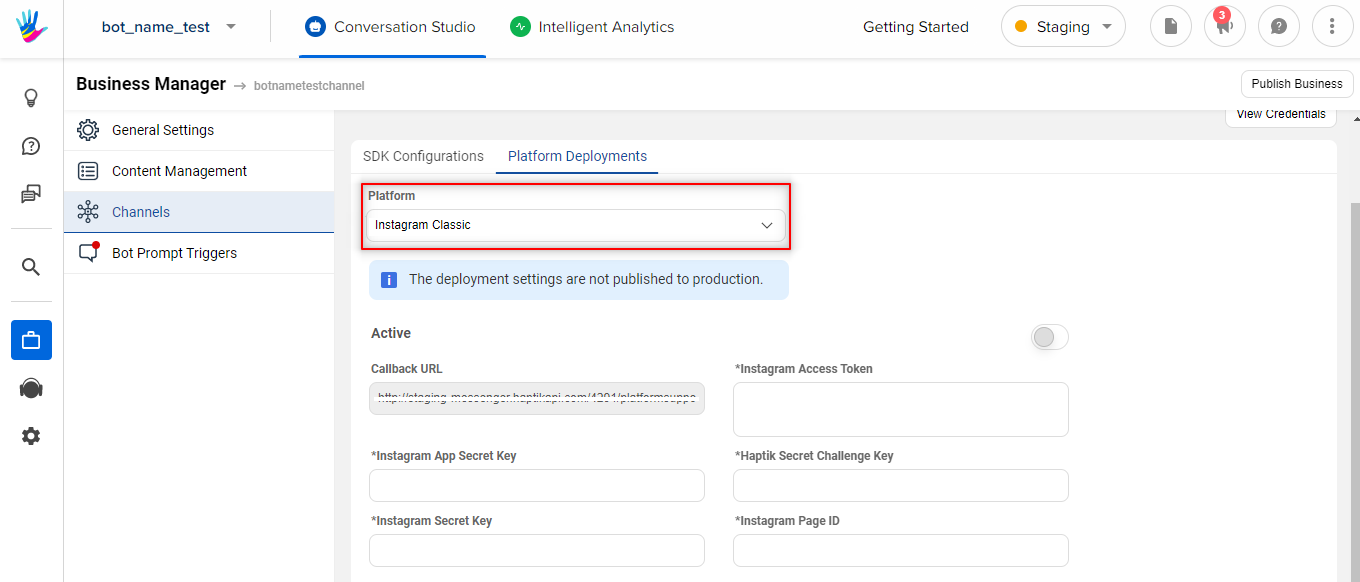
Step 2: You will have to fill the following fields with accurate details:
- Instagram Classic Access Token: Add the Page Access Token here which you had created.
-
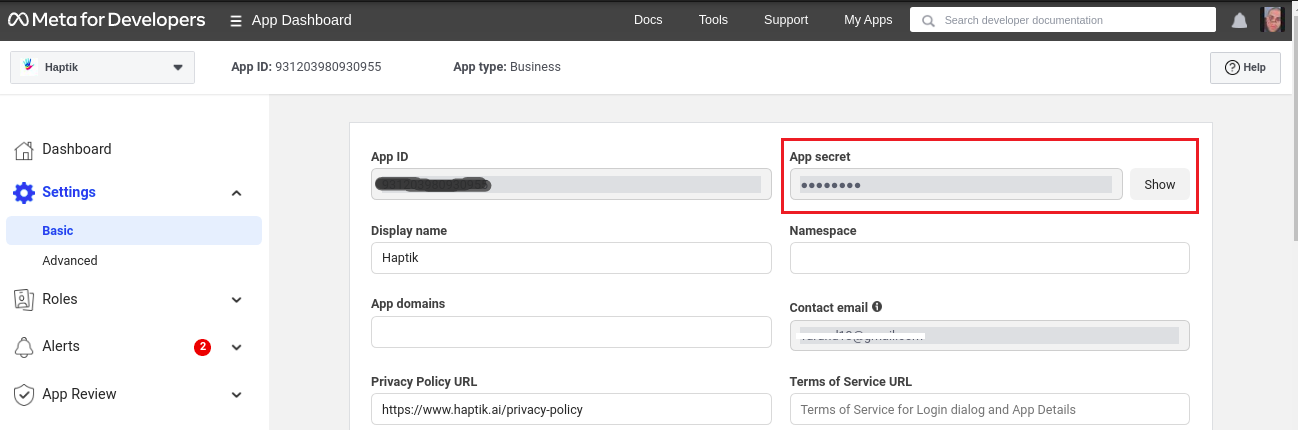
Instagram Classic App Secret Key: Navigate to Meta for Developers dashboard > Settings > Basic, and copy the App Secret. This will be used as Instagram Classic App Secret Key.
- Haptik Secret Challenge Key: Add any random string(text) here. This field will be used for authentication purposes.
- Instagram Classic Secret Key: Add any random string(text) here. This field will be used for authentication purposes.
- Instagram Classic Page ID: Add the Page ID here.
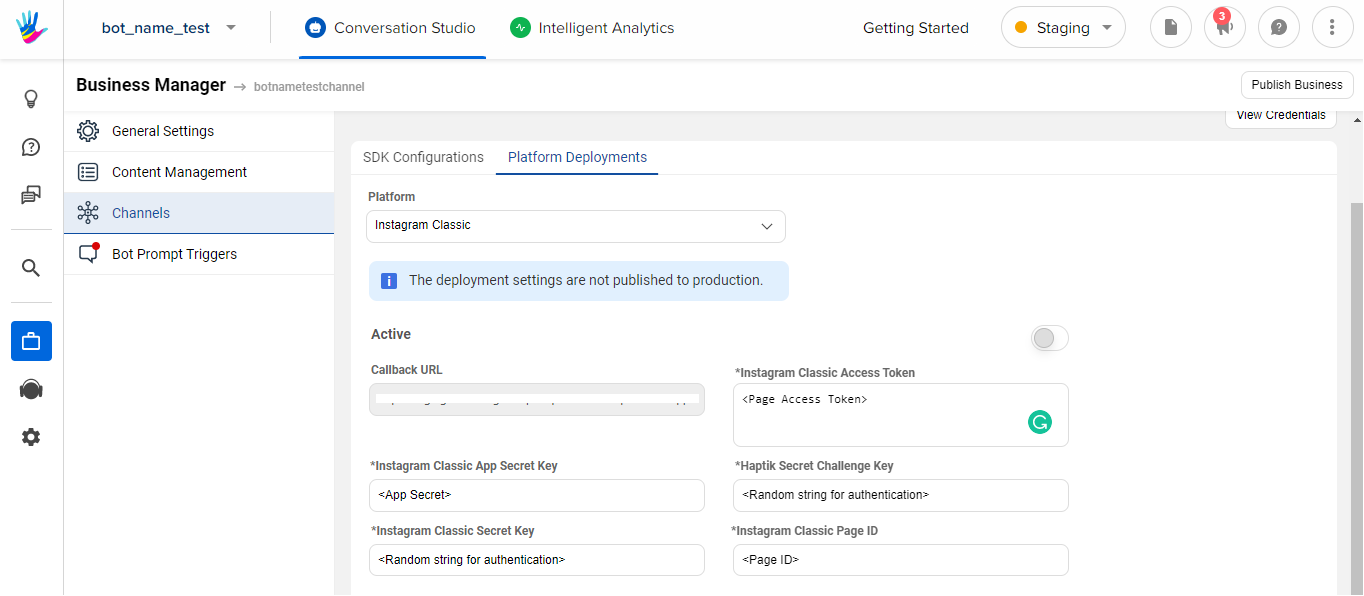
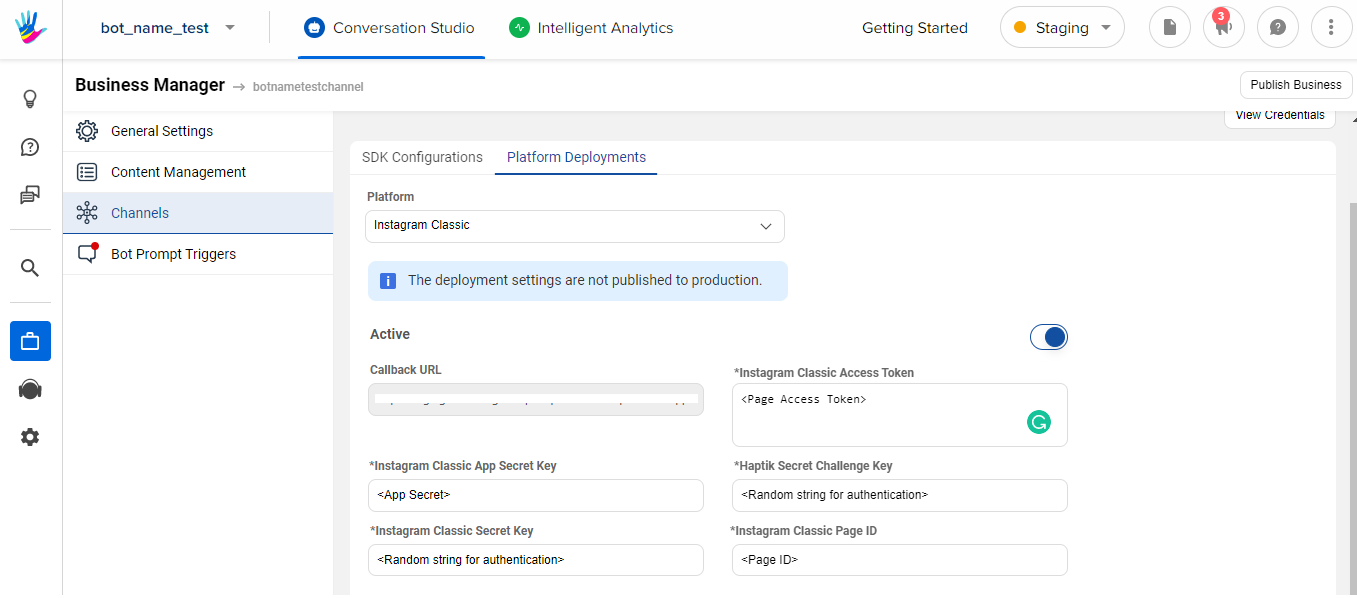
Once you have followed the above steps, you need to switch the Active toggle on, and then you are good to move to the next section, which is registering webhooks for the bot.
4. Registering webhooks for the bot
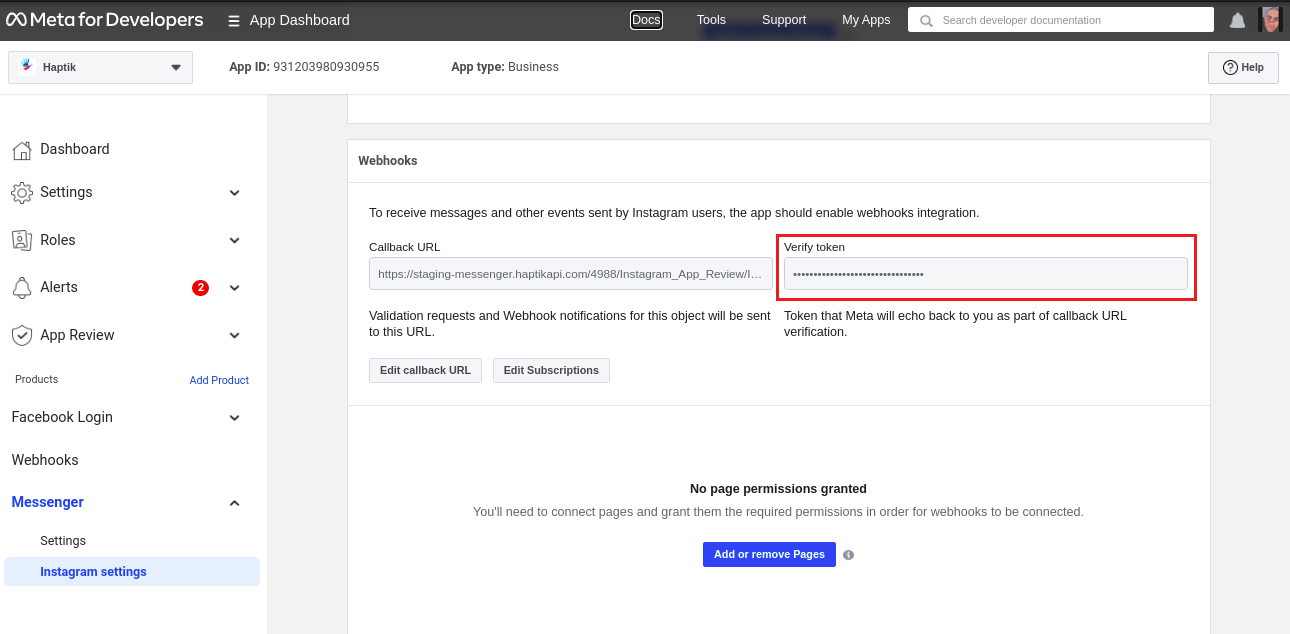
Step 1: Navigate to Meta for Developers dashboard > Products > Messenger > Instagram Settings, and scroll down to the Webhooks section, as shown.
Step 2: Select the Edit Callback URL button, as shown.
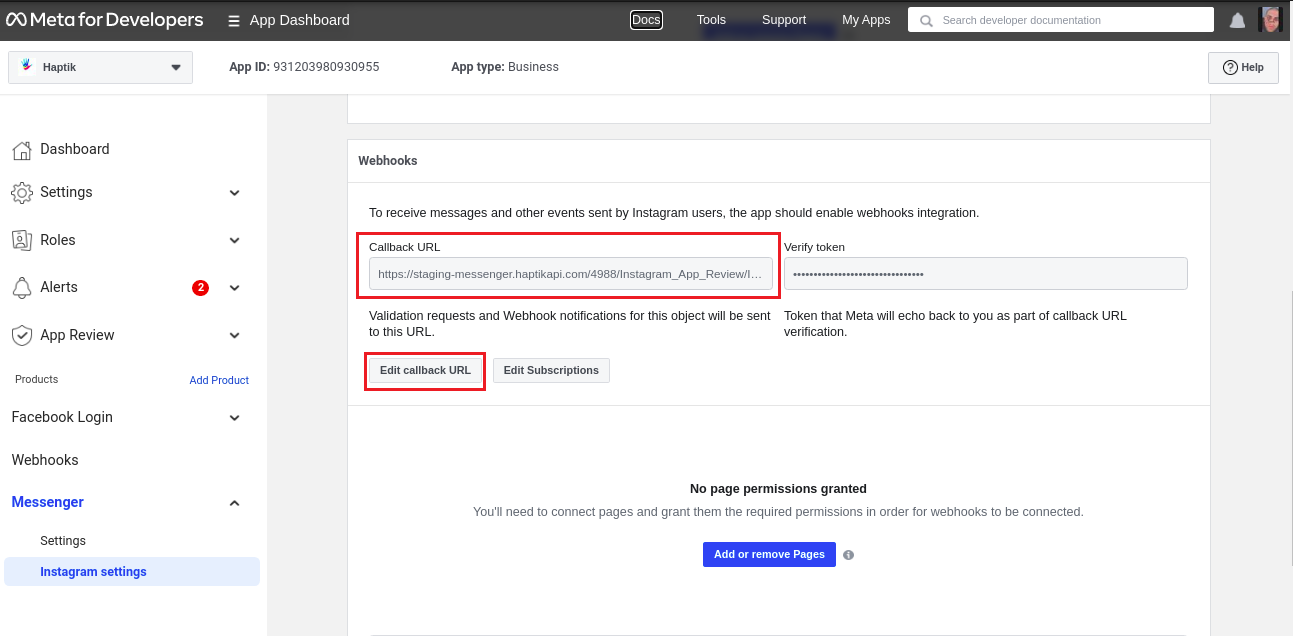 Step 3: You need to copy the Callback URL from the Platform Deployments section on Haptik and paste it into the Callback URL of the Webhooks.
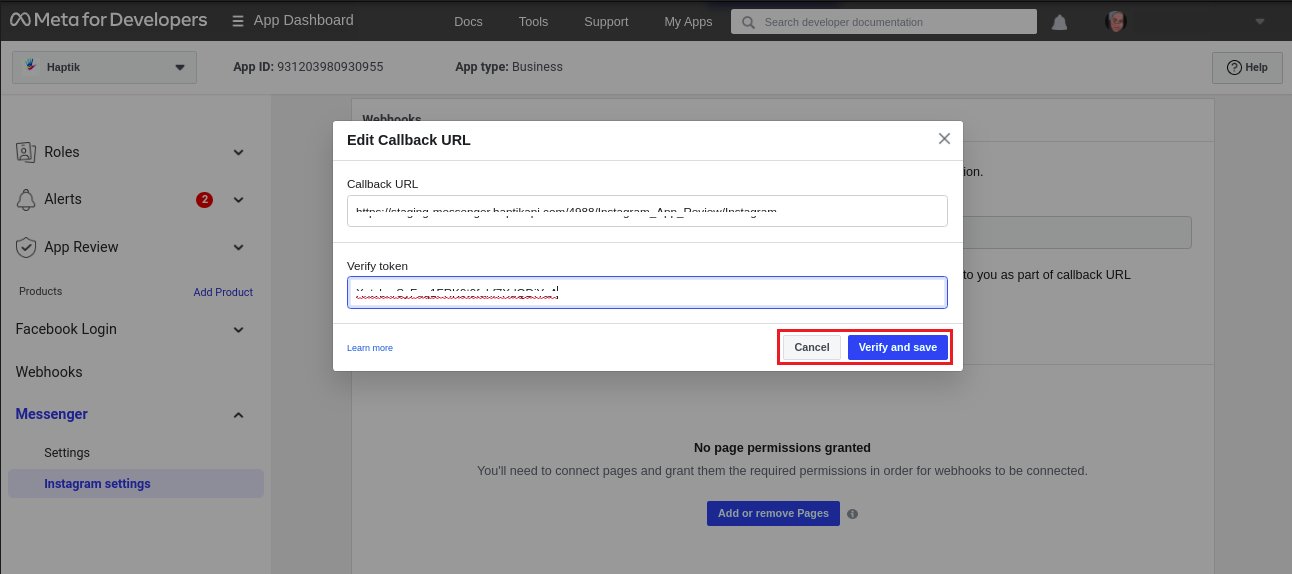
Step 4: You need to copy the Haptik Secret Challenge Key from the Platform Deployments section on Haptik as shown in the above image and paste it in the Verify Token as shown in the image below.
Step 5: Once you have pasted the Haptik Secret Challenge Key in the Verify Token field, you will have to click on Verify, and this will successfully add the Callback URL to Webhooks.
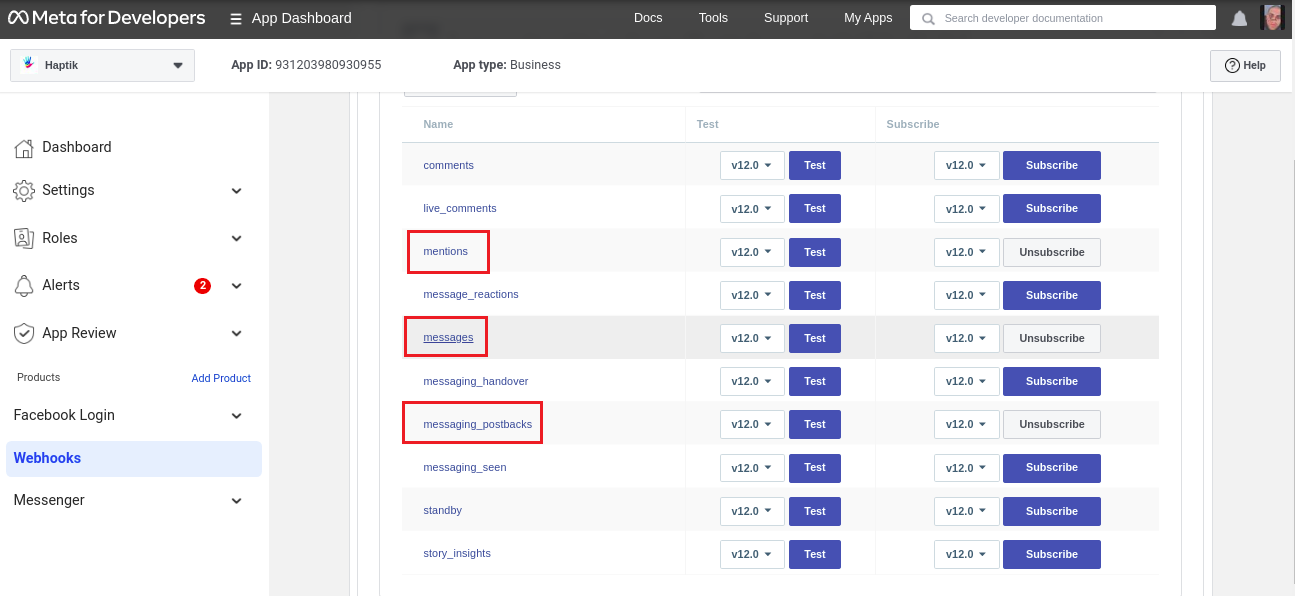
Step 6: Navigate to Meta for Developers dashboard > Products > Webhooks, and subscribe to all the required subscriptions. You should subscribe to messaging_postbacks, messages, and mentions without fail.
This brings us to the end of section 4. You can proceed to the last section of App Review.
5. Completing the App Review
You need to complete the App Review, prior to taking your bot live. This is a mandatory step. In order to submit the App for an App review, you will have to request Advanced Access. The basic permissions that you can request are messages and messages_postbacks. You can read more about it, here.
- Facebook will manually do an App Review. You will have to inform them how to access your bot, which flows can be tried so that they can understand the bot's working in a better way. Along with that, you will also have to inform them what data are you collecting from the users during the conversation. Basically, you need to give all the required details, such that they can go through it, and review the app.
- Once you have provided Facebook with all the required information, you can submit the app for app review.
- If all the details provided by you are accurate, your app will get reviewed by Facebook within a day, and the bot will be made live.
- If there are any objections from the Facebook team, the business will have to make the required changes to the app and resubmit it for review.
Once you are done with App Review, you are done with the process of deploying your Haptik bot on Instagram.
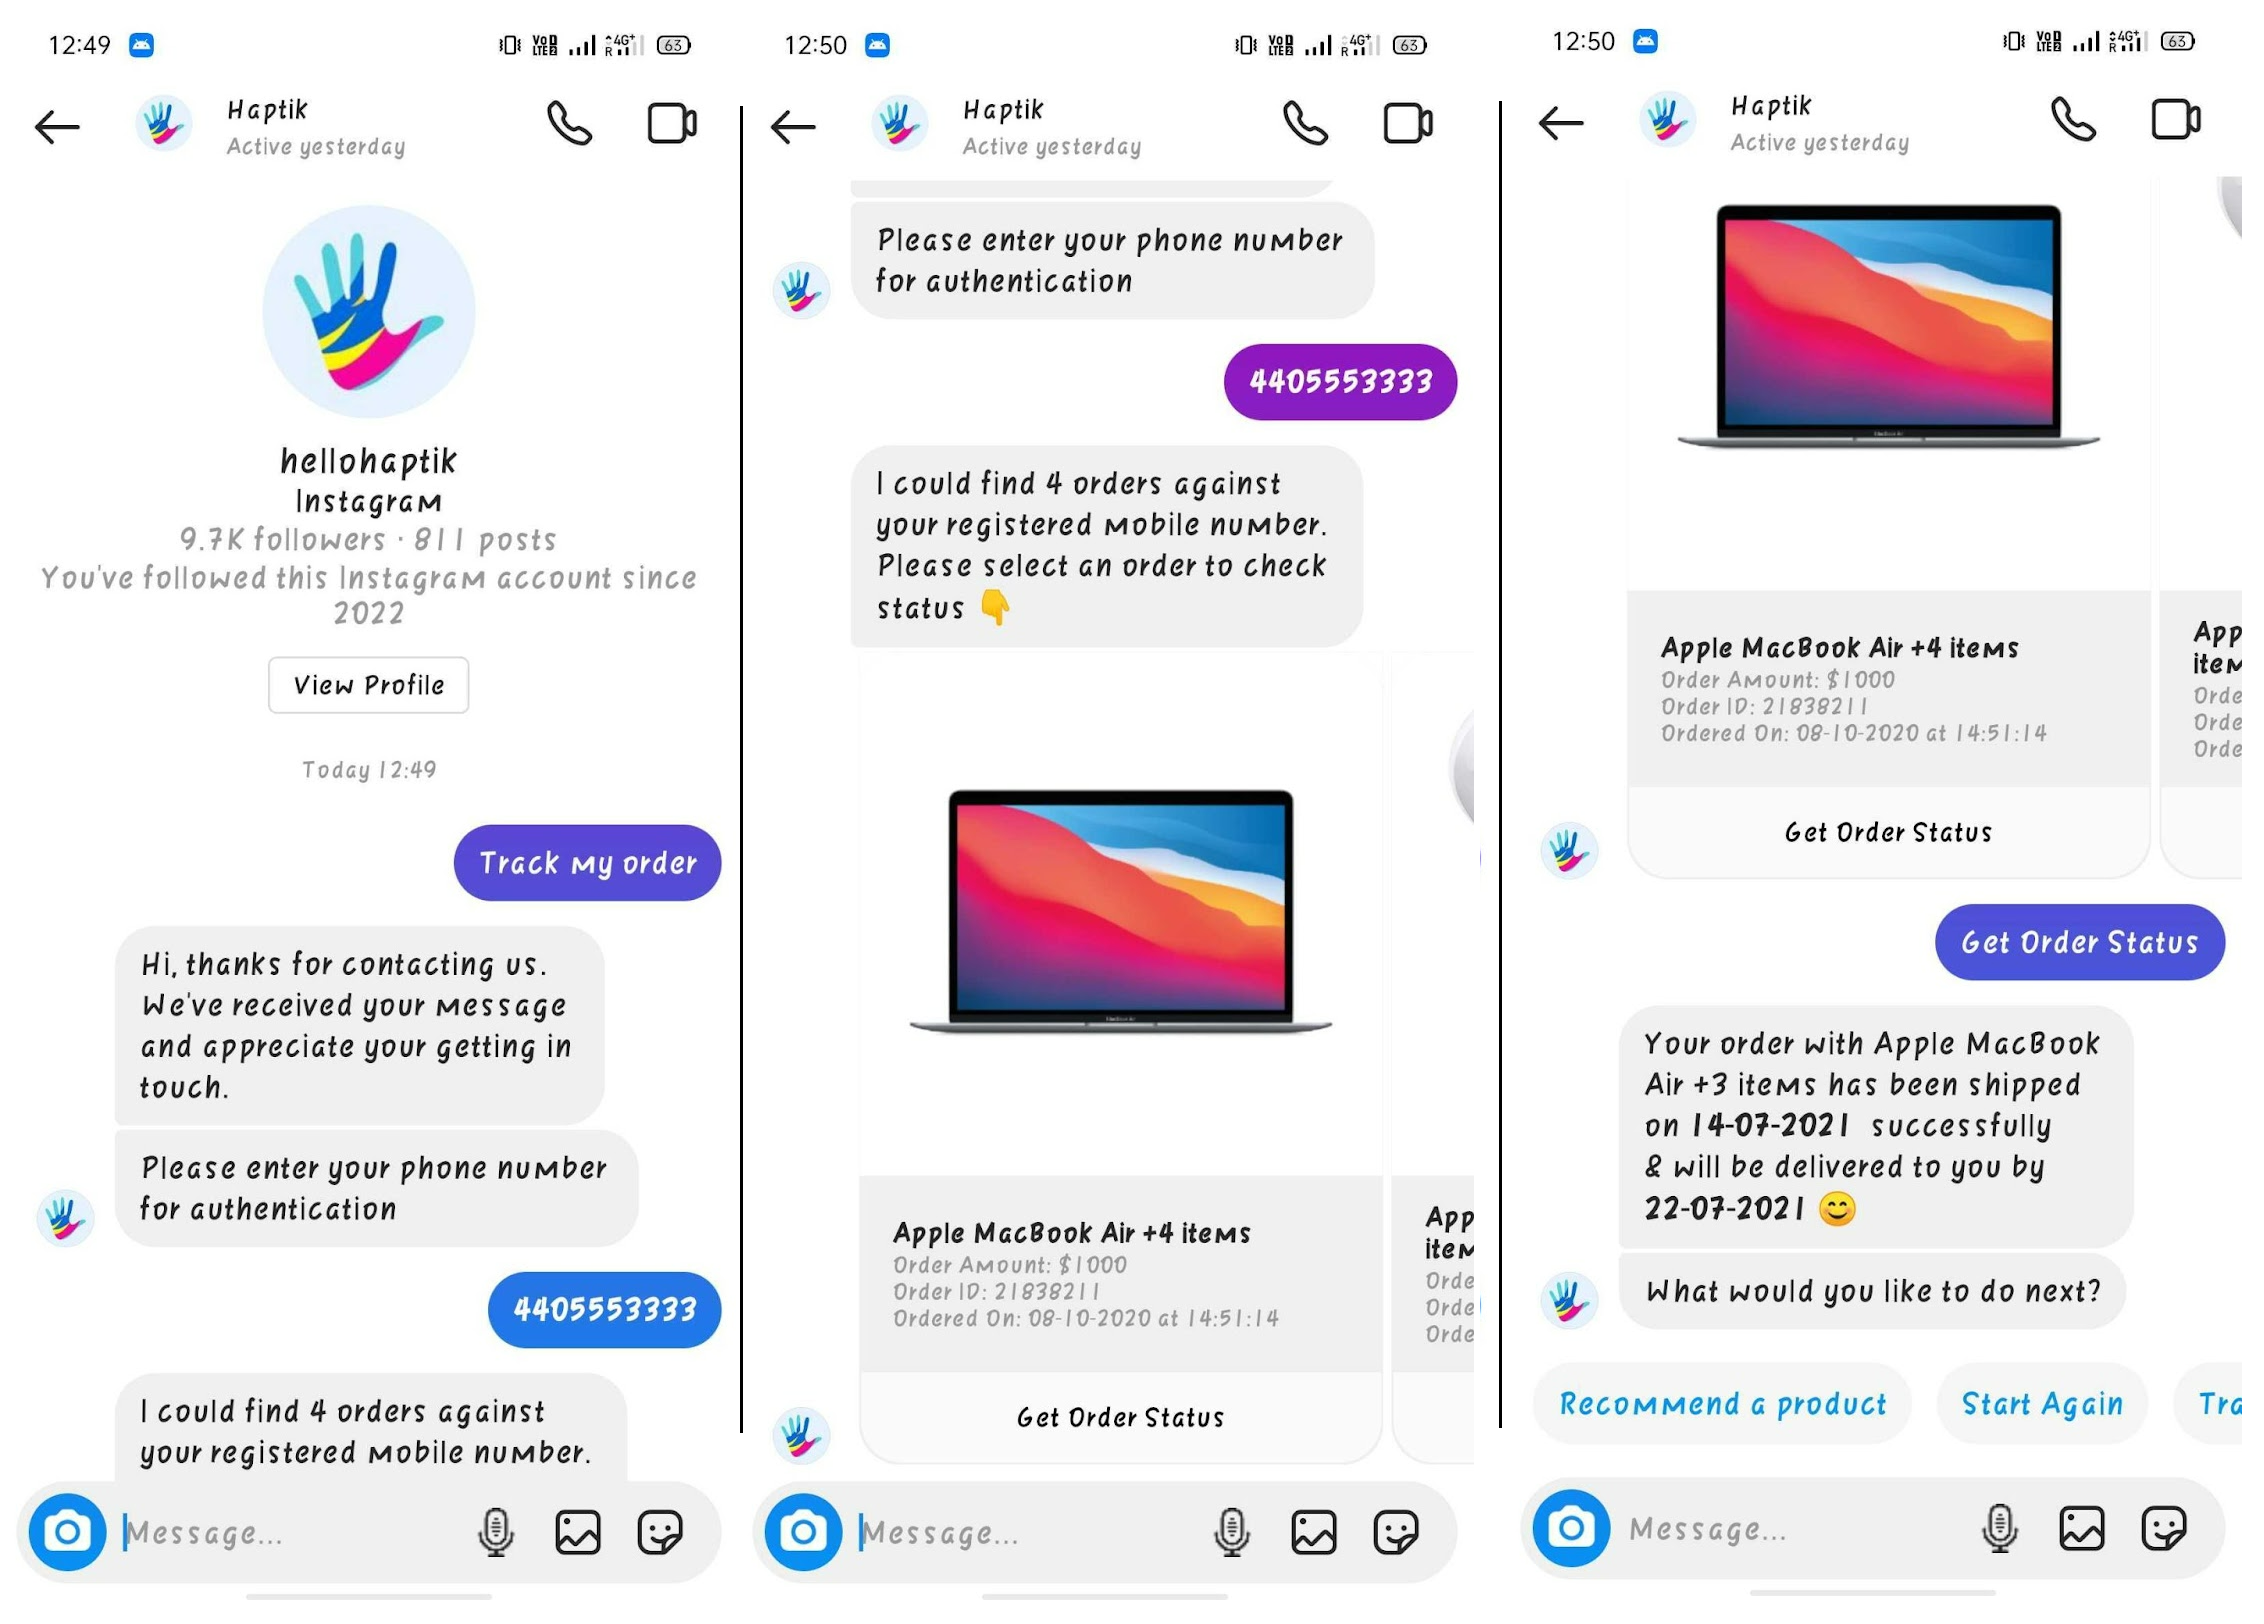
You can now test your bot on Instagram, and it will look just the same as it looks when we chat with our friends on Instagram. The only difference here would be that a bot would be replying to your queries.