Live Traffic Section Overview
- Getting Started
- Bot Building
- Smart Agent Chat
- Conversation Design
-
Developer Guides
Code Step Integration Static Step Integration Shopify Integration SETU Integration Exotel Integration CIBIL integration Freshdesk KMS Integration PayU Integration Zendesk Guide Integration Twilio Integration Razorpay Integration LeadSquared Integration USU(Unymira) Integration Helo(VivaConnect) Integration Salesforce KMS Integration Stripe Integration PayPal Integration CleverTap Integration Fynd Integration HubSpot Integration Magento Integration WooCommerce Integration Microsoft Dynamics 365 Integration
- Deployment
- External Agent Tool Setup
- Analytics & Reporting
- Notifications
- Commerce Plus
- Troubleshooting Guides
- Release Notes
Table of Contents
Overview
The Live Traffic section on SAC is a virtual representation of your overall chat traffic. The Traffic section helps you monitor the entire queue of user chats in real-time across different stages, and provide you with the means to monitor chats, and take necessary actions to ensure that your customers always have a good chat experience.
Permitted User Roles
This section is only accessible to Team Leads and Admins.
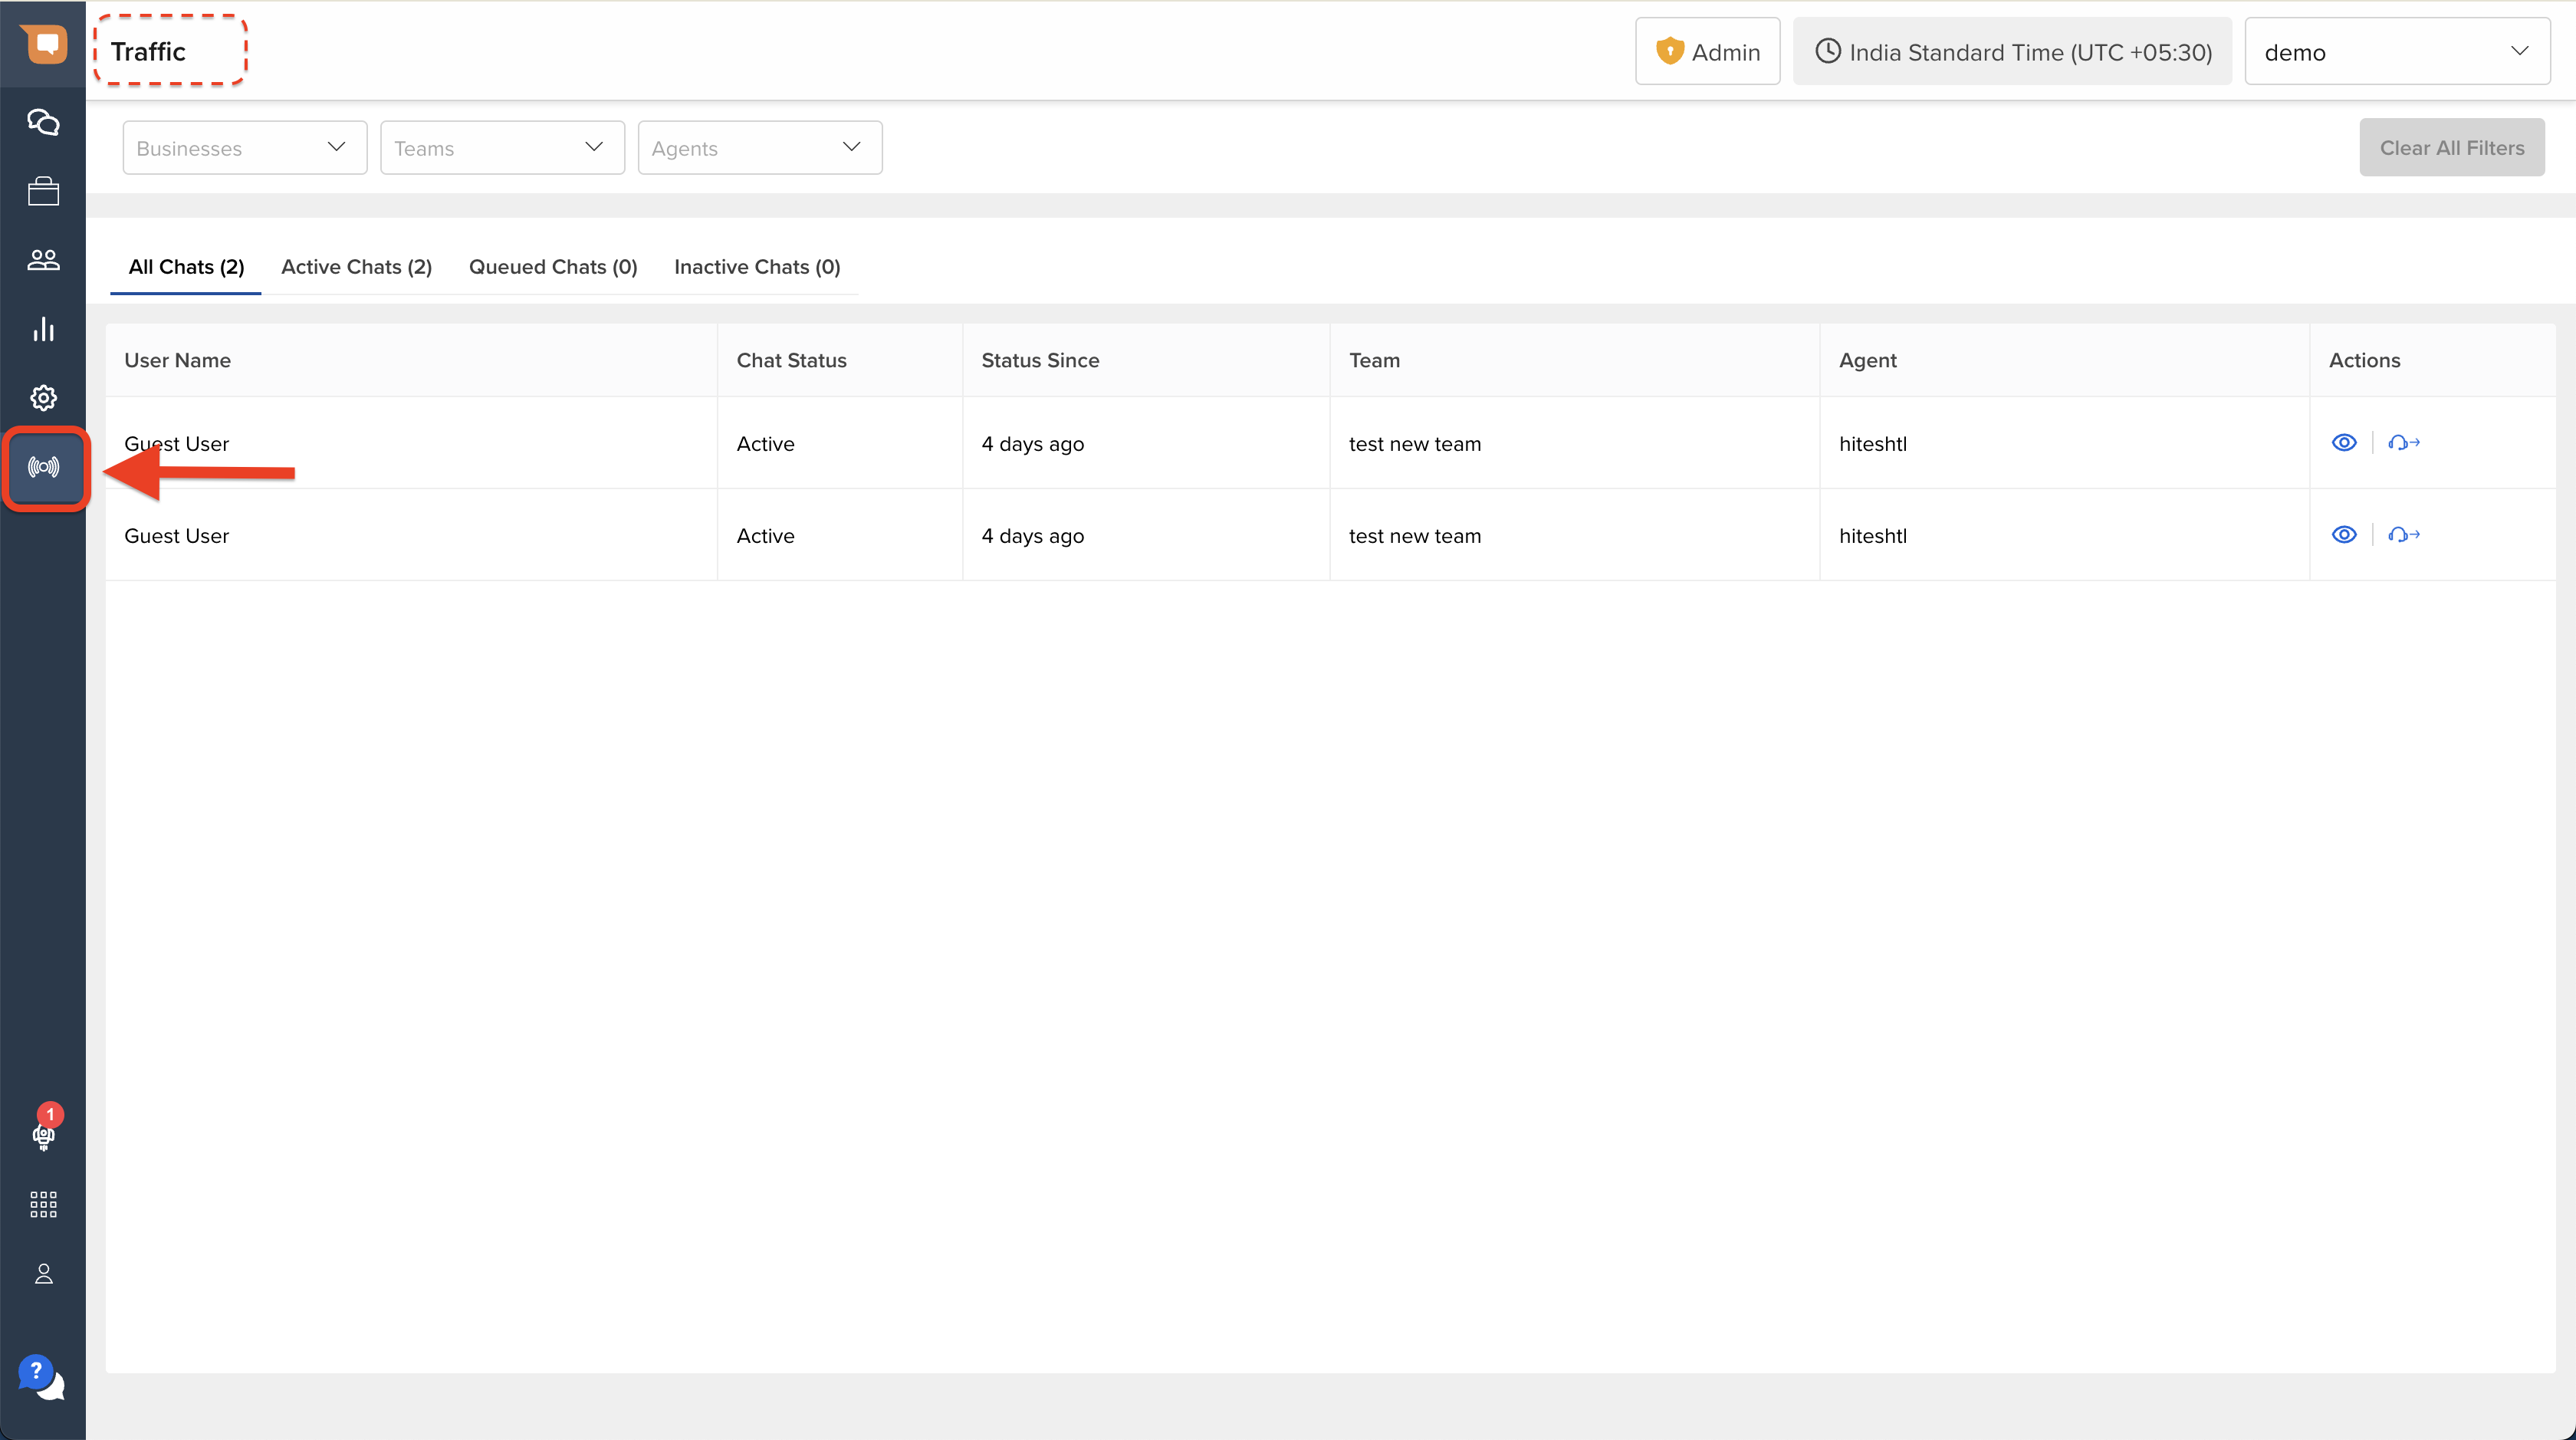
The Traffic page is accessible by clicking on the "Traffic” icon on the left nav bar, as shown below.
Information in the Traffic section
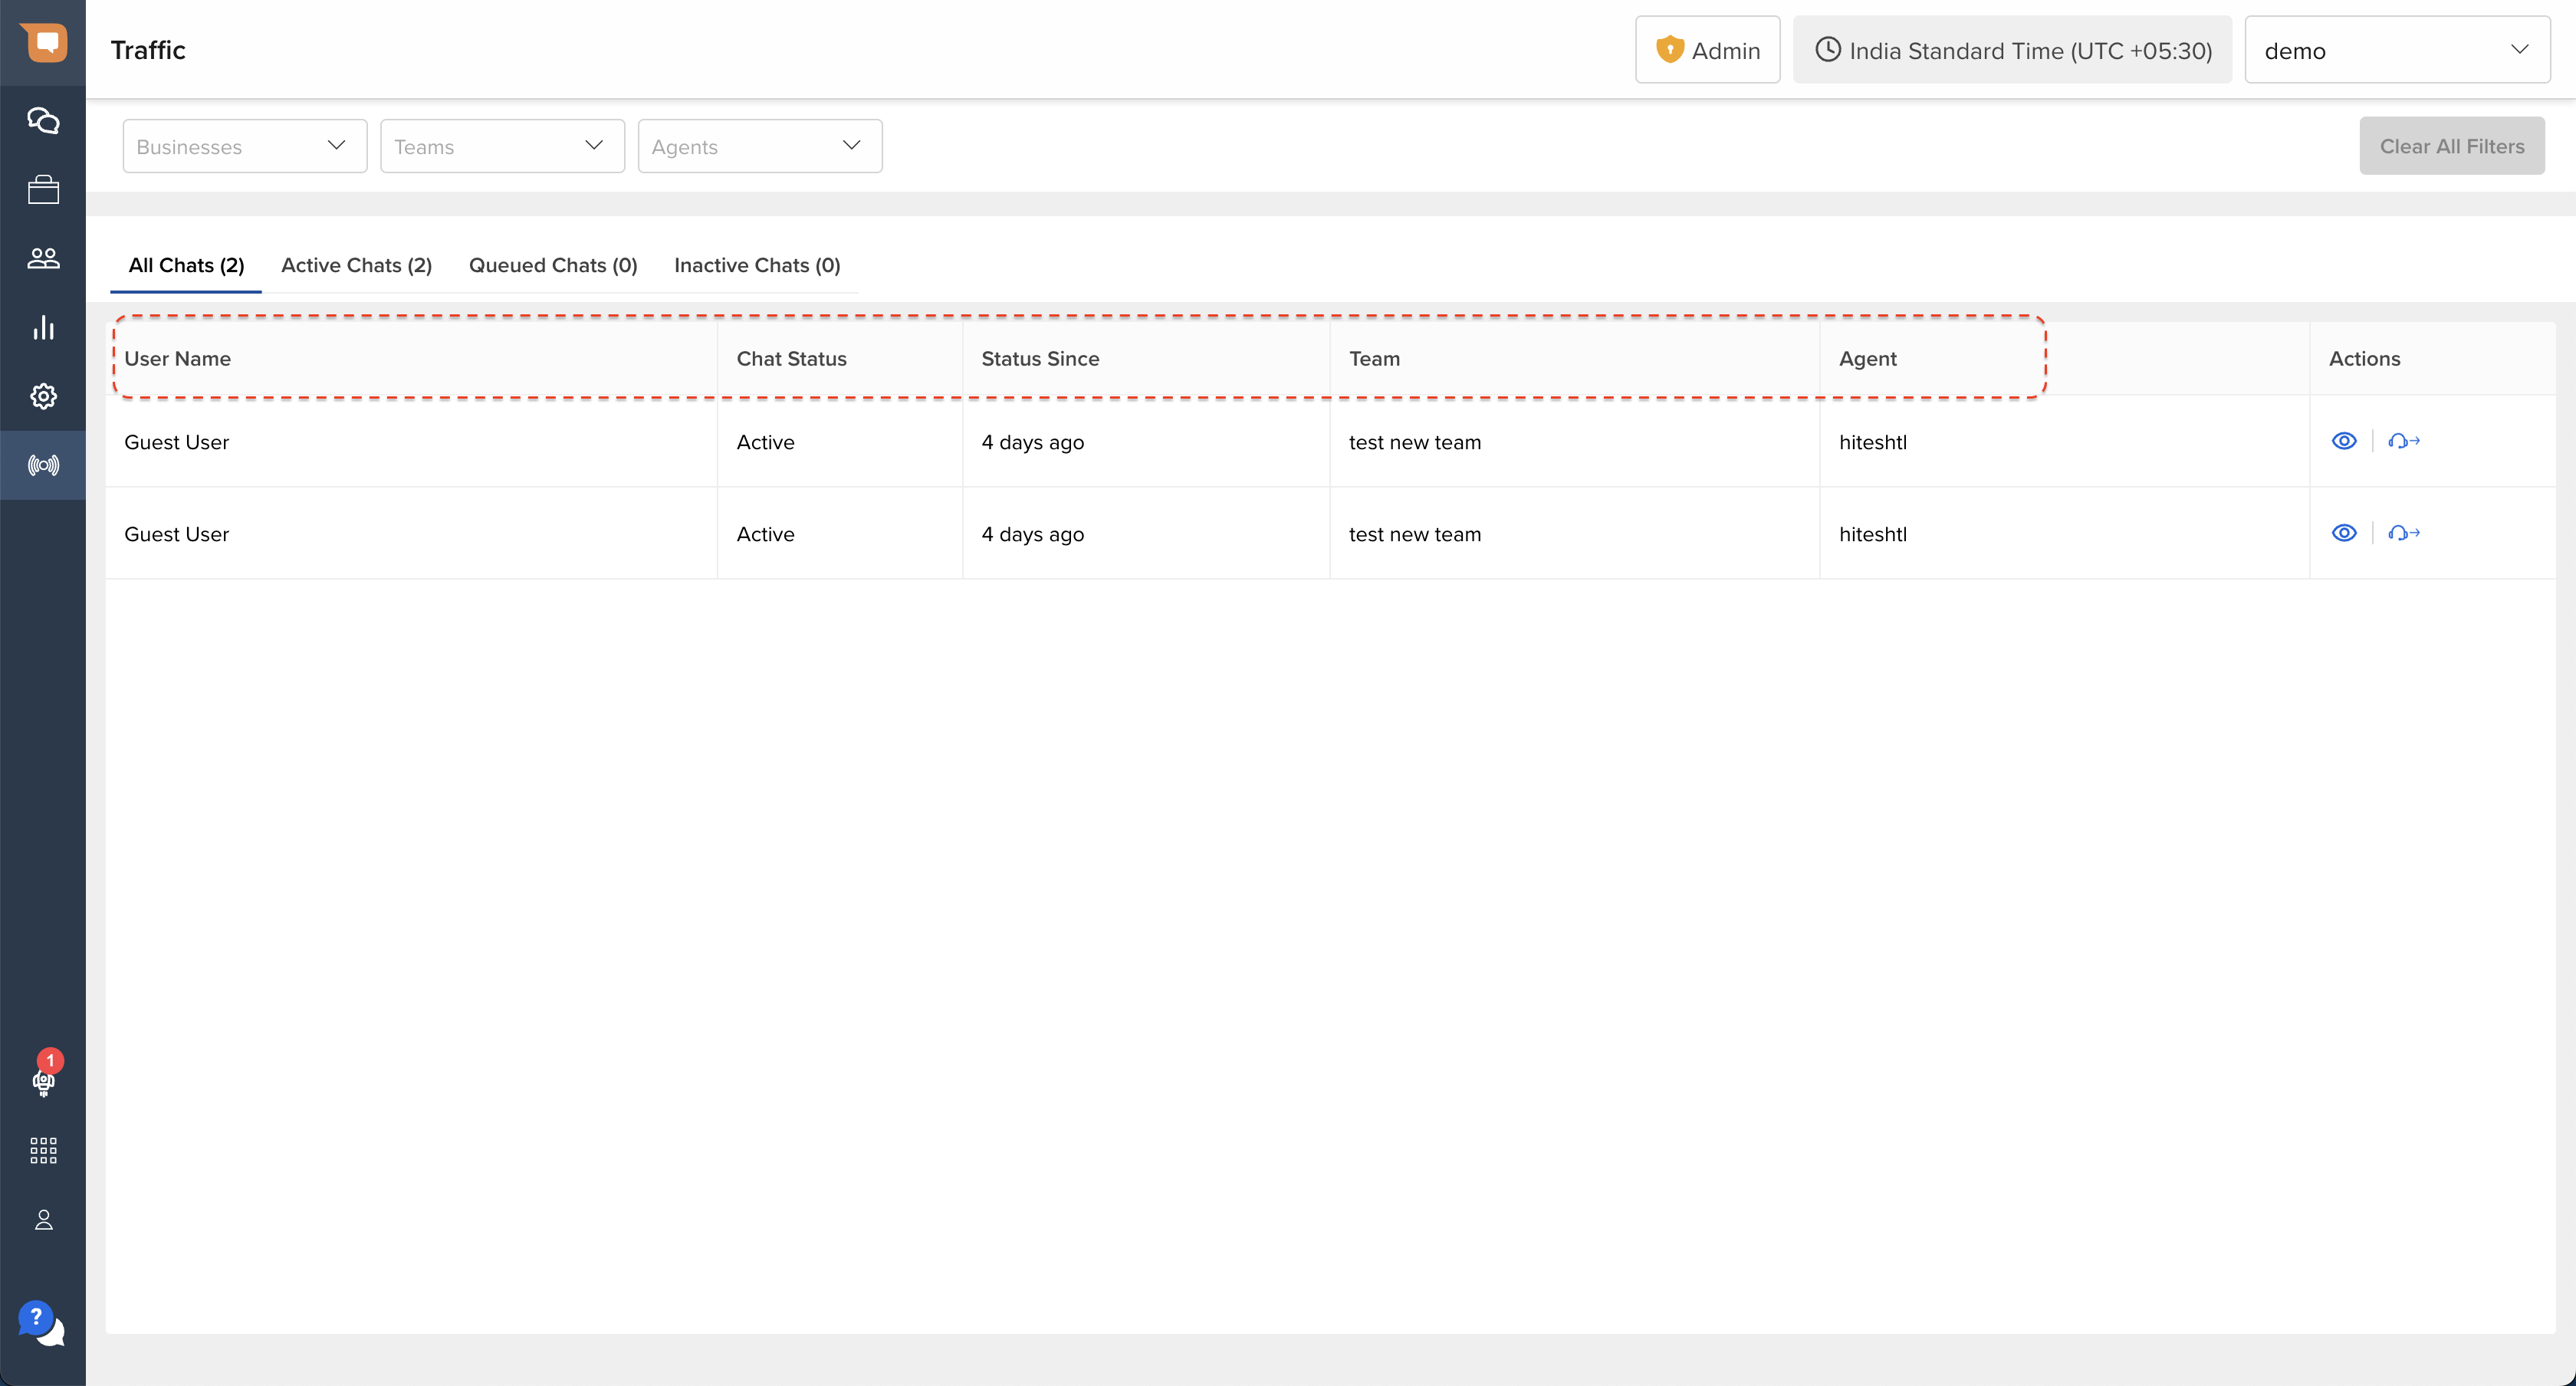
Below you can find what types of information you can find in the Traffic section:
- User Name: This displays either the name of the customer that has requested for a chat if the details are available by way of either an entity, or as part of user_details. If the name is not available, the system by default labels a customer as “Guest User”.
-
Chat Status: This column the status of a chat in real-time. The status of a chat can be either of:
- Queued - if the chat is waiting in a Team Queue or an Agent Queue
- Active - if the chat has been assigned to an Agent, and is visible in their MyChats inbox
- Inactive - if the chat has been assigned to the Inactive Queue ("Waiting for User") by an Agent
-
Status Since: This indicates how long the chat has been in its current status, in real-time.
- By default, chats are sorted from newest to oldest using this column
- You can use the column header to reverse the sorting from oldest to newest instead
- Team: This indicates the Team to which the chat has been assigned.
-
Agent: This indicates the Agent to which the chat has been assigned.
- If a chat is waiting in a Team Queue, and hasn't yet been assigned an Agent, this column remains empty.
- If a chat is waiting in an Agent Queue, this column displays the name of the relevant Agent.
Setting filters
At the top of your Traffic section you can find filters. Use them to find and target a very specific group of users or chats.
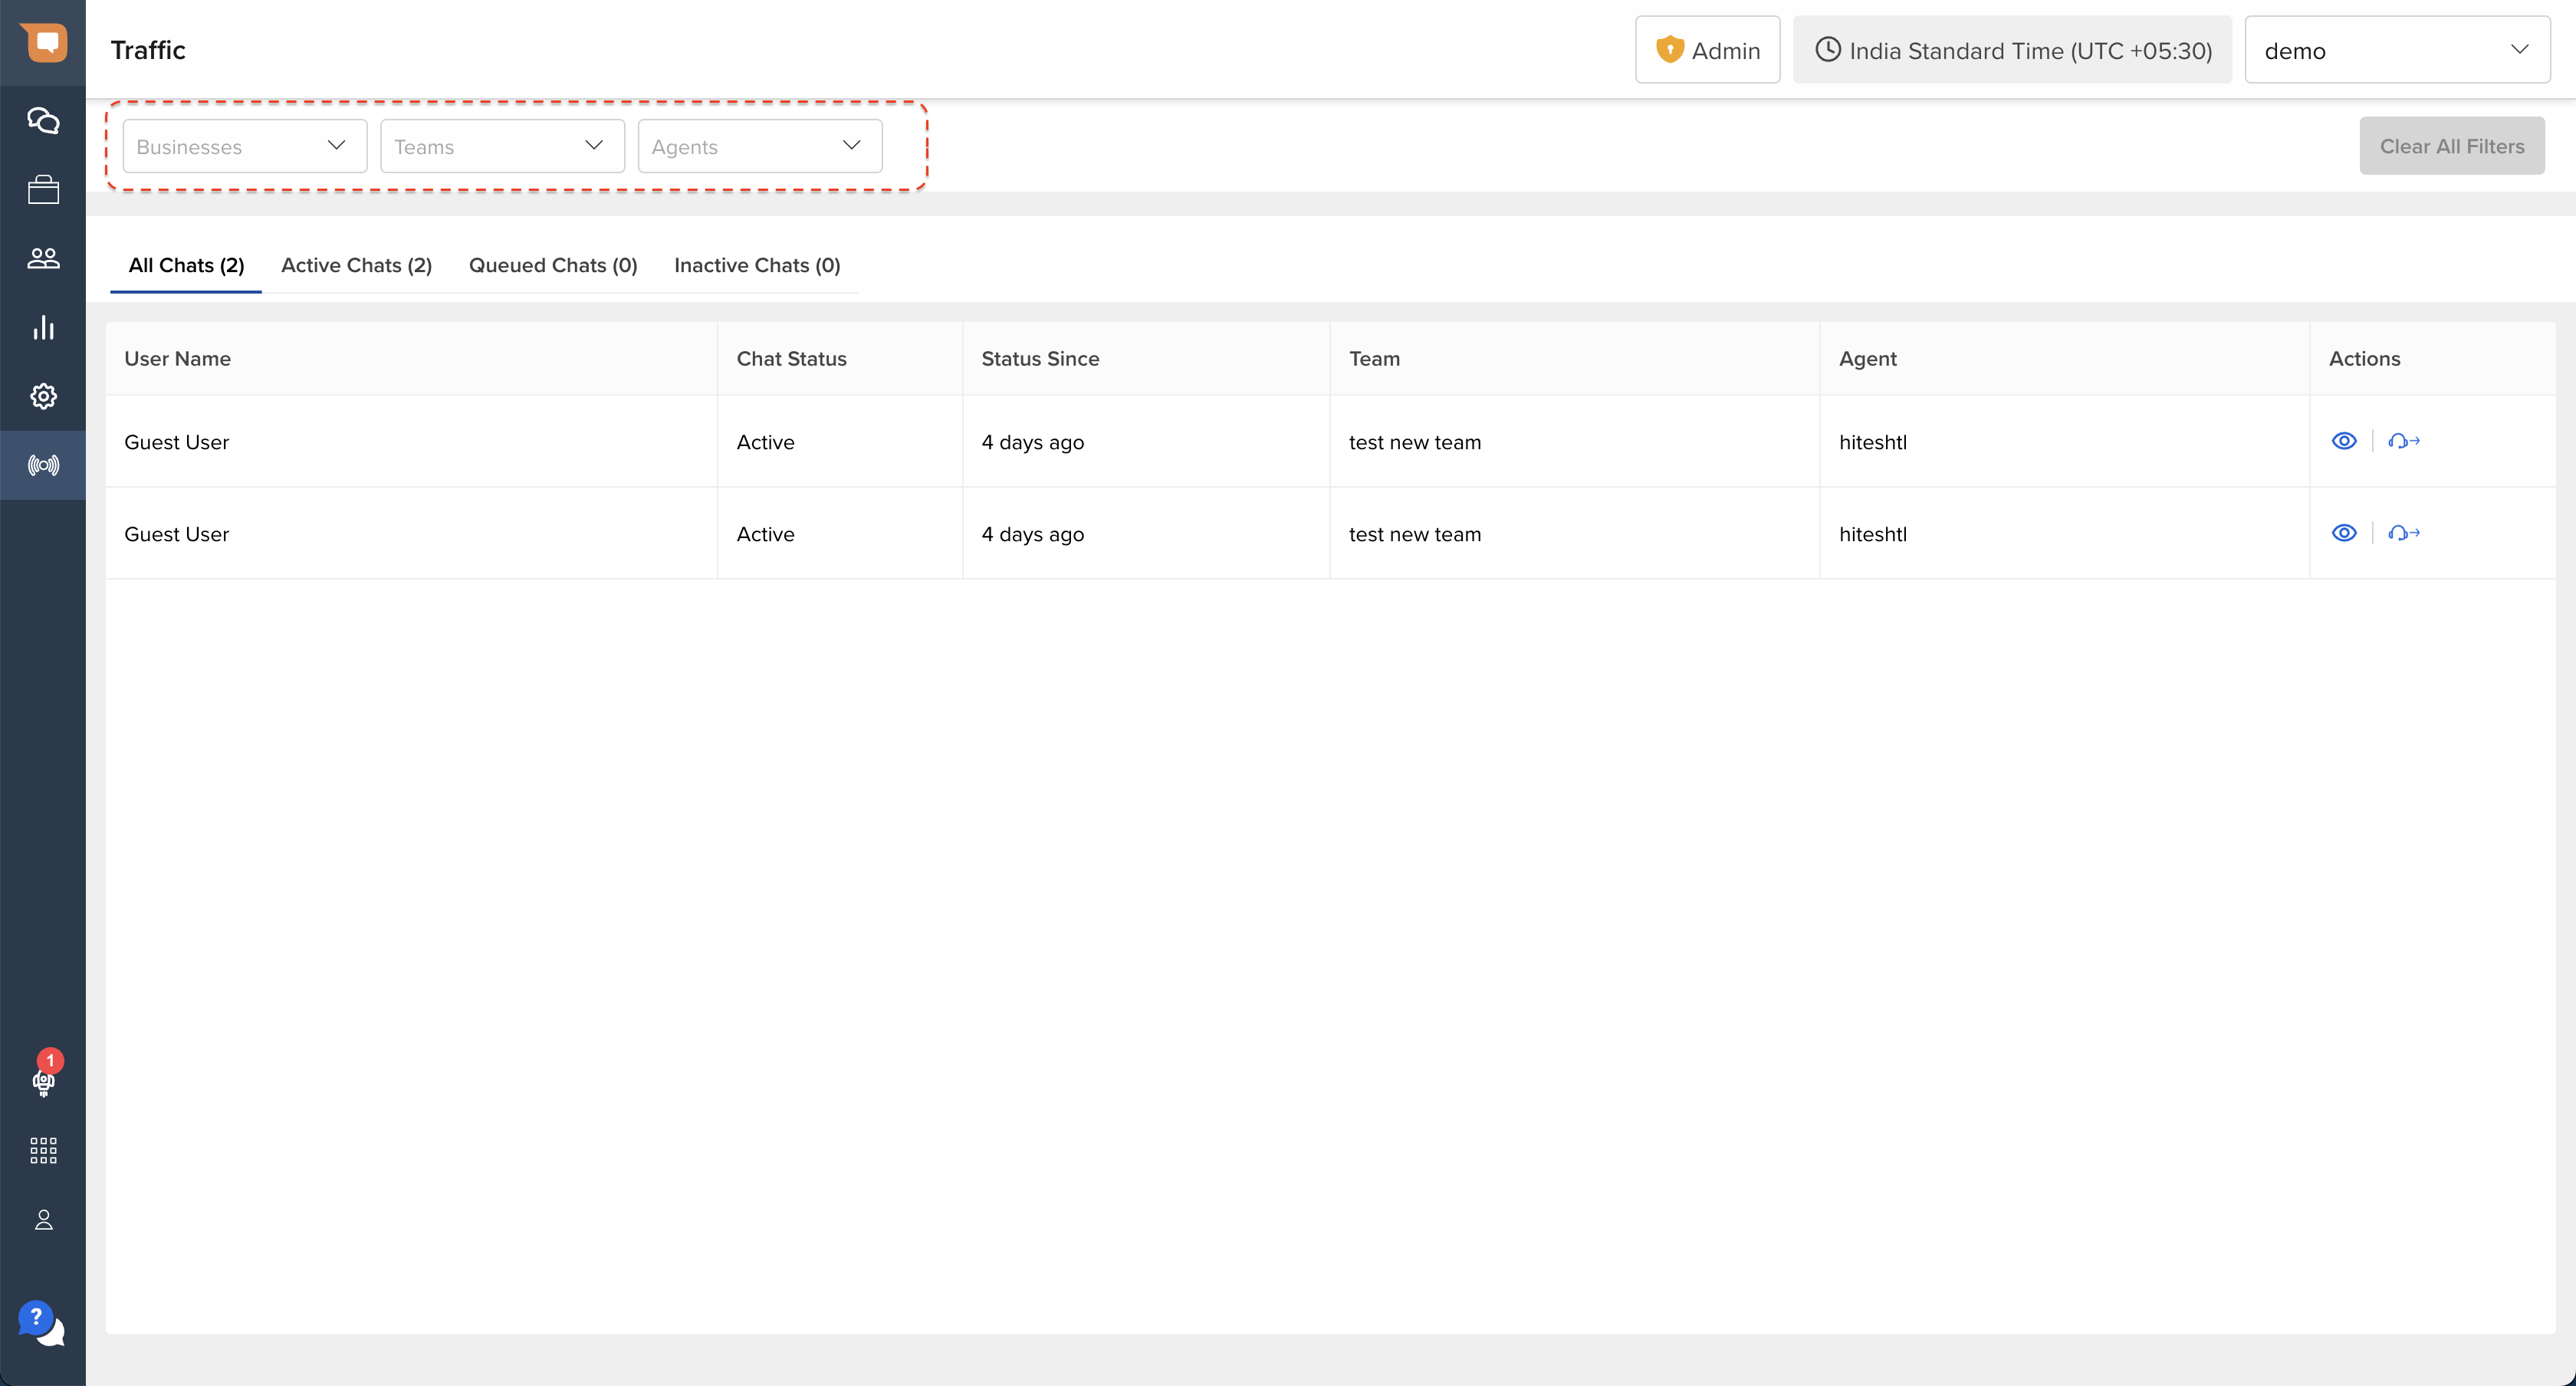
We currently support the following filters:
- Business: This indicates the “Business” or the chatbot from which the chat has been handed over.
- Team: This indicates the agent Team to which the chat has been assigned to.
- Agent: This indicates the Agent to which the chat has been assigned to (where applicable).
Note on Filtered Views
Applying filters will also restrict visibility of new or ongoing chats to only ones within the filters. To ensure that you're able to view all updates for incoming & ongoing chats, ensure that you clear all active filters first.
Queue Segments
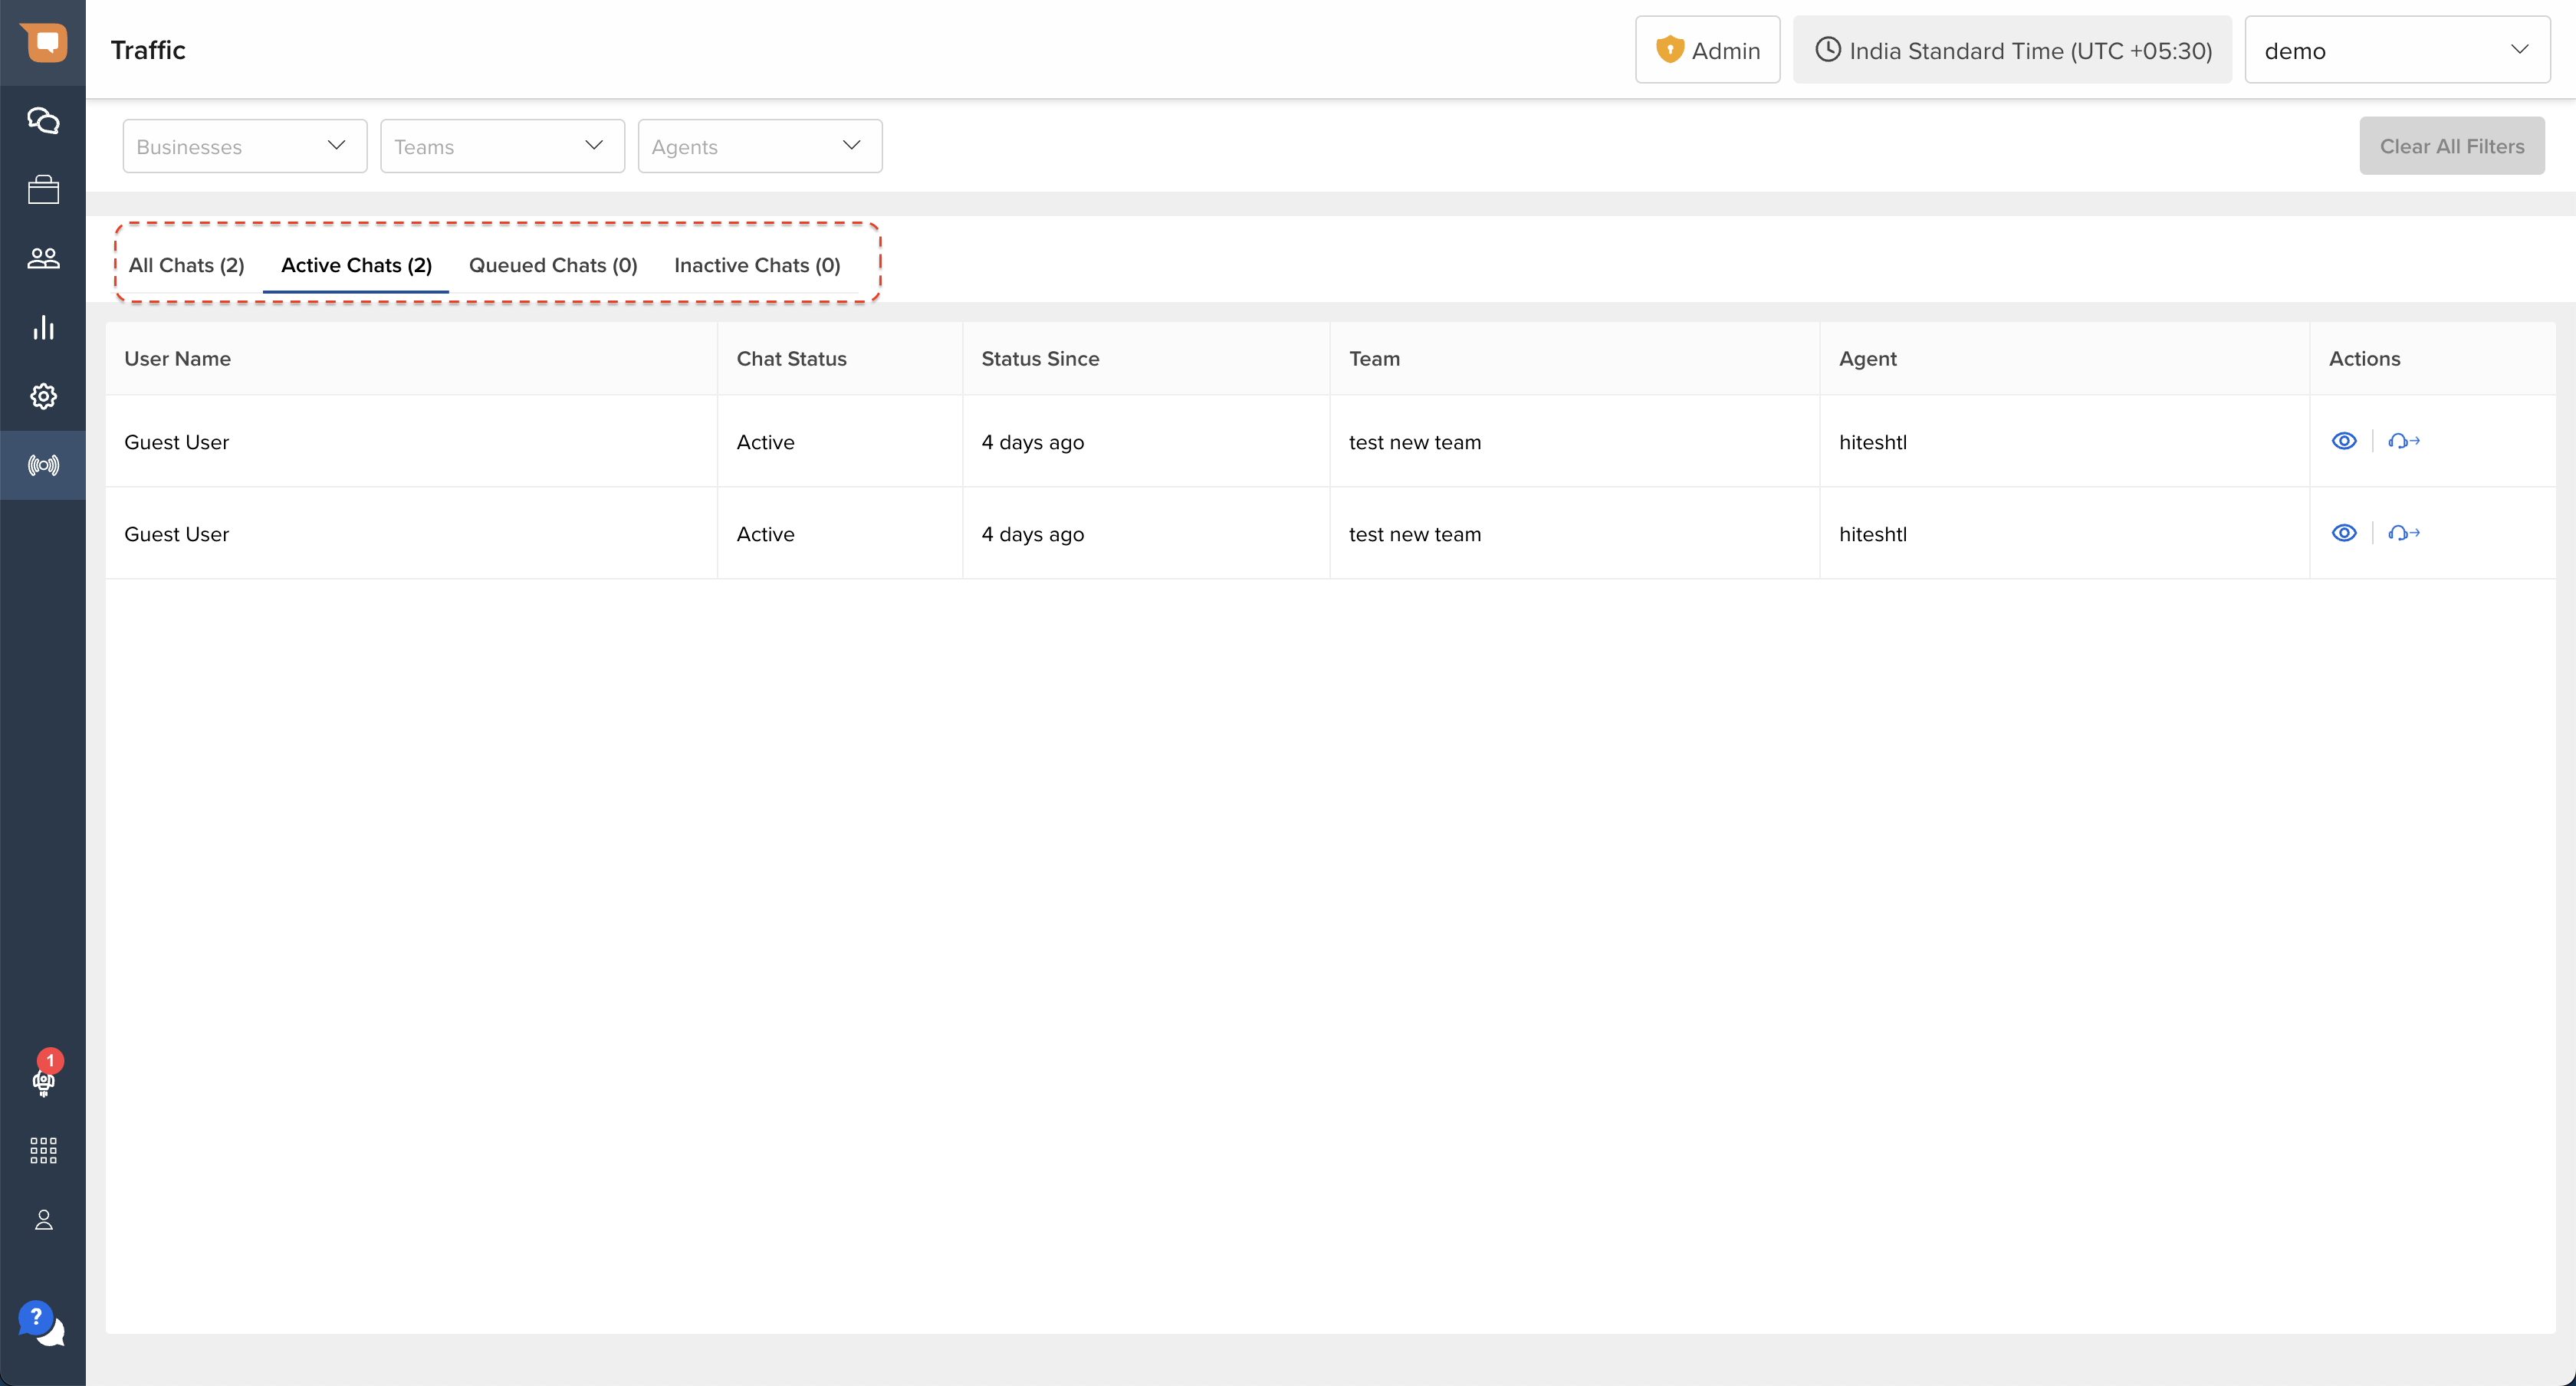
With so many ongoing chats, it would be really painful to set up the filters over and over again every time you log in to SAC. This is why we have created segments. Segments are preset filters for chats in different queue states that you can access quickly while supervising chats in real-time.
- All - This segment includes all chats in different queue states across all Teams and Agents.
- Active - Chats that have been assigned to an Agent, and is visible in their MyChats inbox.
- Queued - Chats that are waiting in a Team Queue or an Agent Queue
- Inactive - Chats that have been marked as “Waiting for User” by an Agent, and are in the Inactive Queue.
Initiating Chat Actions
The Traffic page can be used by Team Leads and Admins to conveniently check how your agents are doing, and to intervene in cases where agents are stuck, or customers request for an escalation. This can be done by initiation an 'Action' with respect to a chat from the Traffic Screen, as shown below.
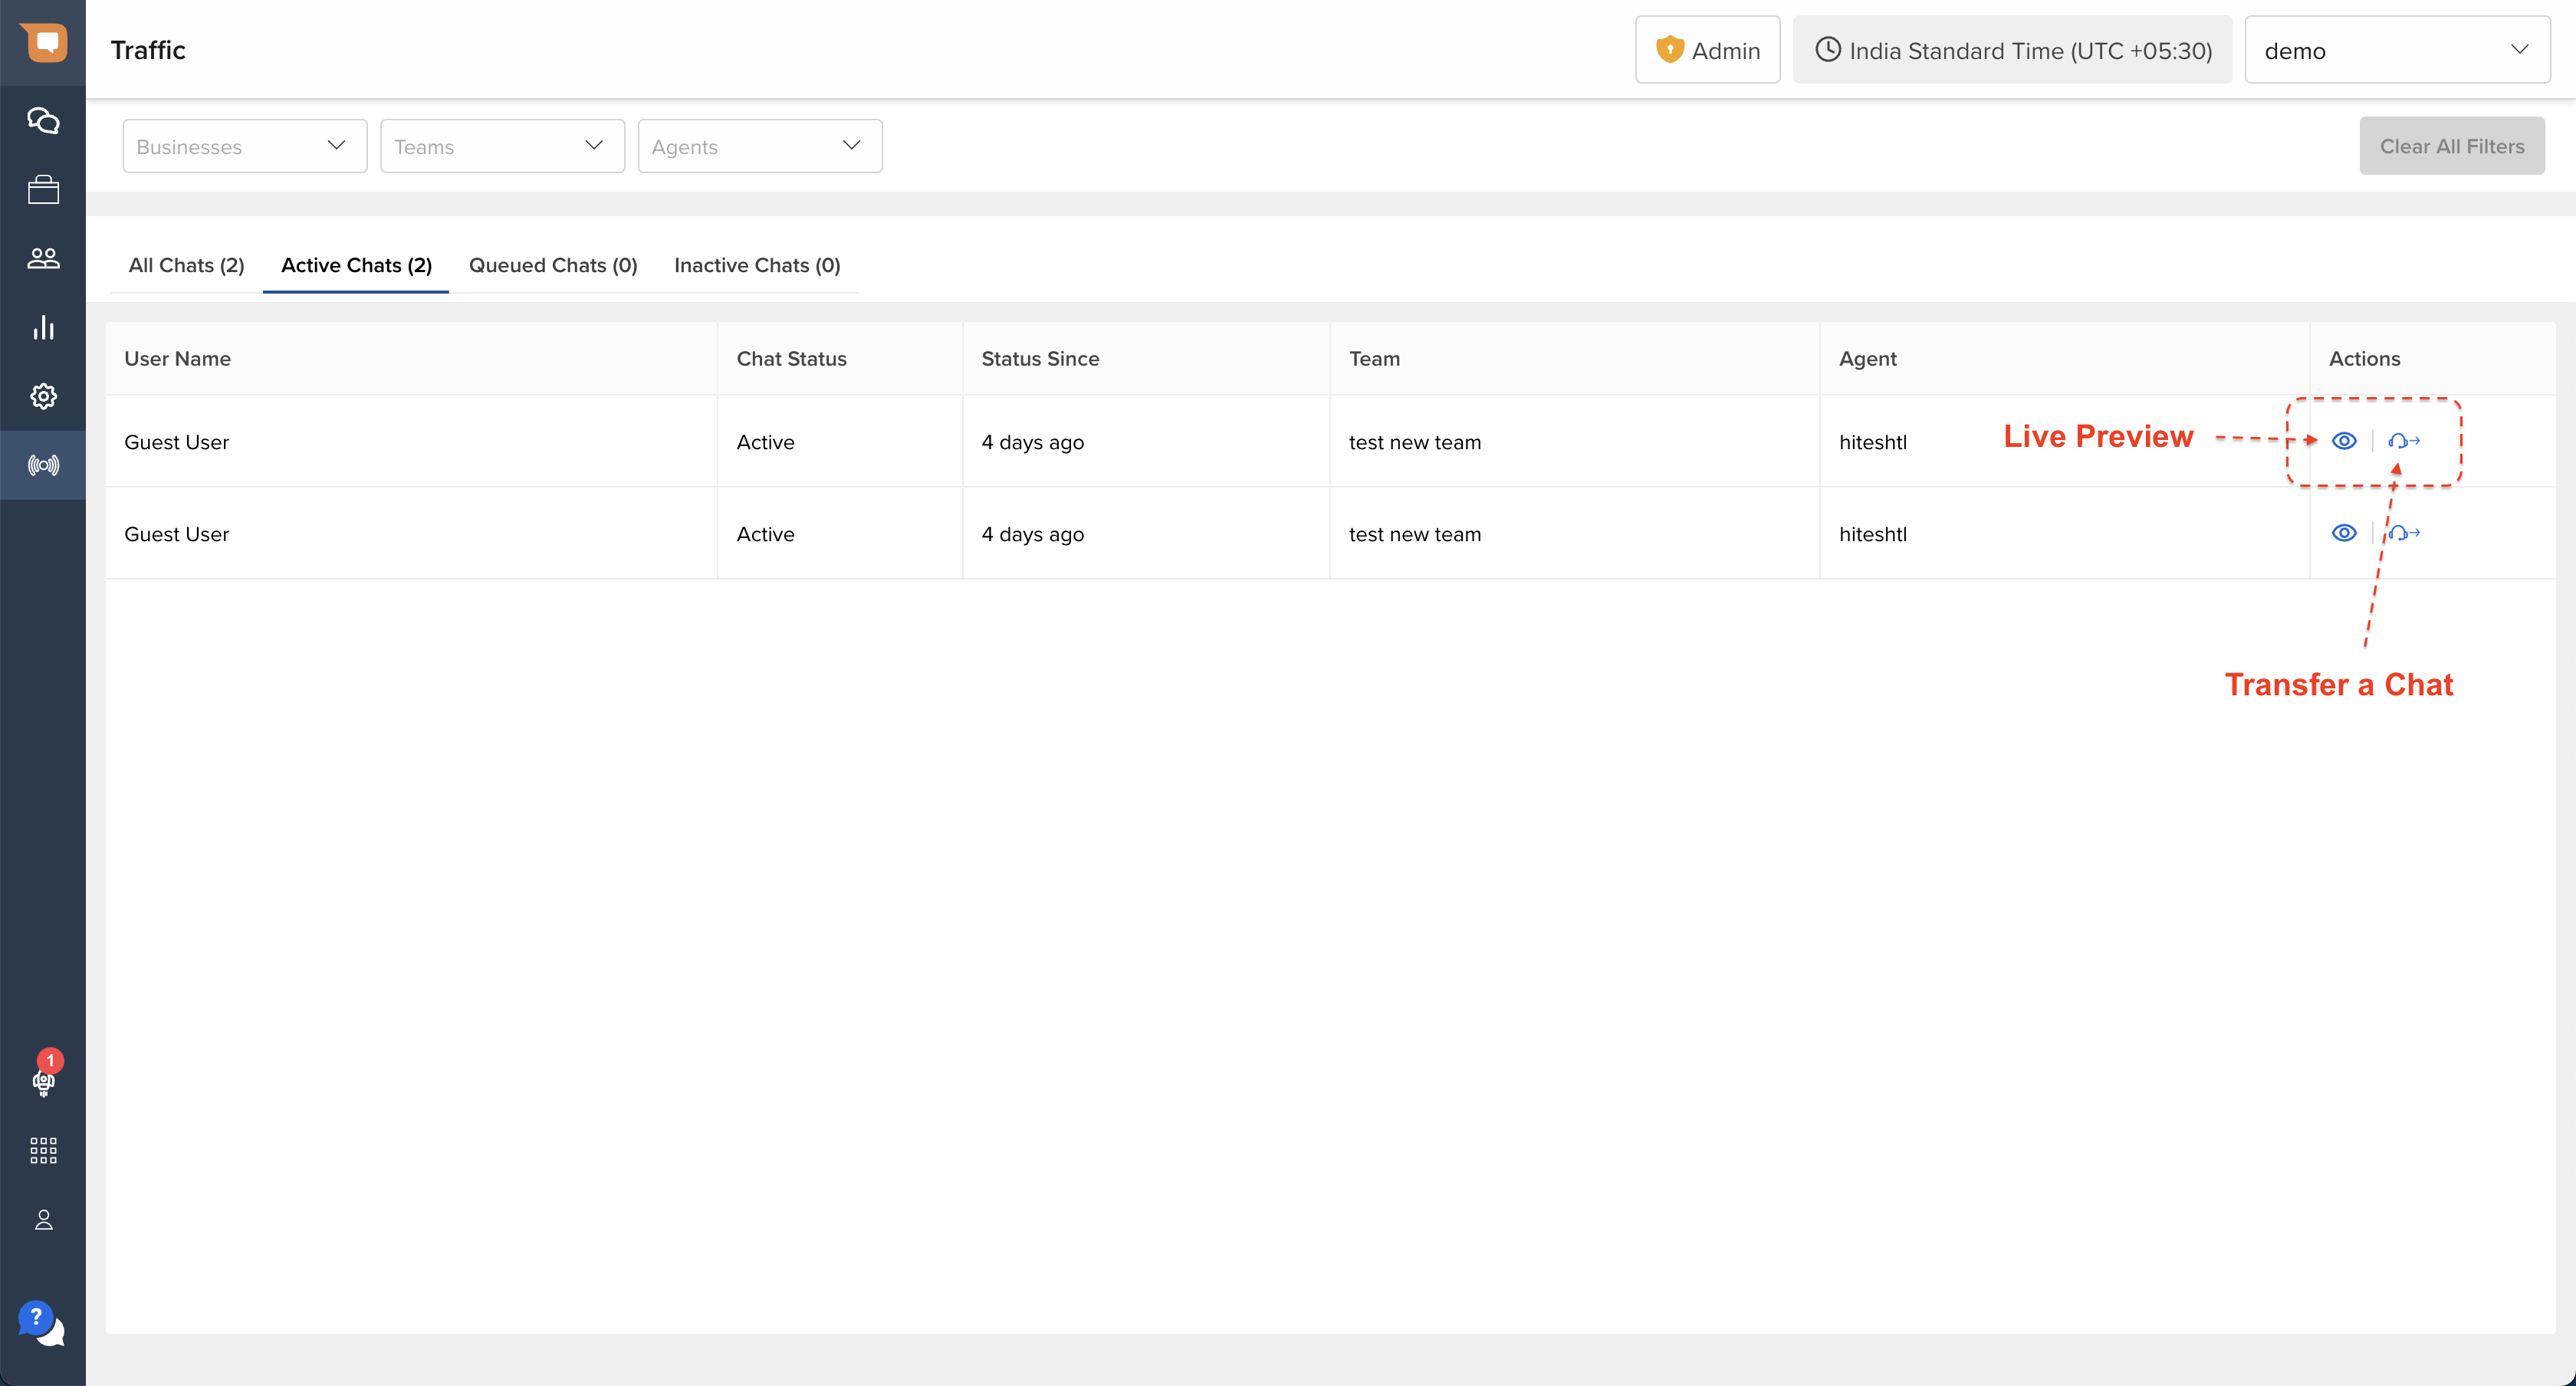
Live Preview of ongoing Chats
Click on the Live Preview Chat icon in the Actions column to start monitoring a chat in real-time, as shown below.
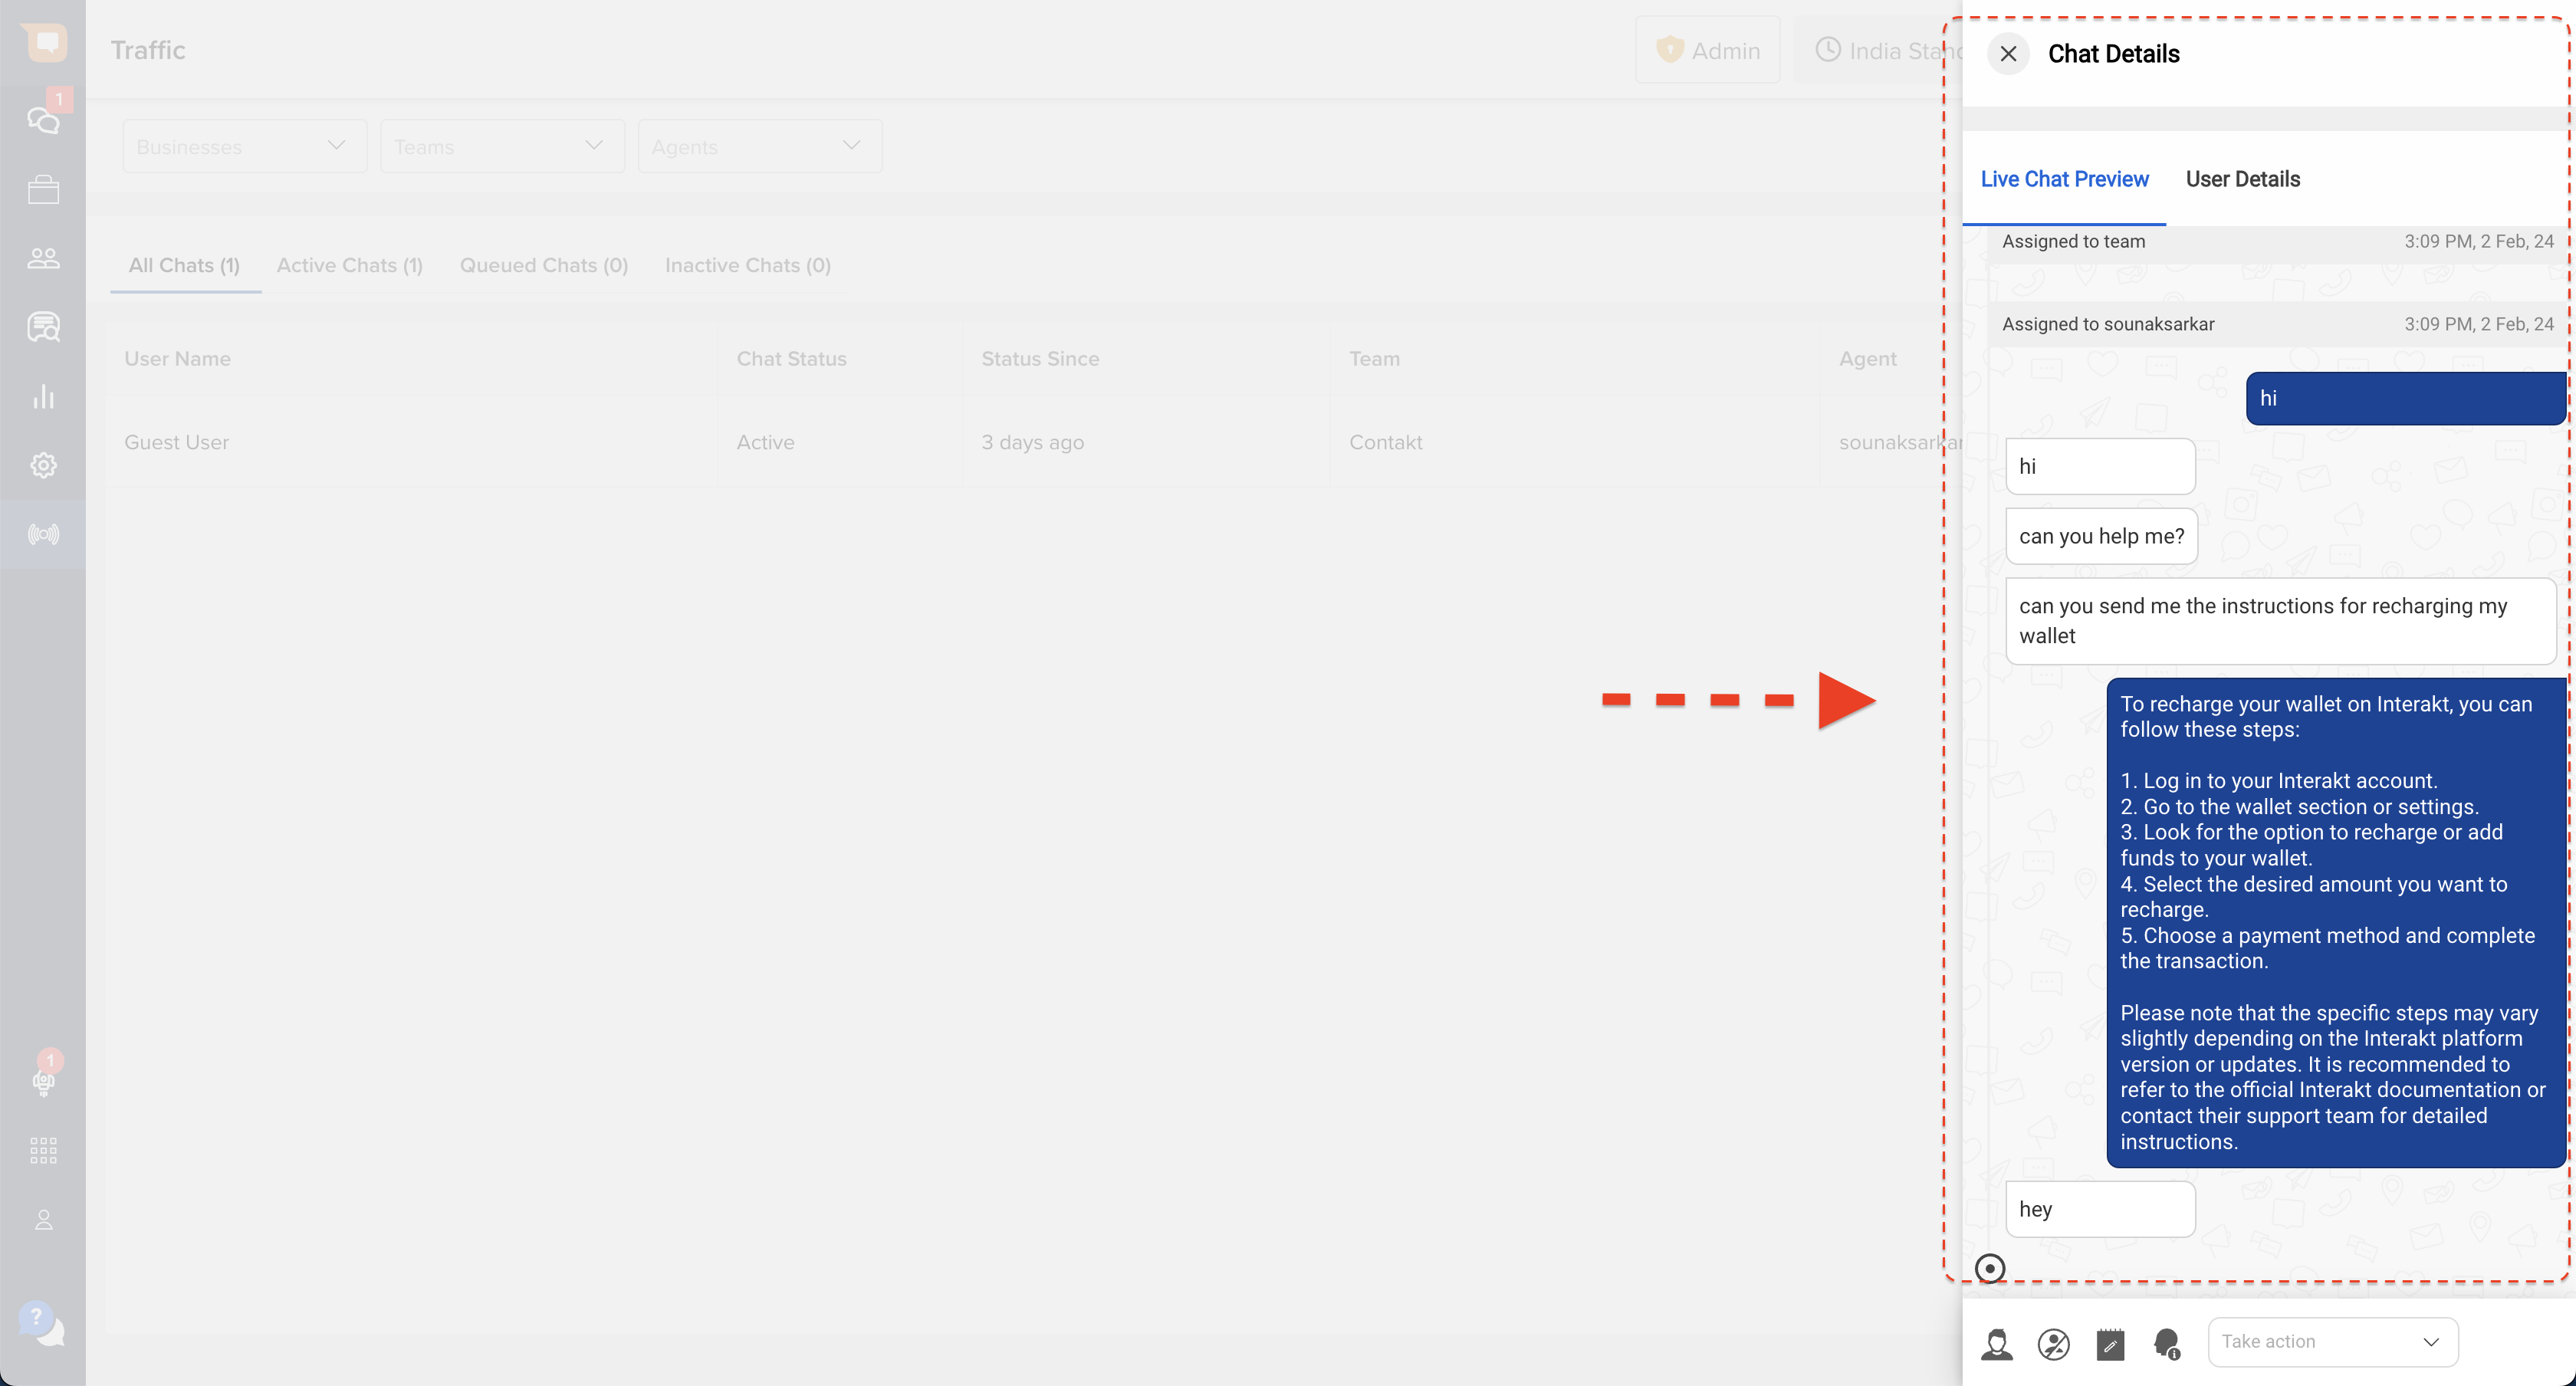
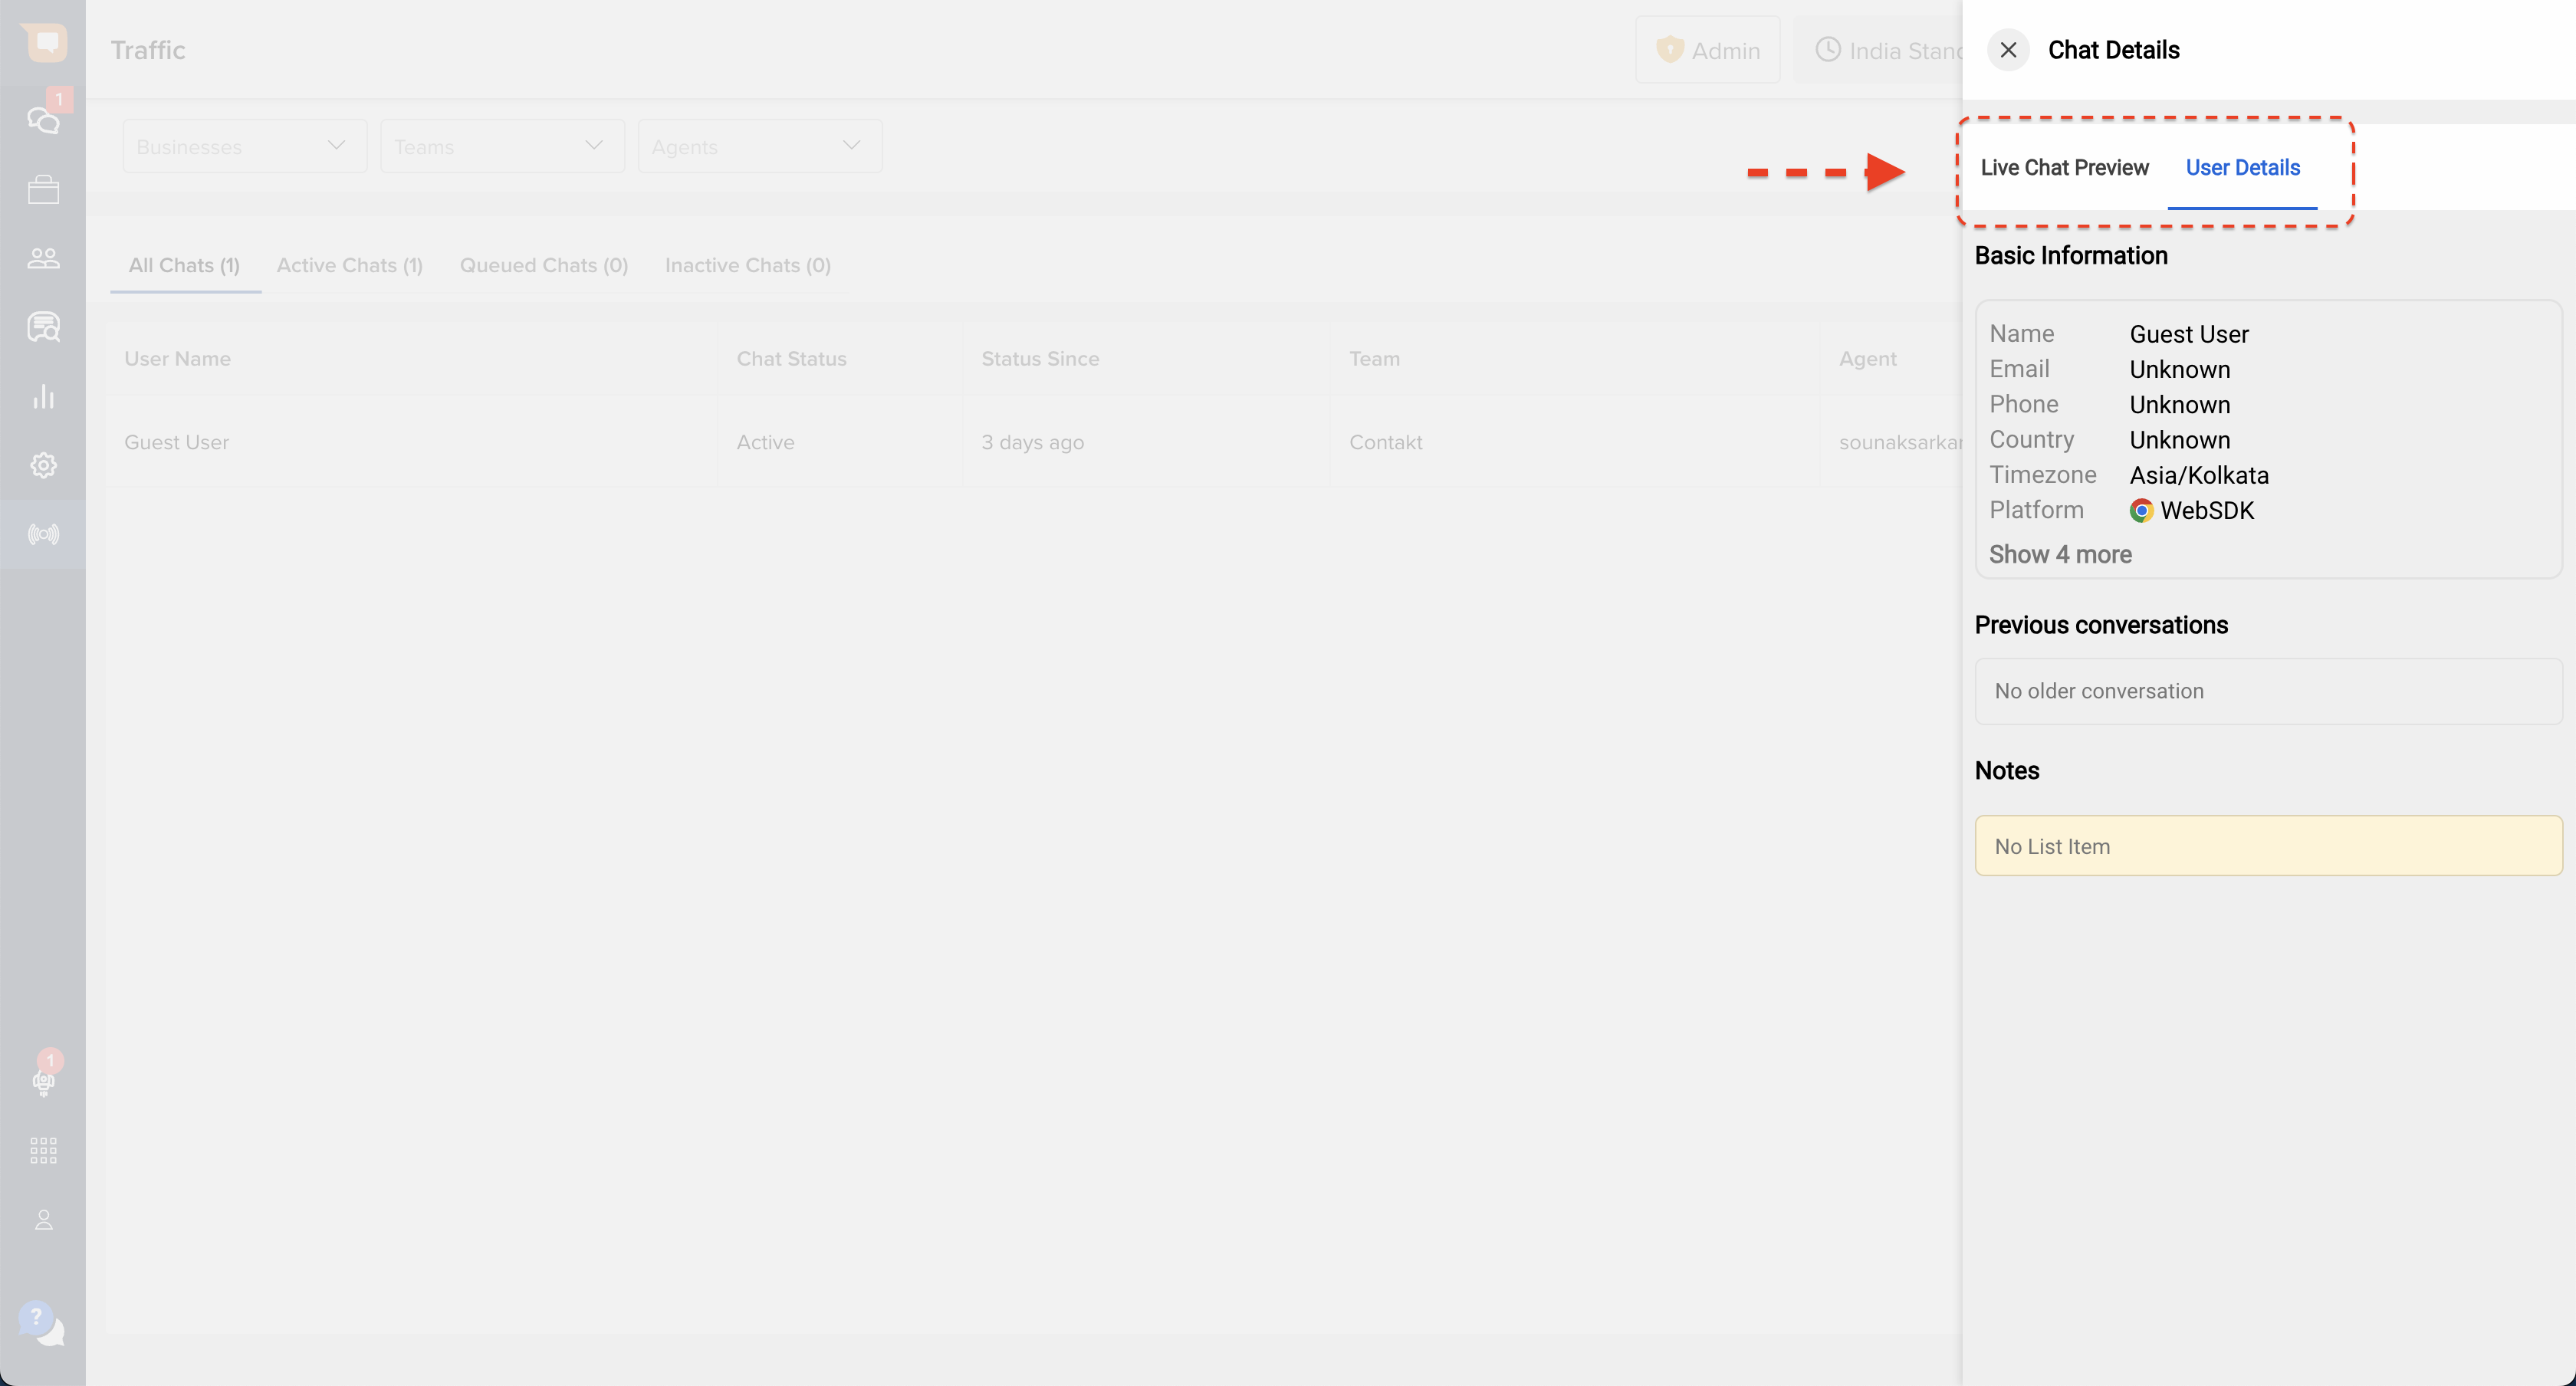
Once the live preview pane opens on the right, you can use the navigation tabs on the top of the window to switch between the chat preview, and the User Details tab which contains all available details about the customer, that are also visible to the Agent handling the chat.
From here, you can either continue monitoring the chat, or take one of the following actions, as necessary, using the action buttons present at the bottom of the Live Chat Preview tab.
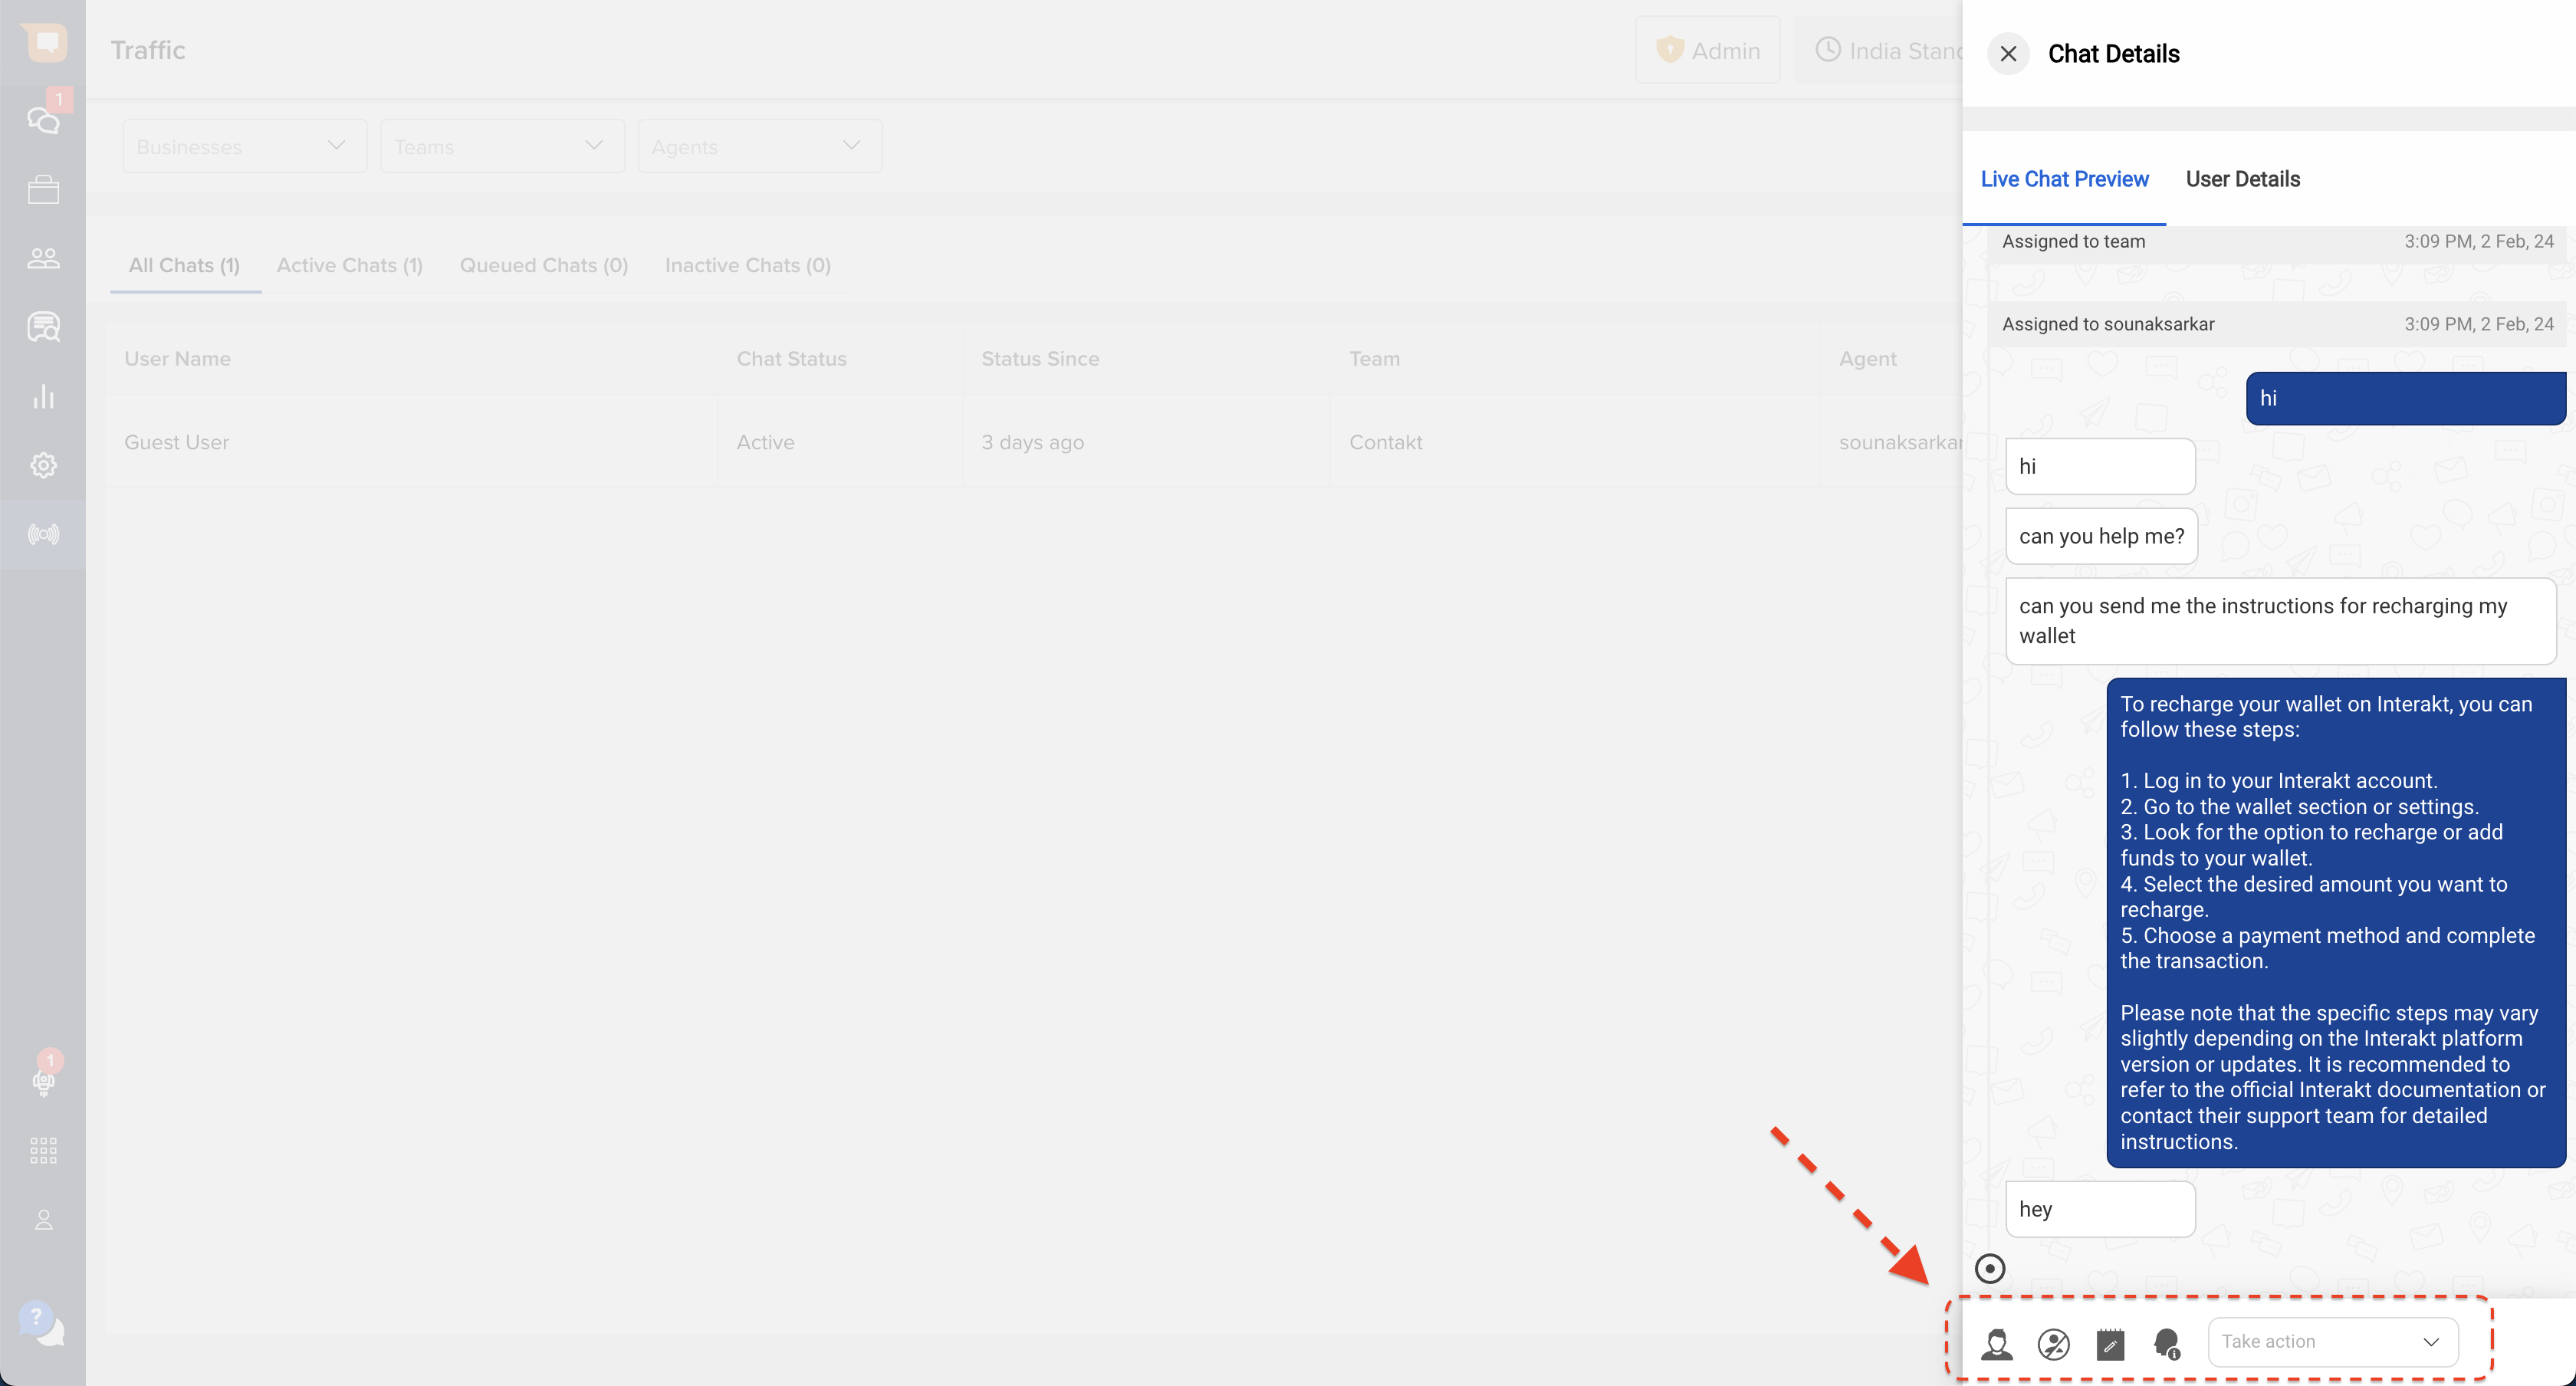
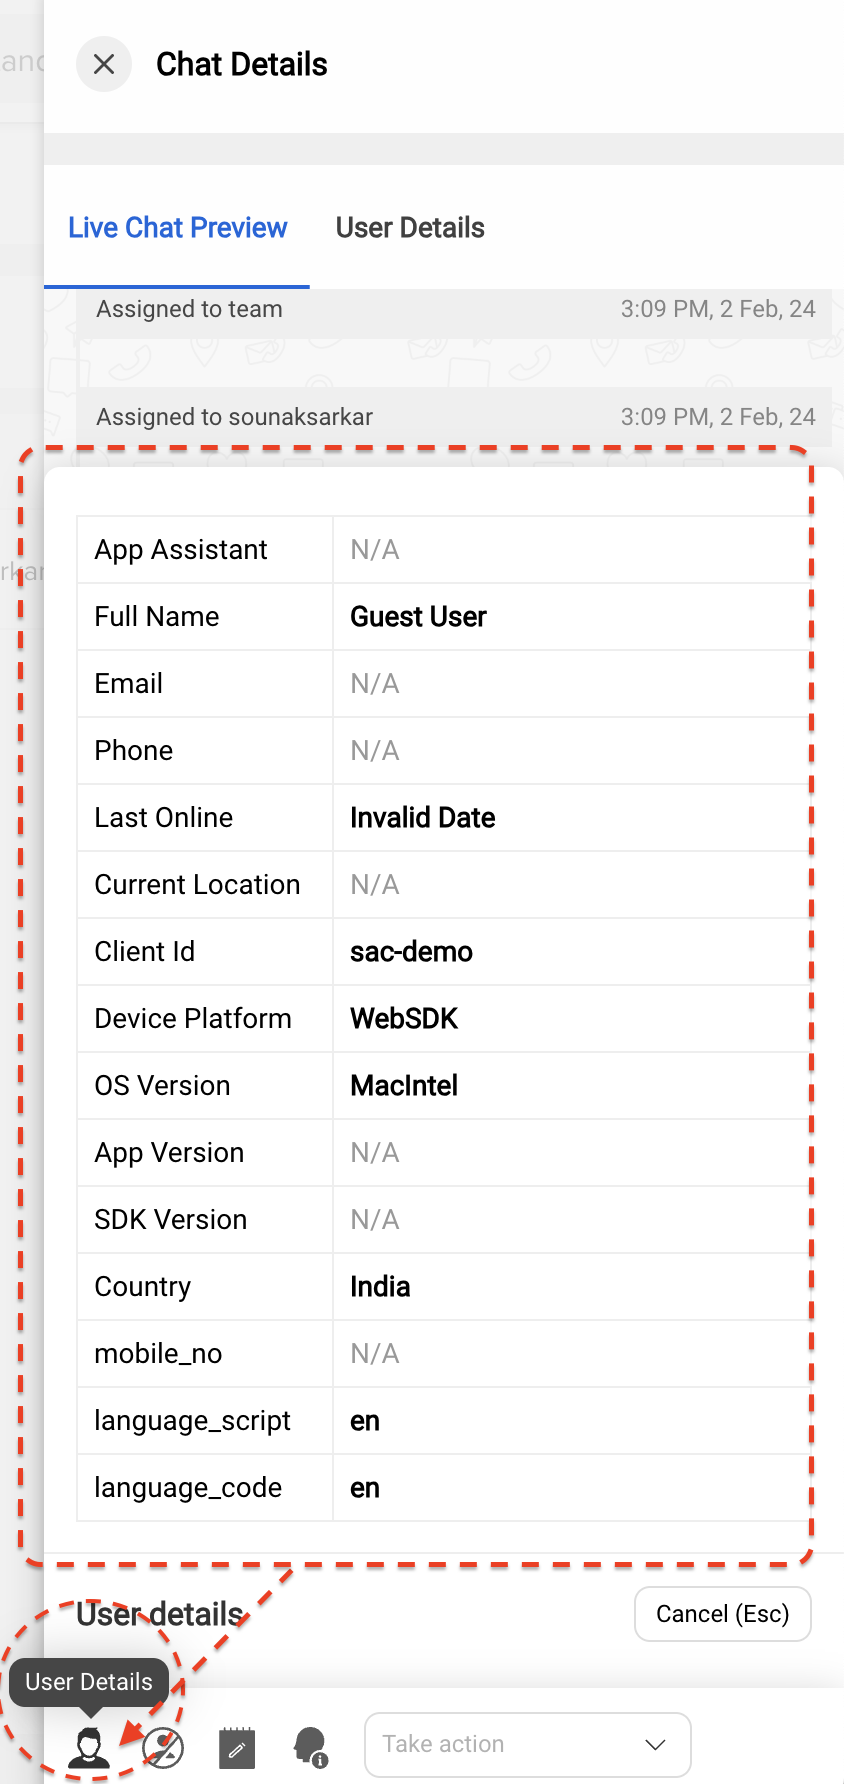
View User Details
You can view the User Details which agents are able to see in the User Details section, on the right-hand side of the screen.
Report a User as Inappropriate
TLs can mark a user as inappropriate, and block him/her by clicking on the “Report Inappropriate” icon:
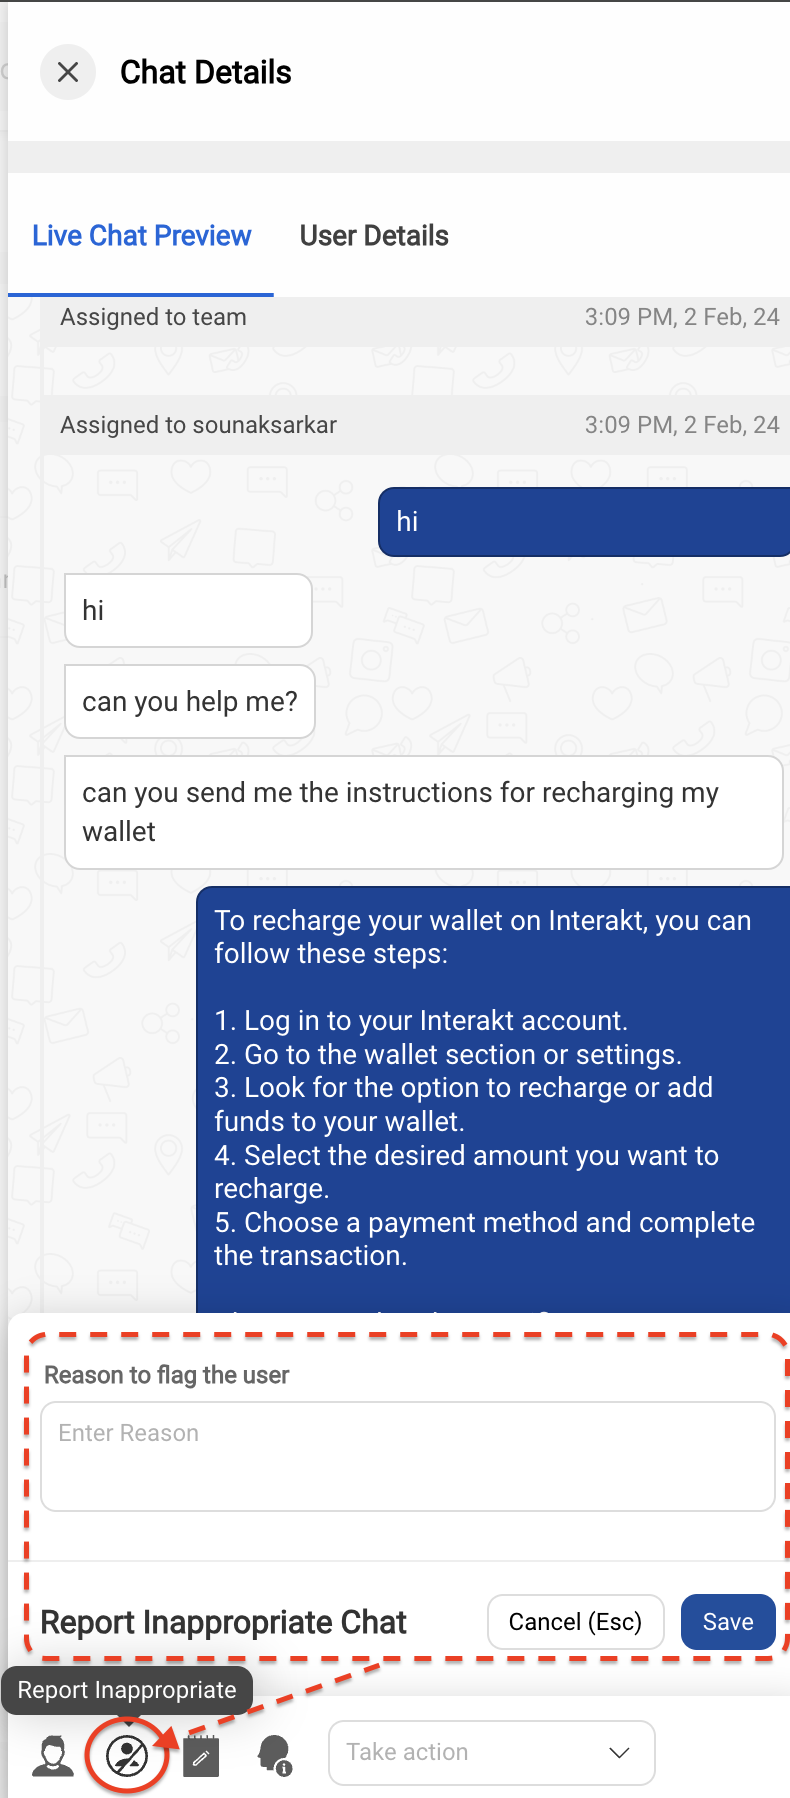
It is not an IP based blocking. In a non-logged in scenario, the user will be different every time and therefore, the blocking won’t really apply.
We register/log a user is marked as inappropriate once every 2 hours per user. If the inappropriate count for a user is greater than 3, we send a blocked message to the user as shown below:
Hi <User Name>, this is a system generated message to inform you that your access to this chat service has been permanently disabled. You will not be able to use this chat service any more as you have been flagged multiple times for inappropriate messages sent to our Human assistants.
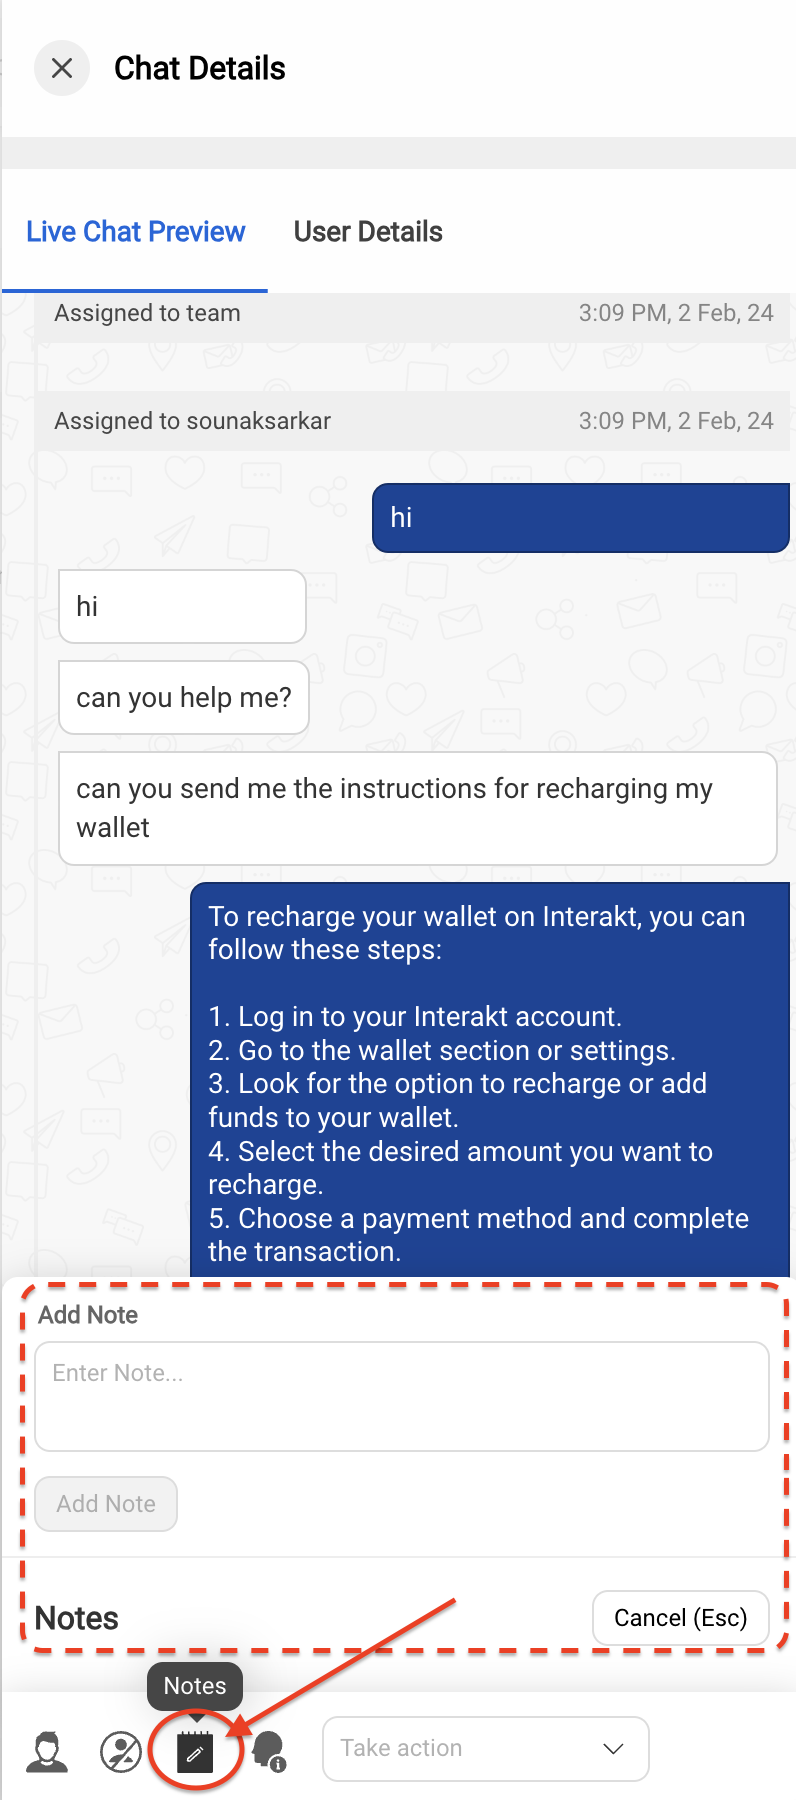
Add Notes
Notes section is used to save any information related to the chat, that an Agent wants to record and share for the reference of other Agents for that particular user. An Agent can add any number of Notes during a chat.
For returning Users who are continuing a conversation from the past, these details can help Agents who have been newly assigned to obtain relevant contextual information quickly, and solve customer issues effectively.
User Info Link
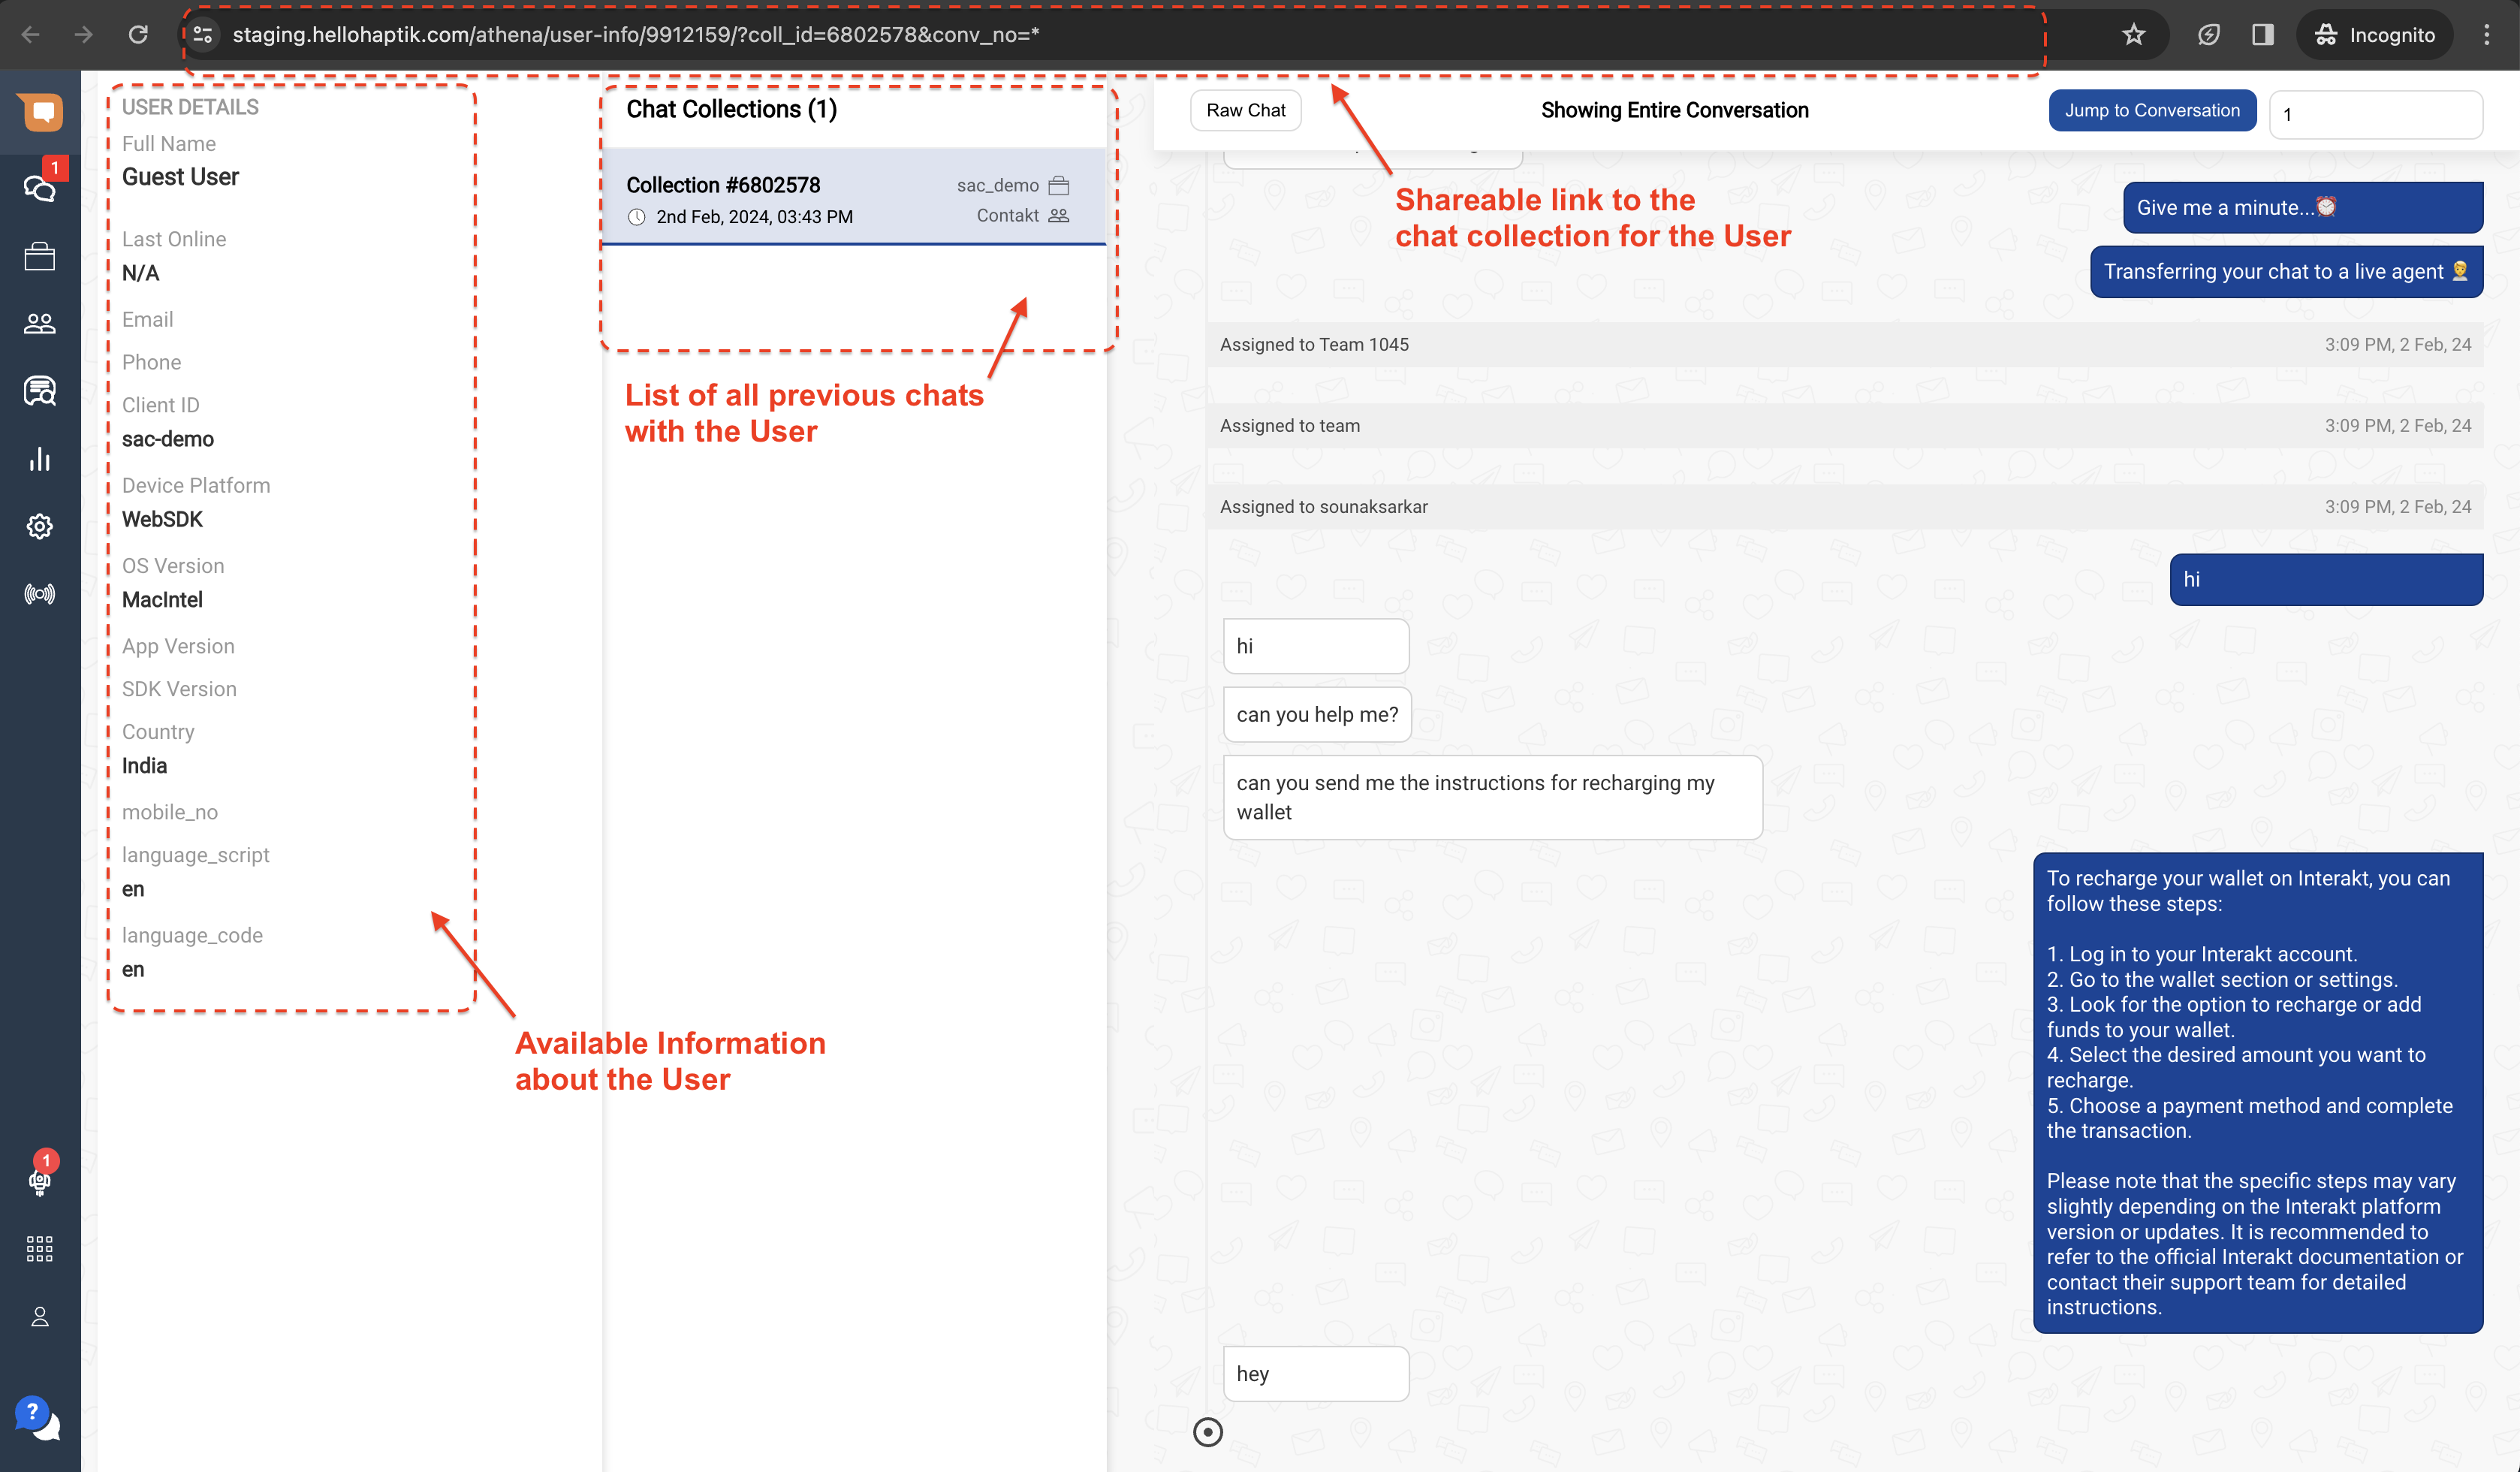
The User Information link is a shareable URL to a screen that contains available information about a specific User, along with a quick view of all past chats with that User.
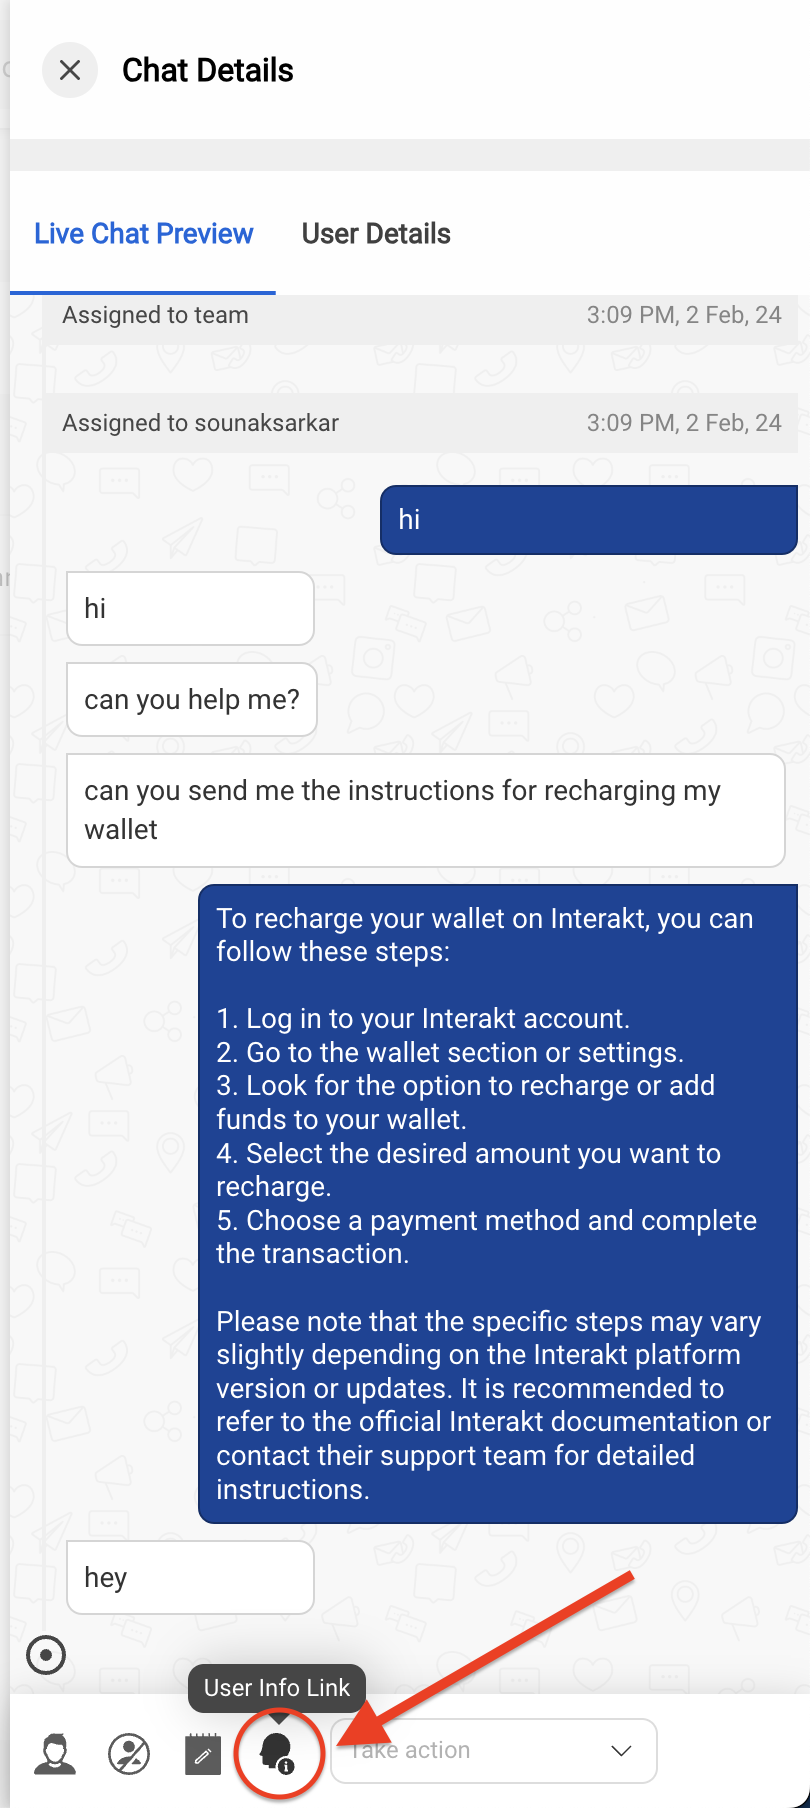
Once you click on this button, you will be redirected to a new screen with the chat collection view, as shown below. The URL for this screen can be used as a shareable chat link for the purpose of sharing with either users or other Agents.
Take an Action
Depending on which state the chat is in, you can take different actions for a particular chat.
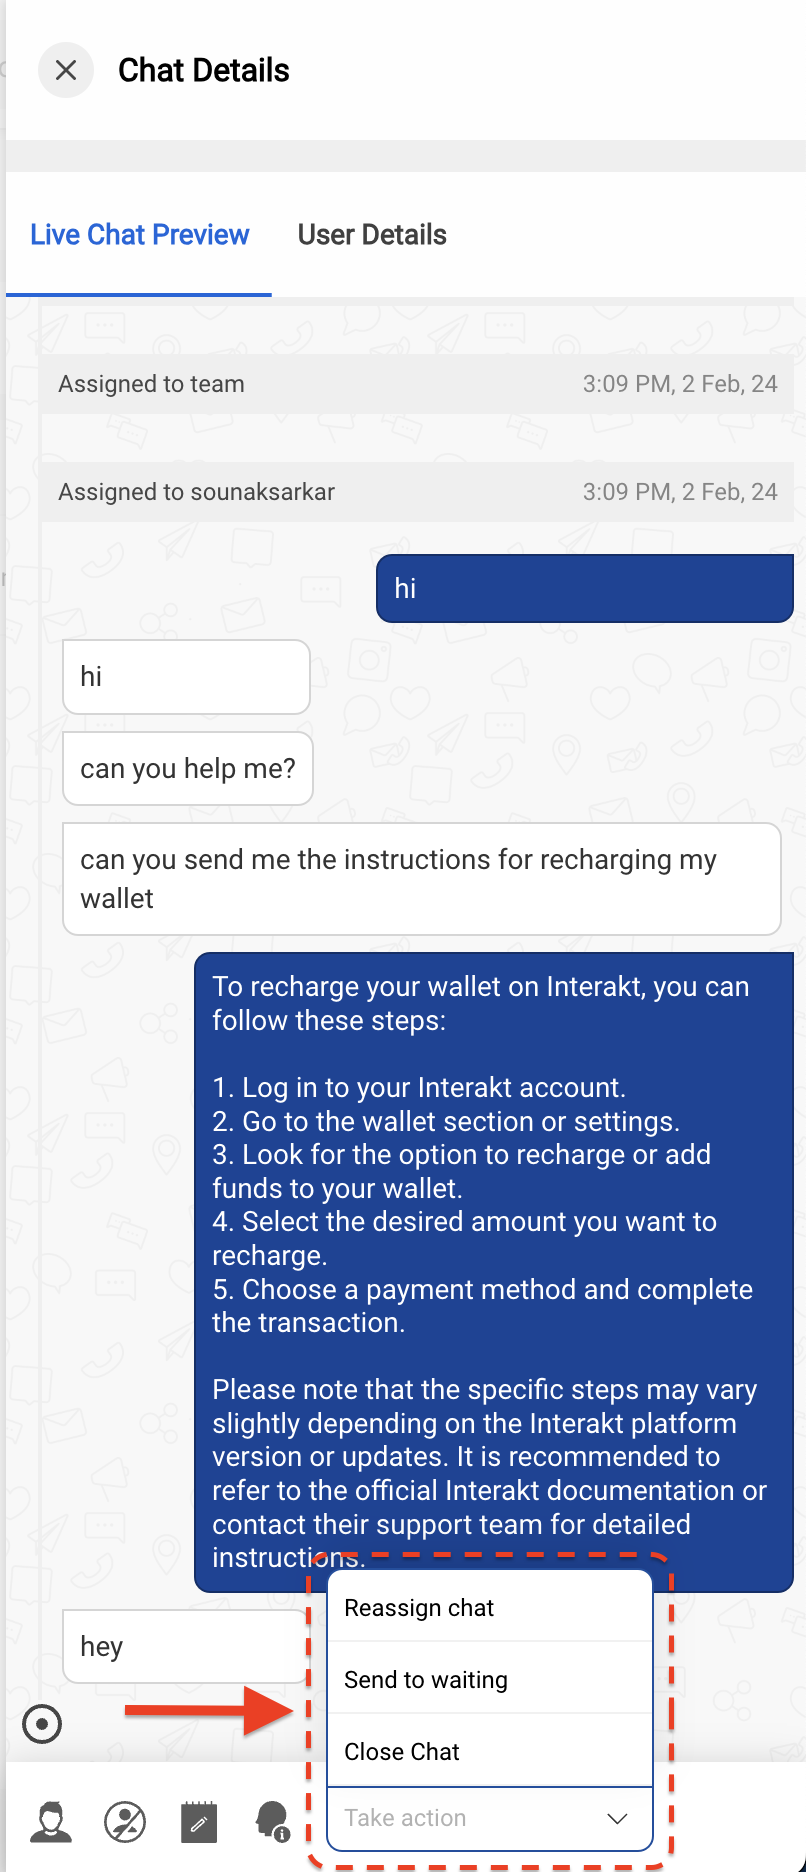
If the chat is in Queued or Active state, you can choose to either -
- Reassign the chat - You can reassign the chat to yourself, a specific agent, or a specific Team.
- Send the chat to waiting - This will send the chat to the “Waiting of User” (Inactive) state. If the user does not reply back within 8 mins, then the chat will be auto-completed.
- Close the chat - This will close the chat and mark the chat as complete.
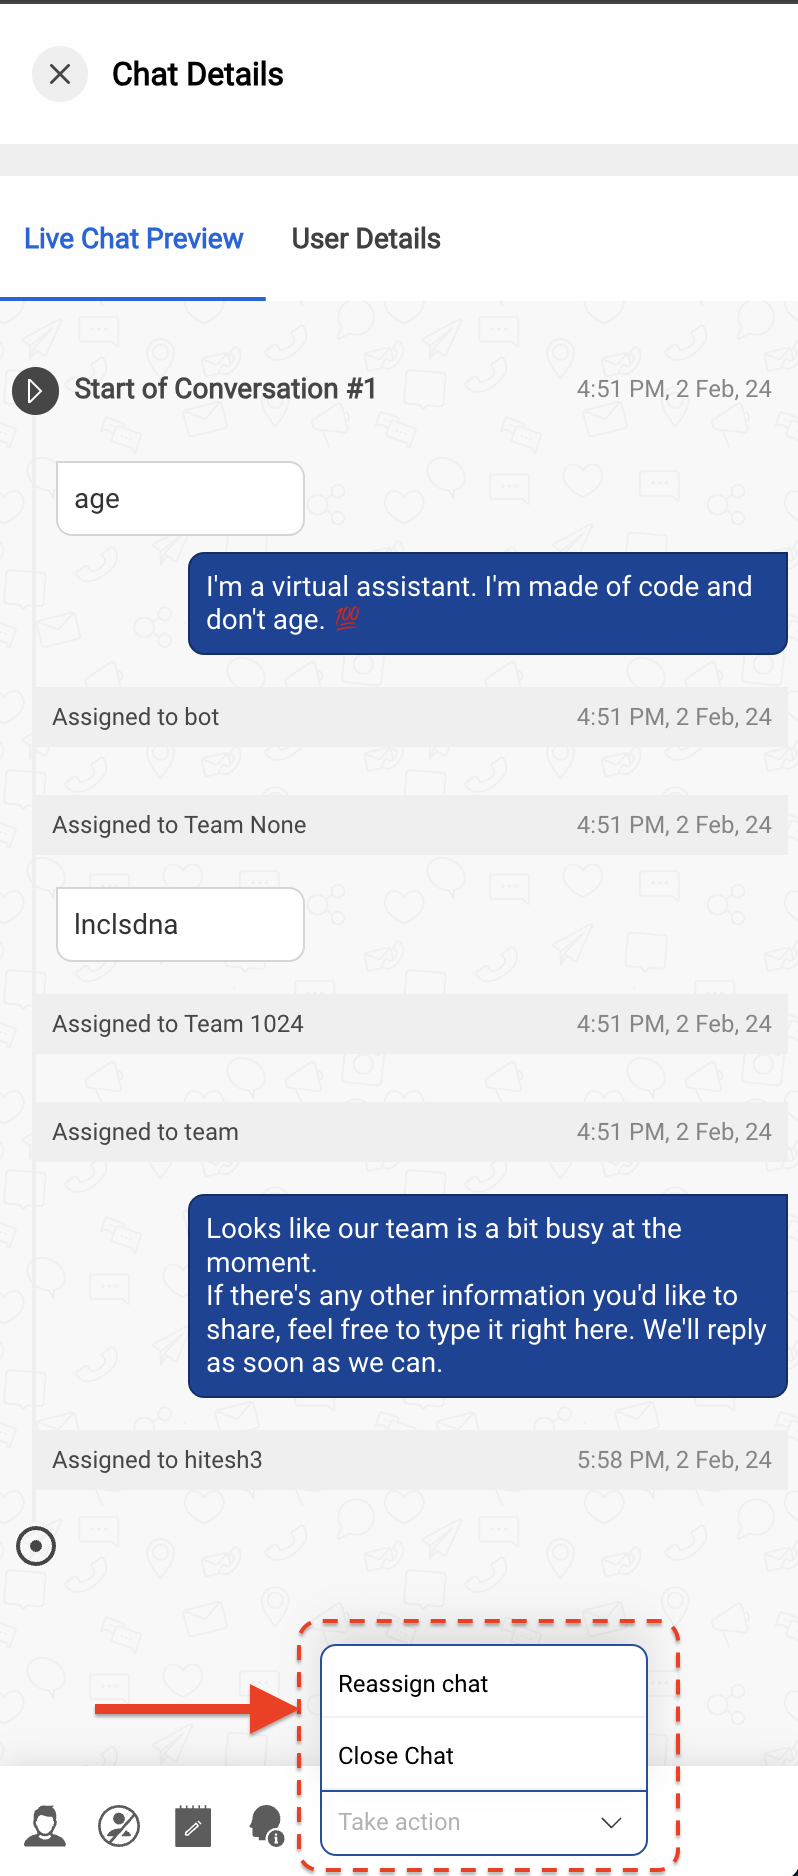
If the chat is in Inactive state, you can choose to either -
- Reassign the chat - You can reassign the chat to yourself, a specific agent, or a specific Team.
- Open chat - Once you open a chat, the chat is added to the Team queue, and is assigned to the next available agent from the Team as per the configured Agent Assignment Logic.
Chat Disposition form is not available on the Traffic page
When a chat is closed directly through the Traffic section, the Chat Disposition form that is available to Agents on the MyChats page is not available. Hence, Closing Categories and Custom Fields for such chats will not be recorded.
