How to Set Up WooCommerce Integration
- Getting Started
- Bot Building
- Smart Agent Chat
- Conversation Design
-
Developer Guides
Code Step Integration Static Step Integration Shopify Integration SETU Integration Exotel Integration CIBIL integration Freshdesk KMS Integration PayU Integration Zendesk Guide Integration Twilio Integration Razorpay Integration LeadSquared Integration USU(Unymira) Integration Helo(VivaConnect) Integration Salesforce KMS Integration Stripe Integration PayPal Integration CleverTap Integration Fynd Integration HubSpot Integration Magento Integration WooCommerce Integration Microsoft Dynamics 365 Integration
- Deployment
- External Agent Tool Setup
- Analytics & Reporting
- Notifications
- Commerce Plus
- Troubleshooting Guides
- Release Notes
Table of Contents
Overview
Being swift with your responses is not an option; it's the responsibility of businesses toward their customers. With Haptik, you can promptly answer your customers' queries.
All you need to do is to connect your WooCommerce store with Haptik to let your bot have all the information about your products for answering questions appropriately.
Prerequisites for WooCommerce Integration with Haptik
- A registered WooCommerce Platform account
- A Haptik bot. Click here if you haven’t created one yet
Steps to Make WooCommerce Integration Active
- Log in to your Haptik account and choose the bot you want to connect with your WooCommerce store.
- Navigate to Conversation Studio > Business Manager > Channels > Platform Deployments and select WooCommerce from the Platform drop-down.
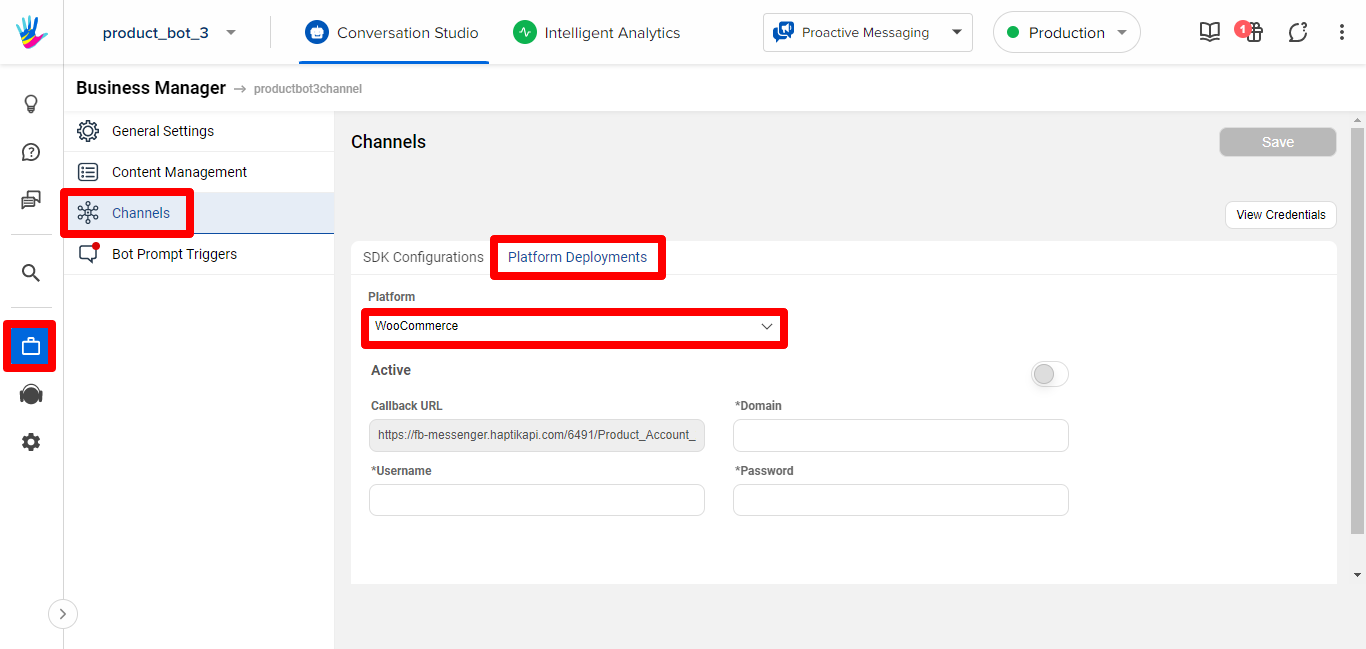
- You’ll see a few blank fields like Domain, Username, and Password. Fill in these fields to establish the connection.
- Once done, turn on the Active toggle button and click on Save.
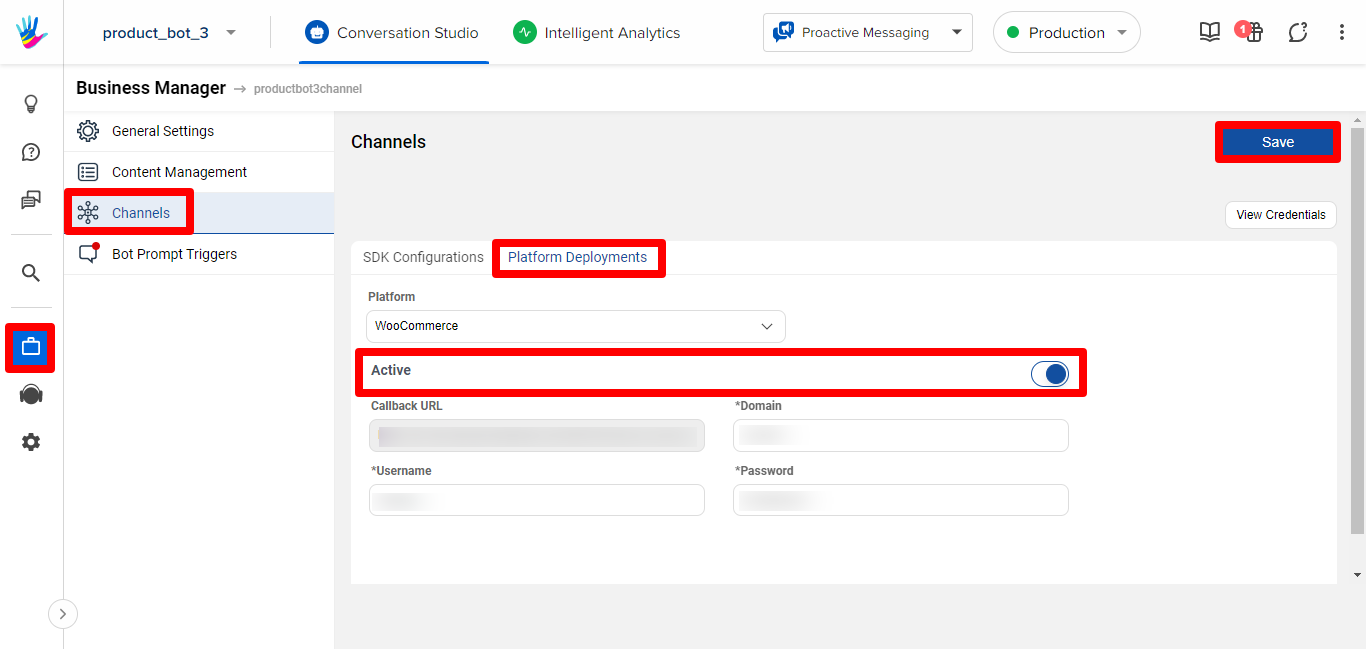
Congrats! Your bot is integrated with your WooCommerce store. Now, you can confirm your Haptik SPOC to take the next steps in building the commerce journey.
Generating API Key on WooCommerce
Follow these steps to get generate an API Key for successful integration.
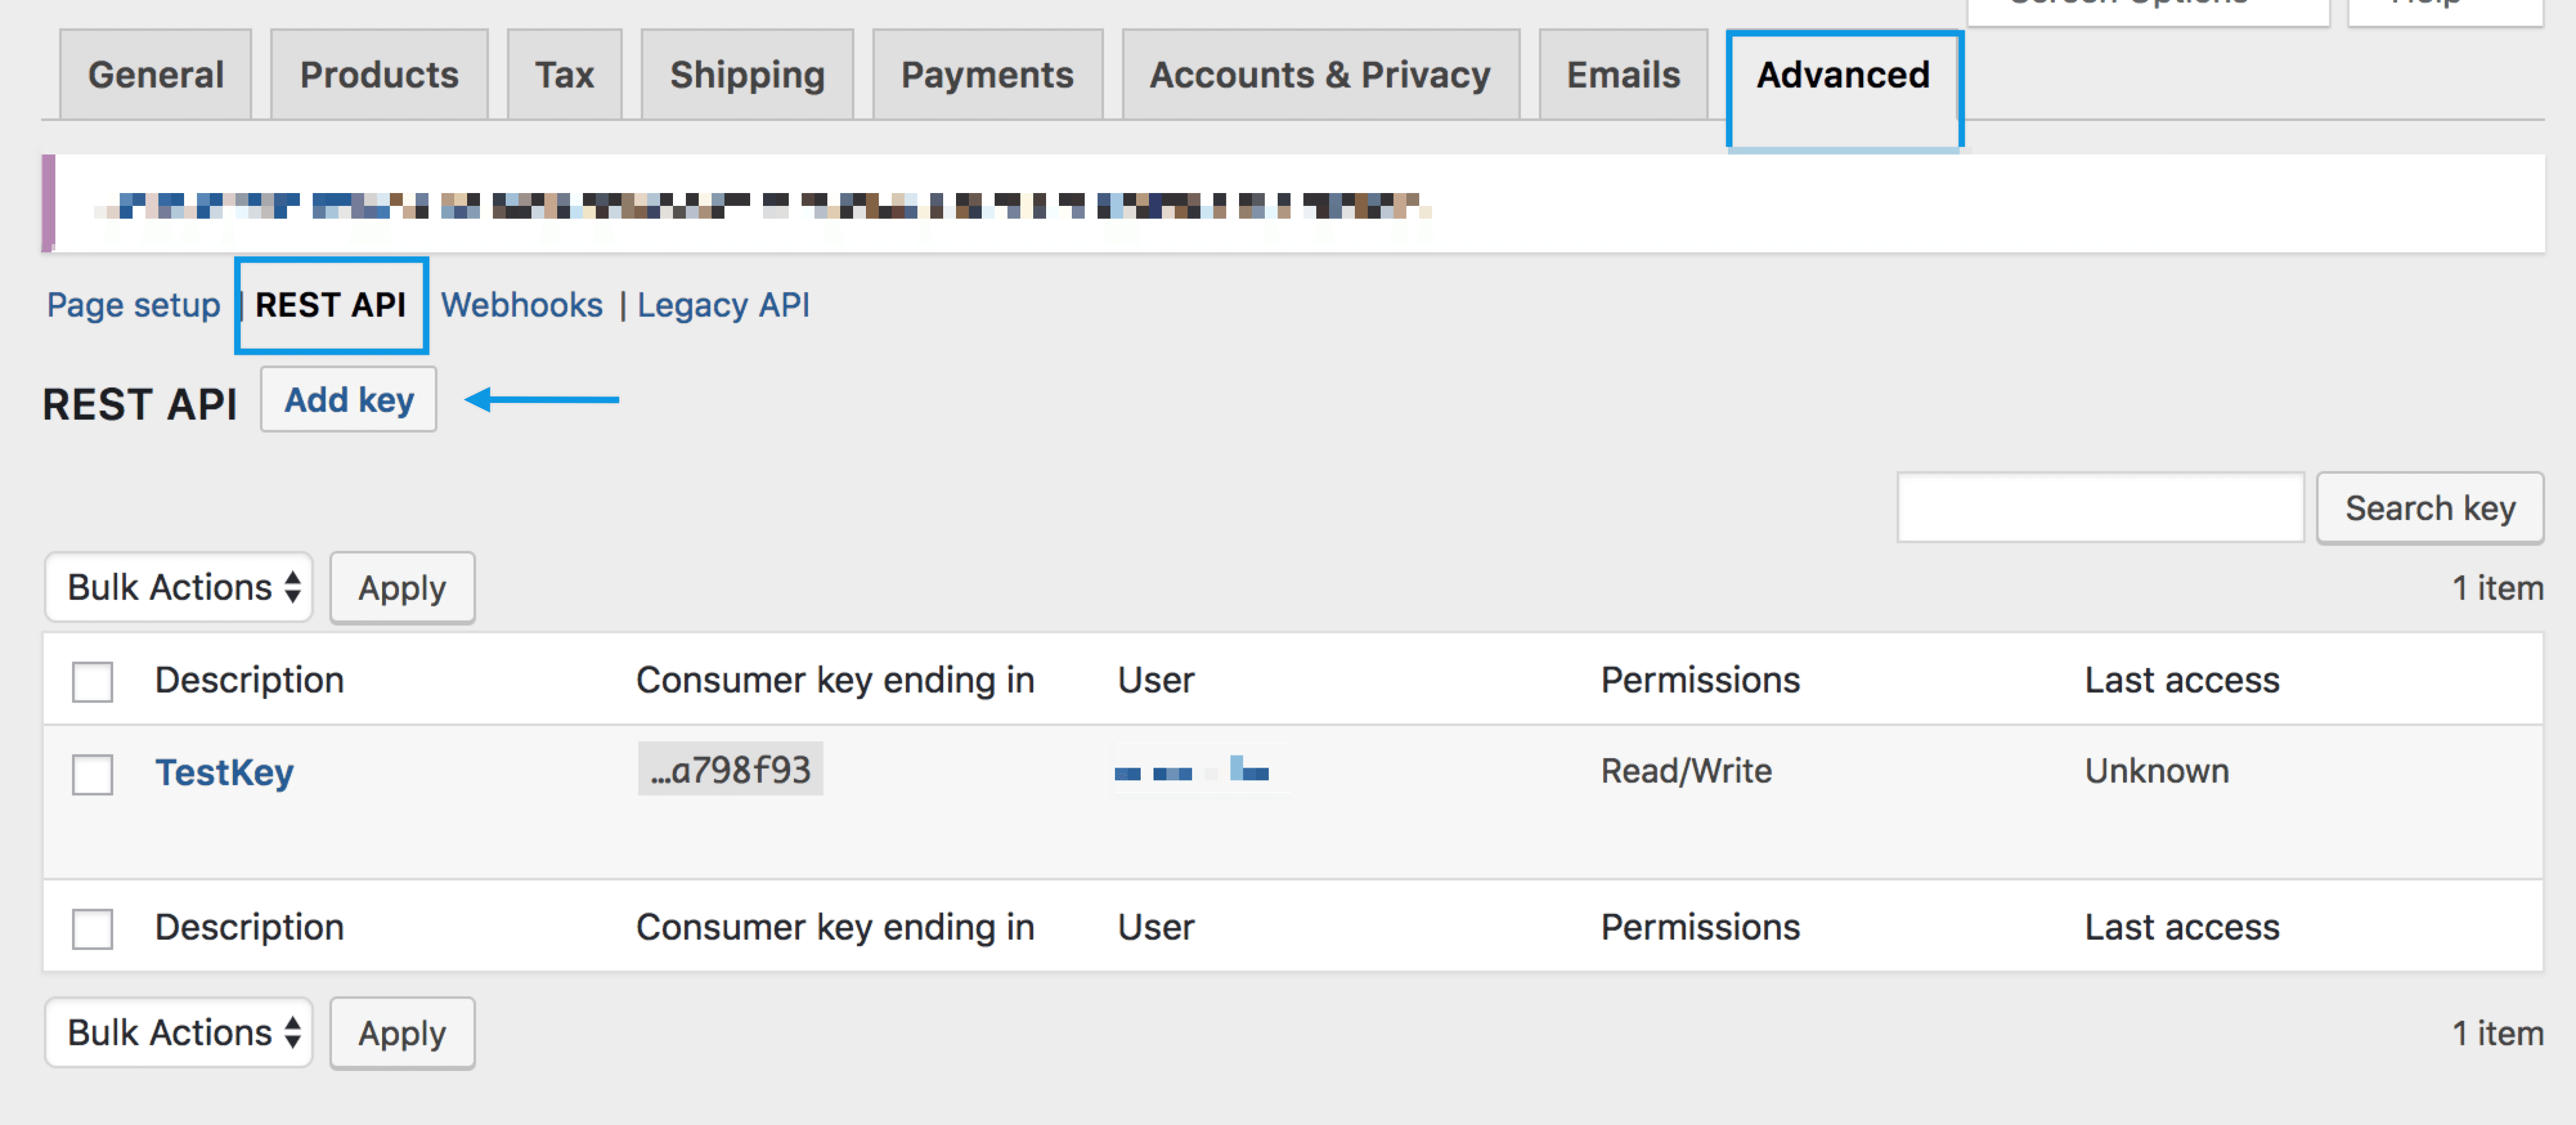
- Go to WooCommerce admin panel > Settings > Advanced > REST API.
- Select Add Key to be able to see the Key Details screen.
- Add a Description as you like.
- Select the User for which you would like to generate a key.
- Set the Read access for your API key.
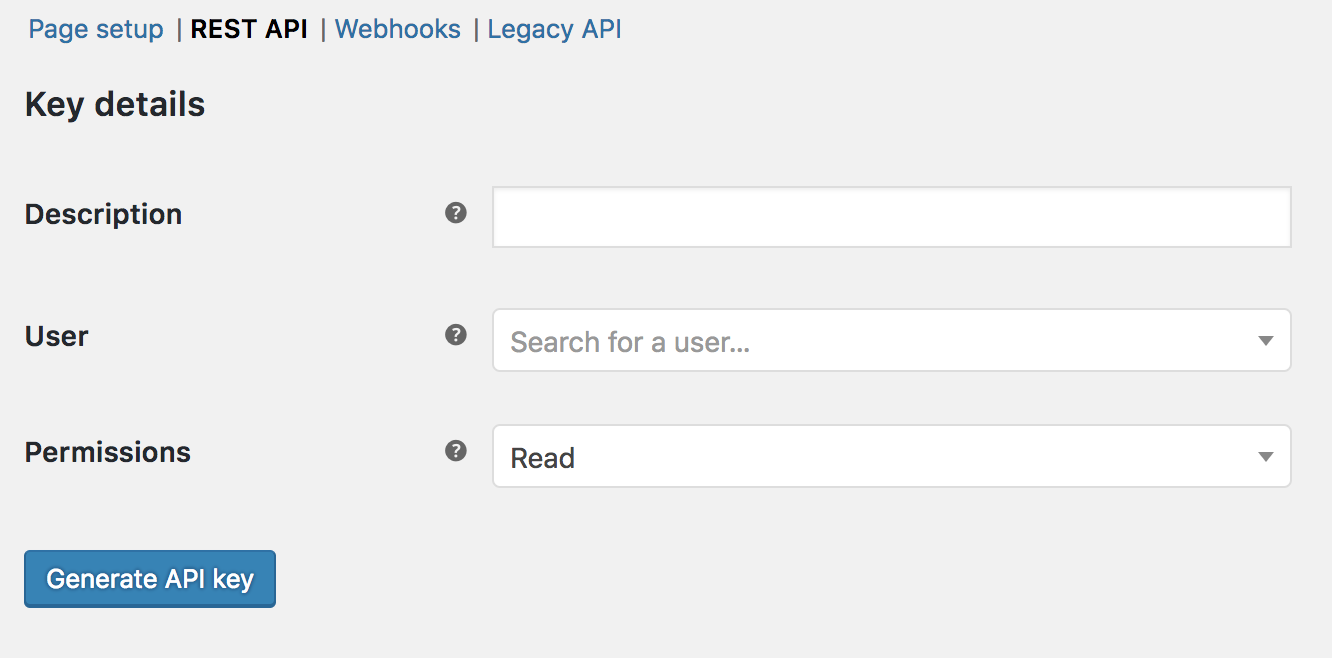
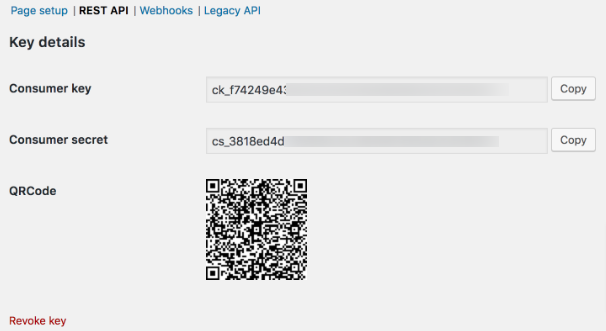
- Click Generate API Key to get details as shown below.
- Copy the Consumer Key and Consumer Secret to paste them into the respective fields of your Haptik account.
In case you need more help in this process, refer this link or reach out to your Haptik SPOC.
