How to Create & Manage Teams
- Getting Started
- Bot Building
- Smart Agent Chat
- Conversation Design
-
Developer Guides
Code Step Integration Static Step Integration Shopify Integration SETU Integration Exotel Integration CIBIL integration Freshdesk KMS Integration PayU Integration Zendesk Guide Integration Twilio Integration Razorpay Integration LeadSquared Integration USU(Unymira) Integration Helo(VivaConnect) Integration Salesforce KMS Integration Stripe Integration PayPal Integration CleverTap Integration Fynd Integration HubSpot Integration Magento Integration WooCommerce Integration Microsoft Dynamics 365 Integration
- Deployment
- External Agent Tool Setup
- Analytics & Reporting
- Notifications
- Commerce Plus
- Troubleshooting Guides
- Release Notes
Table of Contents
What is a team?
A team is a group of agents who are trained to handle user queries related to a specific topic. The team can be divided based on the subject matter/location of a user/expertise of agents. The logic for team routing can be defined as per the business requirement.
Overview of ‘Manage Teams’
On this page, you can:
- Create a Team
- View the list of all Teams
- View Available Capacity in Teams
- View Capacity Utilization of Teams
- Edit Team Settings for an existing Team
- Disable a Team
Create a Team
To create a new Team, click on the “Create Team” button on the top right corner.
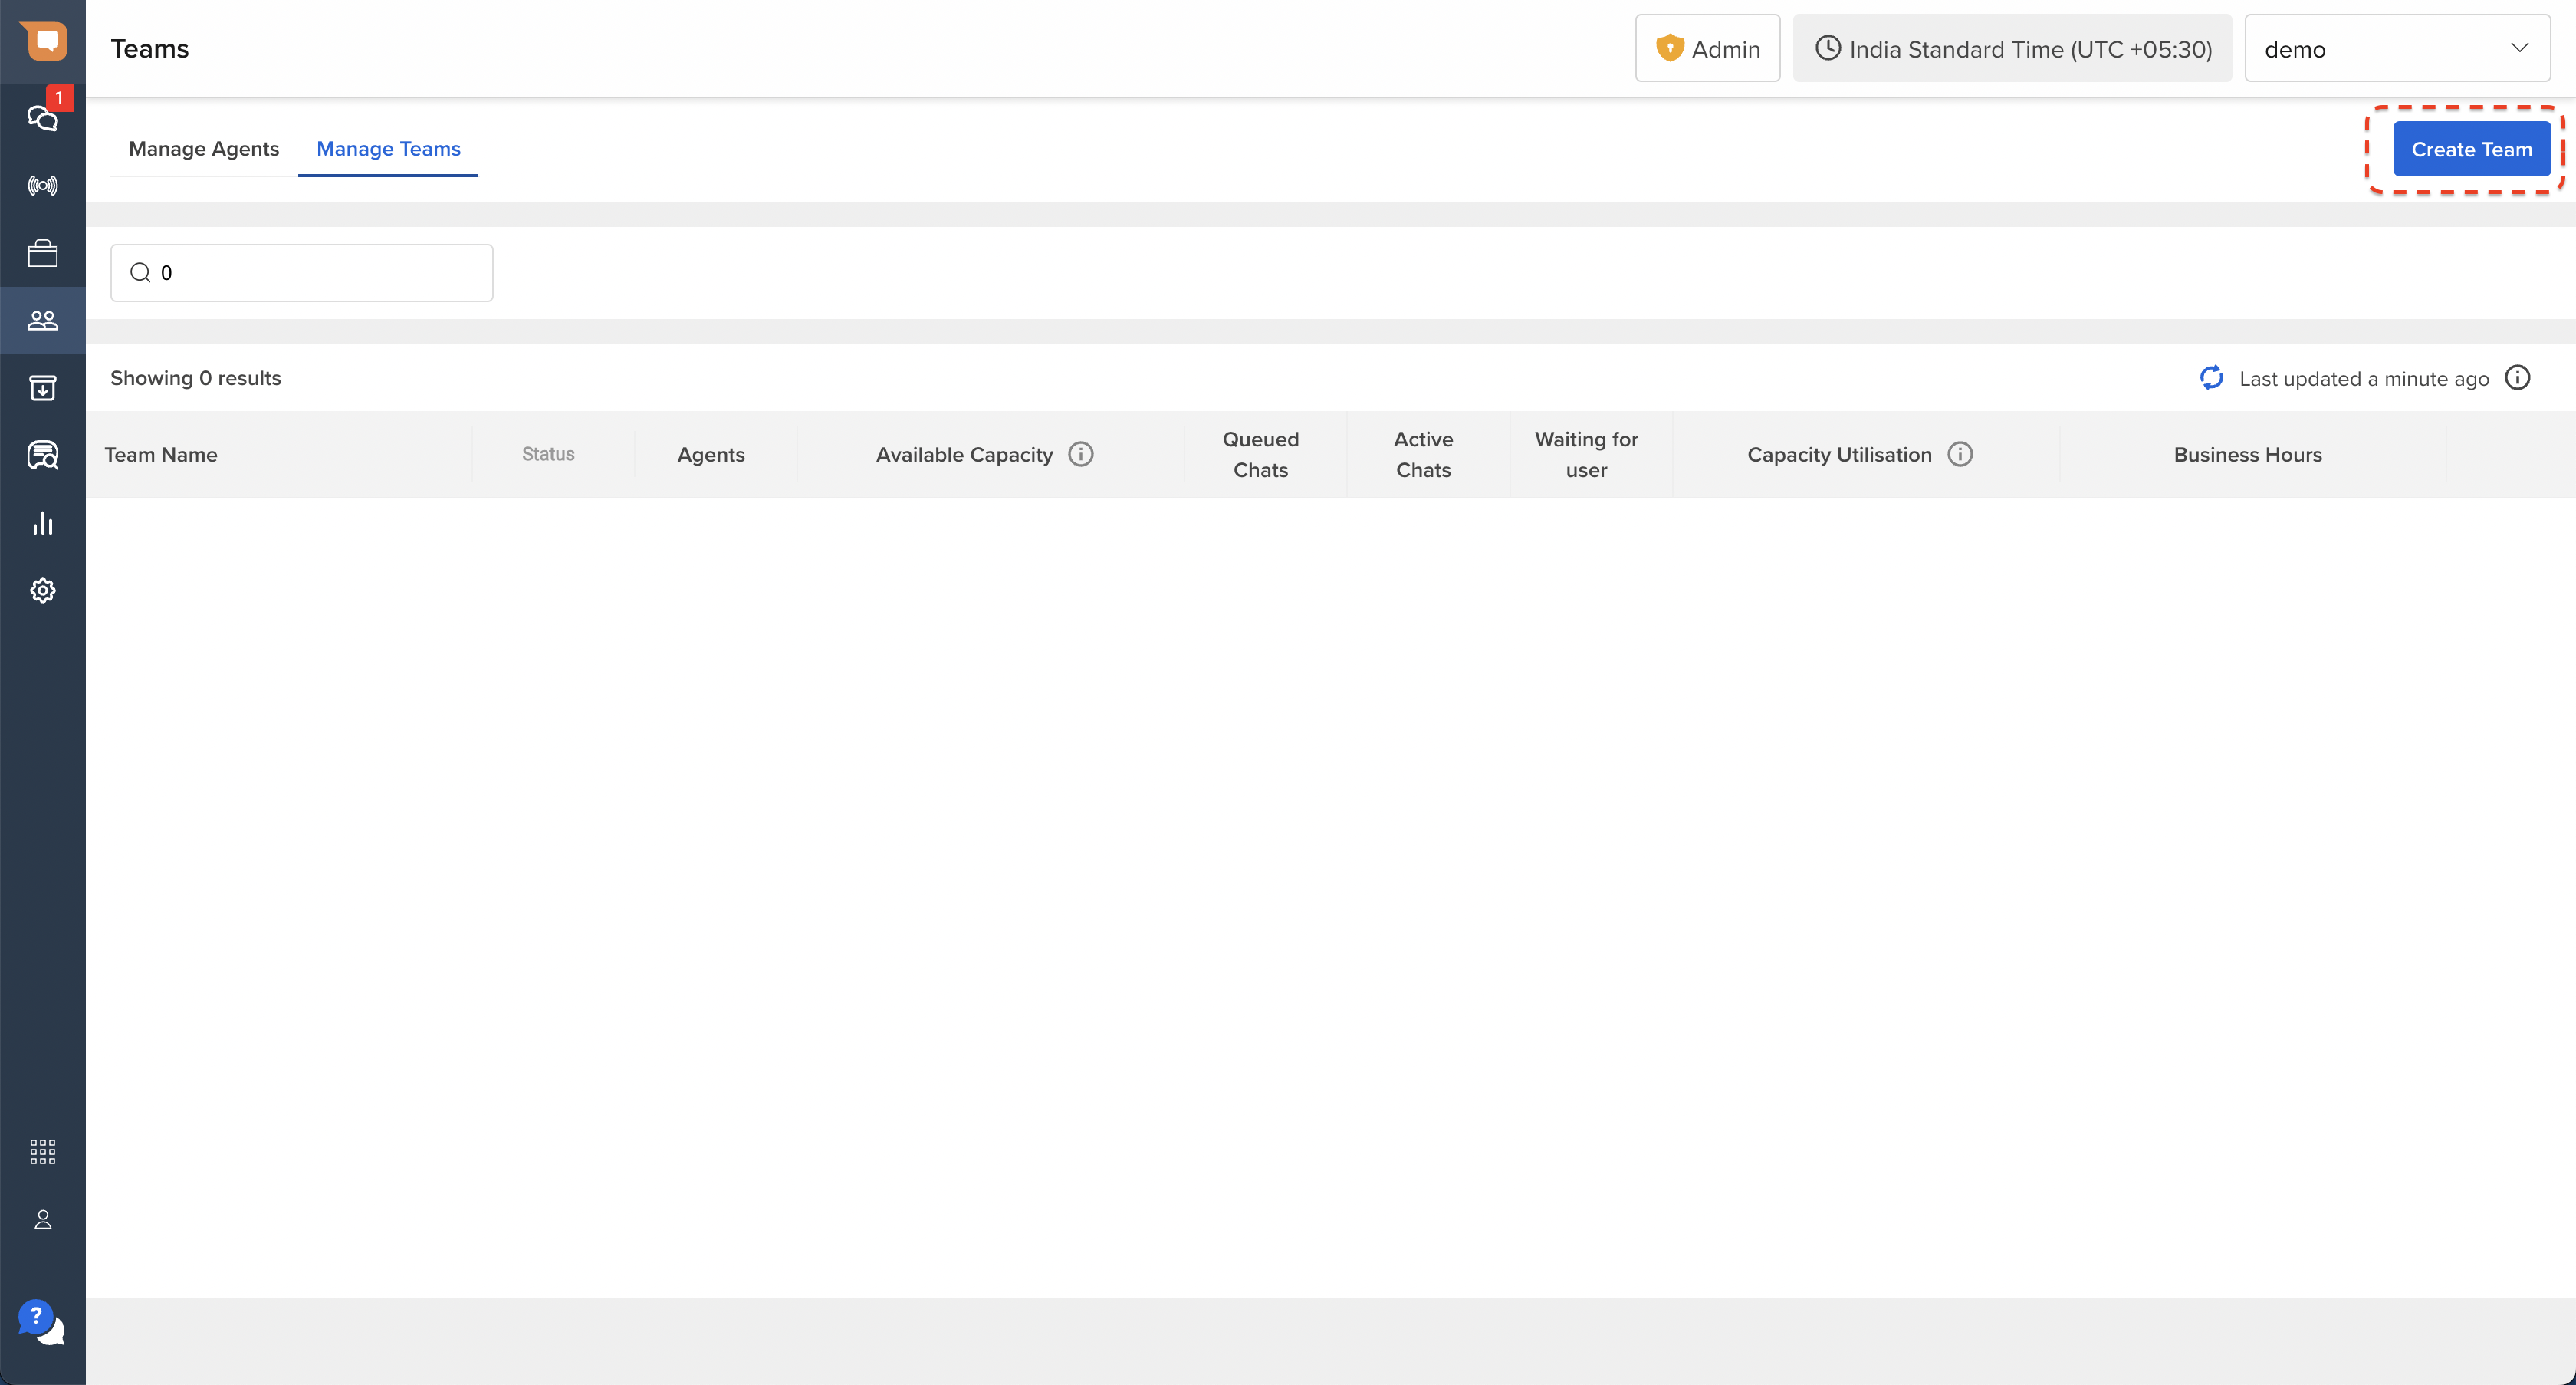
In the popup that appears, add all the required information to invite a new Agent to your Account.
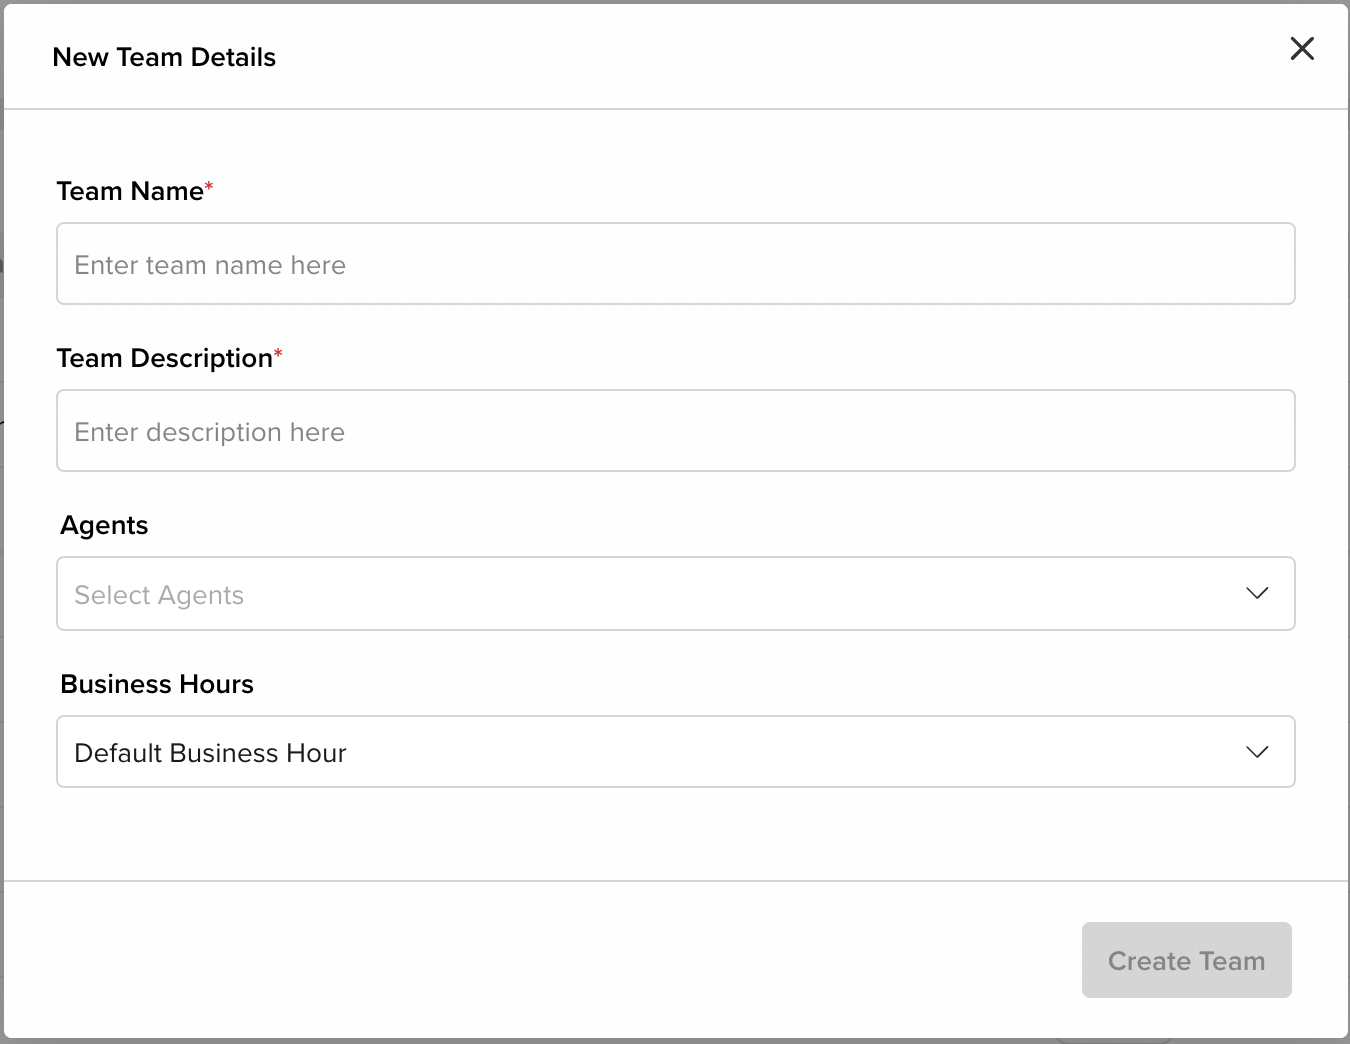
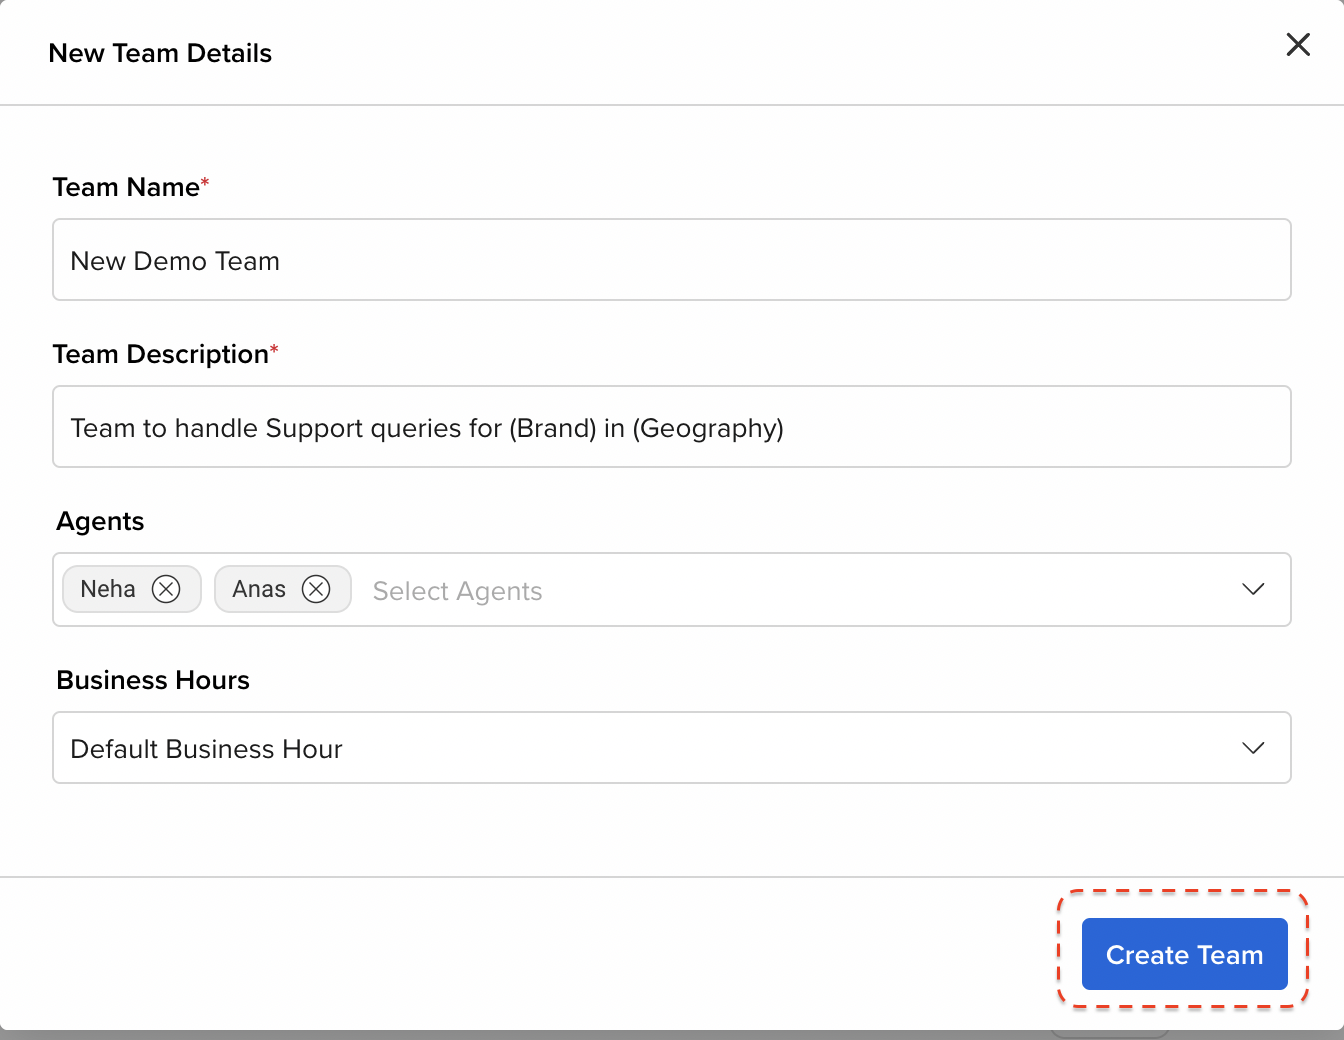
While creating a new Team, the “Team Name” field is a mandatory field, as it is used to create a unique record of that Team in the system for your Account. The remaining fields are optional:
- Team Description: This is a short description that can help other Users understand the role of that Team in your contact center.
- Agents: This field can be used to assign one or more existing Agents from your Account to the Team.
- Business Hours: This determines the Business Hours setting assigned to the Team. Refer to this article to learn more about how to set up Business Operational Hours for your Teams. By default, the “Default Business Hour” is automatically assigned to any Team that is created.
Once all the details have been filled up, click on the “Create Team” button on the bottom right corner of the popup.
Once a Team has been created, you will see a confirmation message on the bottom of the Manage Teams page.
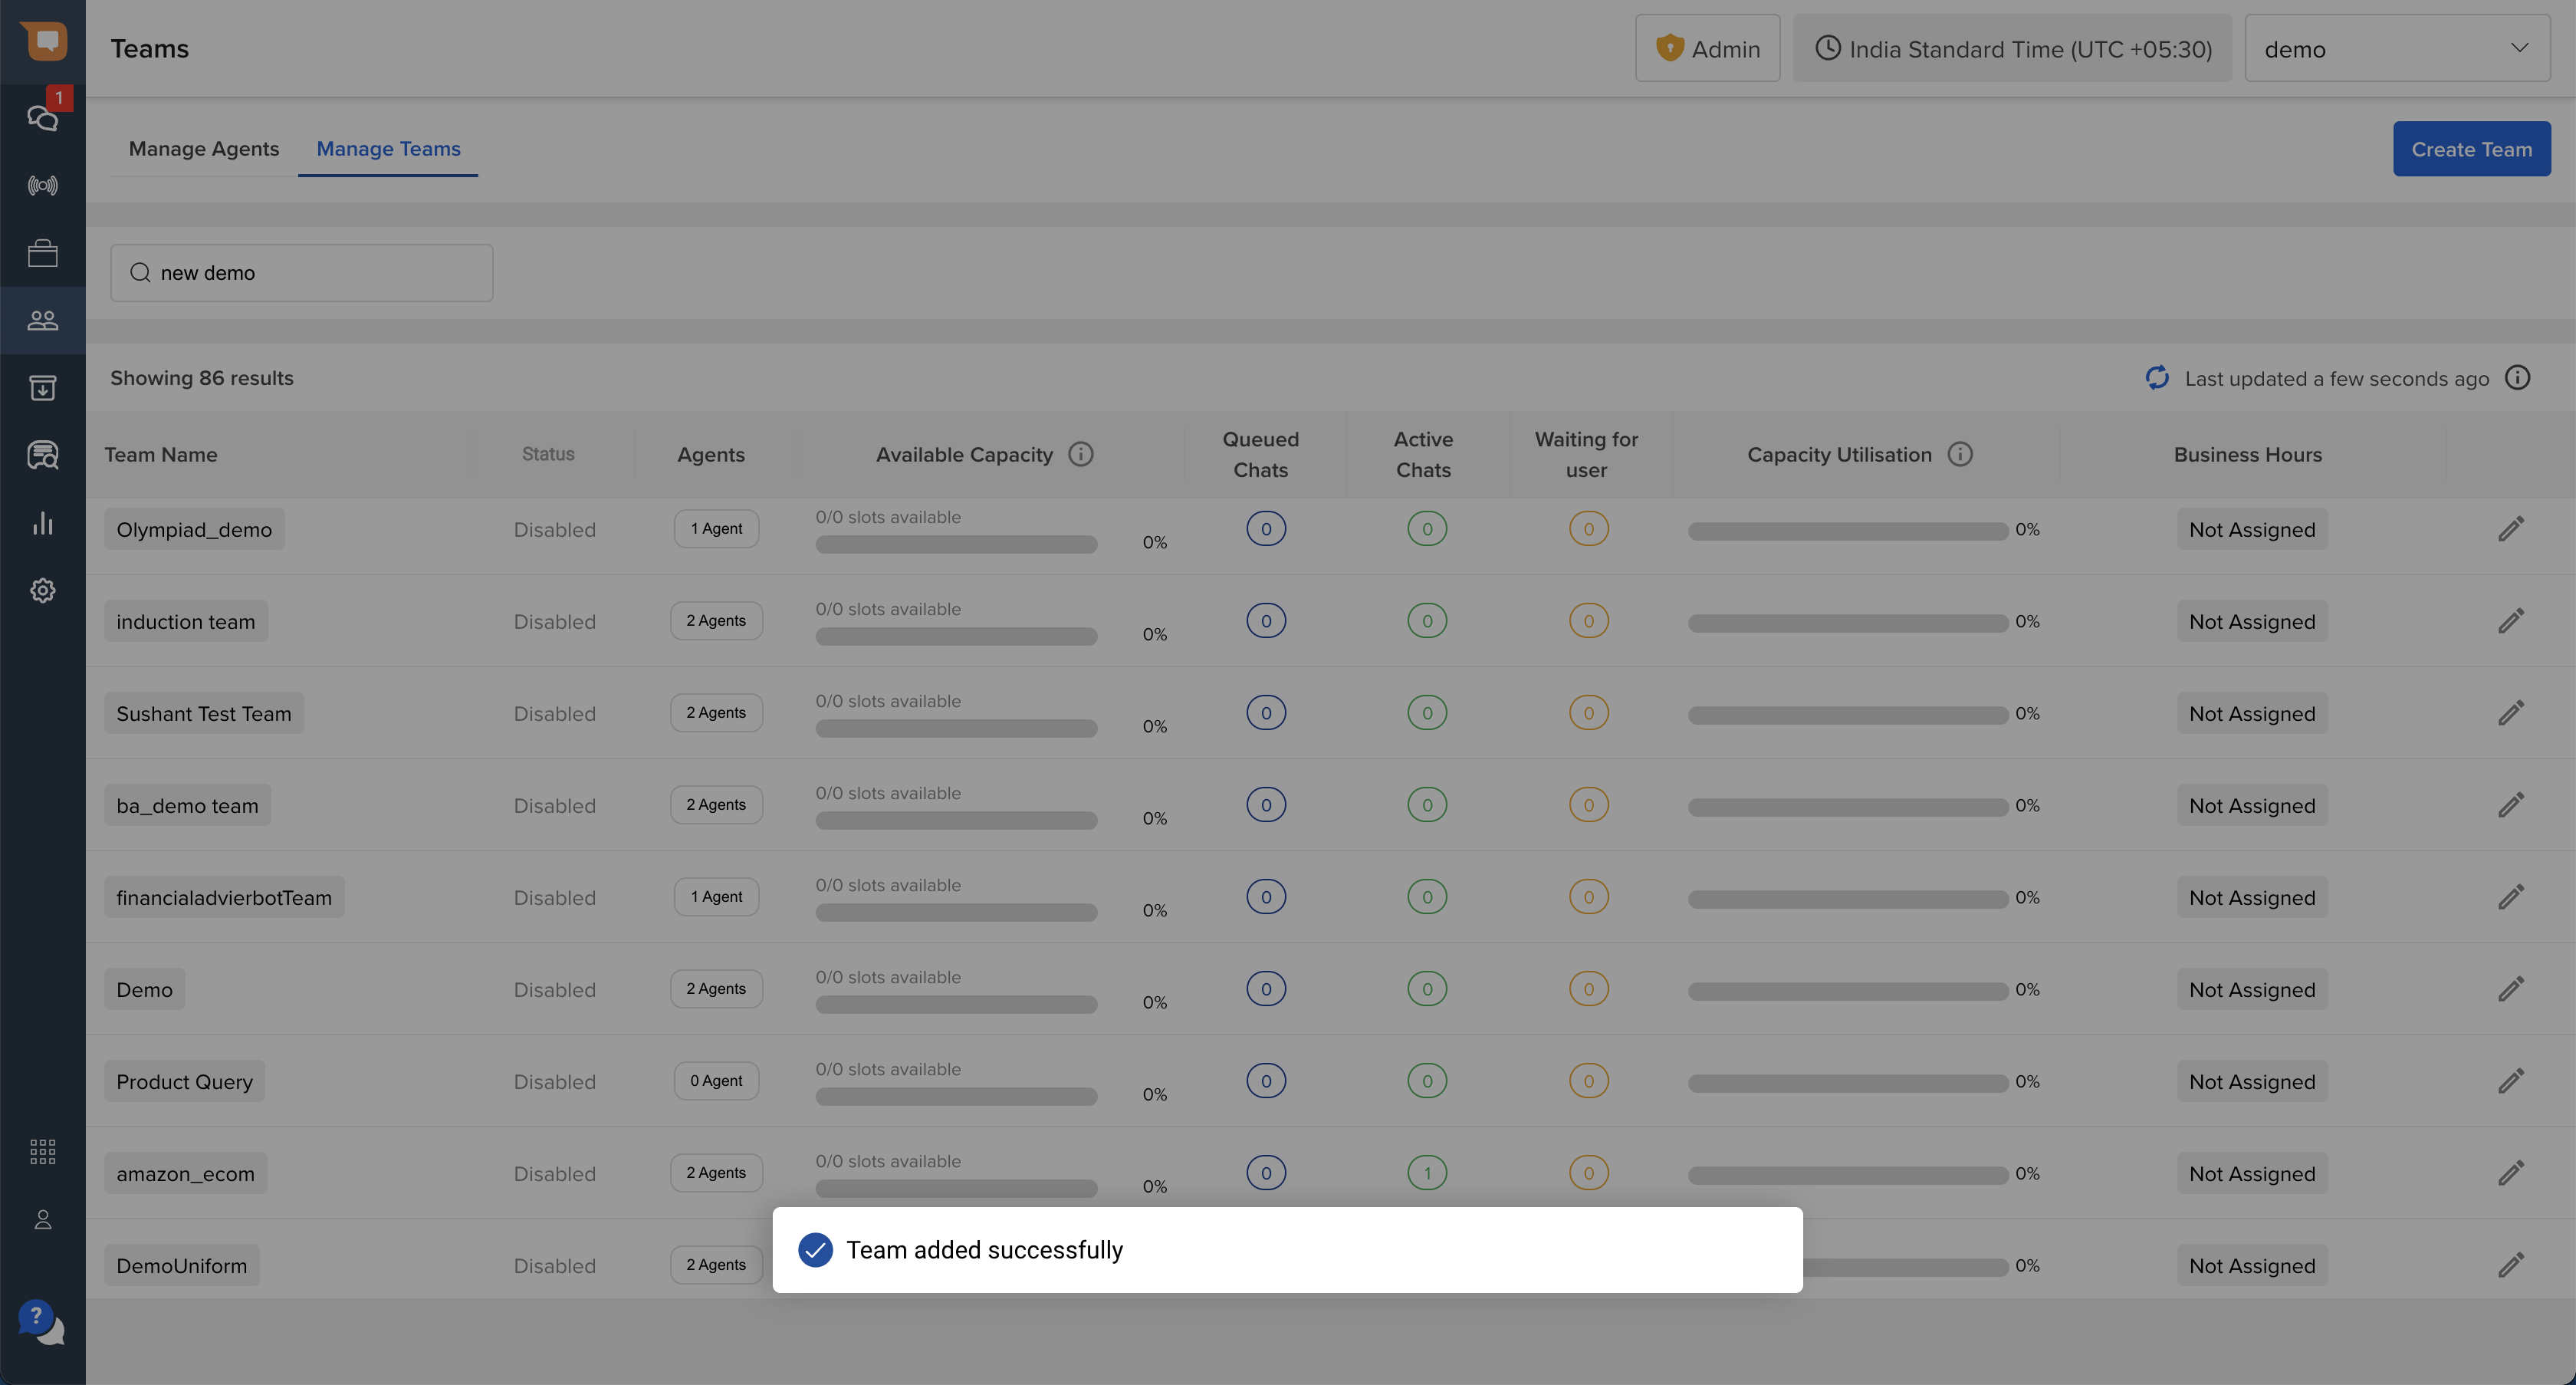
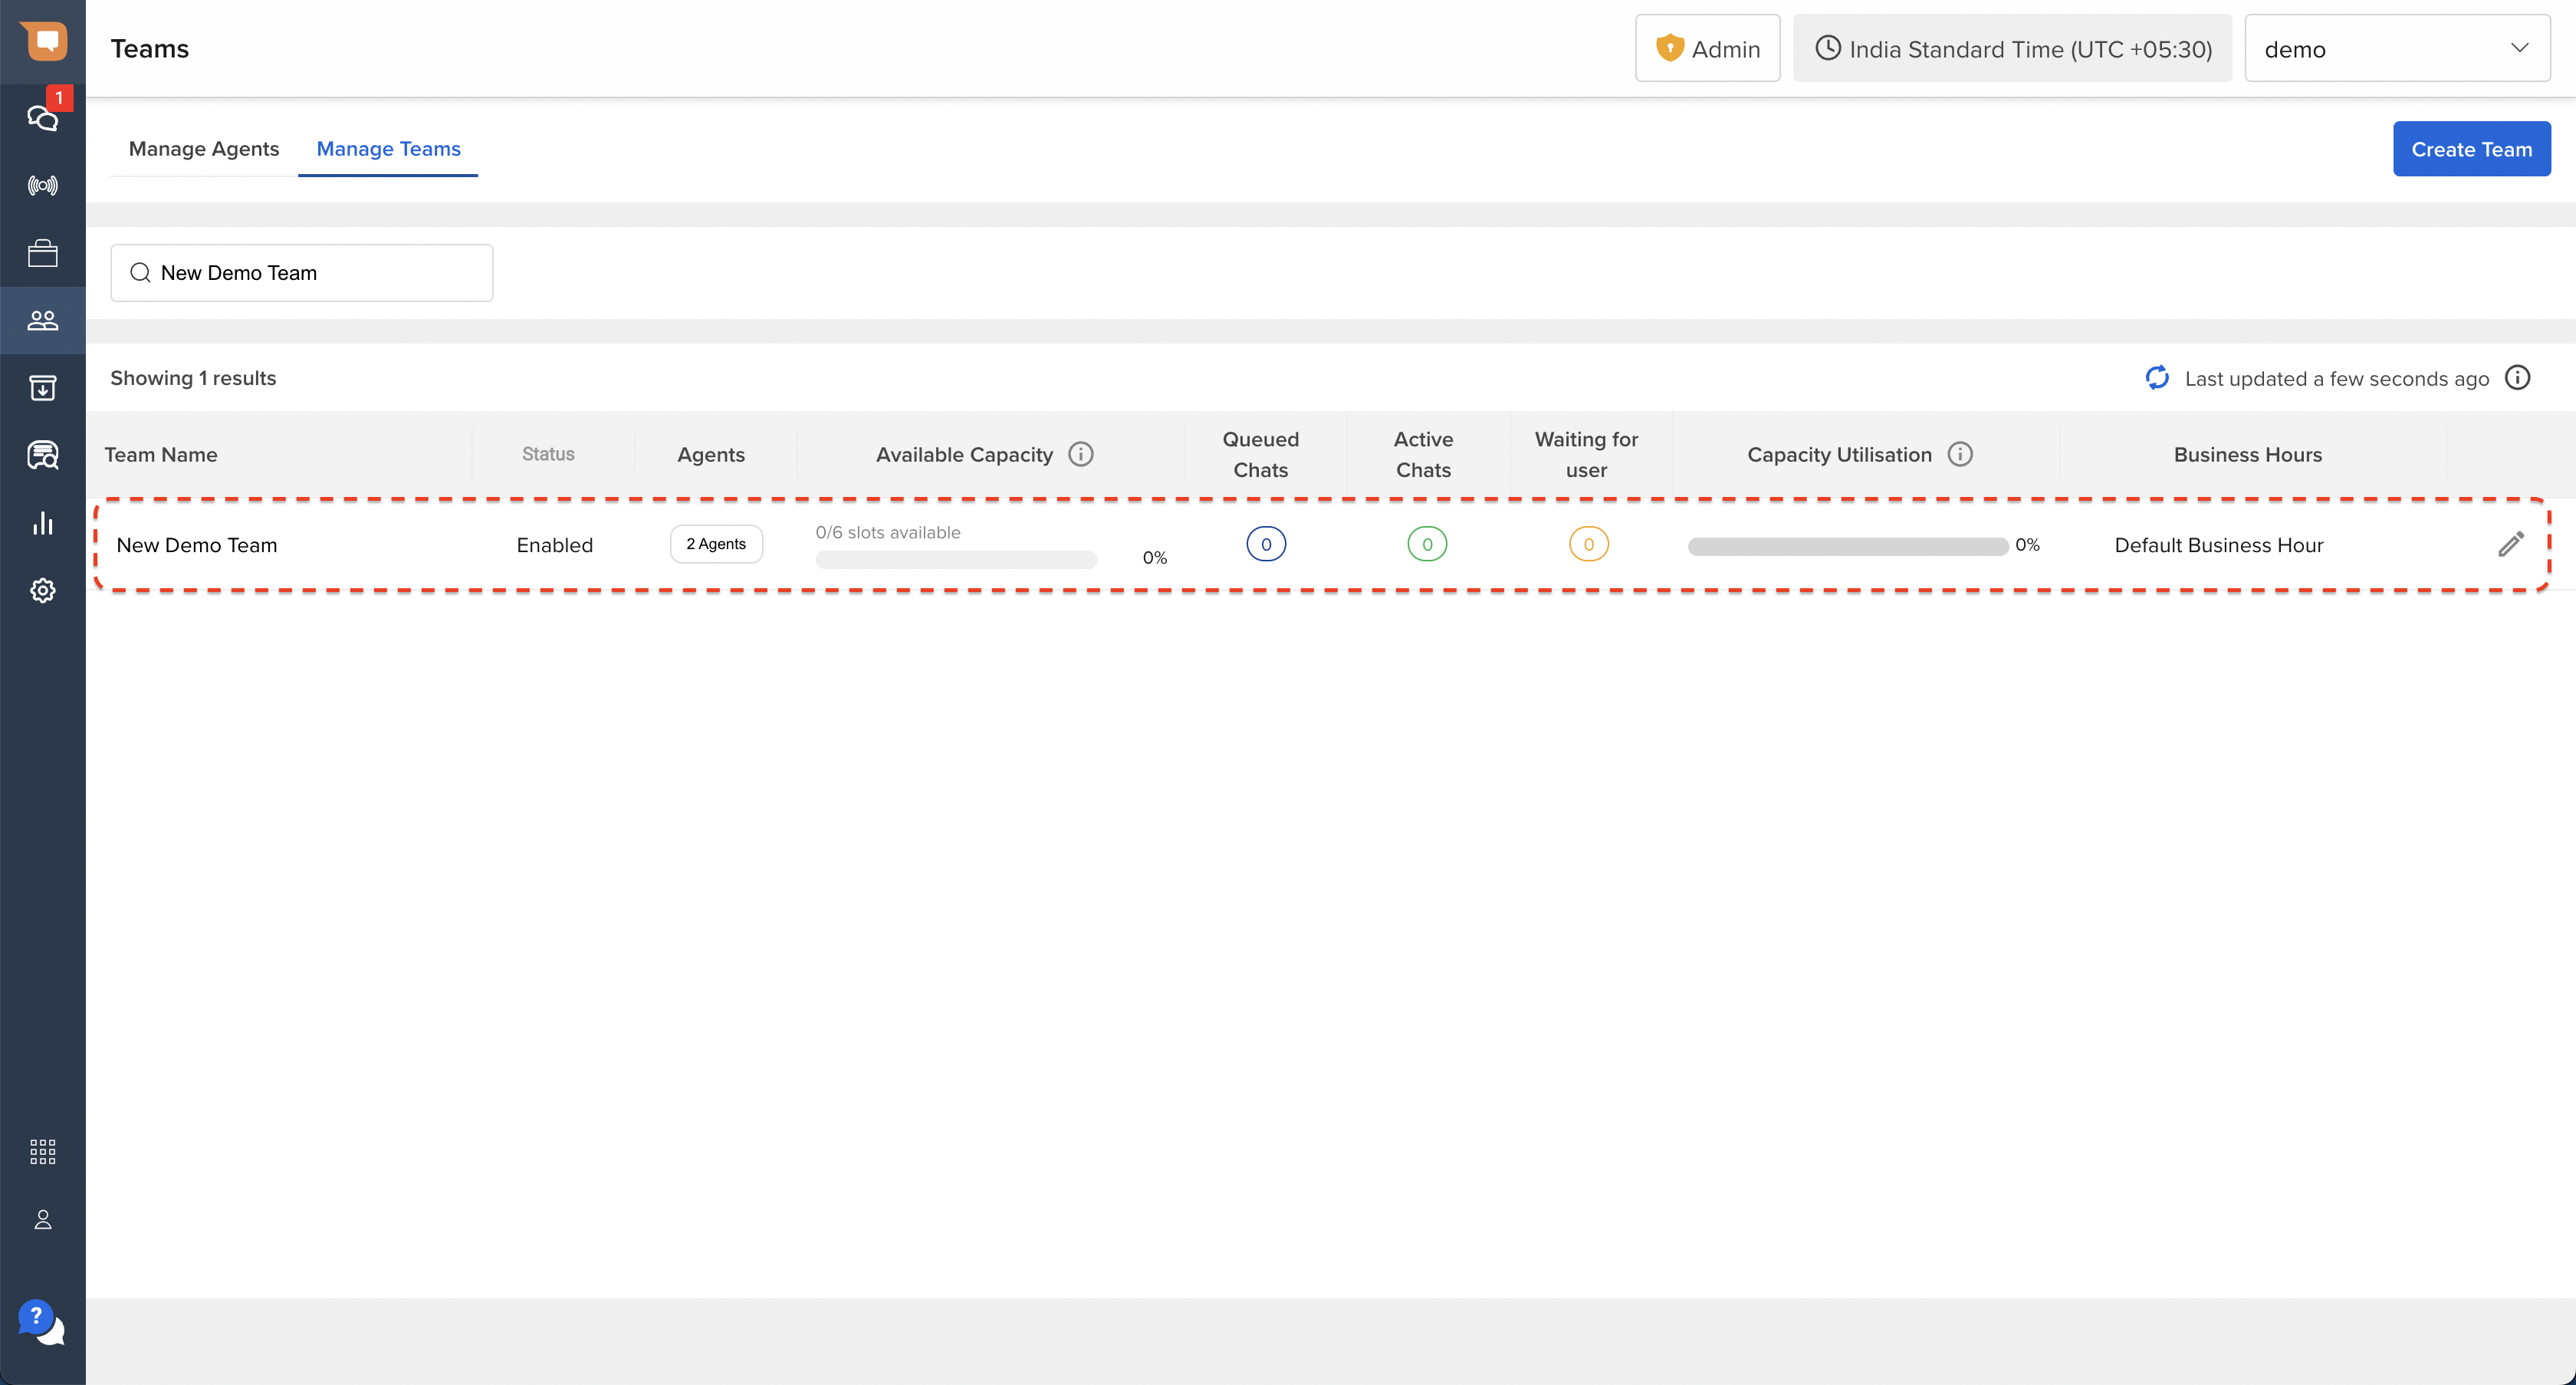
Upon searching for the Team using the search bar, you will find that a new Team record has been created on this page for the Team that was newly created.
View the list of all Teams
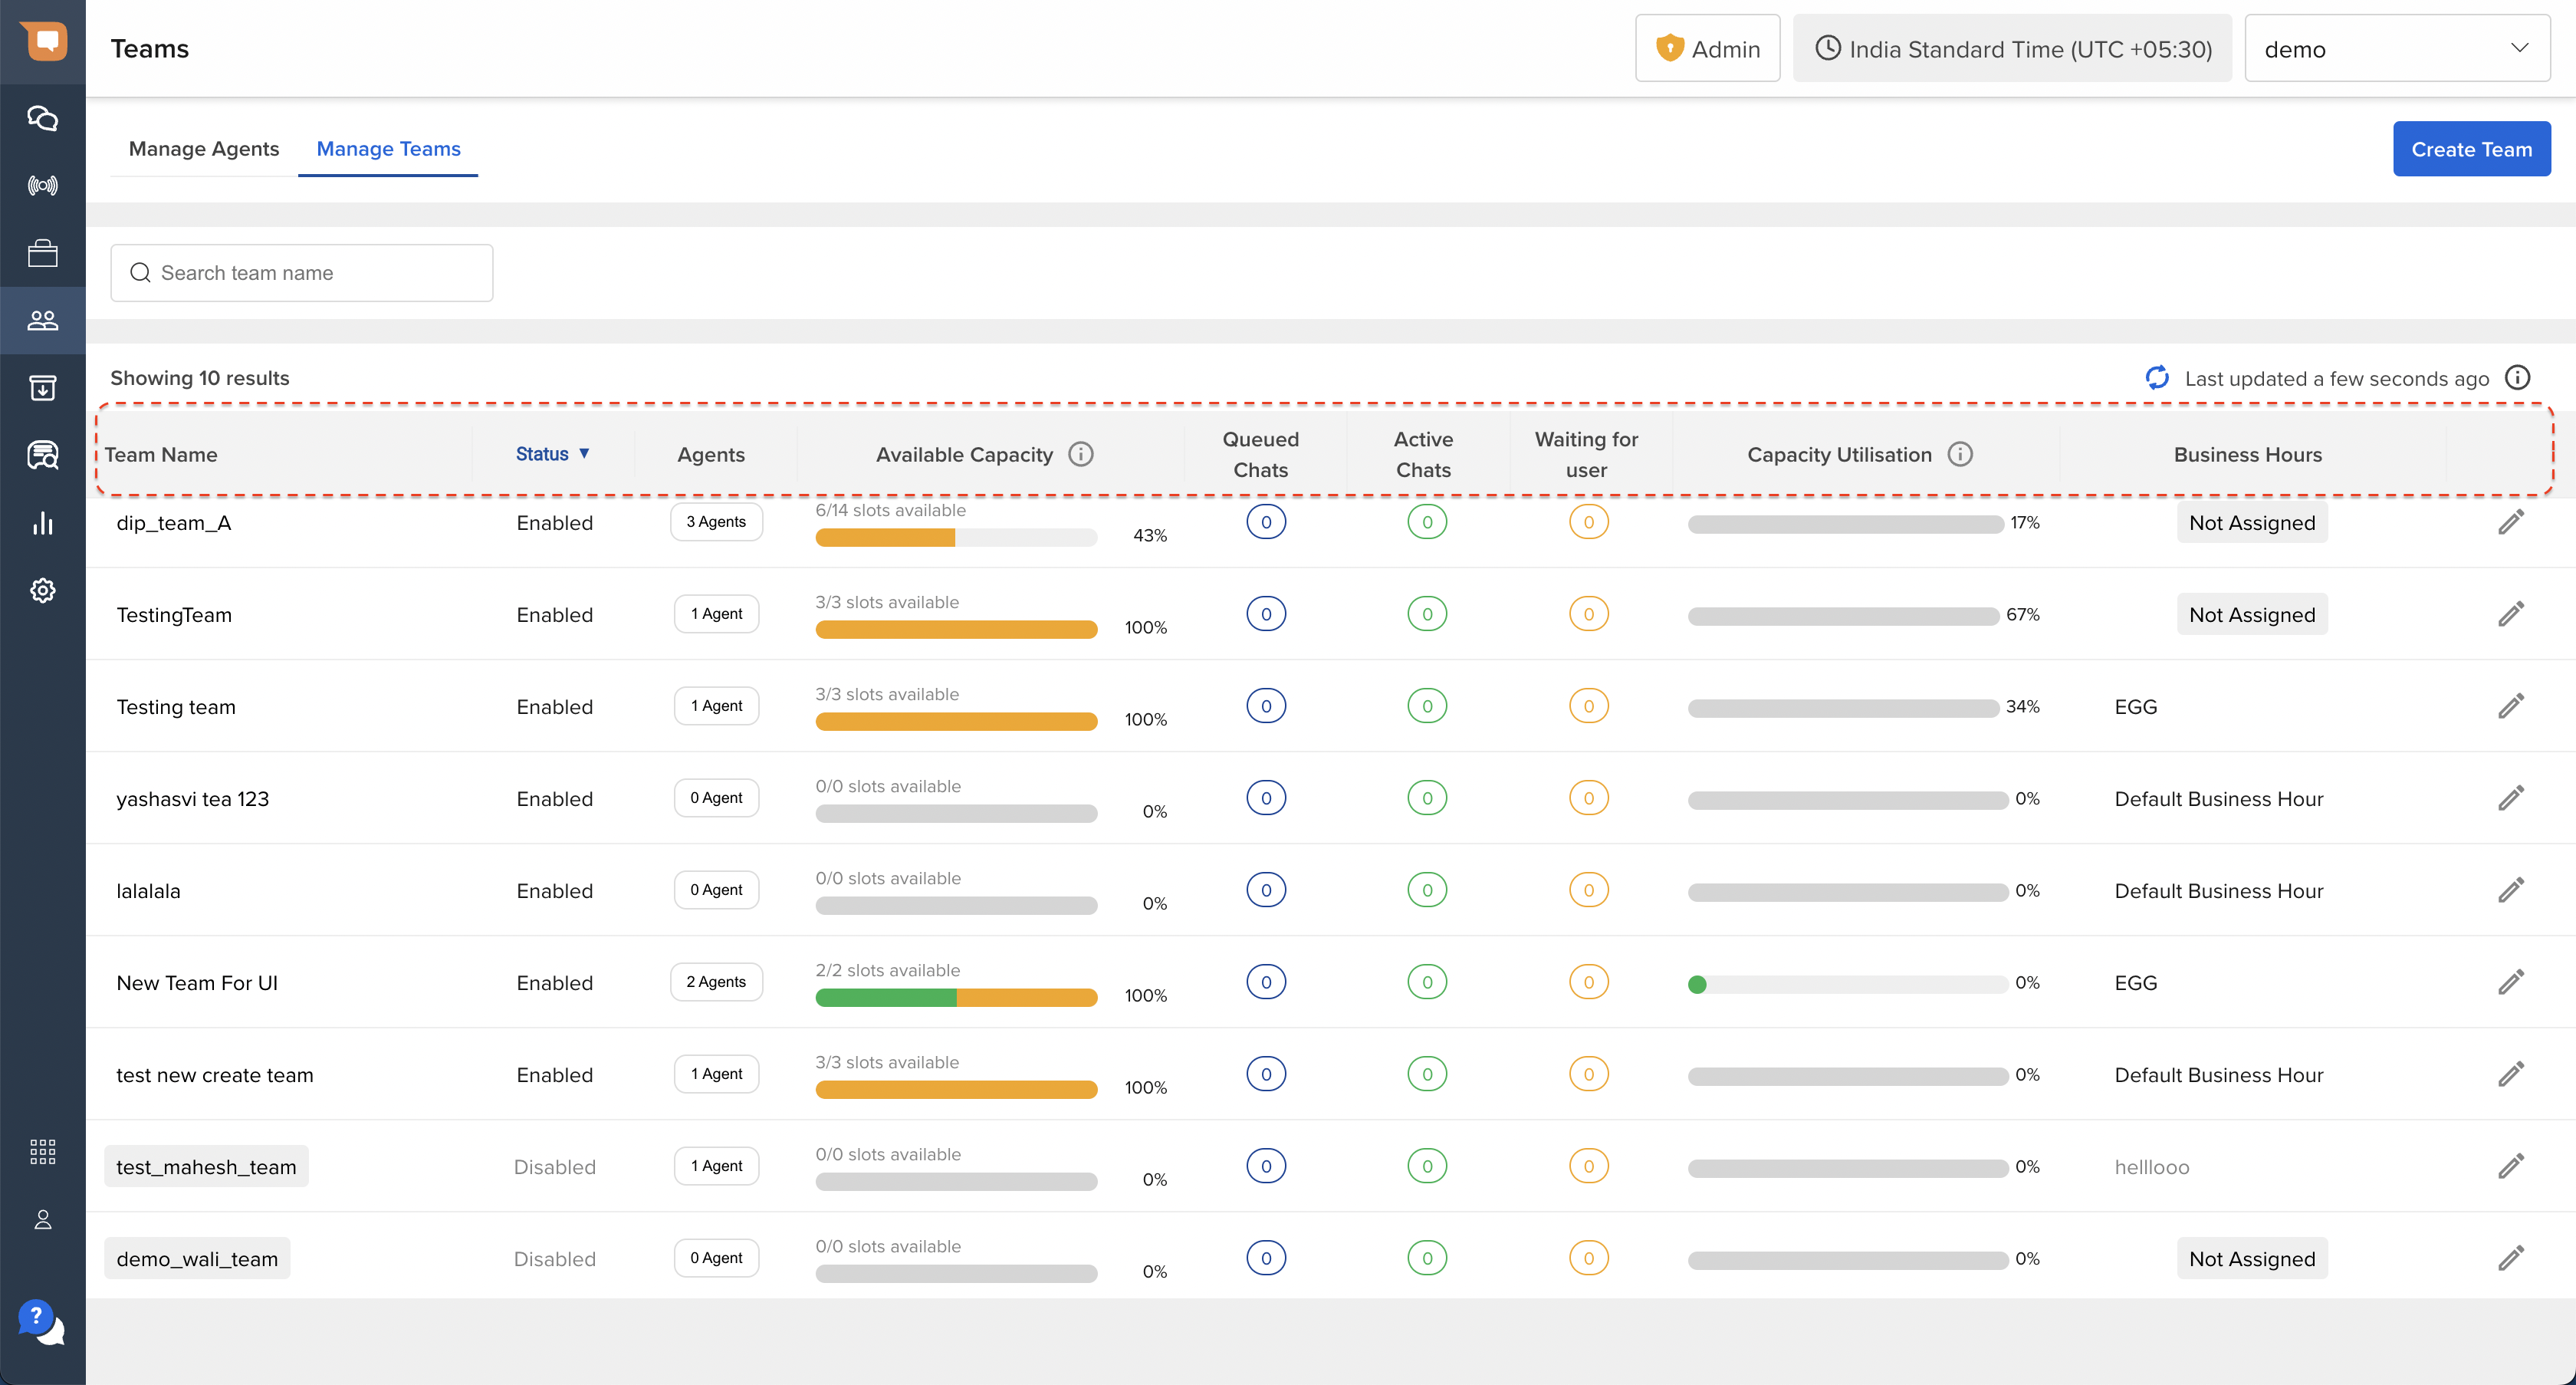
Once a Team is created, it appears as a part of the Teams list on the landing page of the Manage Teams section, as shown below. This list view displays the following points of information:
- Team Name - the name assigned to the Team at the time of creation.
- Team Status - whether the Team is Enabled or Disabled.
- Number of Agents - shows the number of total Agents who are part of the Team.
- Available Capacity - displays how many agent slots are available in real-time, with a break up of Active and On-Break agent slots (refer to the section below for details).
- Queue Chats statistics - a real-time view of how many chats are in Queue, Active, or Inactive for the Team.
- Capacity Utilization - a real-time indication of how many slots (Active or On Break) are already occupied with chats (refer to the section below for details).
- Business Hours - indicates the Business Operational Hours assigned to the Team.
View Available Capacity in Teams
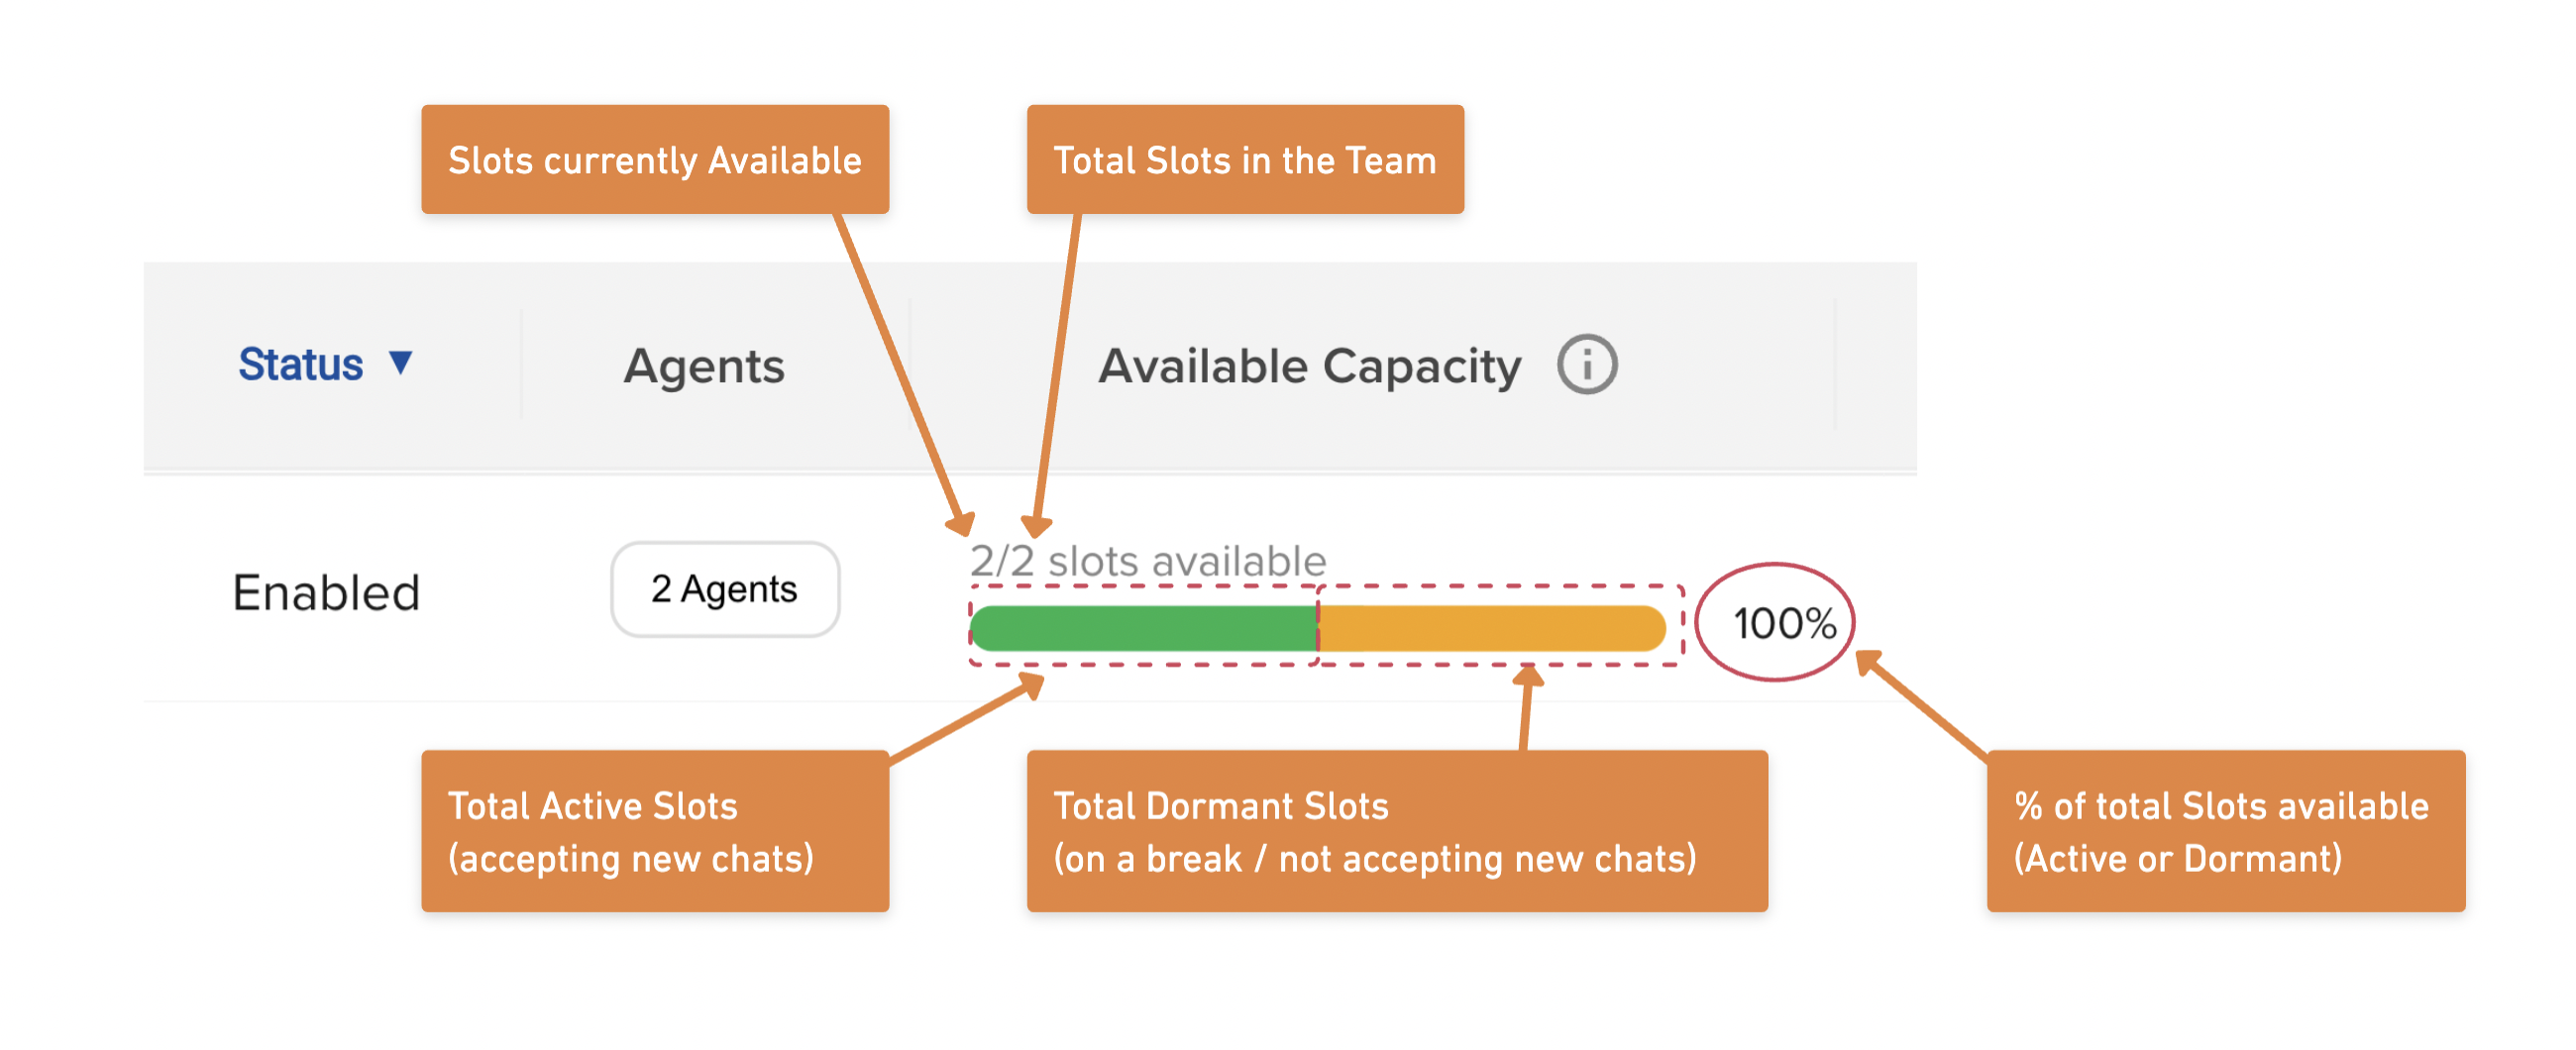
The “Available Capacity” column indicates the total number of Slots available in a Team.
- A single Slot represent capacity to handle a single chat. The Total Slots available with an Agent is a function of their maximum concurrency (i.e. if an Agent's maximum concurrency is set to 3, it means they have 3 chat slots available).
- Hence, the Total Slots available for a Team = (Number of Agents) x (Average Concurrency of all Agents)
- The header for each bar indicates how many Agent slots are Available.
- The Green bar indicates the number of slots of Agents who are Active, i.e., available to accept new chats.
- The Yellow bar indicates the number of slots of Agents who are On-Break, i.e., they are logged in, but are currently either on a break, or not accepting new chats (but might be wrapping up chats already assigned to them). This represents dormant capacity that can be easily recalled in the events a lot of chats are waiting in the Team's queue.
- The % indicator at the tip of each bar shows the % of total slots that are Available (either Active, or On-Break).
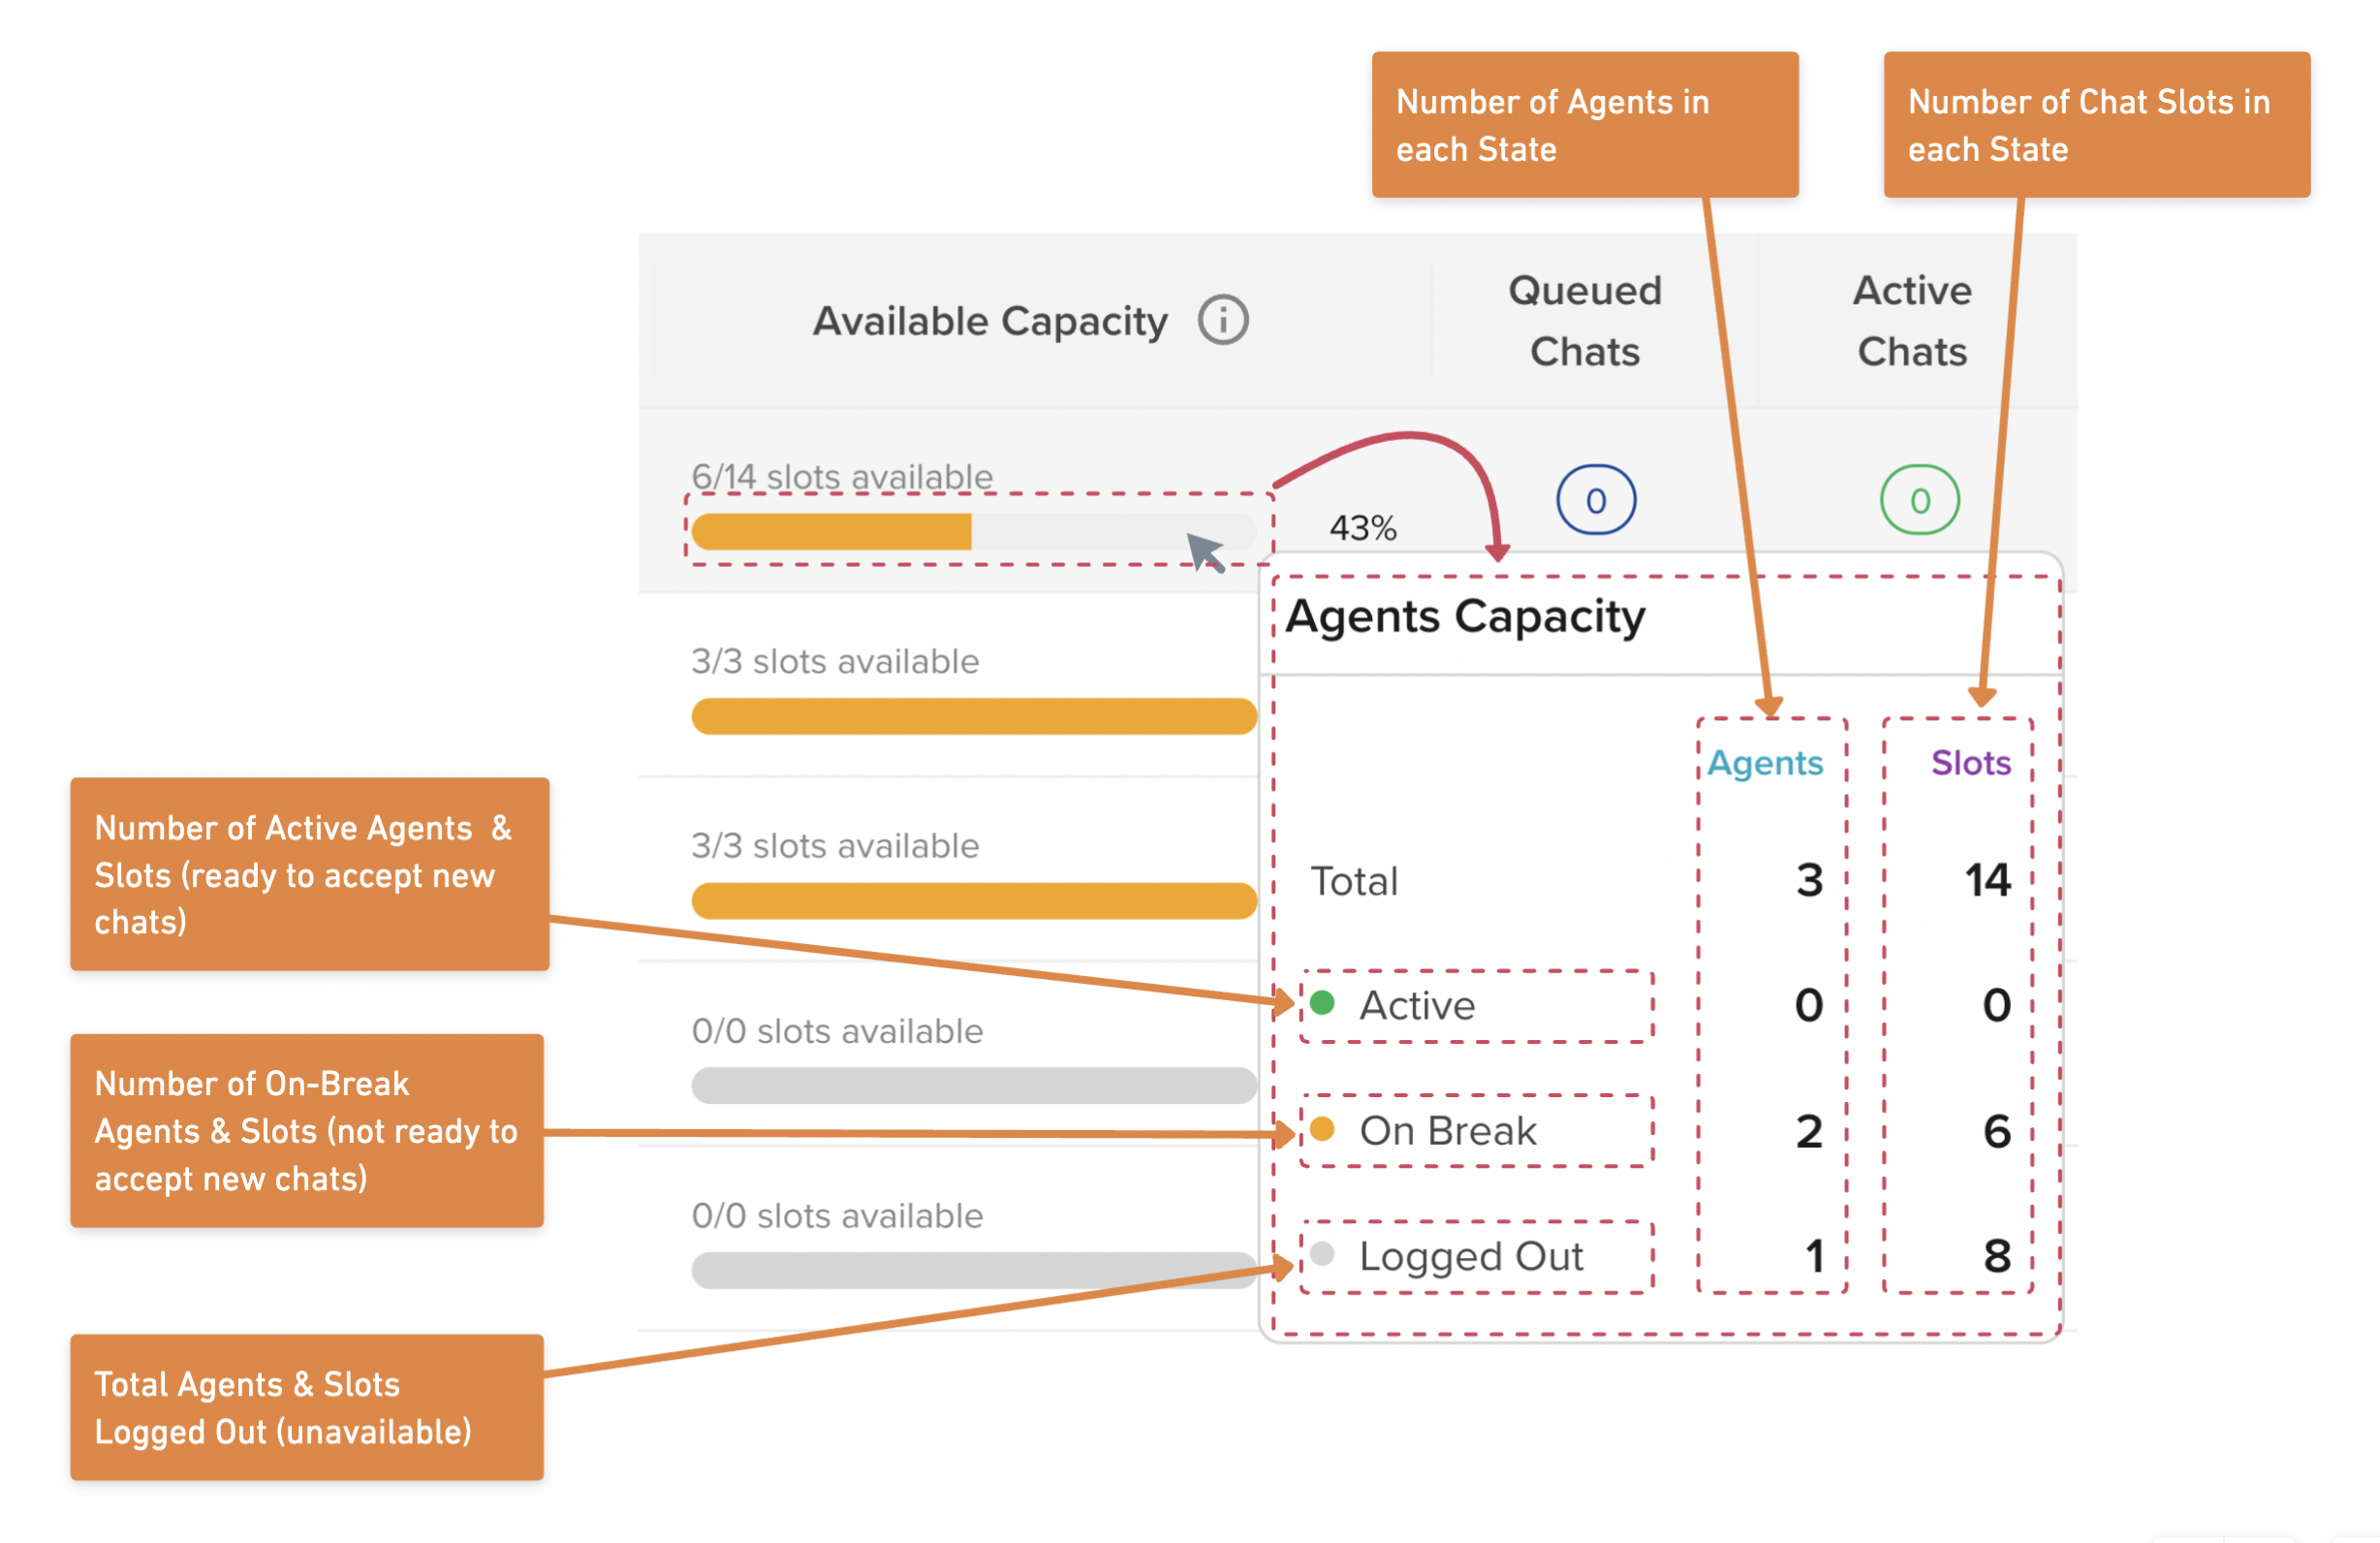
Hovering the cursor on a bar additionally unfurls a pop-up with a detailed breakdown of the number of Agents, and corresponding slots that are either:
- Active (accepting new chats)
- On Break (dormant capacity, but not accepting new chats at the moment)
- Logged Out (they are not logged into Smart Agent Chat)
View Capacity Utilization of Teams
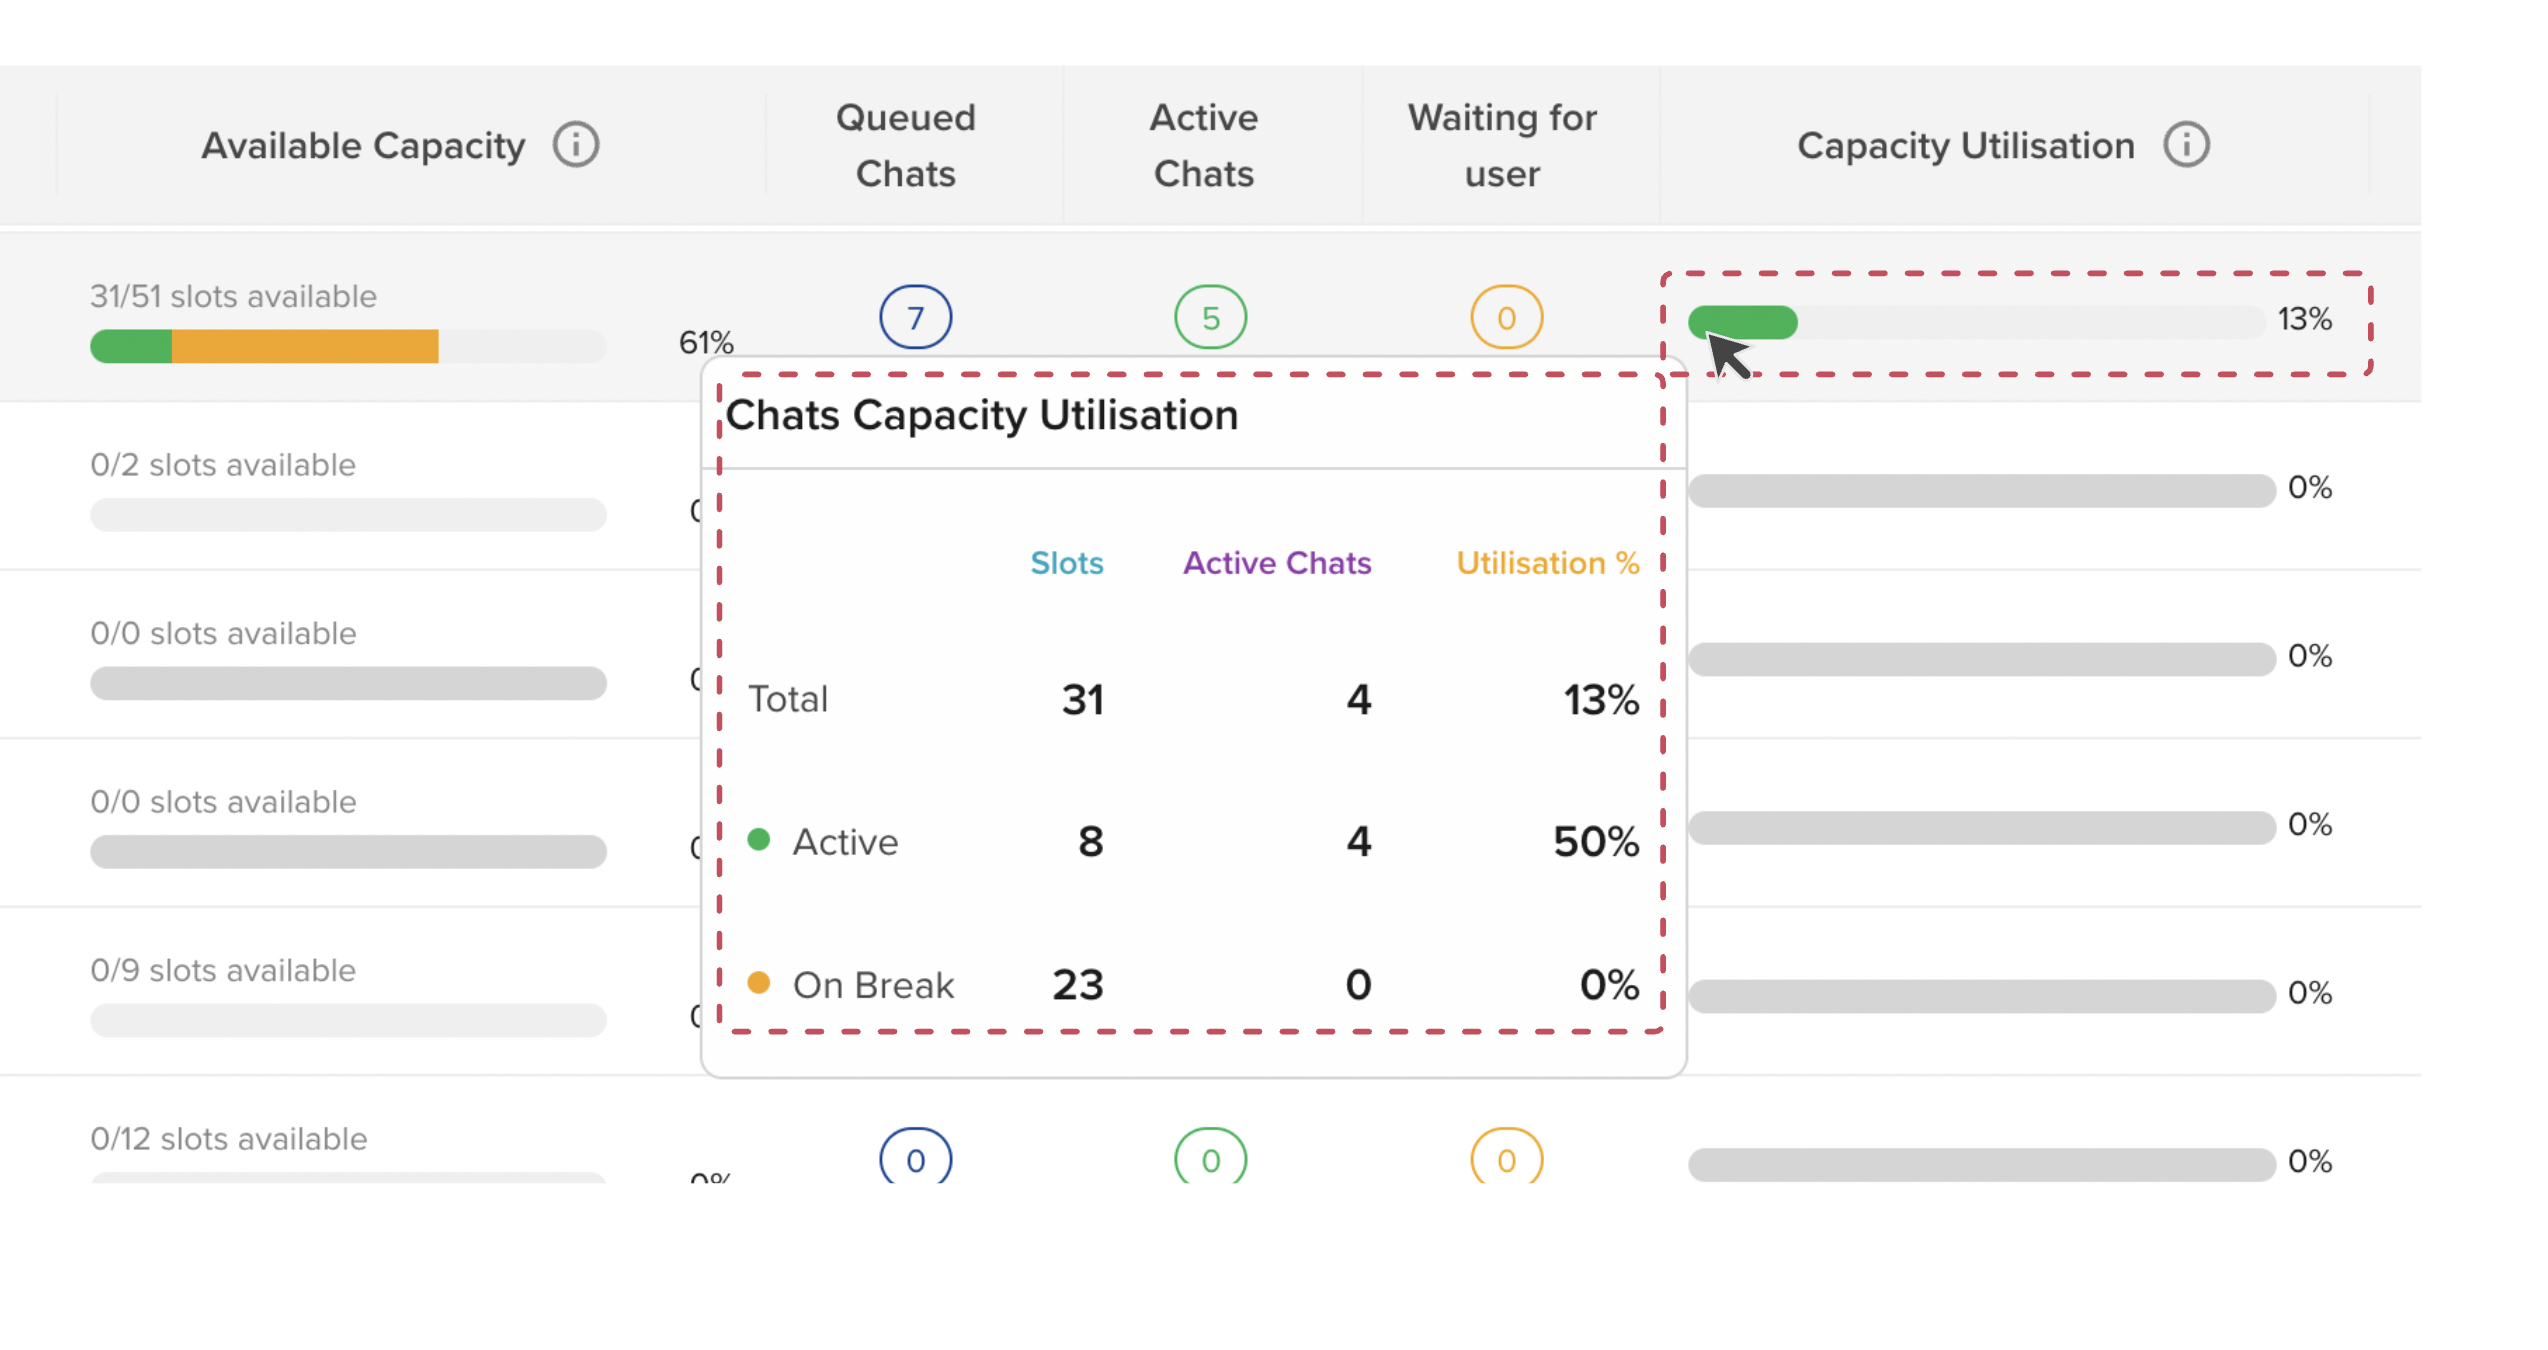
The “Capacity Utilization” column indicates the % of available Agent chat slots that are occupied.
- When capacity utilization is low, the bar is shown in green.
- As the capacity utilization nears 100%, the bar changes to yellow, and eventually red.

If a Team is at maximum capacity while there are chats still waiting in the Team's Queue, it signals a potential bottleneck, as customers will need to wait longer before they are able to chat with an Agent. This is a cue for supervisors to either recall Logged-Out or On-Break Agents, add new Agents to the Team, or increase the maximum concurrency of Agents in that Team.
Hovering the cursor over the utilization bar additionally opens a pop-up with a detailed breakdown of the capacity utilisation of Agents (and their corresponding number of slots) that are Available or On-Break, as shown below.
Capacity Utilization for Agents who are part of multiple Teams
Since an Agent can be shared between multiple Teams, it is possible that Agents are not assigned chats from one Team, because they are already occupied with chats from a different Team. In such cases, it is possible that Queued chats are not assigned to Agents even though the Team's Capacity Utilisation is shown to be less than 100% (as their capacity is being utilized by a different Team).
To validate this, navigate to the Live Traffic section of SAC and filter out all the chats that are being handled by Agents from the relevant Teams.
To prevent this from happening, and minimize complexity, we recommend against adding Agents to multiple Teams unless absolutely necessary. This simplifies workforce management, and reduces the chances of bottlenecks.
Edit Team Settings
Once a Team has been created, you can edit its settings by clicking on the “Edit” icon present at the right edge of the Team row in the list of Teams.

Upon clicking this, a modal will open up on the right edge of the screen containing all the details of the Team.
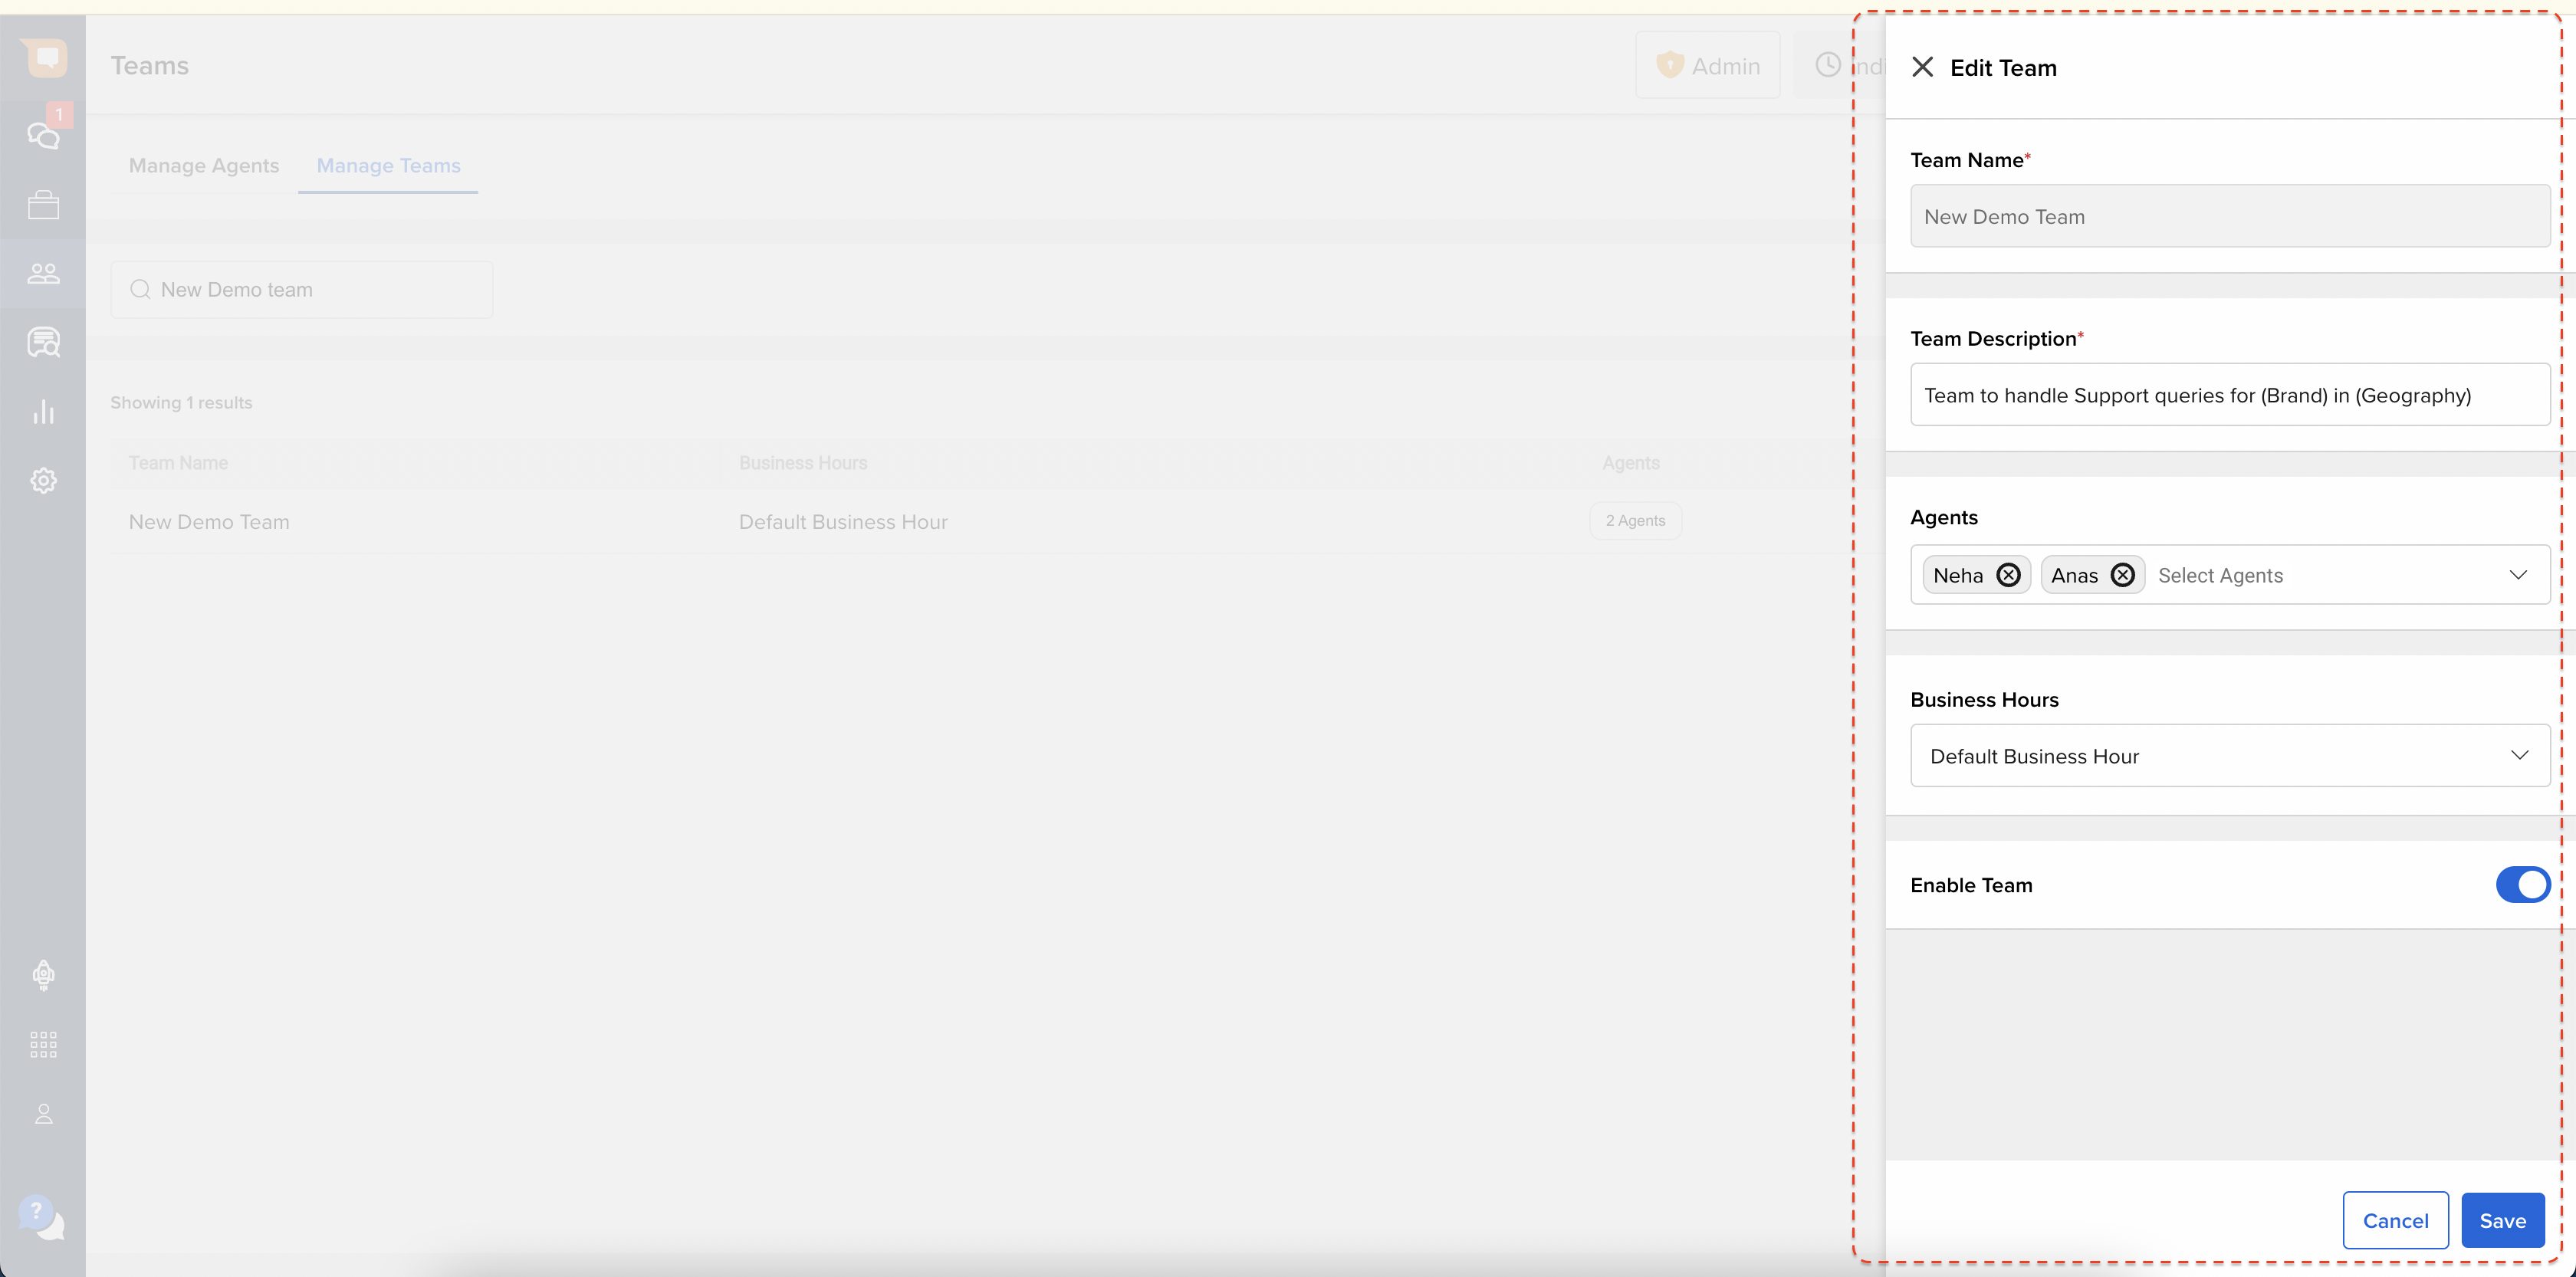
You can now use this Modal to modify the following details associated with that Team:
- Team Description
- Agents assigned to the Team
- Business Hours assigned to the Team
- Team Status
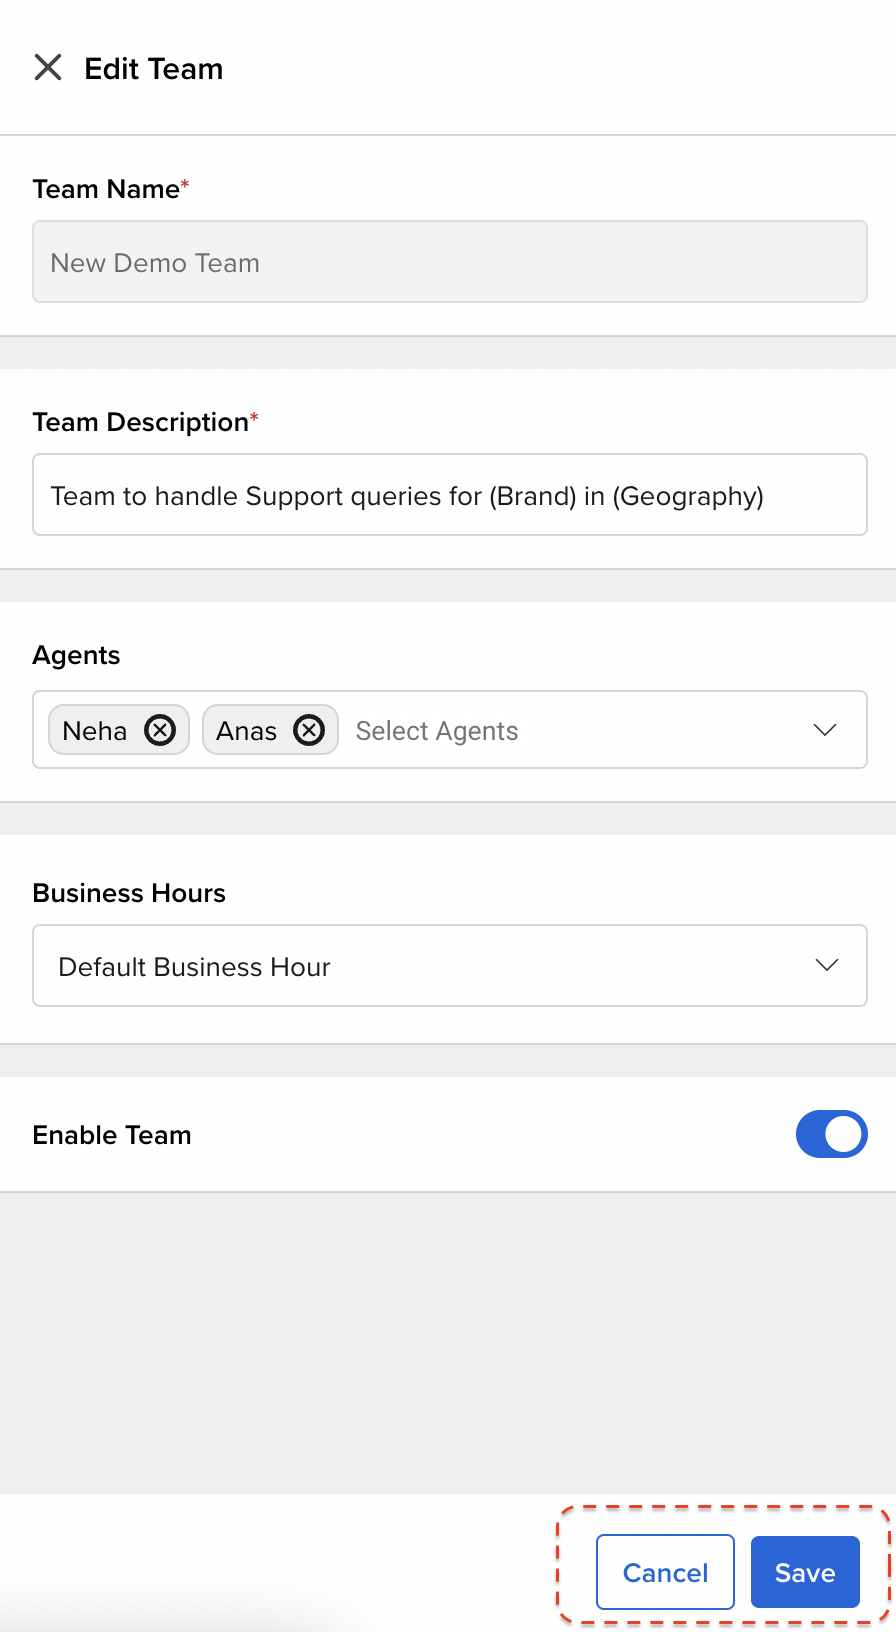
To save any changes made to the Team's settings, click on the “Save” button on the bottom right. Or else, click on “Cancel” to revert any changes that were made.
Disable a Team
To disable a Team on your Account, click on “Edit” icon on the Team row, and then click on the “Enable Team” toggle in the modal.

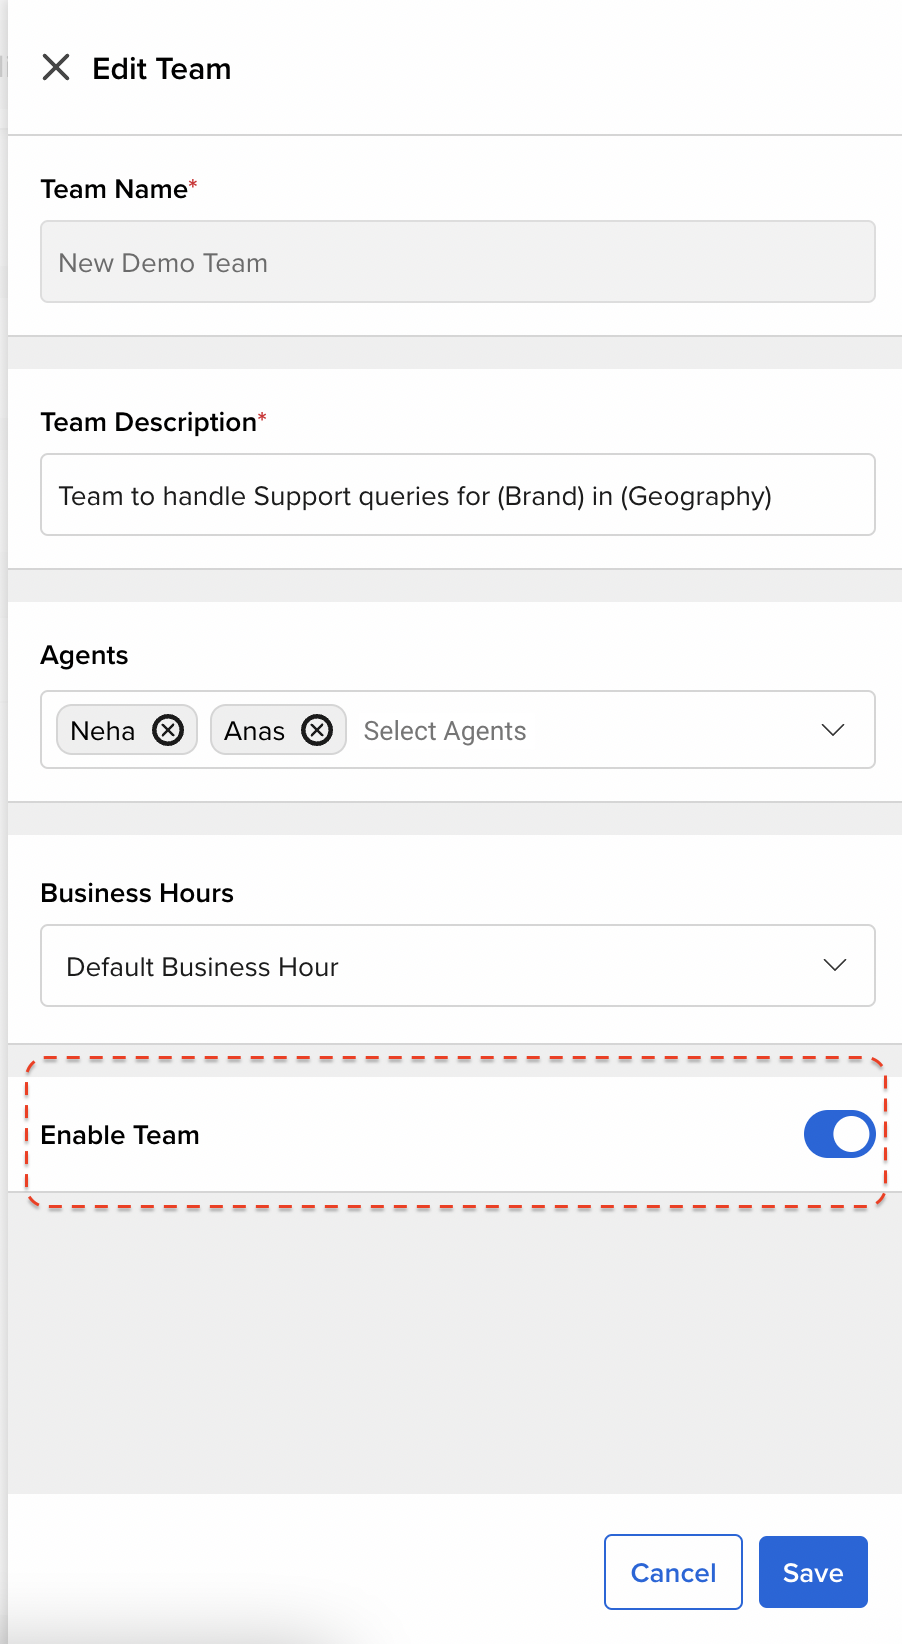
Once a Team has been disabled, the system will show a confirmation popup on the Manage Teams page.
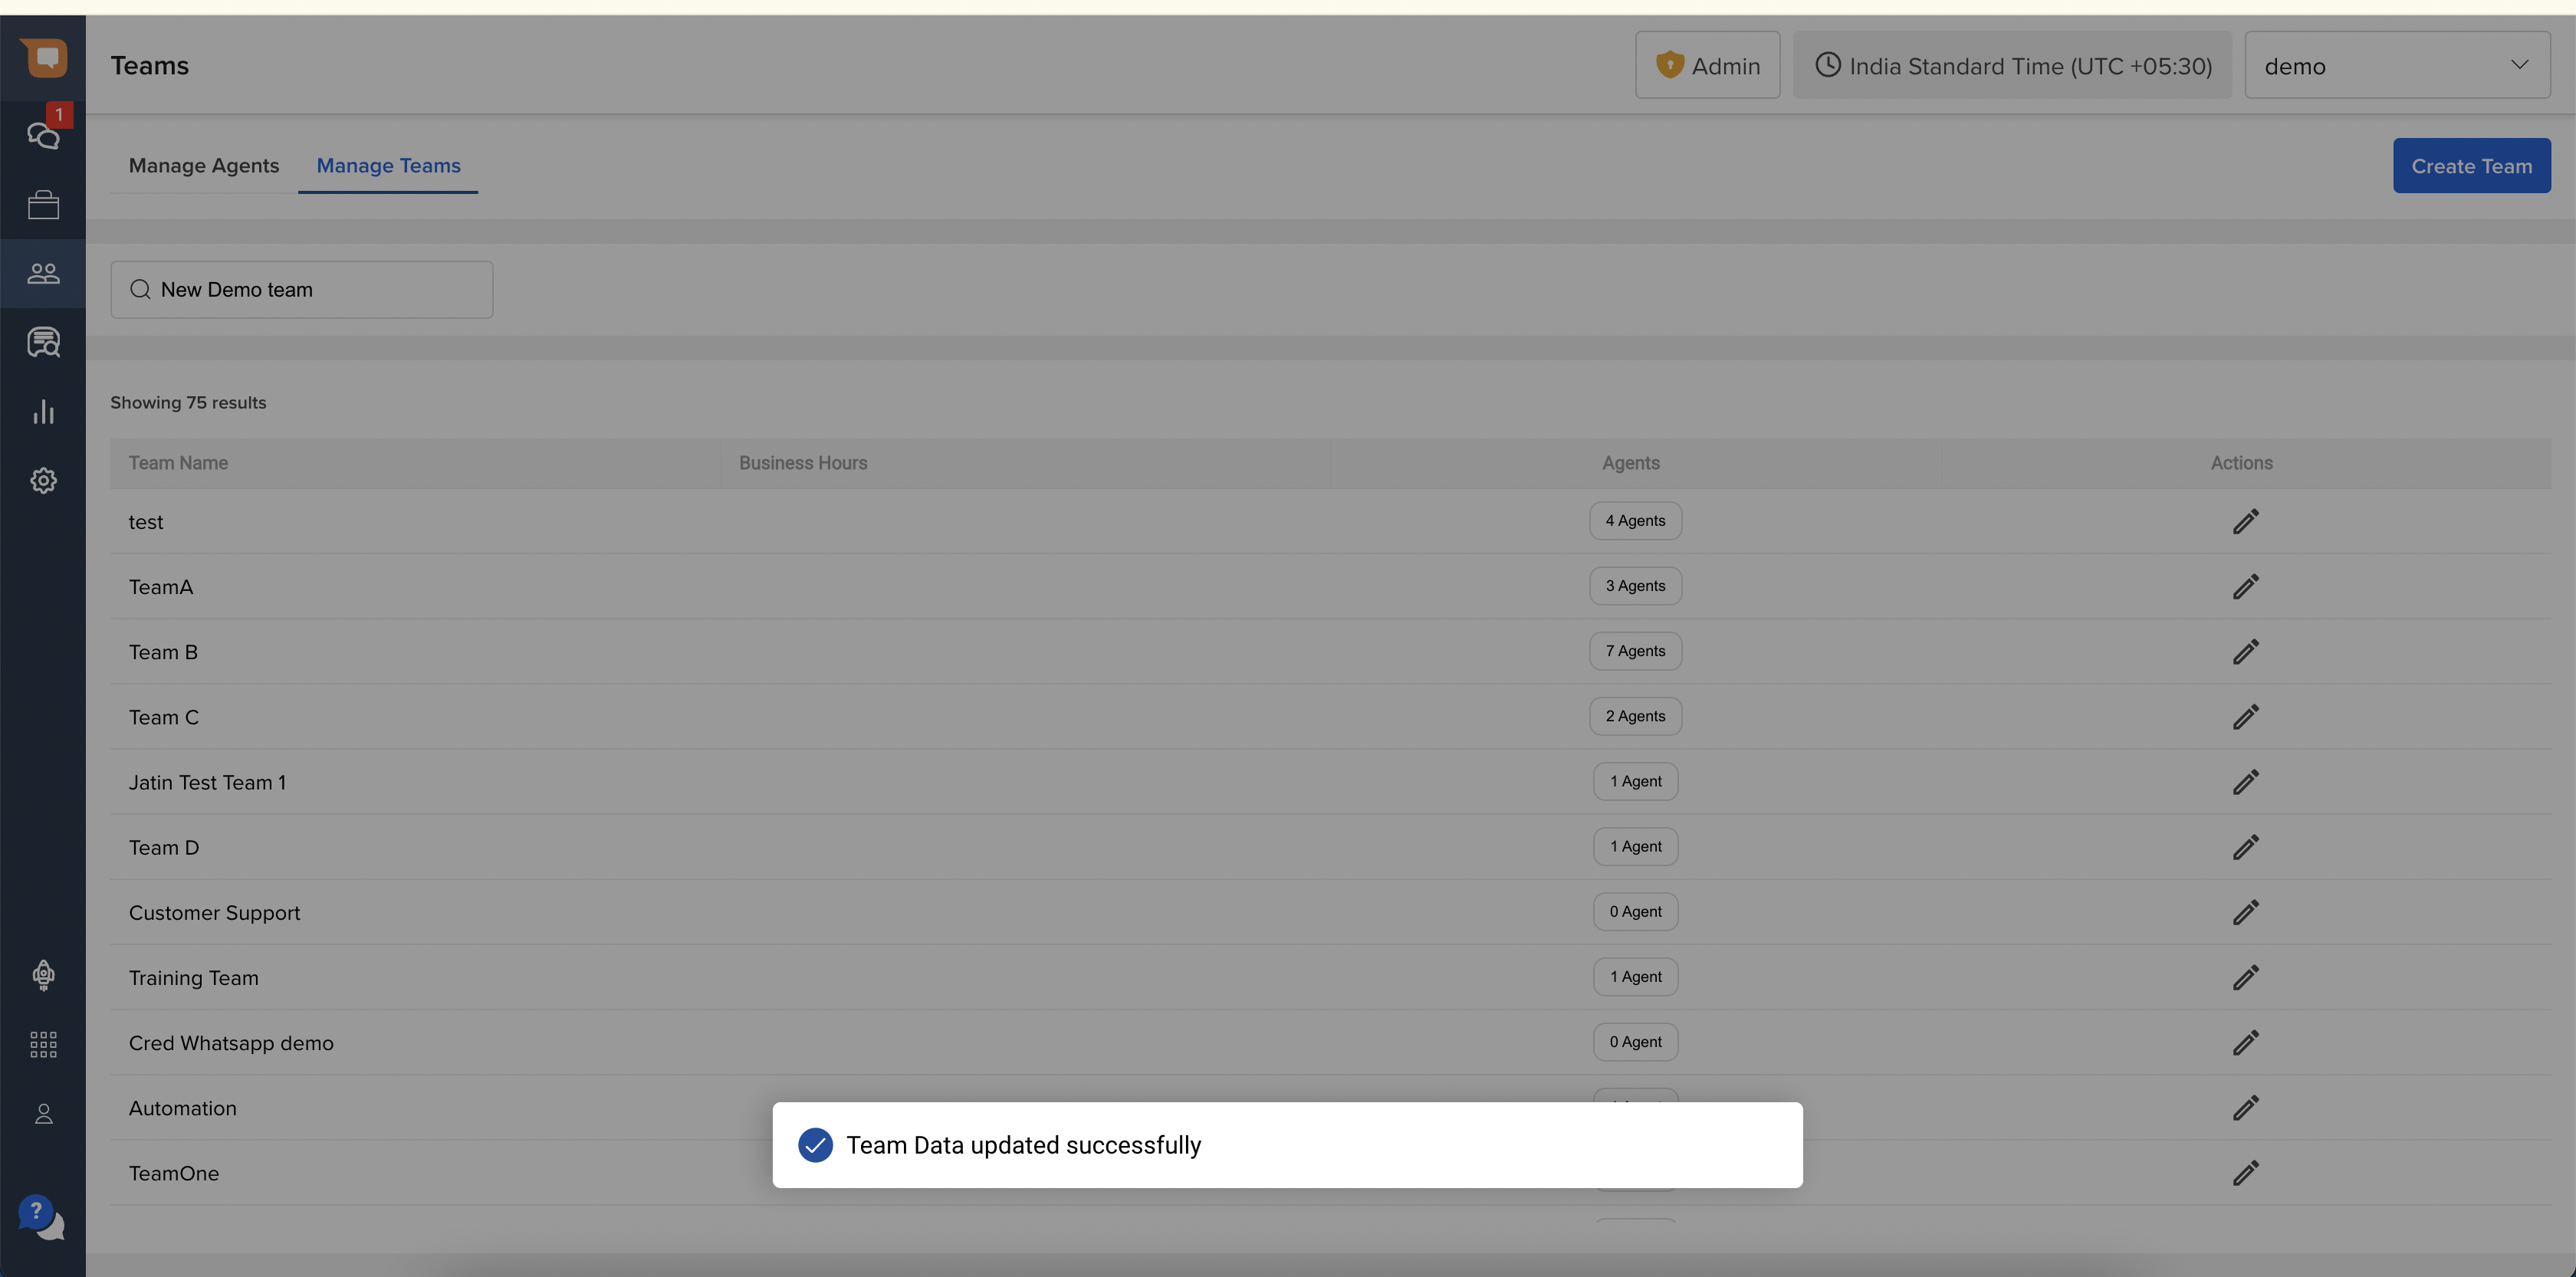
The status of the Team will also be changed to “Disabled” on the main Manage Teams screen, as shown below.

