How to deploy a logged-in bot on my website?

Written by Medha Anand
Updated on August 11th, 2023
- Getting Started
- Bot Building
- Smart Agent Chat
- Conversation Design
-
Developer Guides
Code Step Integration Static Step Integration Shopify Integration SETU Integration Exotel Integration CIBIL integration Freshdesk KMS Integration PayU Integration Zendesk Guide Integration Twilio Integration Razorpay Integration LeadSquared Integration USU(Unymira) Integration Helo(VivaConnect) Integration Salesforce KMS Integration Stripe Integration PayPal Integration CleverTap Integration Fynd Integration HubSpot Integration Magento Integration WooCommerce Integration Microsoft Dynamics 365 Integration
- Deployment
- External Agent Tool Setup
- Analytics & Reporting
- Notifications
- Commerce Plus
- Troubleshooting Guides
- Release Notes
Table of Contents
Overview
User authentication on the SDK is disabled by default. Whenever a user opens the SDK for the first time, a new anonymous user is created. This user's login id is stored in the application stored locally on the device.
This is ideal for chatbots that are either informational in nature or where user identity is handled by a 3rd party provider(Facebook, Twitter, etc).
Since the user information is store locally, once the browser history is cleared, the user information is lost and a new user is created on the subsequent visit.
Custom Client Sign Up
For cases when the client/parent application already has a signup flow in place and wants to link the same user to the SDK, we support Custom Signups.
To enable custom sign up, set the signup-type in the Business manager to signup identifier provided. This will disable the default authentication flow. The chat button will not show up automatically and will wait for the signup call as detailed below.
document.addEventListener('haptik_sdk', function() { HaptikSDK.signup(authOptions, function(success,error) { if (success) { console.log('SIGNUP REQUEST SUCCEEDED!');HaptikSDK.show(); } else { console.log('ERROR:',error); } }); });
authOptions <Object>
An object containing all the data required to initiate the signup handshake. It contains the following keys:
-
auth_id <String>: User Identifier [Mandatory] -
auth_code <String>: Authorisation Token [Mandatory] -
username <String>: The name of the signed in user -
custom_data <Object>(optional): Arbitrary custom data that the client needs to send
callback <Function>
This function is executed after the signup request completes. It is not mandatory to provide this parameter. This can be used by the client to identify status of the authentication process and take additional steps if necessary.
The function is called with the following parameters to report the status of the handshake:
-
status <Boolean>Whether the sign-up was successful or not. -
error <String>When the sign-up process is unsuccessful - it’s an error message. -
data <Object>The sign-up process response from the client API provider.
This method will create a new user, or identify an existing user if his/her signup has taken place before. (We assume that the auth_id of a user of a client will not change). This function will also save/update the auth_code (token) for that user.
Clients are ideally to call this method once they’ve verified the user from their end and want to initiate the handshake process. If the handshake process is successful, the chatbot icon is shown in the webpage. Below is an example for reference.
document.addEventListener('haptik_sdk', function() {
 HaptikSDK.signup({
 username: 'Firstname Lastname',
 auth_id: '9955511100',
 auth_code: 'XXXXXXXXXXXX',
 mobile_no: '0123456789',
 email: 'demo@gmail.com',
 }, function(success,error) {
 if (success) {
 console.log('SIGNUP REQUEST SUCCEEDED!');
 } else {
 console.log('ERROR:',error);
 }
 });
});
Implementation Details
When the client calls the signup method of the SDK by passing auth_id and auth_code, the signup process begins at Haptik's backend.
In order to validate the credentials passed in by the SDK, Haptik's API makes a call to a verification endpoint by passing both auth_id and auth_code and expects the response to indicate if they are valid.
Verification Endpoint
This verification endpoint has to be built at the client's end. Here are some points that need to be kept in mind while developing the verification endpoint:
- The endpoint needs to be built by the client.
- This endpoint must be publicly available.
- This should be a RESTful endpoint that accepts and responds using JSON.
- The verification endpoint should perform the business logic to confirm that the auth_id and auth_code match with each other.
- If they match successfully respond back with a 200 OK response.
- If they do not match successfully then respond back with a 400 Bad Request response.
- If the verification is successful, signup gets completed and the auth_id and auth_code get stored into the User details in Haptik's DB.
- This data is then made available in the request body of the call that Haptik API makes to each integration function. This can be used as necessary by the developer.
Server to Server API call
Haptik API will make a POST call to the above verification endpoint with the following request body:
{
 "auth_id": "<auth_id>",
 "auth_code":"<auth_code>"
}
The endpoint must respond in the following format.
Success Response Format:
{
 "status": true
}
auth_id and auth_code will be the exact auth_id and auth_code values passed by the client while calling the signup method of the SDK while launching the chatbot.
Clients are ideally to call this method once they’ve verified the user from their end and want to initiate the handshake process.
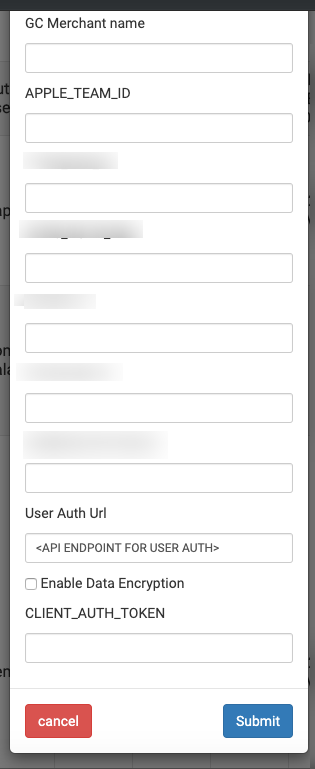
The URL needs to be updated for the account from the account tools on staging as shown below: account Tool
A custom signup example. Read the full documentation in the custom signup section of the documentation.
<!DOCTYPE html>
<html>
<head>
 <title>Haptik JS SDK Custom Sign Up Demo</title>
 <meta charset="UTF-8">
 <meta content="width=device-width; initial-scale=1.0;" name="viewport">
</head>
<body>
 <div style="width: 100%; padding-top: 100px;">
 <div style="max-width: 7000px; margin: 0 auto; padding: 0 40px; text-align: left;">
 <h4>Haptik JS SDK</h4>
 </div>
 </div>
</body>
<script type="text/javascript">
 window.haptikInitSettings = {
 "business-id": <View Credentials>, # Find the documentation link below to know what View Credentials is
 "client-id": <View Credentials>, # Find the documentation link below to know what View Credentials is
 "base-url": "https://staging.hellohaptik.com/",
 'signup-type': 'third_party' # Please connect with your Haptik SPOC for third party custom signup
 };
</script>
<script type="text/javascript" charset="UTF-8"
 src="https://toolassets.haptikapi.com/platform/javascript-xdk/production/loader.js"></script>
<script>
 document.addEventListener('haptik_sdk', function () {
 HaptikSDK.signup({
 username: 'John Doe',
 auth_id: '890xxxxx',
 auth_code: 'xxxxxxx',
 mobile_no: '9123456789',
 email: 'demo@gmail.com',
 custom_data: { demo: 'demo' }
 }, function (success, error, data) {
 if (success) {
 console.log('SIGNUP REQUEST SUCCEEDED!', data);
 } else {
 console.log('ERROR:', error);
 }
 });
 });
</script>
</html>
Expiring Tokens
Often, tokens expire and must be renewed. The SDK exposes a renewSignupToken method for this exact purpose. This method must be explicitly called whenever the authentication token expires so that the server has the most up-to-date valid token.
This method must be called only after successful user signup using the HaptikSDK.signup() method.
HaptikSDK.renewSignupToken(newToken, callback);
newToken <String>
The newly renewed token.
callback <Function>
This function is executed after the signup request completes
It is not mandatory to provide this parameter. This can be used by the client to identify the status of the authentication process and take additional steps if necessary.
The function is called with the following parameters to report the status of the handshake --
-
status <Boolean>Whether the sign-up was successful or not. -
error <String>When the sign-up process is unsuccessful - it’s an error message. -
data <Object>The sign-up process response from the client API provider.
