How to Set Up CIBIL Integration on Haptik Bot

Written by Soham Amburle
Updated on April 19th, 2023
- Getting Started
- Bot Building
- Smart Agent Chat
- Conversation Design
-
Developer Guides
Code Step Integration Static Step Integration Shopify Integration SETU Integration Exotel Integration CIBIL integration Freshdesk KMS Integration PayU Integration Zendesk Guide Integration Twilio Integration Razorpay Integration LeadSquared Integration USU(Unymira) Integration Helo(VivaConnect) Integration Salesforce KMS Integration Stripe Integration PayPal Integration CleverTap Integration Fynd Integration HubSpot Integration Magento Integration WooCommerce Integration Microsoft Dynamics 365 Integration
- Deployment
- External Agent Tool Setup
- Analytics & Reporting
- Notifications
- Commerce Plus
- Troubleshooting Guides
- Release Notes
Table of Contents
What is CIBIL?Prerequisites for using CIBIL integrationHow to set up?How does the CIBIL integration work?What is CIBIL?
CIBIL stands for Credit Information Bureau (India) Limited, and it is a credit bureau or credit information company, responsible for maintaining the records of all the credit-related activities of companies as well as individuals, including credit cards and loans. It helps us to fetch our credit scores.
CIBIL collects monthly credit reports from banks, lenders, various financial institutions, and other sources. It then analyzes the data and compiles a credit history report with a credit score against each record.

Bots that provide solutions for banks and financial institutions might require access to credit reports to facilitate loan applications. These ready-to-use credit reports created by CIBIL will help in reducing the time taken for handling loan applications.
Bots created on Haptik can facilitate easy access to these credit reports as Haptik has partnered with CIBIL. Haptik has created a ready-to-use Smart Skill (Credit Score Smart Skill) to fetch these credit reports.
Apart from providing these Credit Reports, there are a few more key features that are supported on the CIBIL Integration with Haptik. You can read more about it, here.
Prerequisites for using CIBIL integration
- CSR Token
- Whitelisted IPs
- P12 Certificate
- SiteName, AccountName, AccountCode, ProductConfigurationID, and UAT URL
How to set up?
You can follow the below steps to set up CIBIL integration on your bot using which users can fetch CIBIL's credit scores and reports on the bot.
Step 1: You would need to generate a CSR token for your bot with the help of CIBIL team. You can learn more about it, here.
Step 2: Once you have generated a CSR token, you will have to get your IPs whitelisted by the CIBIL team. You will have to send these IPs over email and this process will take up to 8-10 days.
Step 3: Once the IPs are whitelisted, the CIBIL team will send a mail along with the steps for creating a P12 Certificate, and the URL that you can use for calling the APIs. You can also follow the steps mentioned in this document for generating the P12 Certificate.
Step 4: Next, you will require SiteName, AccountName, AccountCode, ProductConfigurationID, and UAT URL. All of these will be provided by the CIBIL team, and they will be Business-specific.
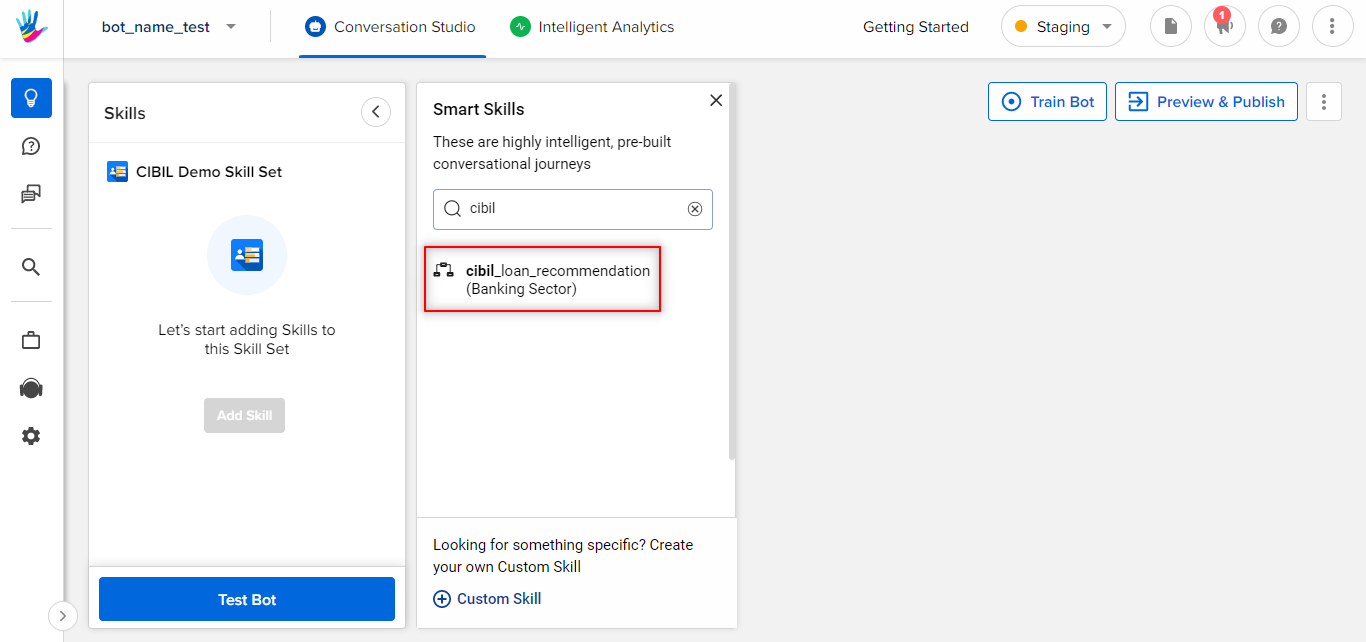
Step 5: You can create a bot on Haptik and add the Credit Score Smart Skill to it. The name of the Smart Skill is cibil_loan_recommendation. Read here to learn how to build a bot on Haptik.
Step 6: After adding the Smart Skill to your bot, you will have to make certain updates on one of the Code Steps of the Smart Skill. Click on the More option available on the top-right corner and then choose Variables. You can add CIBIL credentials under these Variables.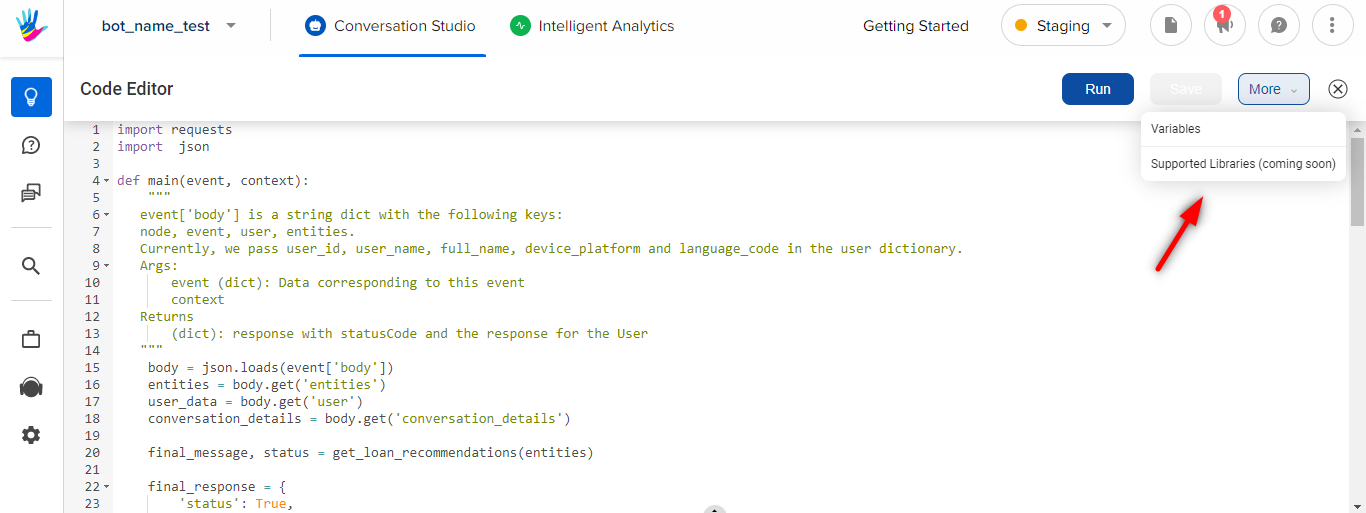
The following is the list of CIBIL credentials to be added as variables.
- ACCOUNT_CODE
- ACCOUNT_NAME
- P_PASSWORD: This is the p12password generated at the time of the P12 Certificate.
- PRODUCT_CONFIGURATION_ID
- SITE_NAME
Except for P_PASSWORD, all details will be provided by the CIBIL team.
Step 7: Next, you navigate to the Code Step “get cibil report and score”, and on lines 8, 10, and 12, change the following.
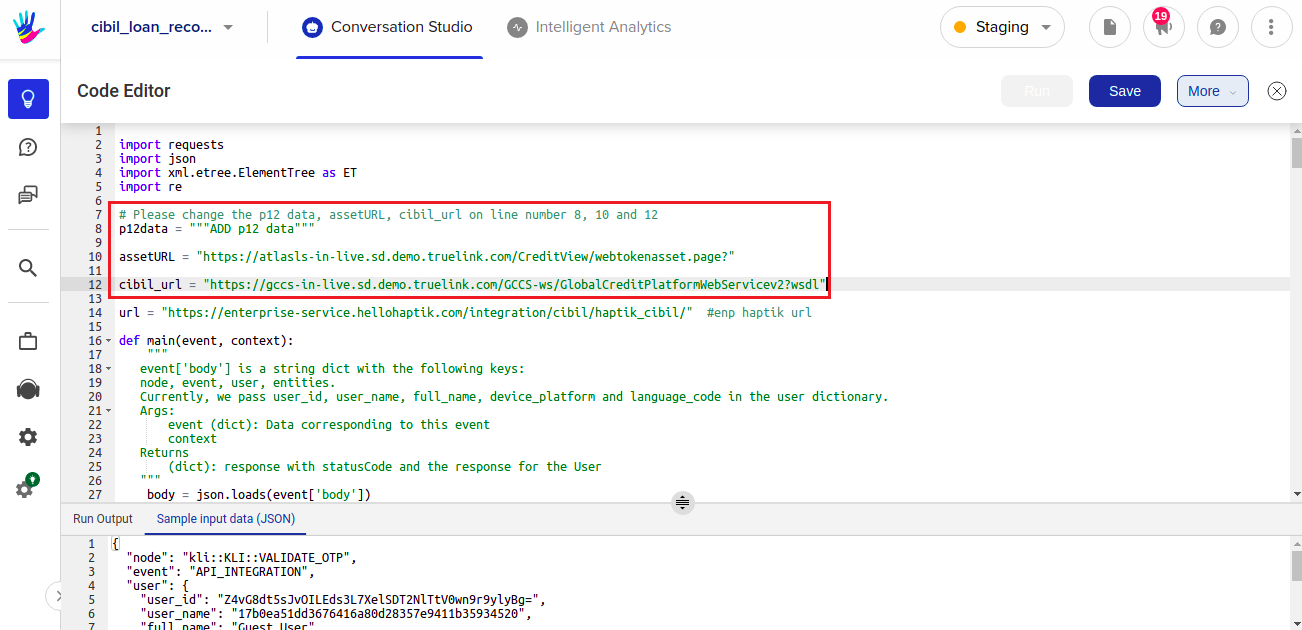
- p12data
- assetURL (UAT URL provided by CIBIL Team)
- cibil_url (Provided by CIBIL Team)
Step 8: Next, you can navigate to Code Step “verify OTP”, and on lines 8 and 10, change the following -
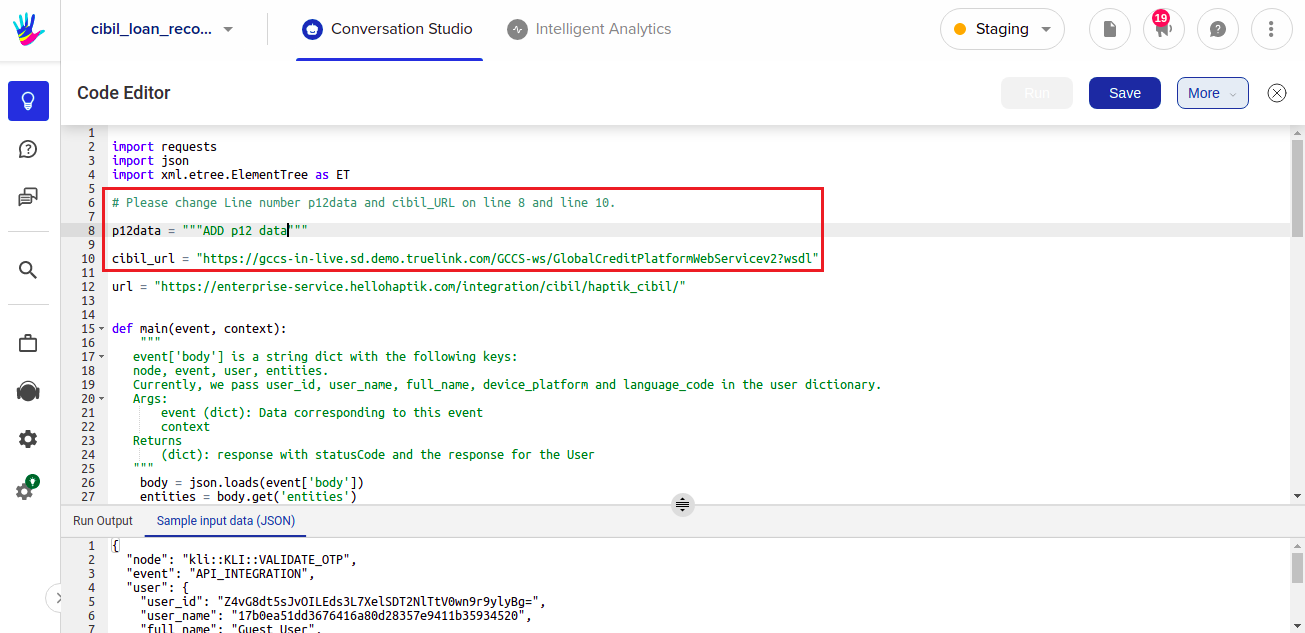
- p12data
- cibil_url(Provided by CIBIL Team)
Once you have completed all the above steps and made all required changes, you are good to go. You will be able to use this Smart Skill on your bot for fetching the CIBIL score and CIBIL report.
How does the CIBIL integration work?
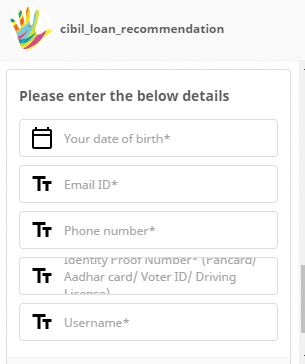
When you have successfully added this Smart Skill to your bot, you can test this with the users. When the user comes on the bot, the bot will initially ask the user to fill up a form with appropriate user details, as shown in the image below.
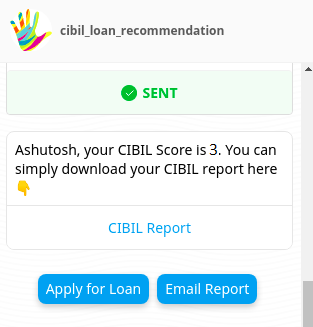
Once the user has added the required details, the bot will straightaway display the CIBIL score if the user is an existing user. On the other hand, if the user is new on the bot, the bot will then ask the user for OTP verification, after which, if the OTP entered by the user is correct, the bot will display the CIBIL score and report.
After fetching the CIBIL score and report, the user can then choose to apply for a loan, or get the CIBIL score and report emailed to their email id by selecting an appropriate option presented by the bot.
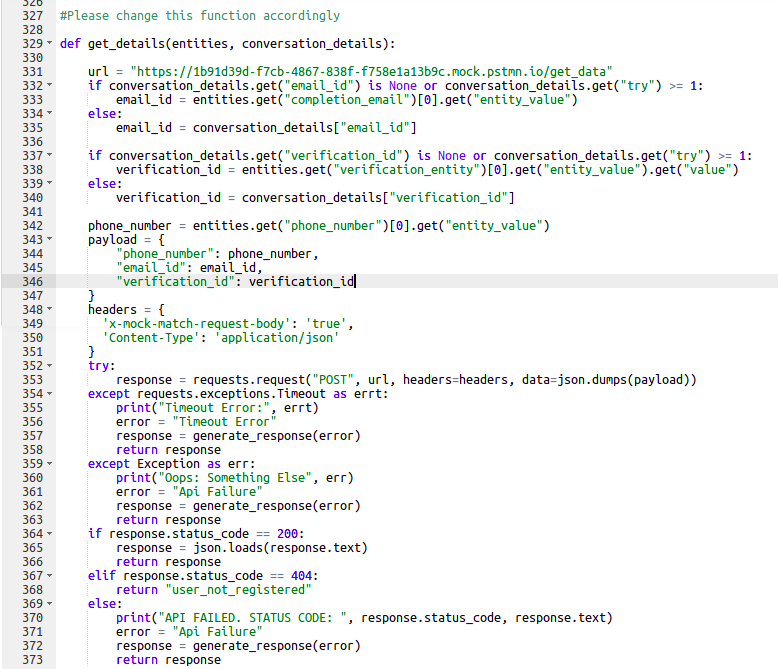
Now, as discussed above, the bot will ask for user details from the user. As a Business, you might not need all these 5 details from the users, as you already have some of the details with you. That is when the get_details function can be used, where you can remove the entity fields that you do not require in the form.
To make updates in the fields which are being asked from the user, you can change the get_details function on the Code Step "Get cibil report and score".
Function |
Change |
def get_detaills(entities) |
Request body Sample: |
You should read this article to learn about the working of the entire Smart Skill.
Once all these changes are made, feel free to test your bot and if everything is working fine, you are ready to take your bot live.
