Creating a Output Step to Static Step Connection
- Getting Started
- Bot Building
- Smart Agent Chat
- Conversation Design
-
Developer Guides
Code Step Integration Static Step Integration Shopify Integration SETU Integration Exotel Integration CIBIL integration Freshdesk KMS Integration PayU Integration Zendesk Guide Integration Twilio Integration Razorpay Integration LeadSquared Integration USU(Unymira) Integration Helo(VivaConnect) Integration Salesforce KMS Integration Stripe Integration PayPal Integration CleverTap Integration Fynd Integration HubSpot Integration Magento Integration WooCommerce Integration Microsoft Dynamics 365 Integration
- Deployment
- External Agent Tool Setup
- Analytics & Reporting
- Notifications
- Commerce Plus
- Troubleshooting Guides
- Release Notes
Table of Contents
1. Transition based on messages sent by the user (User Messages based Connection):2. Transition based on values of entities given by the user (Entities based Connection):You can transition from an output step to a static step based on User Messages or Entities. This functions the same way as Static to Static Connection.
You might want to transition from one static step to another based on the user's input to branch into a different information collection flow.
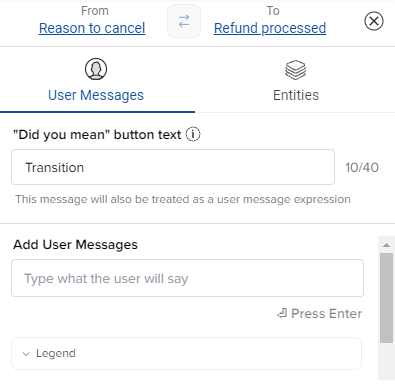
The connections you create can prompt a user to transition from one step to the next in the following three ways:
1. Transition based on messages sent by the user (User Messages based Connection):
This is when a conversation moves from one step to another based on a particular keyword/phrase or set of keywords sent by a user.
- To set a connection based on user input, click on the arrow linking the two steps you need to connect
- The User Messages tab opens up, here you can add the user variations as shown below -
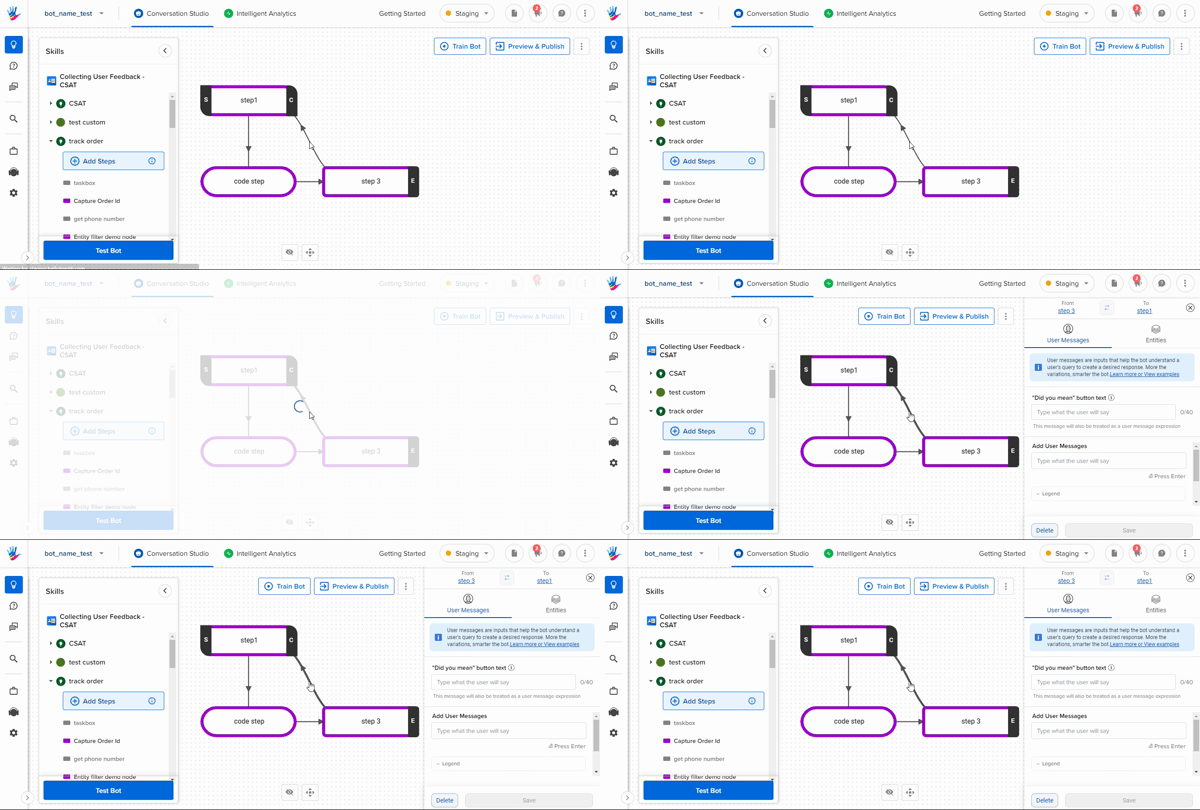
2. Transition based on values of entities given by the user (Entities based Connection):
You can create a connection between two steps on the basis of the values collected from the user in the forms of Entities.
There are 3 options when you open the Entities tab on the Connection line.
-
Do not connect:
- This option will not use the selected entity for the connection. For example, if you do not wish to connect Step 1 to Step 2 on the basis of person_name, you can select the Connection as Do not connect.
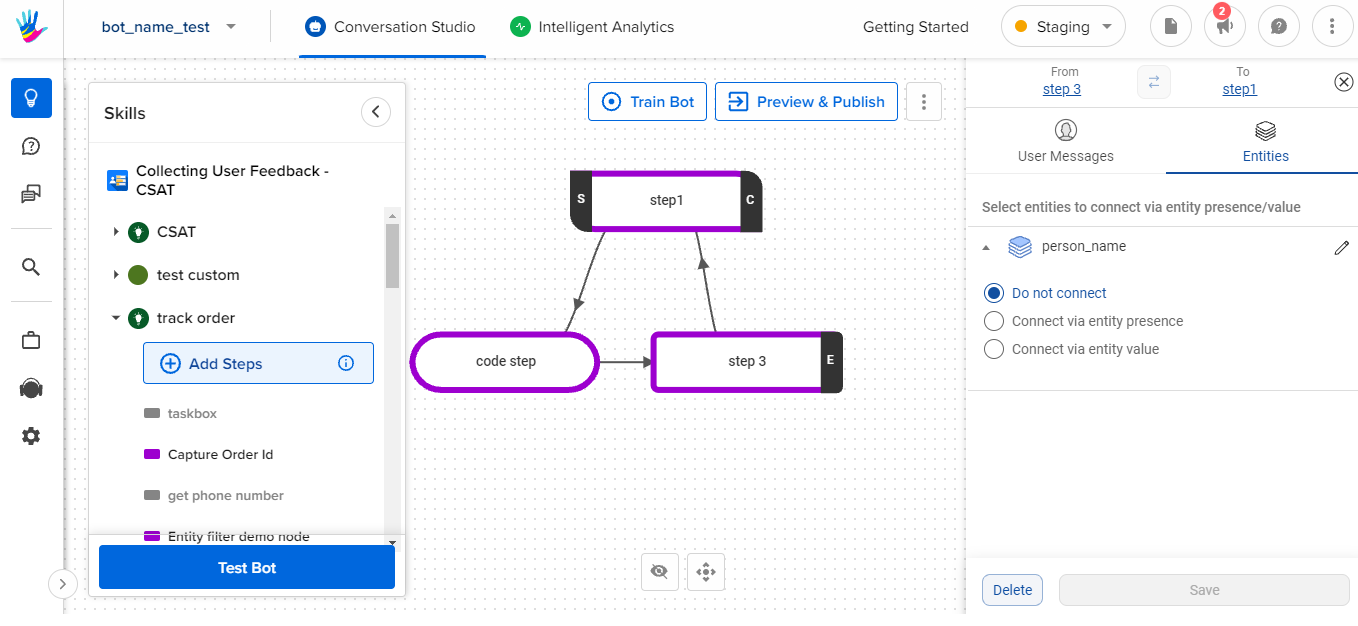
- This option will not use the selected entity for the connection. For example, if you do not wish to connect Step 1 to Step 2 on the basis of person_name, you can select the Connection as Do not connect.
-
Connect via entity presence:
- When you’ve added an entity to a conversation, you can define the transition from the step with the entity to the next as only being possible if the user has input a response that falls within the entity. This is particularly helpful when you are setting a conversational flow in which a user needs to input something like a phone number or email ID. All values within the entities are accepted, but the bot will be able to determine whether or not the user has input the correct type of value (i.e. a 9 digit number or a complete email address)
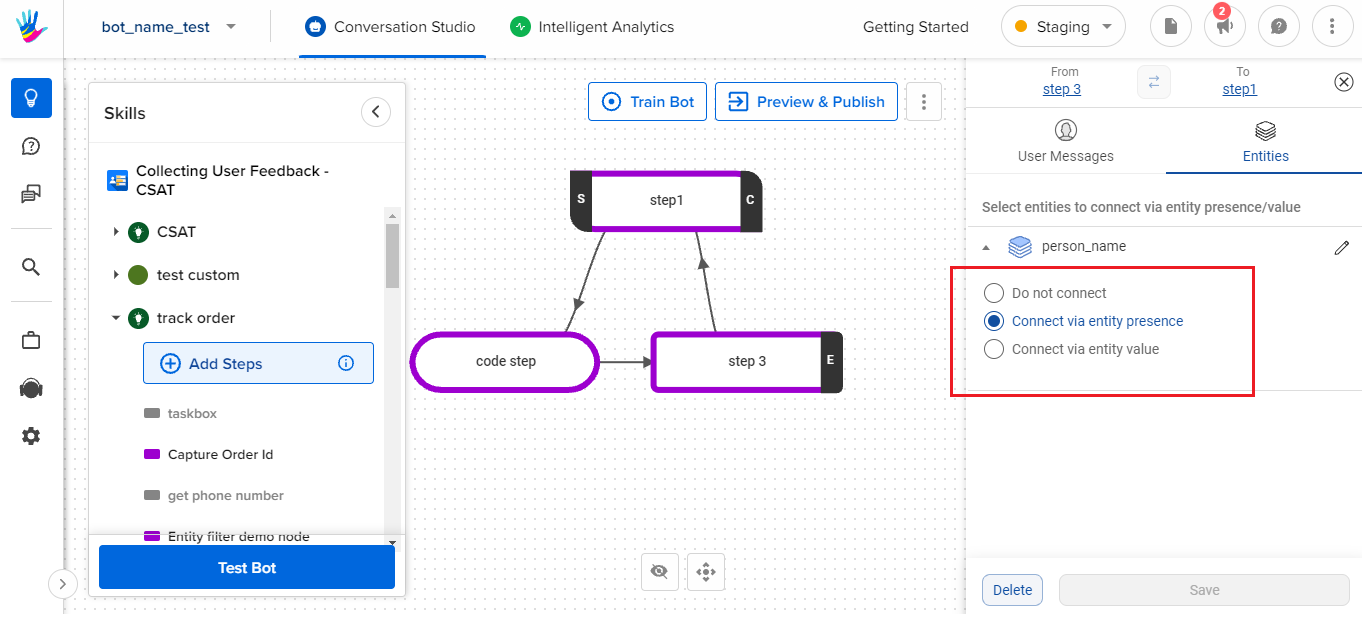
- When you’ve added an entity to a conversation, you can define the transition from the step with the entity to the next as only being possible if the user has input a response that falls within the entity. This is particularly helpful when you are setting a conversational flow in which a user needs to input something like a phone number or email ID. All values within the entities are accepted, but the bot will be able to determine whether or not the user has input the correct type of value (i.e. a 9 digit number or a complete email address)
-
Connect via entity value:
-
You can create a connection on the basis of a particular value(s) of an entity.
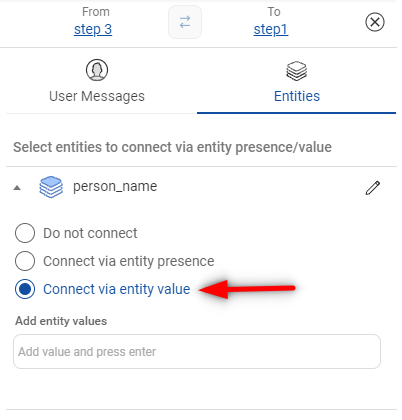
- Here, you add the entity value and press the enter key on your keyboard. You can add multiple values for this entity.
-
You can create a connection on the basis of a particular value(s) of an entity.
The entities from the first step automatically appear in a drop-down menu. Select from the list to complete the creation of a transition based on entity presence.
