Team Queue Overflow
- Getting Started
- Bot Building
- Smart Agent Chat
- Conversation Design
-
Developer Guides
Code Step Integration Static Step Integration Shopify Integration SETU Integration Exotel Integration CIBIL integration Freshdesk KMS Integration PayU Integration Zendesk Guide Integration Twilio Integration Razorpay Integration LeadSquared Integration USU(Unymira) Integration Helo(VivaConnect) Integration Salesforce KMS Integration Stripe Integration PayPal Integration CleverTap Integration Fynd Integration HubSpot Integration Magento Integration WooCommerce Integration Microsoft Dynamics 365 Integration
- Deployment
- External Agent Tool Setup
- Analytics & Reporting
- Notifications
- Commerce Plus
- Troubleshooting Guides
- Release Notes
Table of Contents
Beta Feature
This feature is currently in beta. To get access, please contact your customer success manager.
This feature is only available to SAC Pro customers
Introduction
When contact centre queues face an unexpected spike in customer queries, dedicated Agents might not have sufficient bandwidth to adapt to such spikes. This results in longer queue wait times, which can frustrate irate customers & lower CSAT. Since these tend to be one-off instances, designating additional agents to handle the extra traffic can increase costs, and result in redundant agent capacity over time.
To address this and improve customer satisfaction, SAC's Team Queue Overflow feature enables businesses to maintain backup agents who are assigned chats only if certain conditions are met, or allow users to exit the queue in favour of pursuing alternatives, such as raising a ticket. This helps reduce missed chats, minimise customers' queue wait time, and improve customer CSAT.
Accessing the feature
- Open Admin Settings on the left nav bar
- In the Team Settings section, click on the setting named “Queue Overflow Handling”
Both Admins and Team Leads can configure Queue Overflow settings for all Teams.

Feature Overview
You can tell that your queue is overflowing, when your customers' average queue wait time exceeds a certain duration. Hence, this feature first allows you to define a “Maximum Queue Wait Time” before queue overflow actions are triggered.
Once the maximum queue wait time is exceeded, this feature allows you to take 2 types of actions to handle queue overflows:
-
Route chats to backup agents:
- This feature allows you to designate agents in any Team as “Secondary Agents".
- When your primary agents are busy AND the max queue wait time has expired, the system starts assigning chats to available Secondary Agents in the Team.
- Secondary Agents are not assigned chats if the max queue wait time has not yet expired.
-
Allow users to exit the queue and return to the chatbot:
- If you decide to not staff Secondary Agents, OR if both your primary and secondary agents are busy even after the max queue wait time has expired, this feature allows you to configure an optional “Queue Exit Message”.
- The queue exit message provides your customers with an option to either continue waiting till an agent is assigned, or exit the queue and return to the chatbot.
- This message can also be used to trigger a chatbot flow upon returning the chat to the chatbot. For e.g., if you wish to let customers raise a ticket instead of waiting in queue for an agent, you can configure a ticketing journey on your chatbot, and trigger that flow using the queue exit message.
- If a queue exit message is not configured, a chat continues to remain in queue till either a Primary or Secondary Agent is available to accept that chat.
Important scenarios involving Queue Overflow Handling
- If Primary Agents are Offline, but Secondary Agents are available, chats will still remain in queue till the Maximum Queue Wait Time has expired, before the chats are assigned to the Secondary Agents. If however any Primary Agents come online within this time, they are assigned the chat over Secondary Agents.
- Upon receiving the Queue Exit Message, if a customer opts to ‘continue waiting’, the Maximum Queue Wait Time timer is reset, and the Queue Exit Message is sent again each time this timer ends. However, if the customer doesn't respond to the Queue Exit Message, the MQWT timer does not get reset, even though the chat continues to retain its position in the queue.
- If a customer opts to exit a queue, they forfeit their queue position. If they later re-attempt connecting with an Agent, the customer is assigned a new position in the queue.
- Queue overflow actions are NOT triggered for chats waiting in an Agent Queue.
Setting the Maximum Queue Wait Time
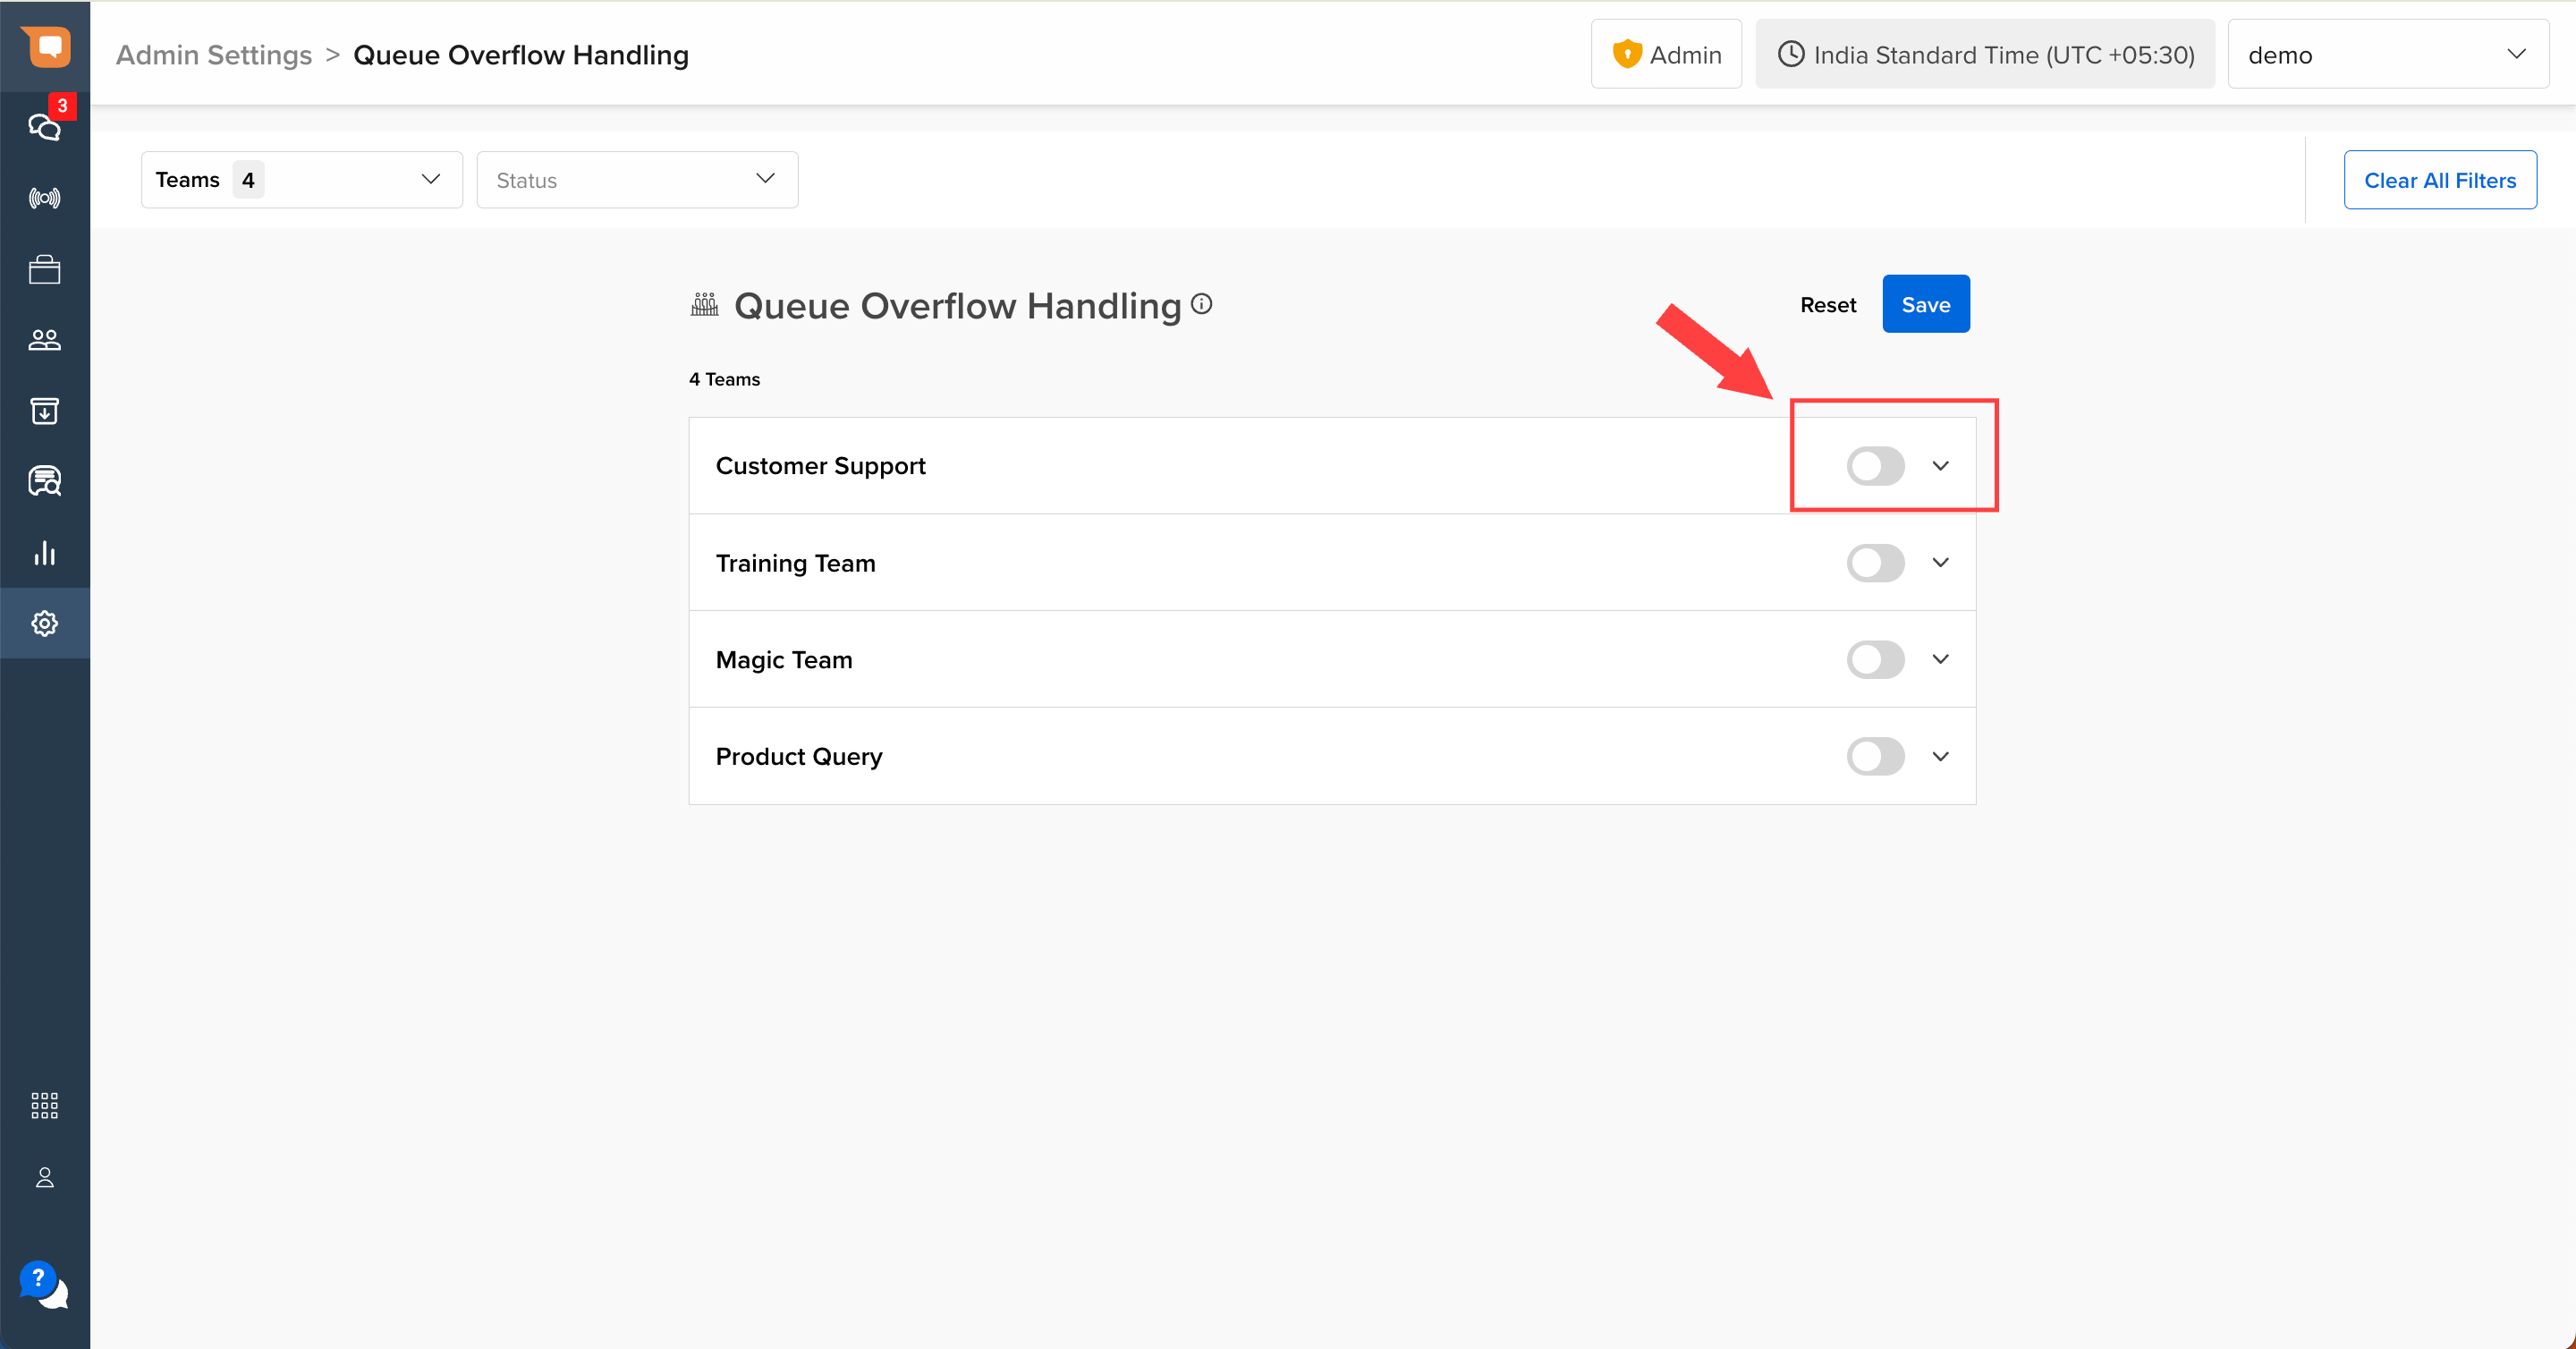
Use the toggle for a specific Team to enable Queue Overflow for that Team, as shown below.
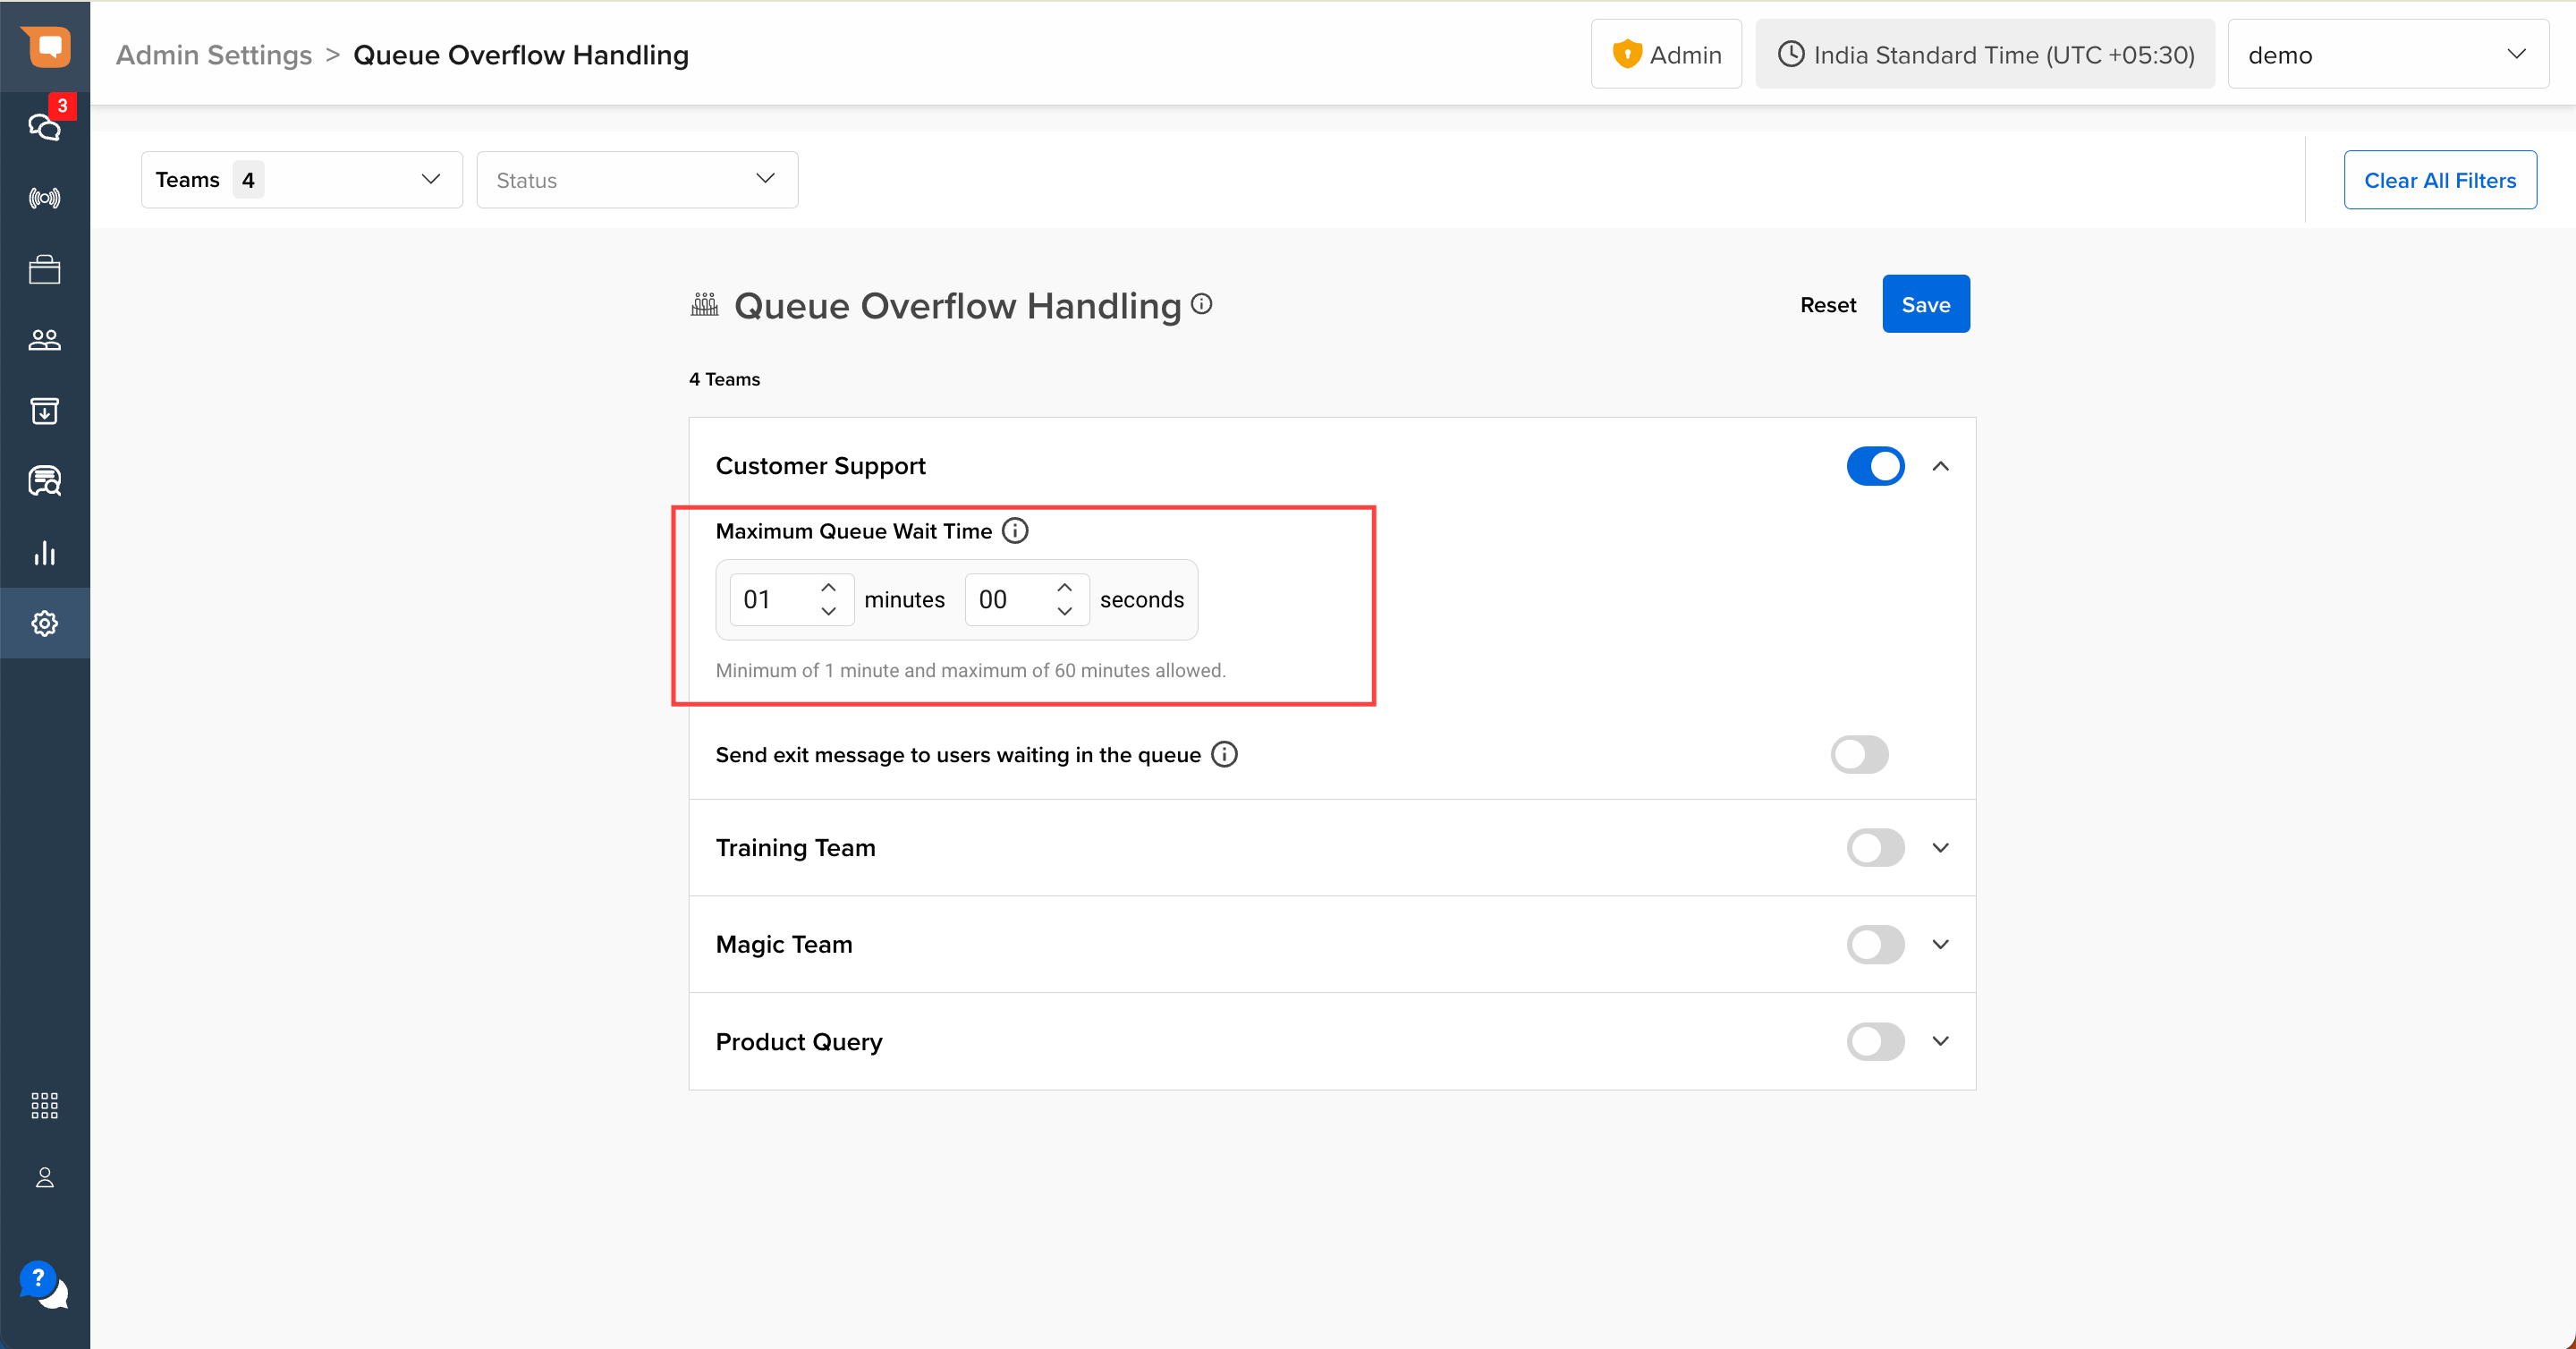
Once enabled, set the Maximum Queue Wait Time, after which Queue Overflow actions are triggered.
- This is a mandatory step.
- The default time is set to 1 minute.
- The minimum wait time value is 1 minute, and the maximum is 60 minutes.
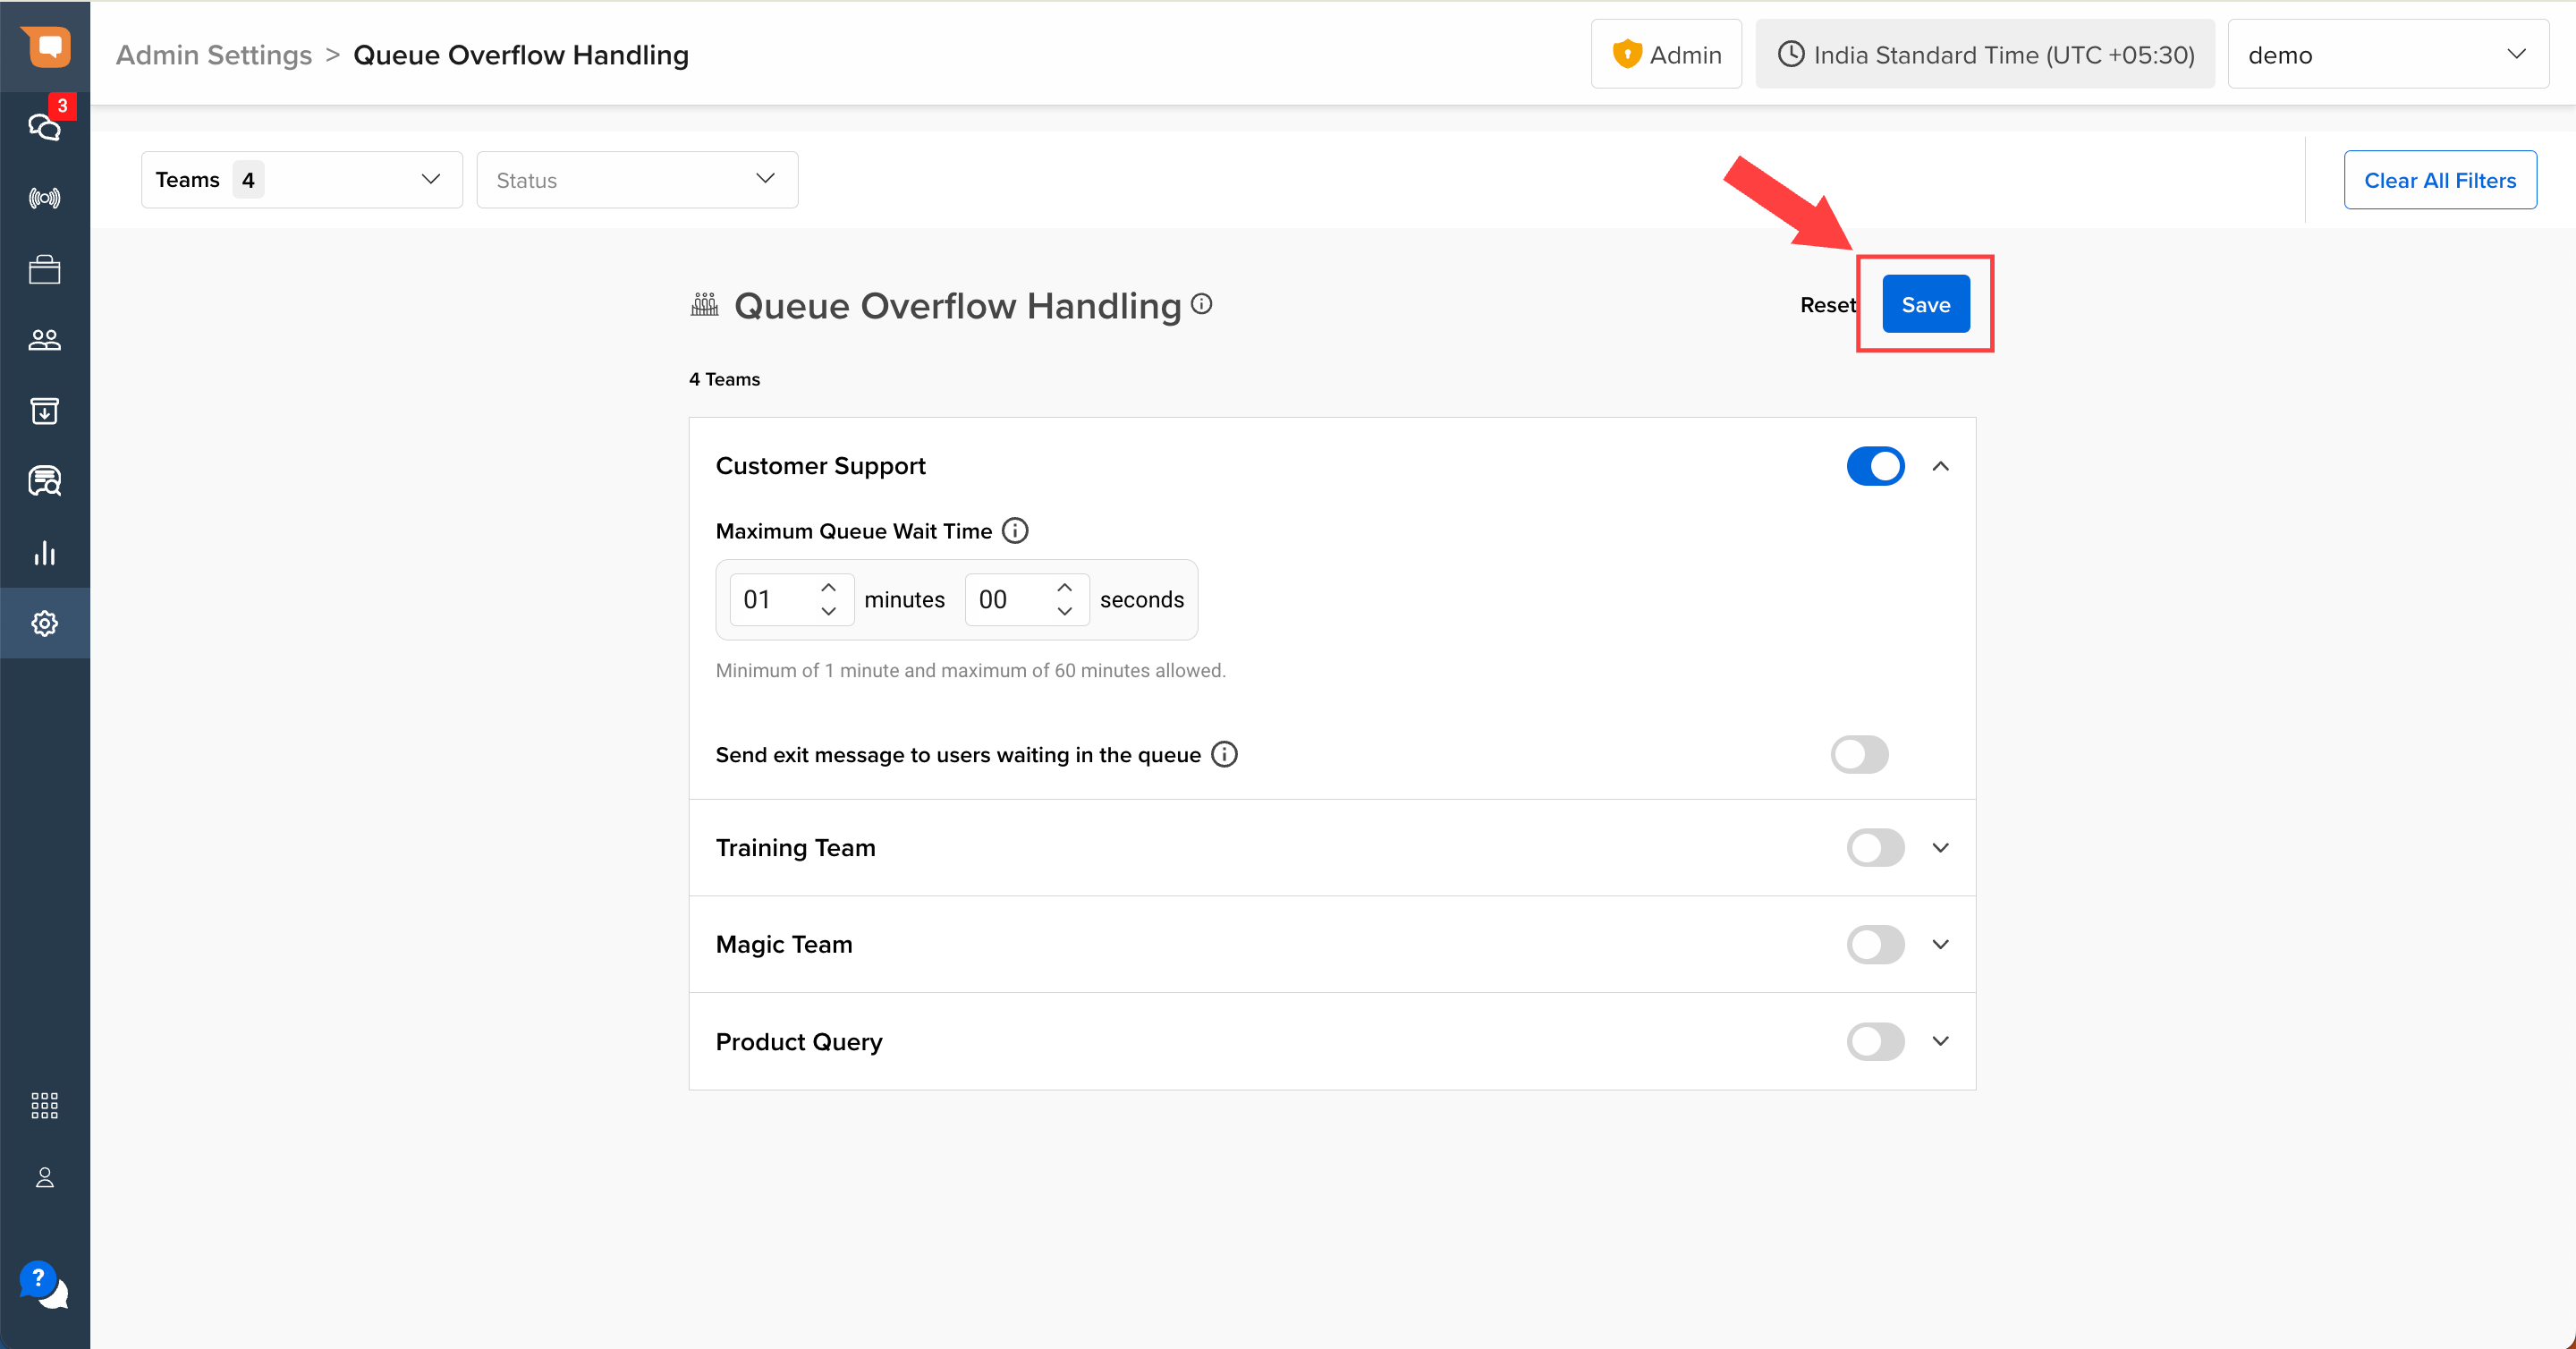
Click on “Save” to save the settings, and activate the feature for the selected team.
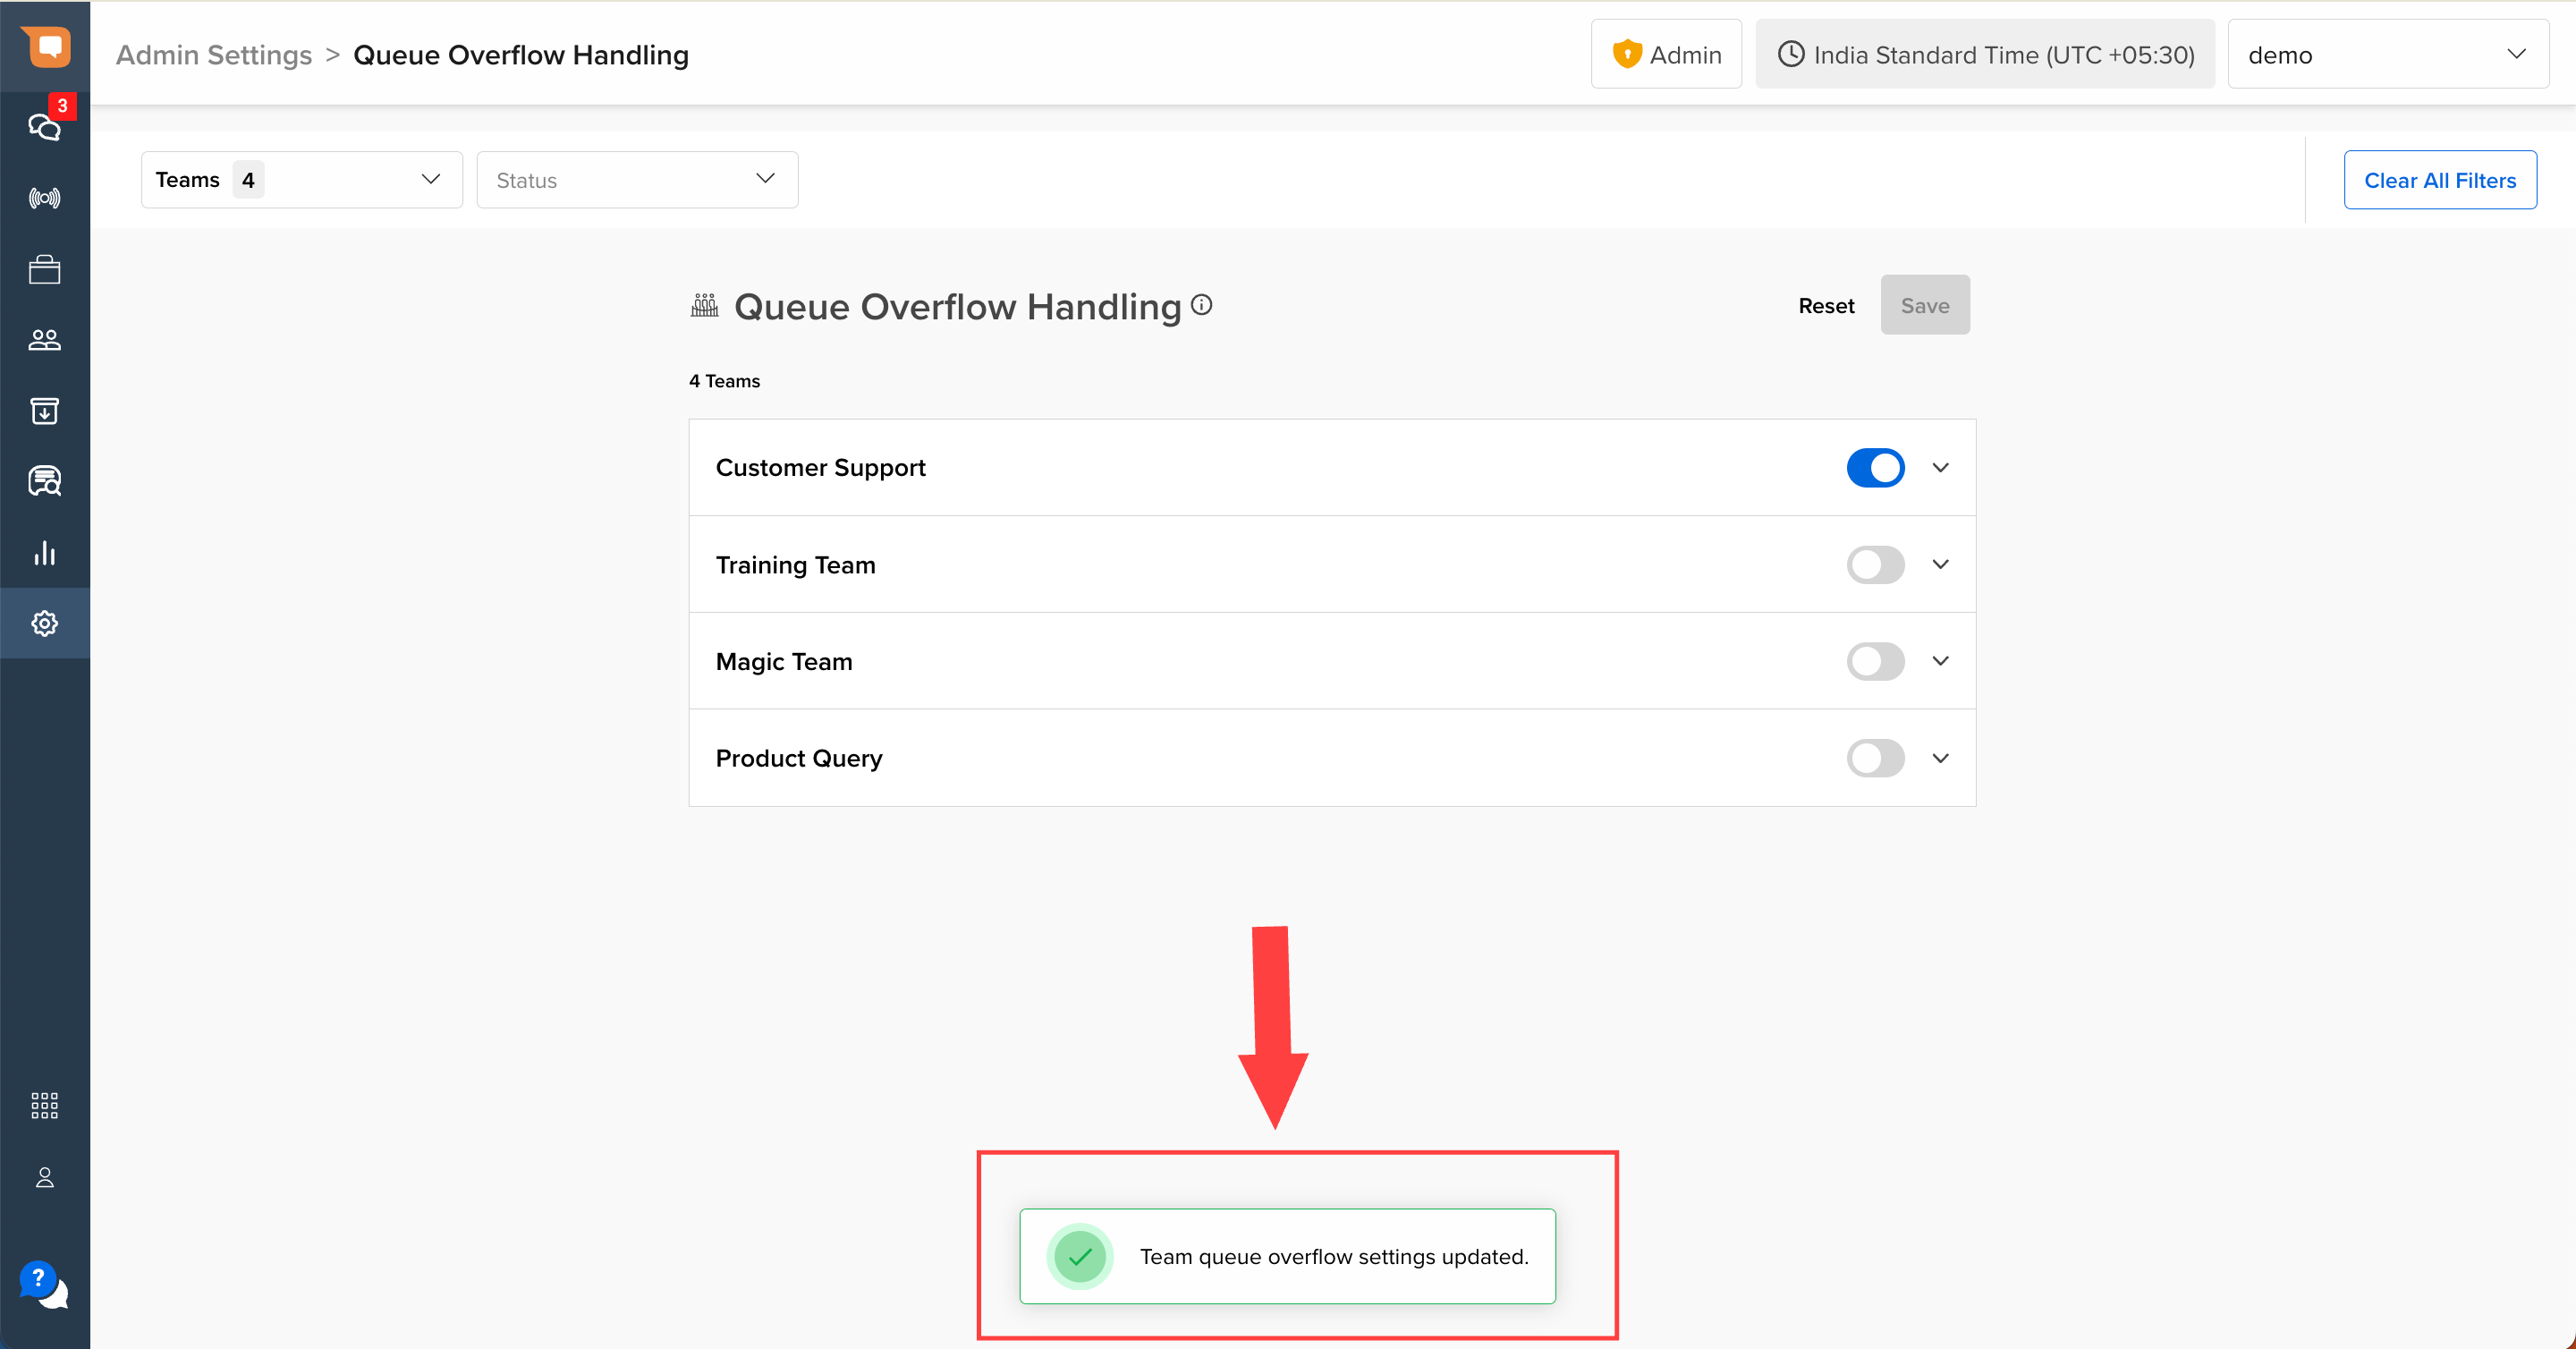
Once saved, you will see a toast message confirming the same, as shown below.
Setting Secondary Agents
Once you have enabled the feature for a Team, you will now be able to view the following new settings in the Teams page:
-
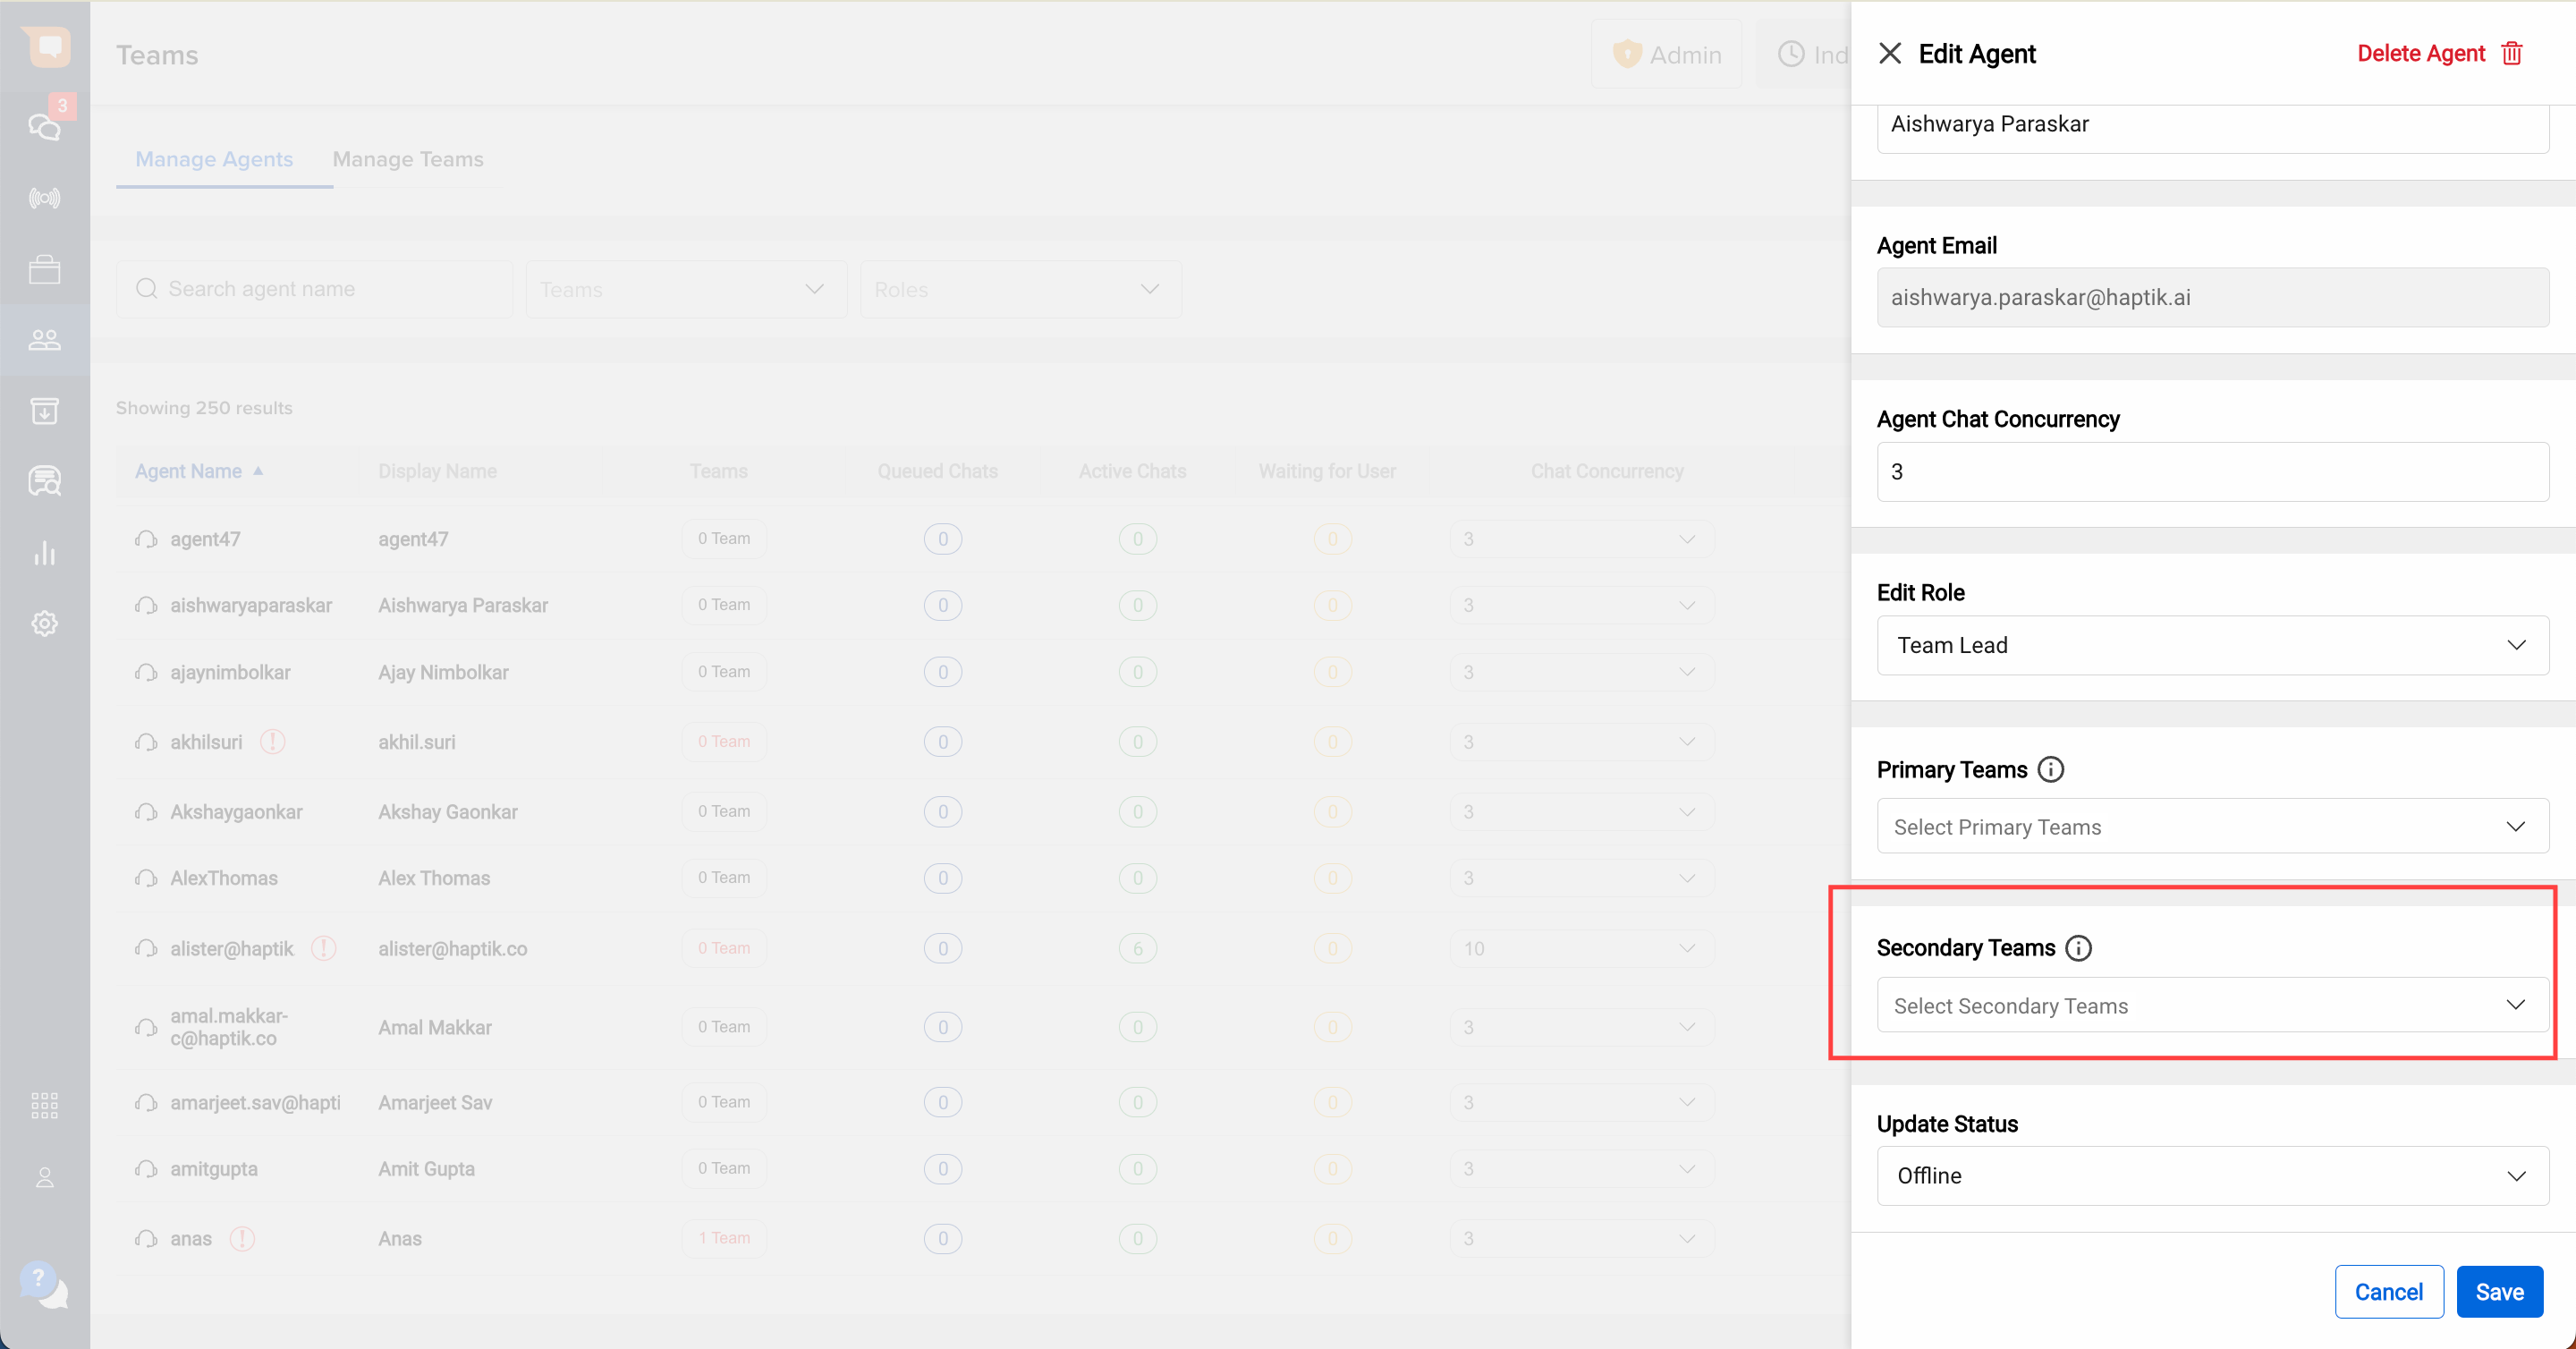
In the ‘Manage Agents’ tab - an option to add “Secondary Teams” under the ‘Edit Agent' settings.
-
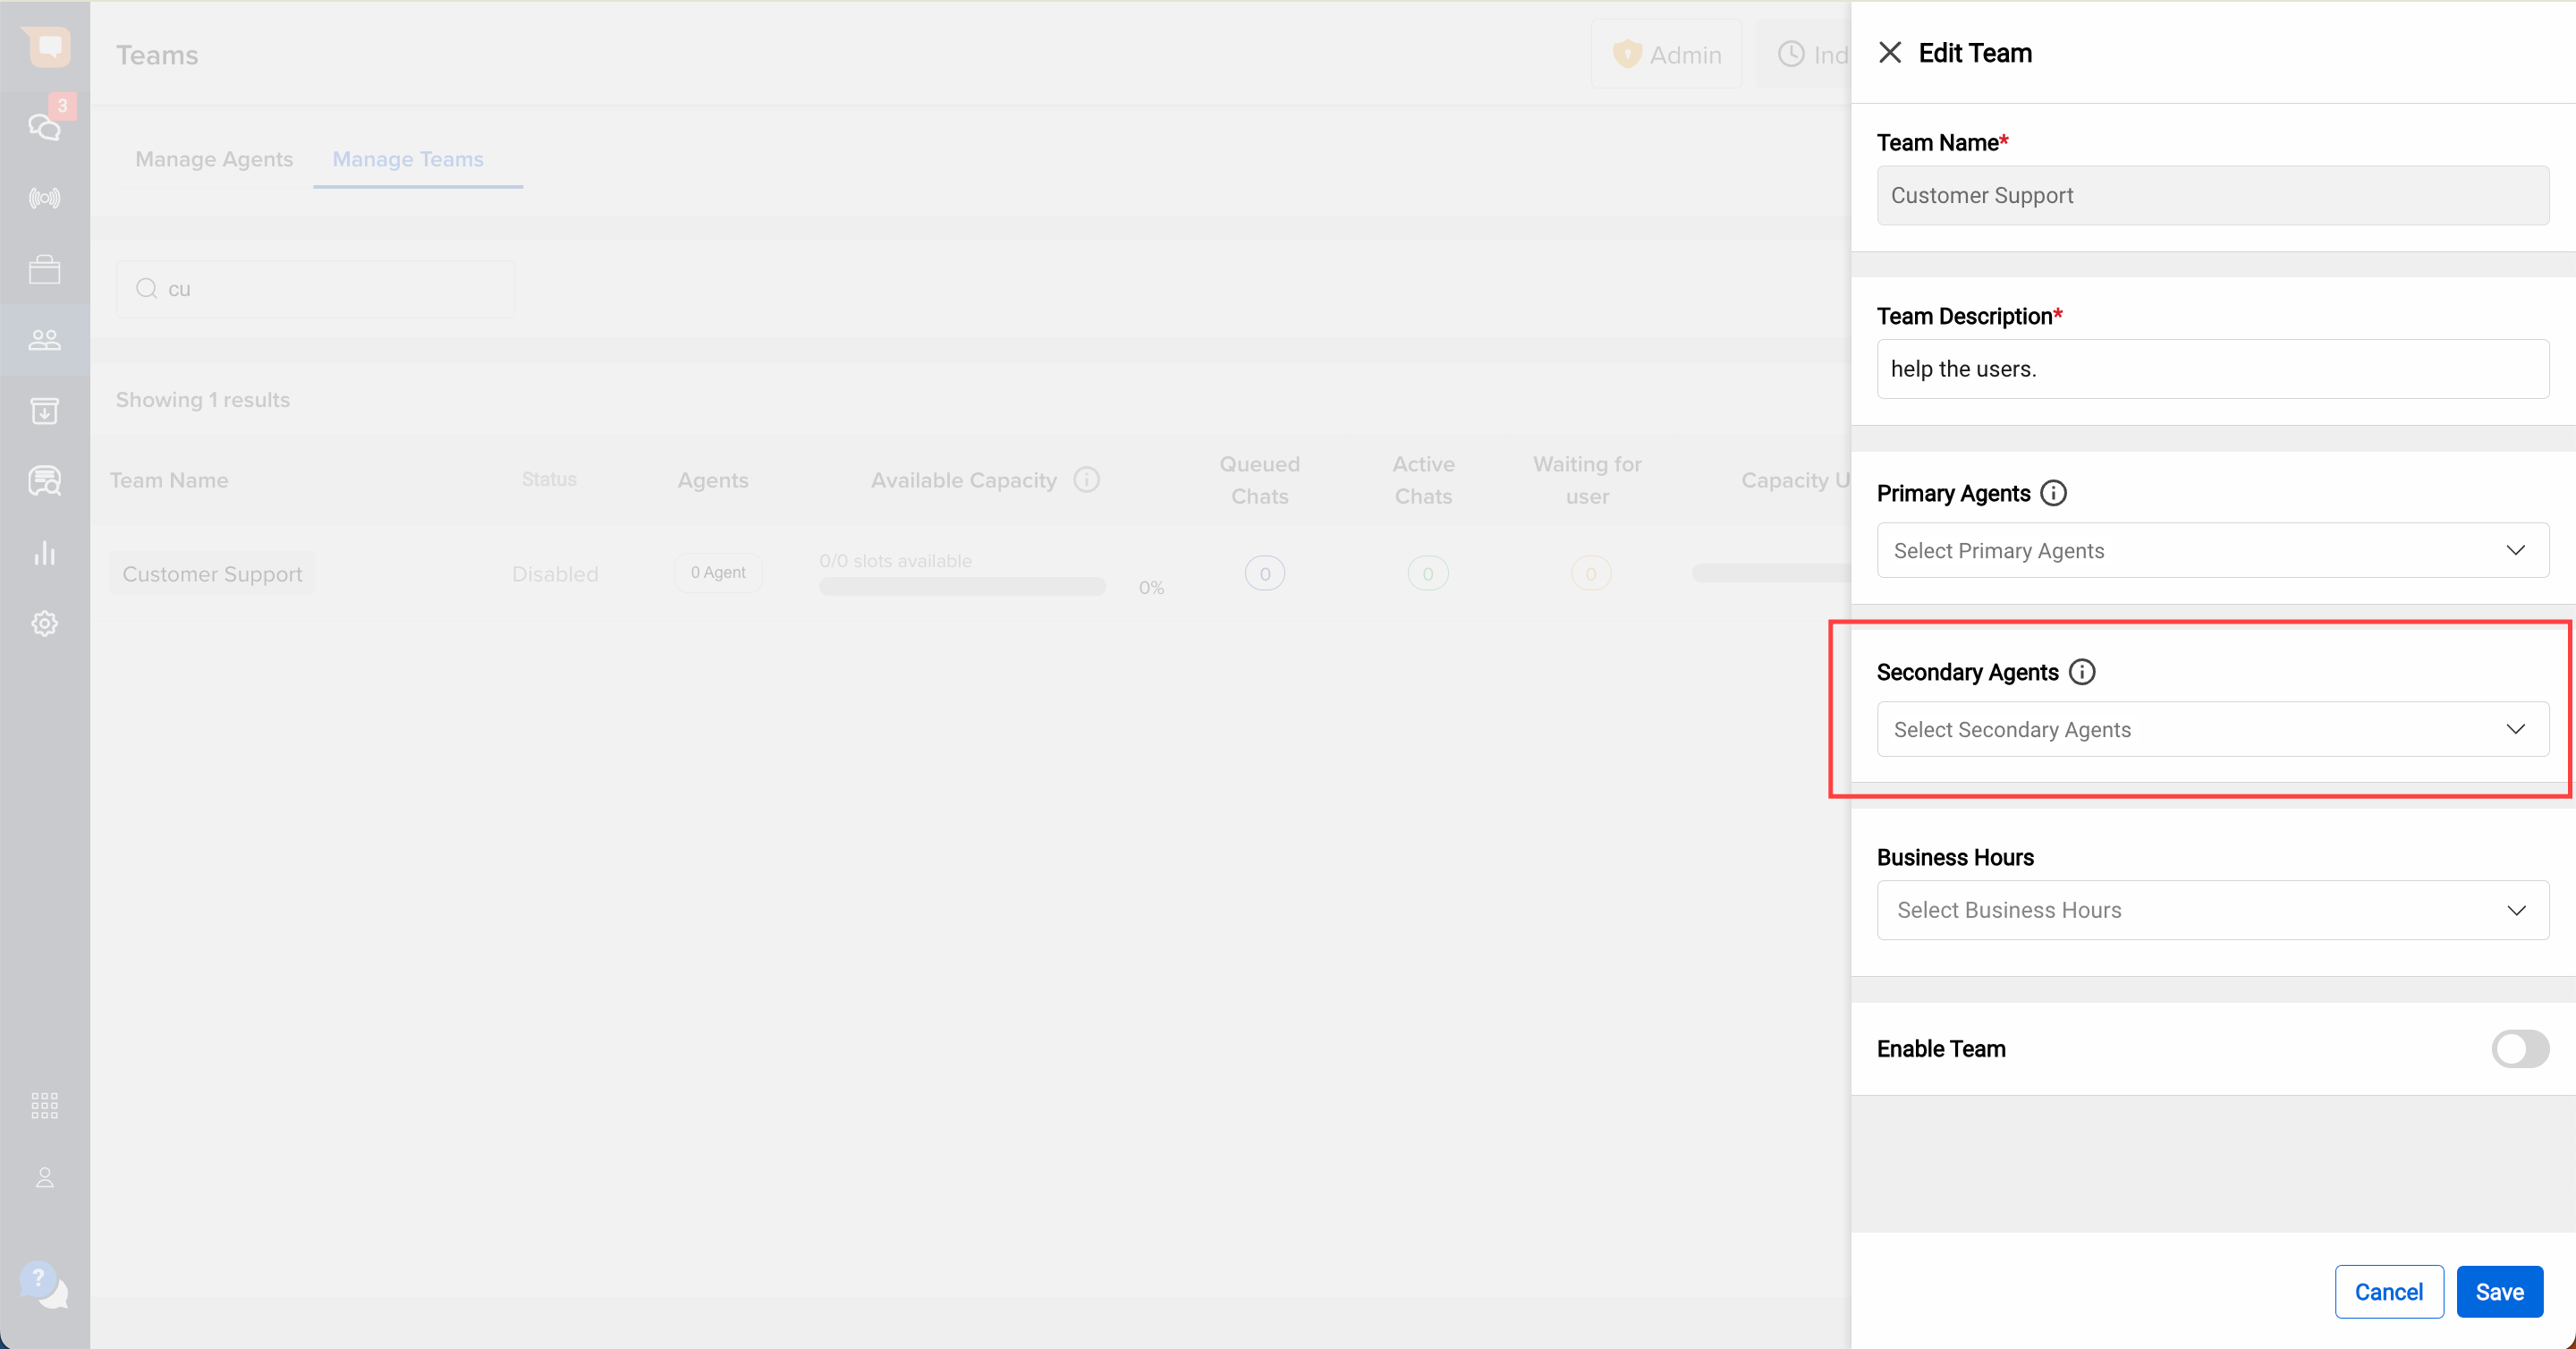
In the ‘Manage Teams' tab - an option to add “Secondary Agents” under the ‘Edit Team’ settings.
You can either
- Use the Manage Agents section to add an Agent to a Secondary Team using the Edit Agent settings (in which case, that Agent becomes a Secondary Agent in that Team), or
- Use the Manage Teams section to add an Agent as a Secondary Agent using the Edit Team settings.
Once your Secondary Agents are set, the system will automatically start routing chats to Secondary Agents when the required conditions are met.
Points to note:
- In a given Team, an Agent can be either a Primary or a Secondary Agent, but not both.
- An Agent can be a Secondary Agent in any number of teams (although, we recommend minimising such instances to reduce the complexity of your team structure).
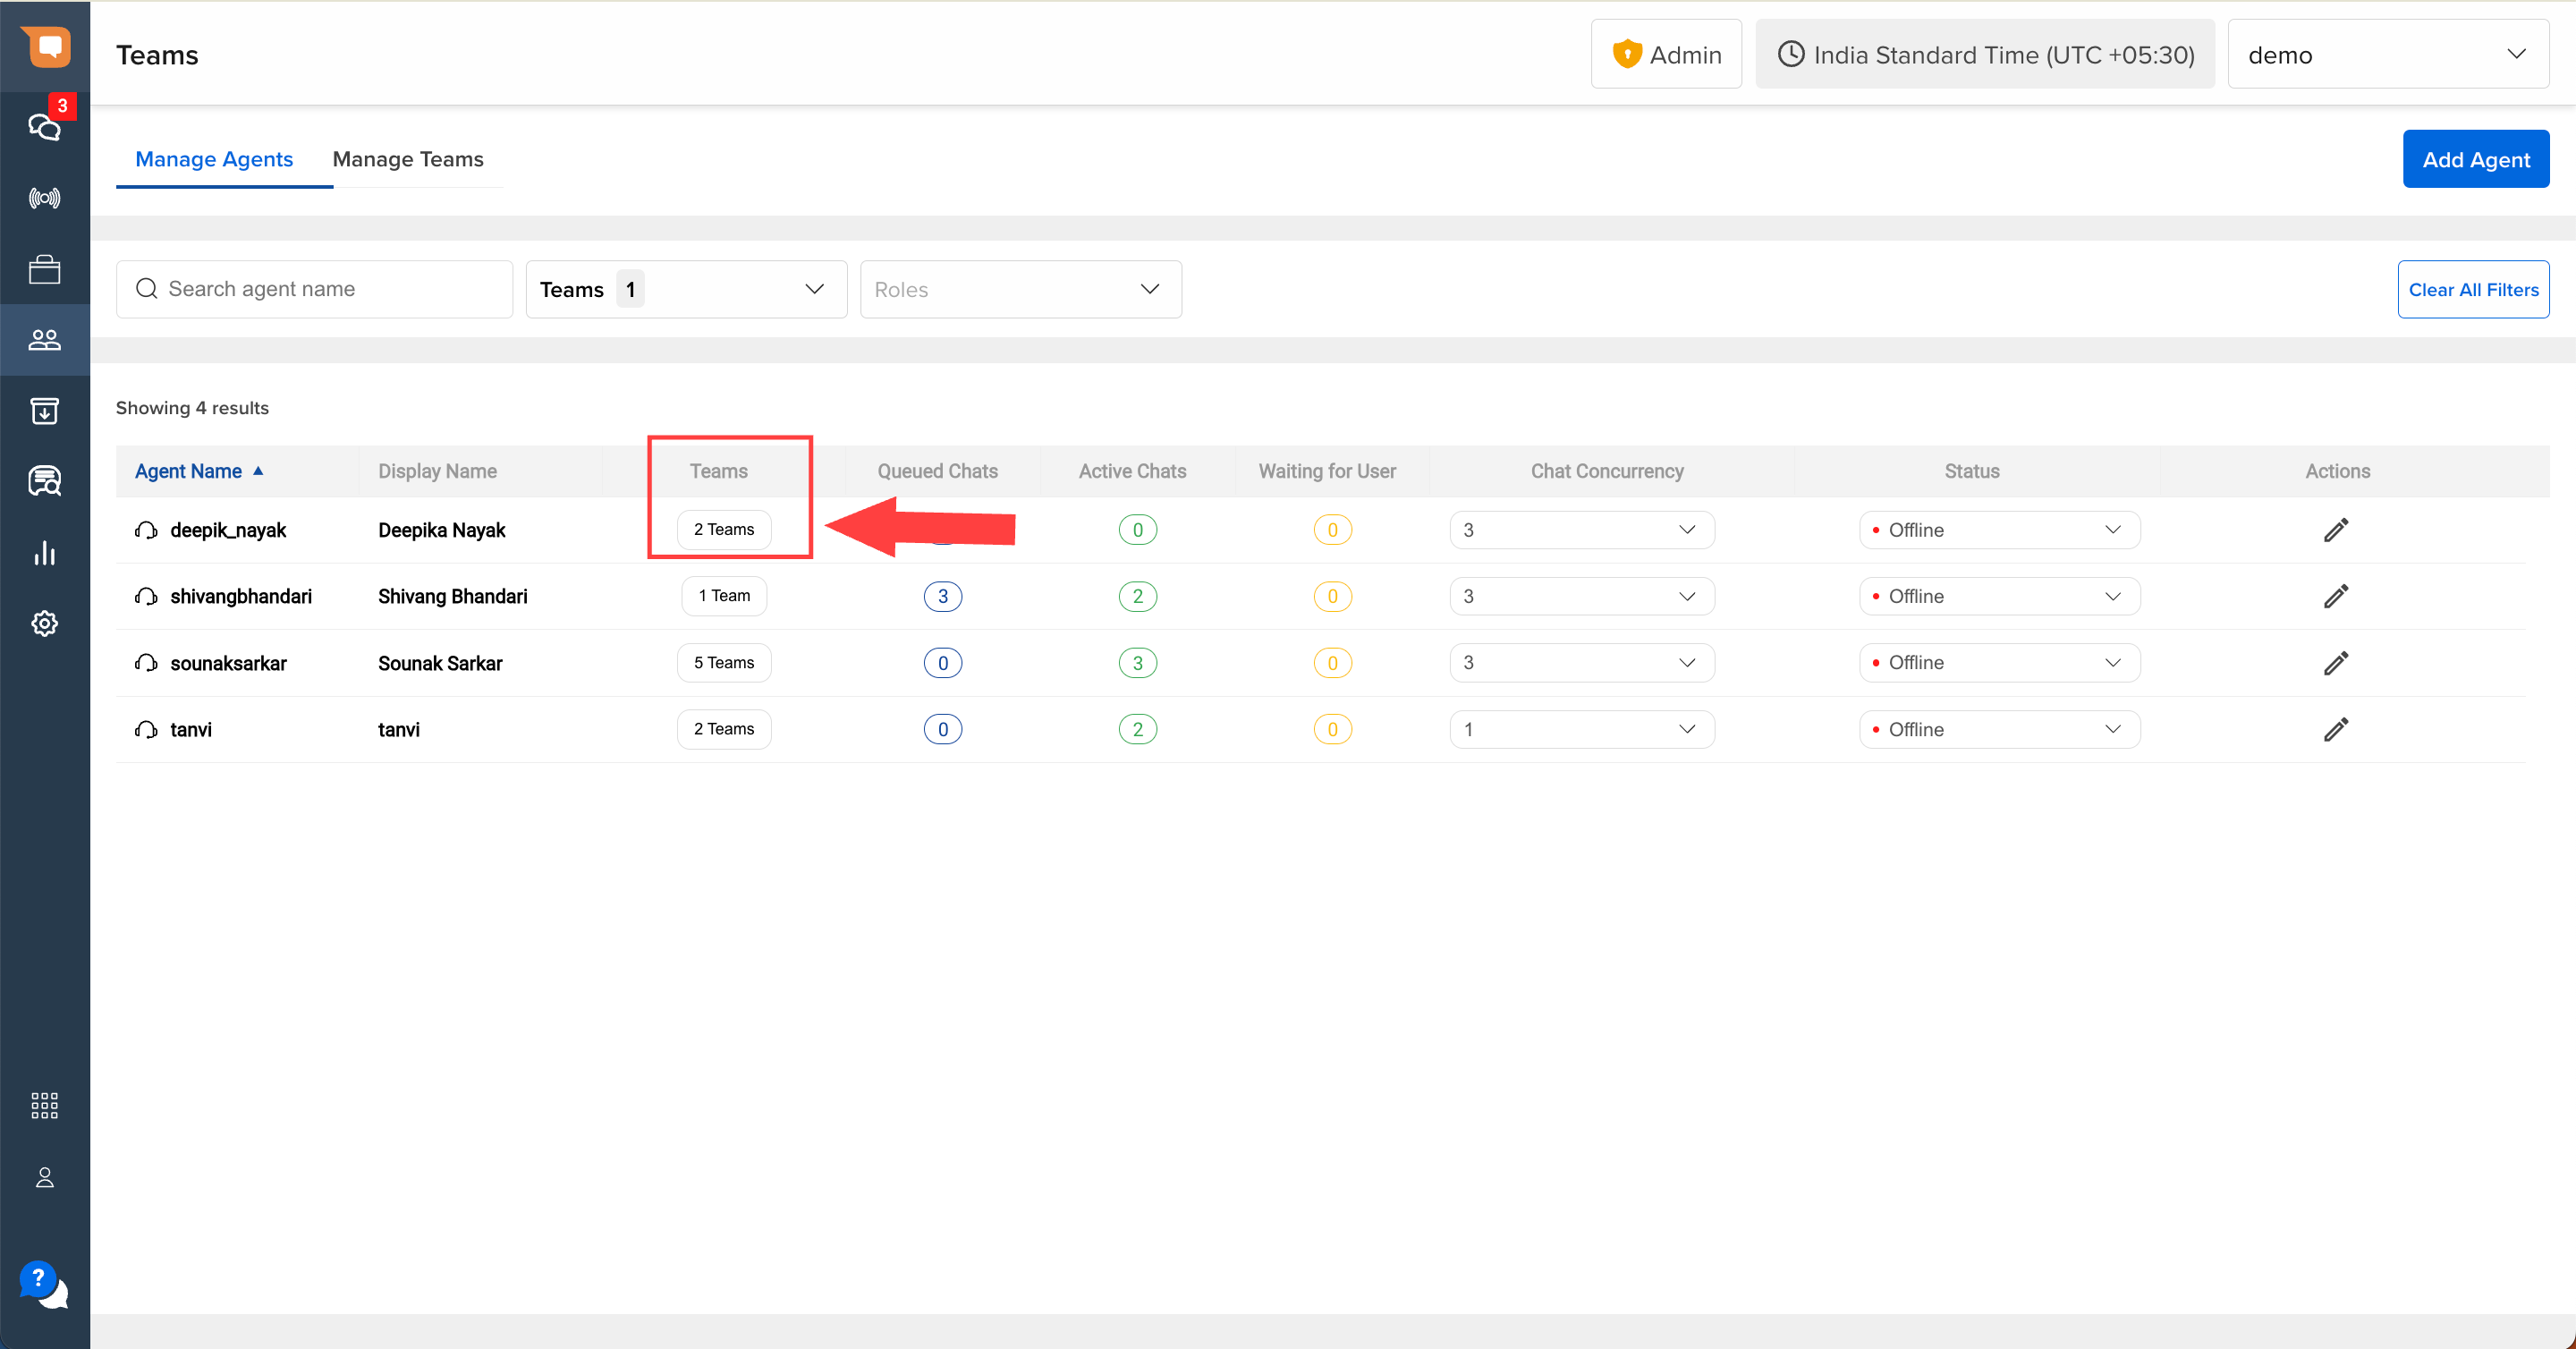
You can check the status of any Agent as a Primary or Secondary Agent in a Team, by clicking on the “Teams” column CTA in the Manage Agents tab, and inspecting the “Team Priority” column in the pop-up, as shown below.
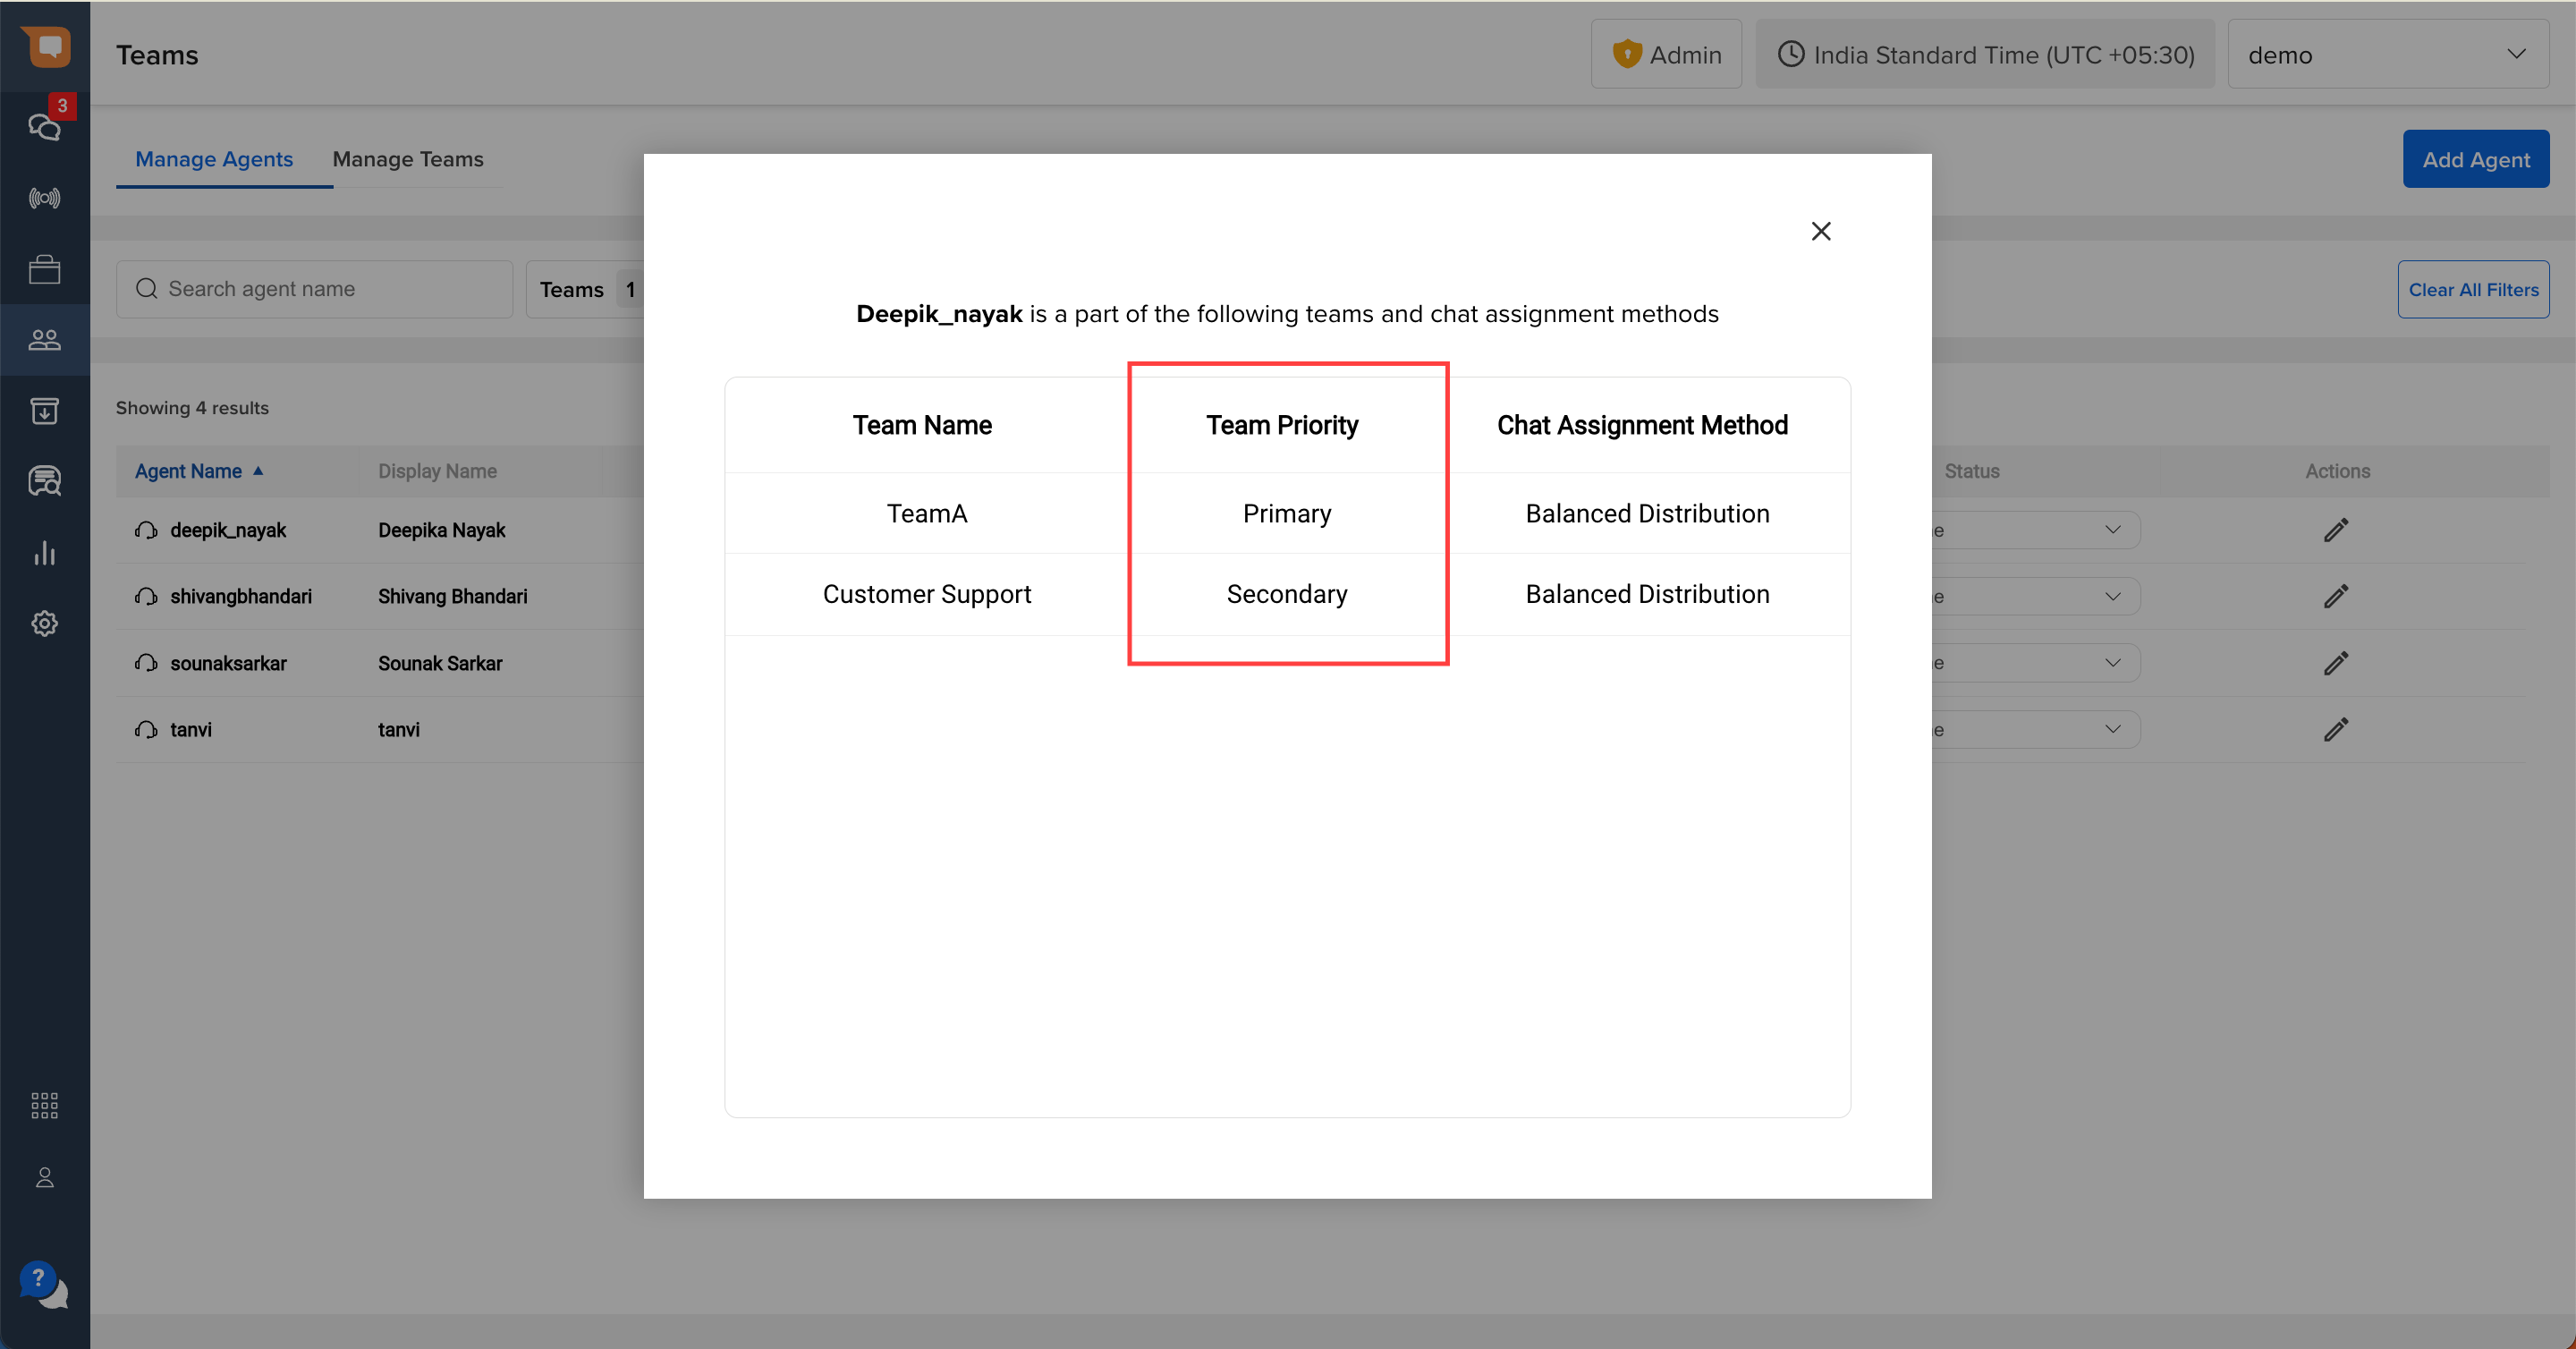
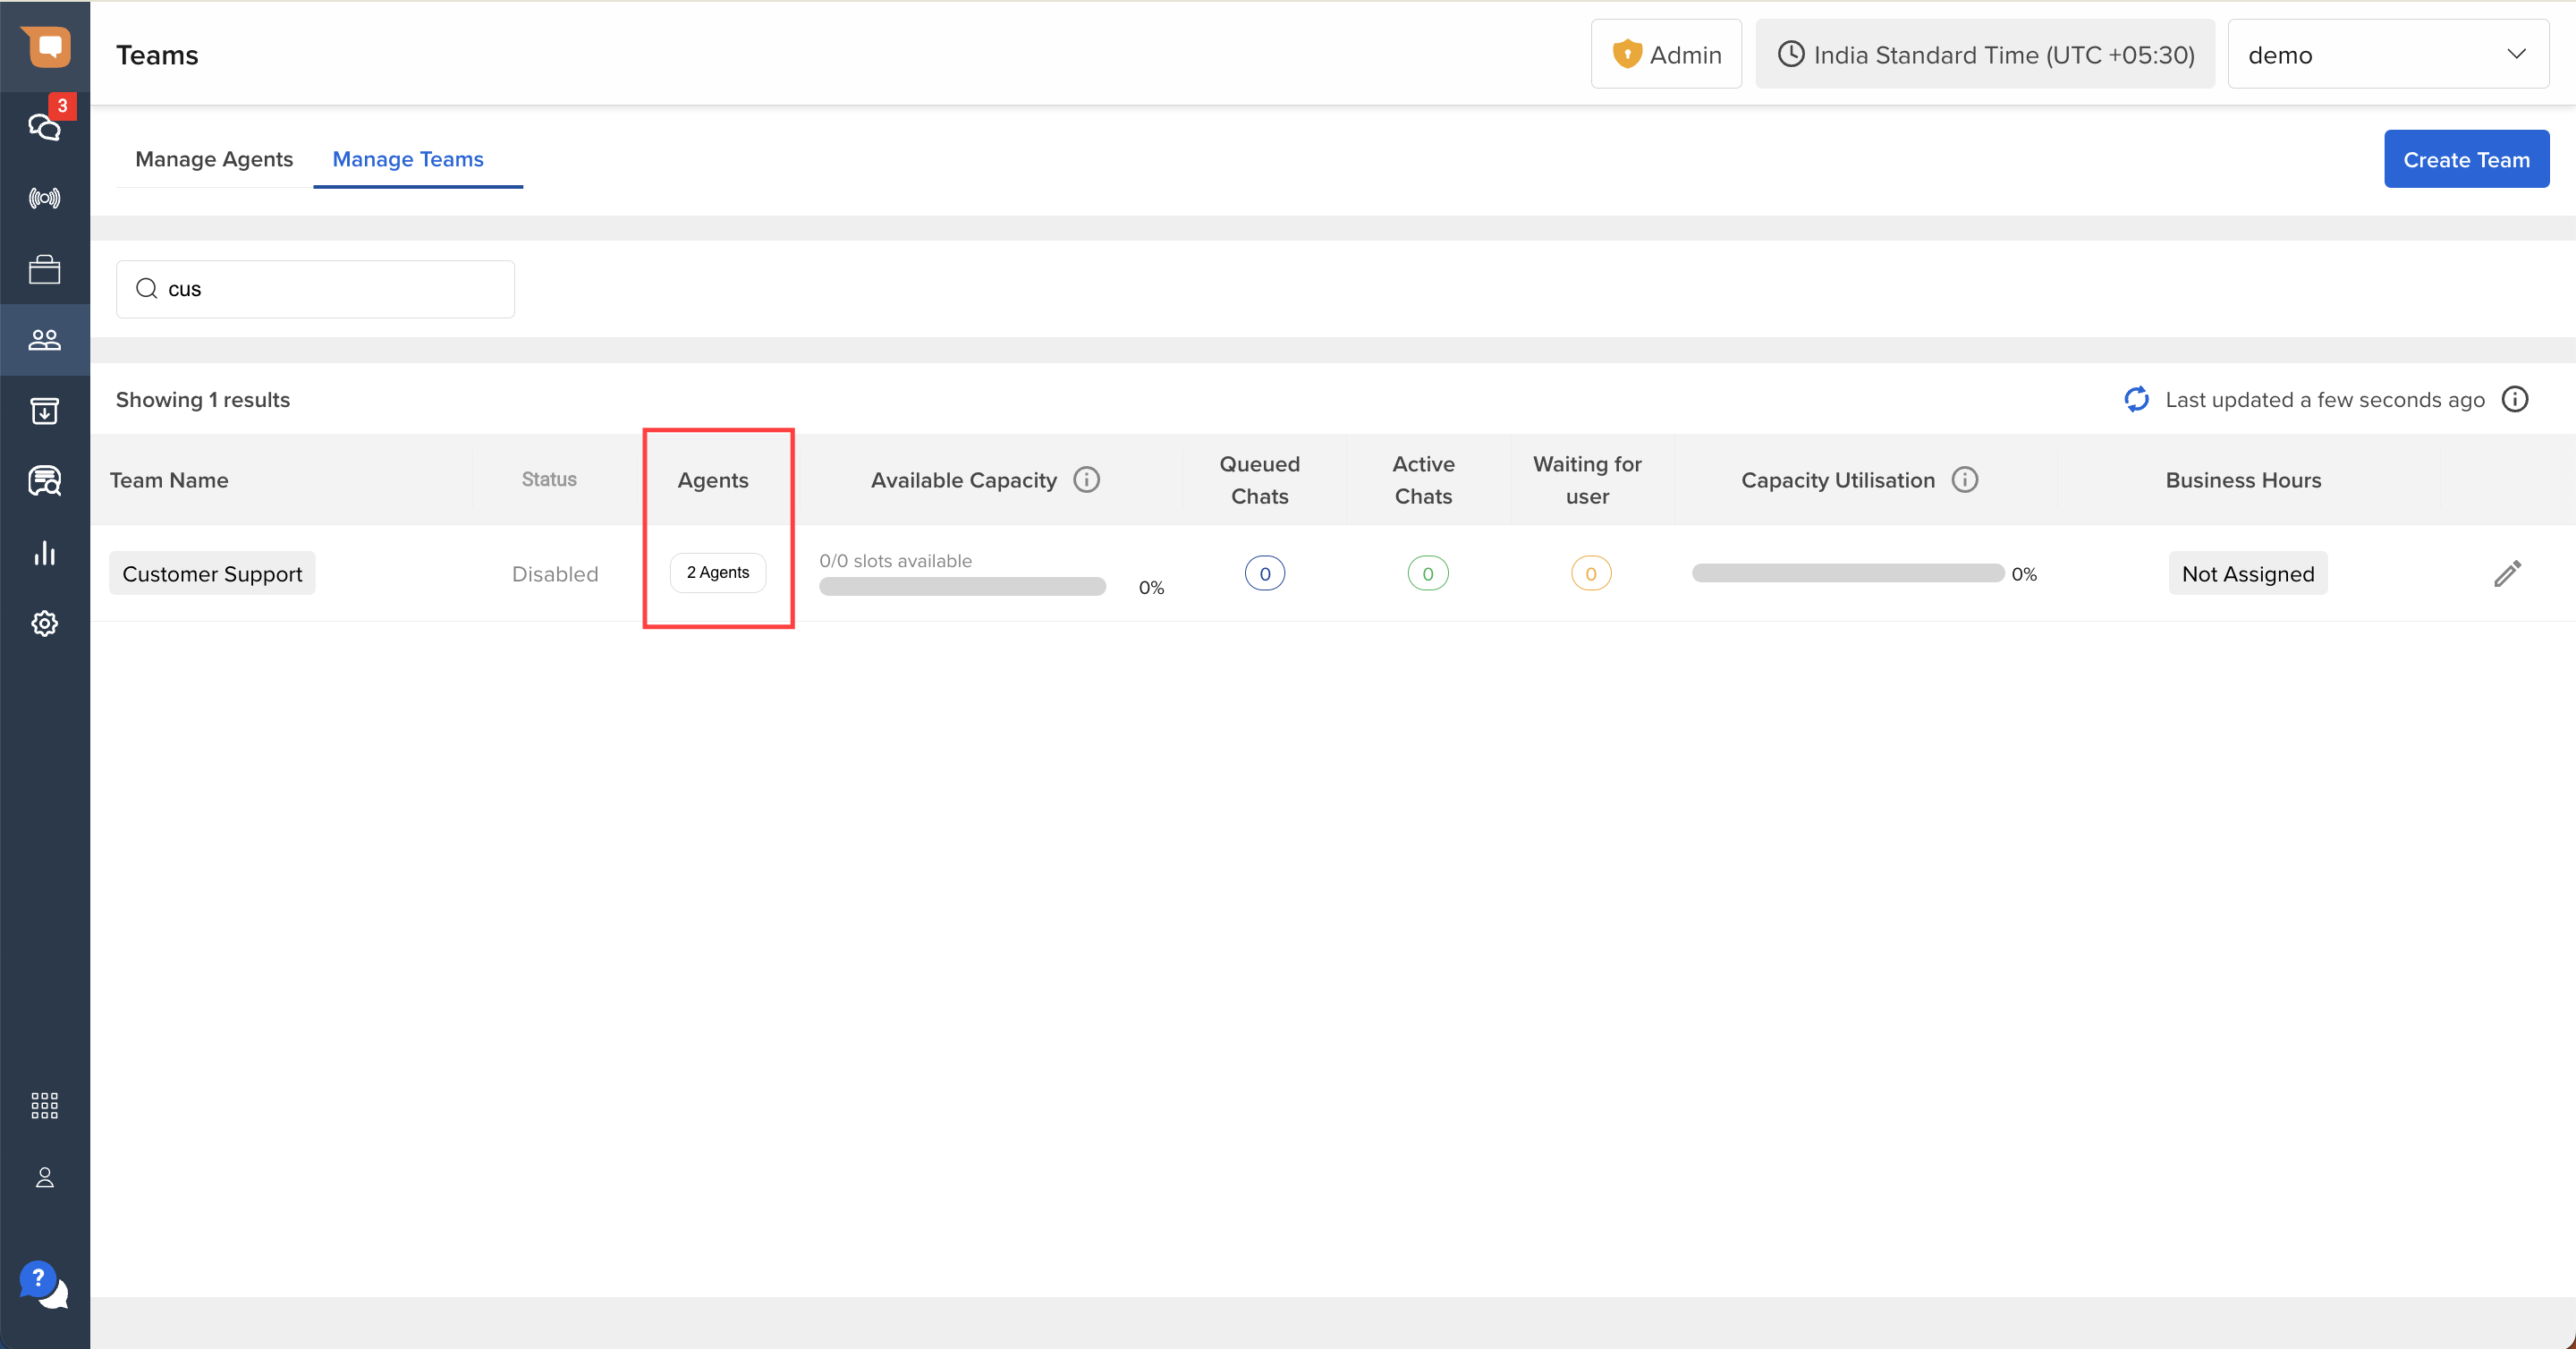
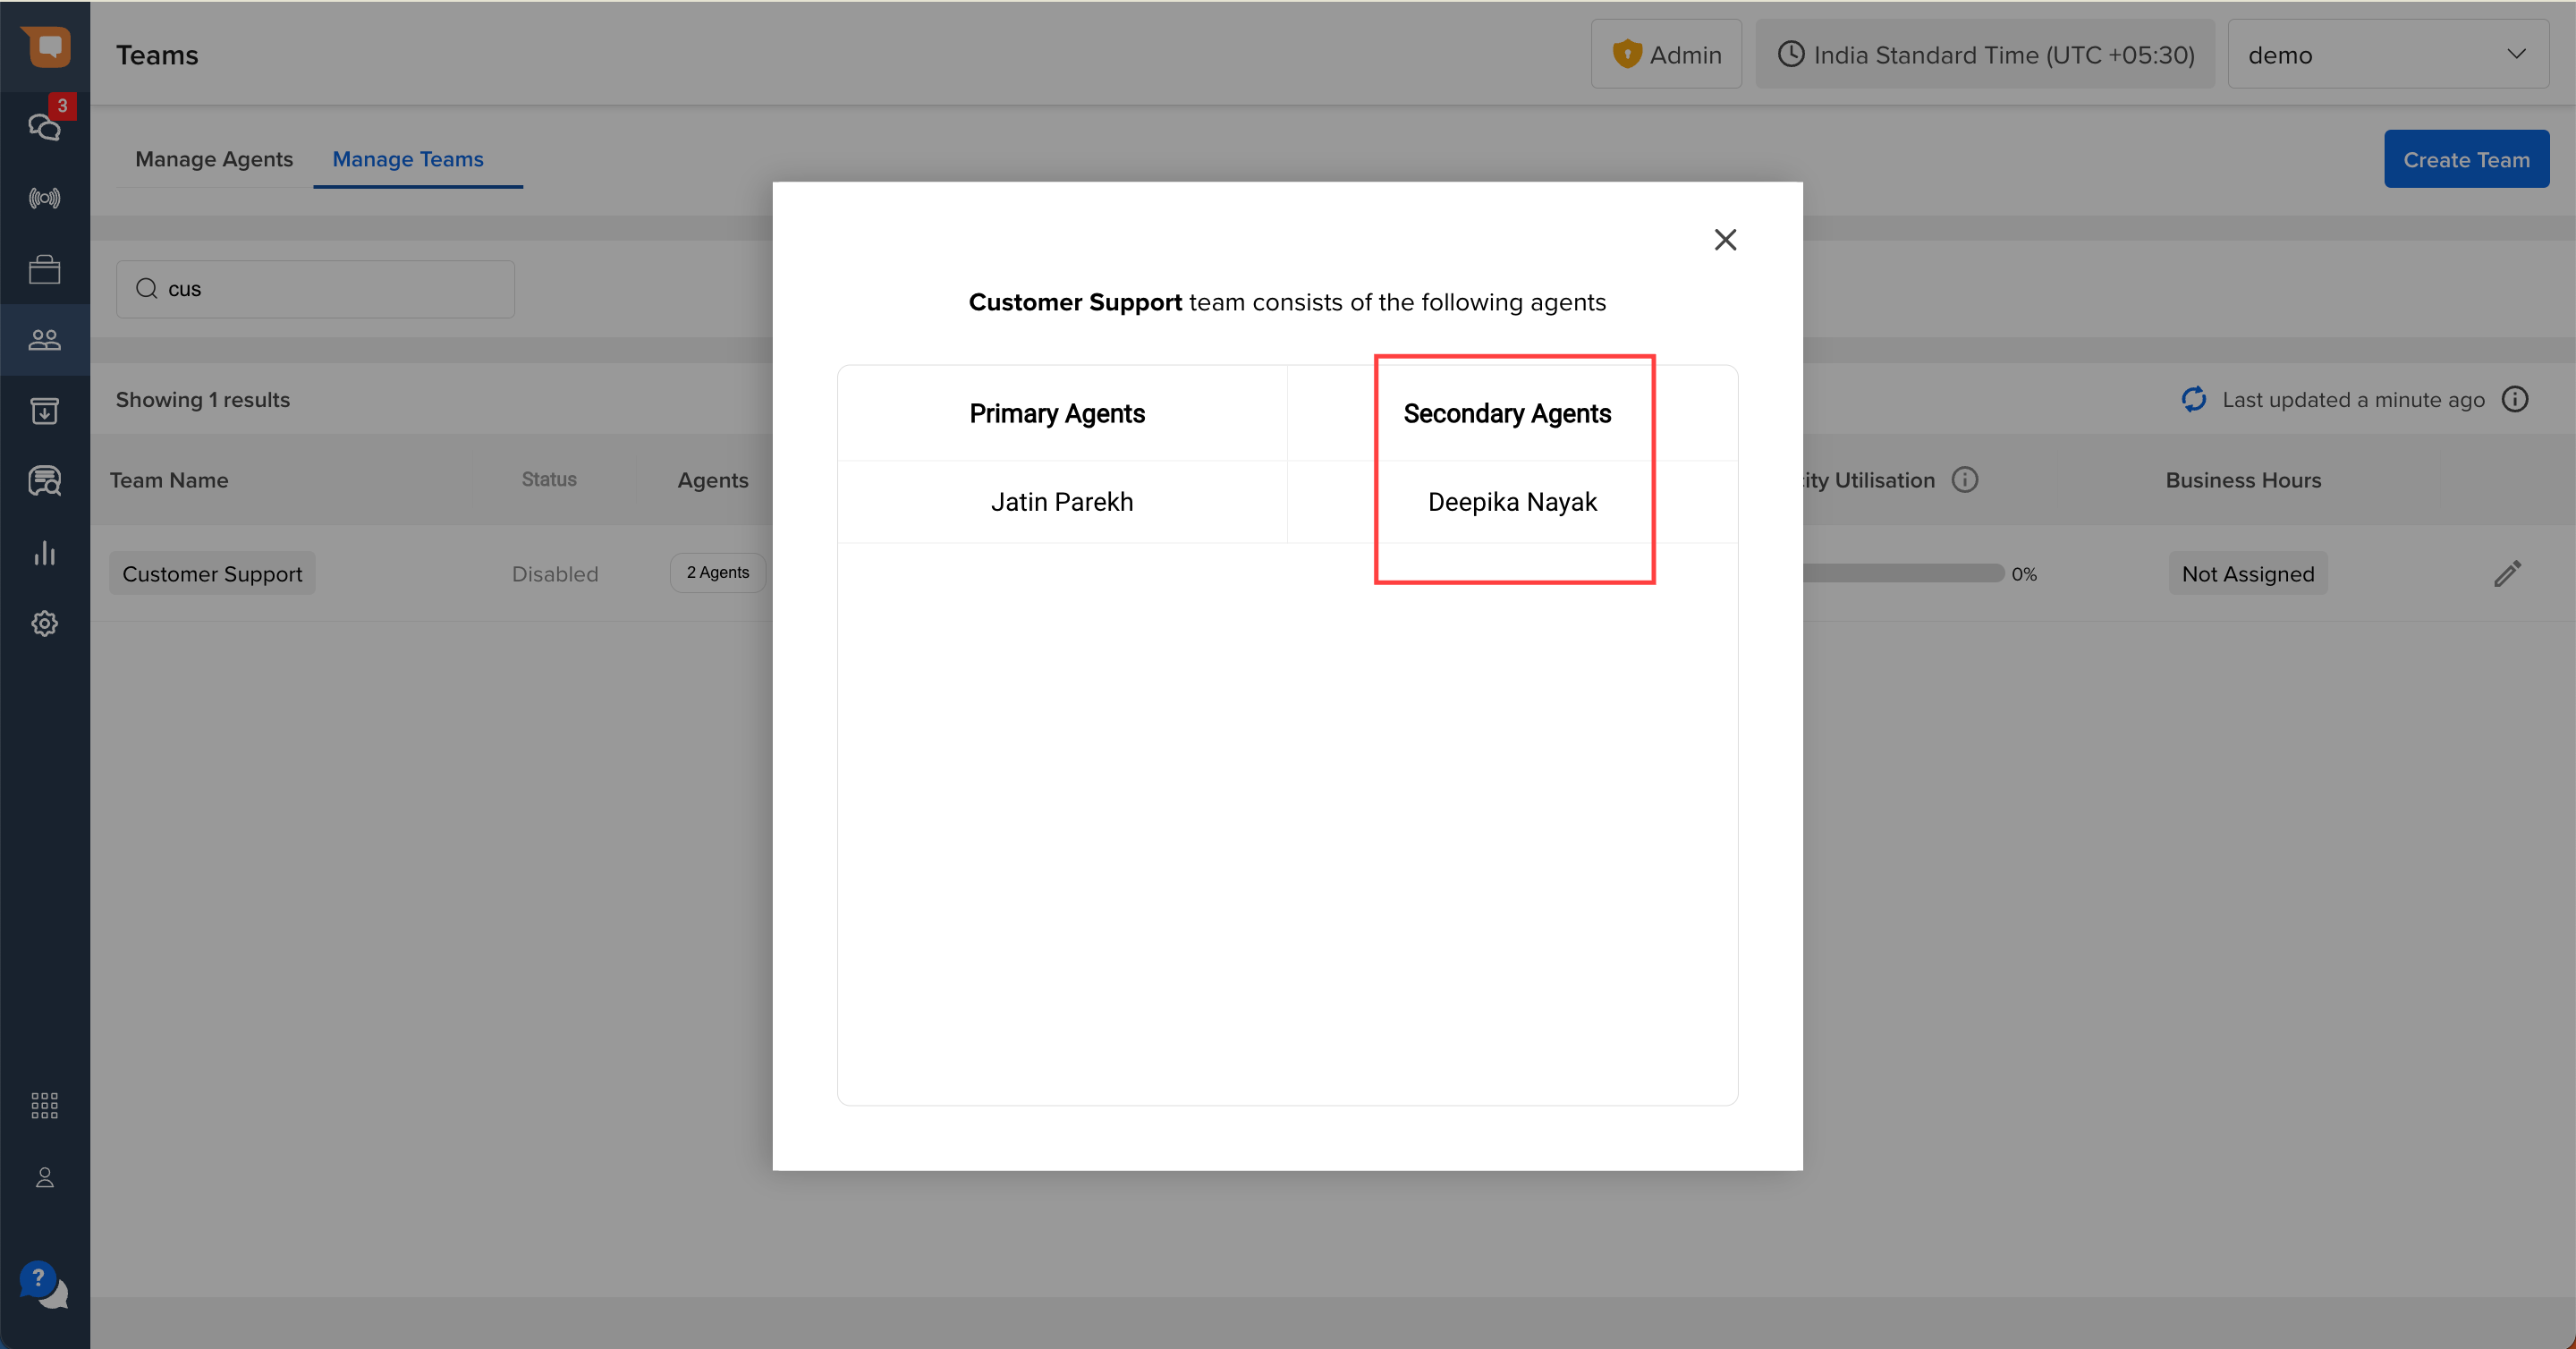
You can also view the list of Primary & Secondary Agents in a Team, by clicking on the “Agents” column CTA in the Manage Teams tab, and inspecting the list of agents in the pop-up, as shown below.
Setting the Queue Exit Message
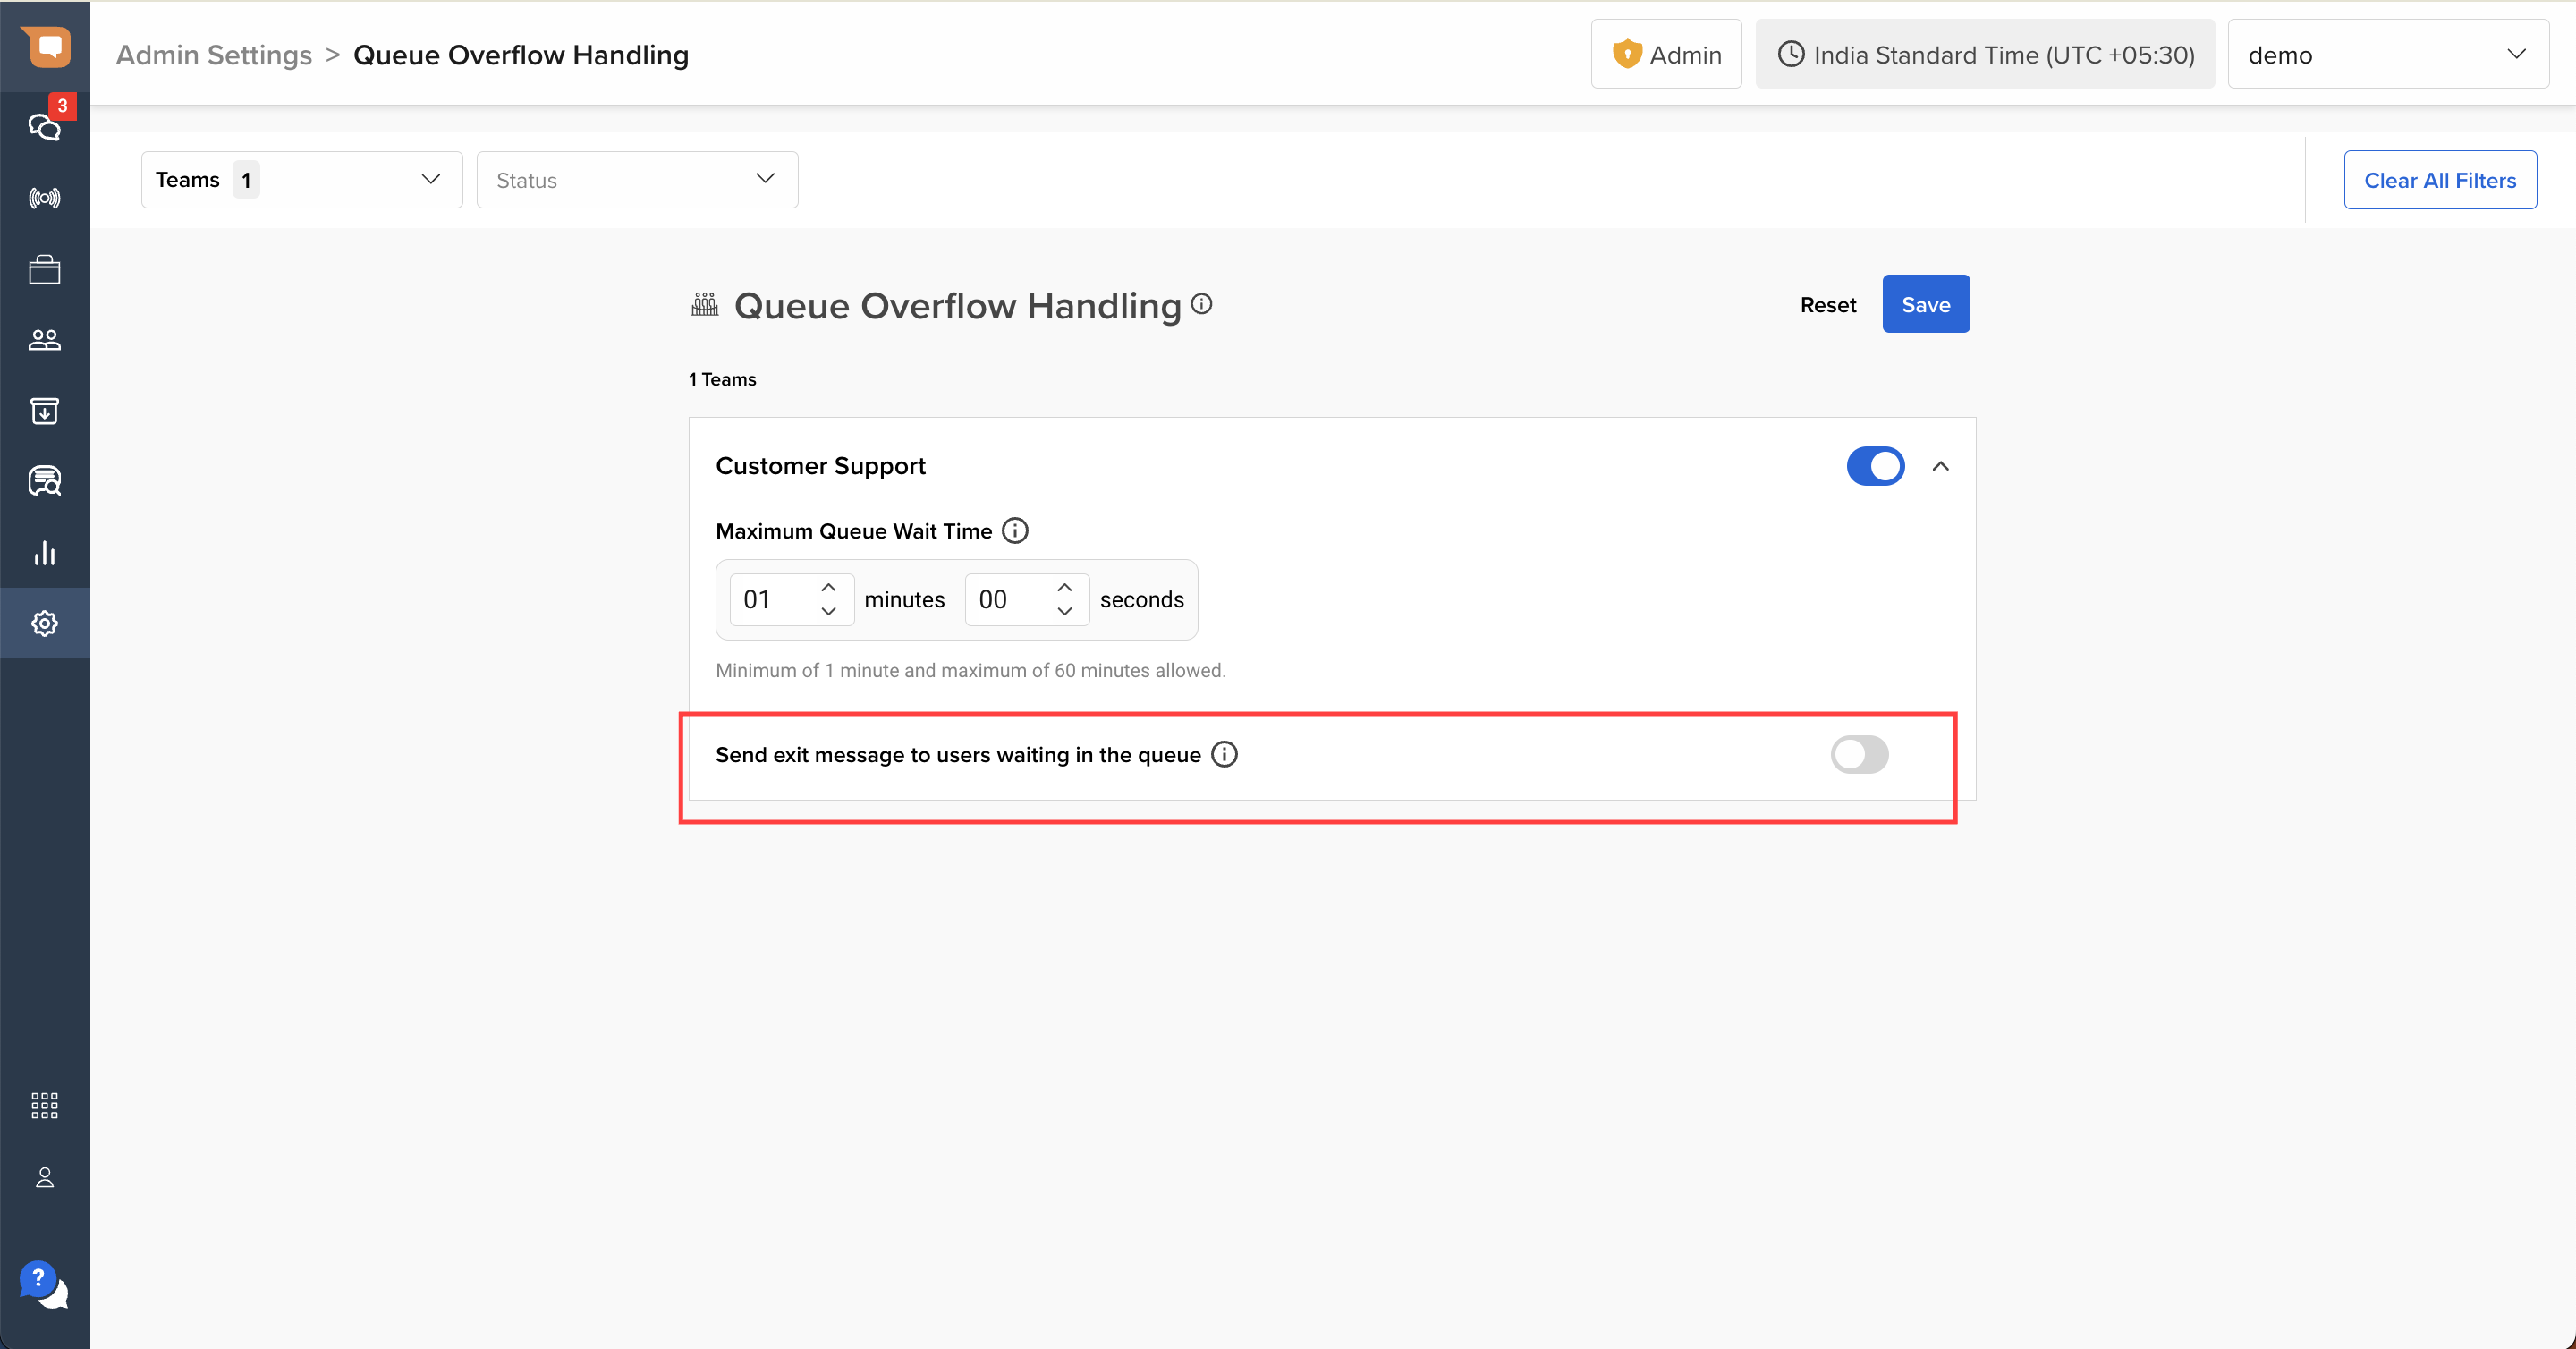
To configure the Queue Exit Message for a specific Team, after setting the Maximum Queue Wait Time, click on the second toggle at the bottom to enable the exit message, as shown in the image below.
Once enabled, you will be able to configure the following messages:
- Exit Message: The message that is sent to users when the maximum queue wait time has expired, but neither primary nor secondary agents are available.
- Follow-up Message: The message that is sent to users if they choose to exit the queue, instead of waiting to be assigned an agent.
Exit Message
The Exit Message can be used to directly trigger a chatbot flow, if the user chooses to exit the queue and return to the chatbot. This is helpful if you wish to set up a ticket creation flow on your chatbot, as an alternative to continuing to wait for an agent.
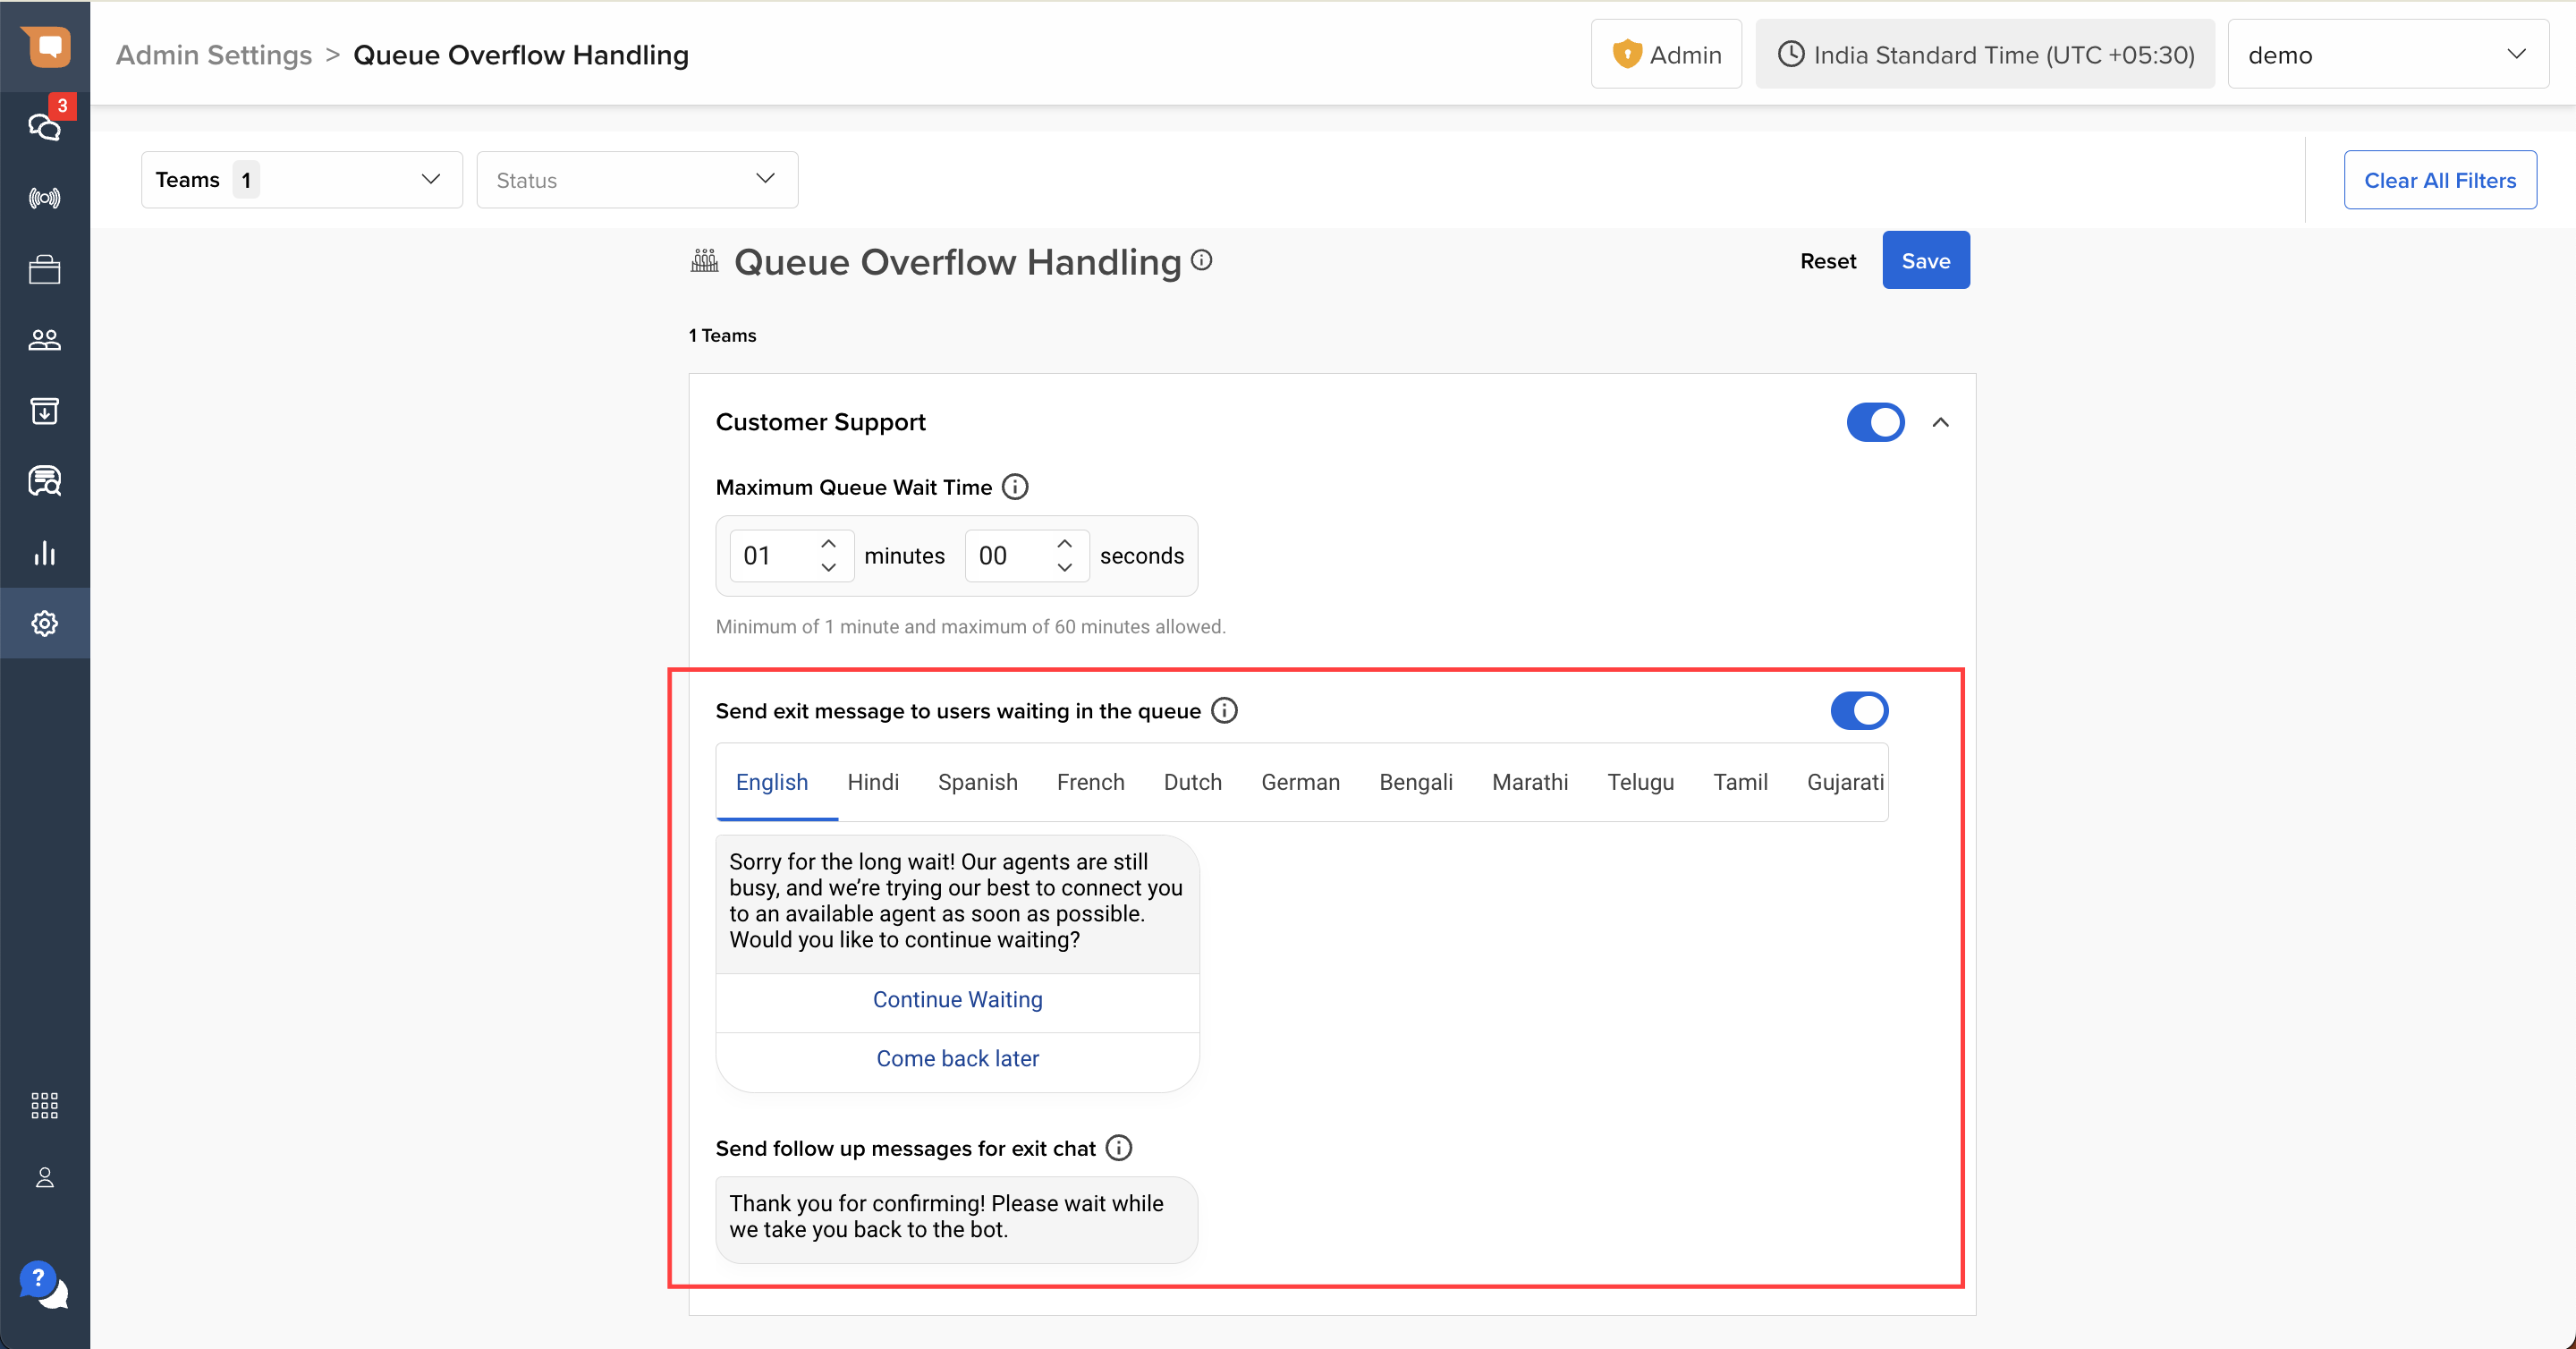
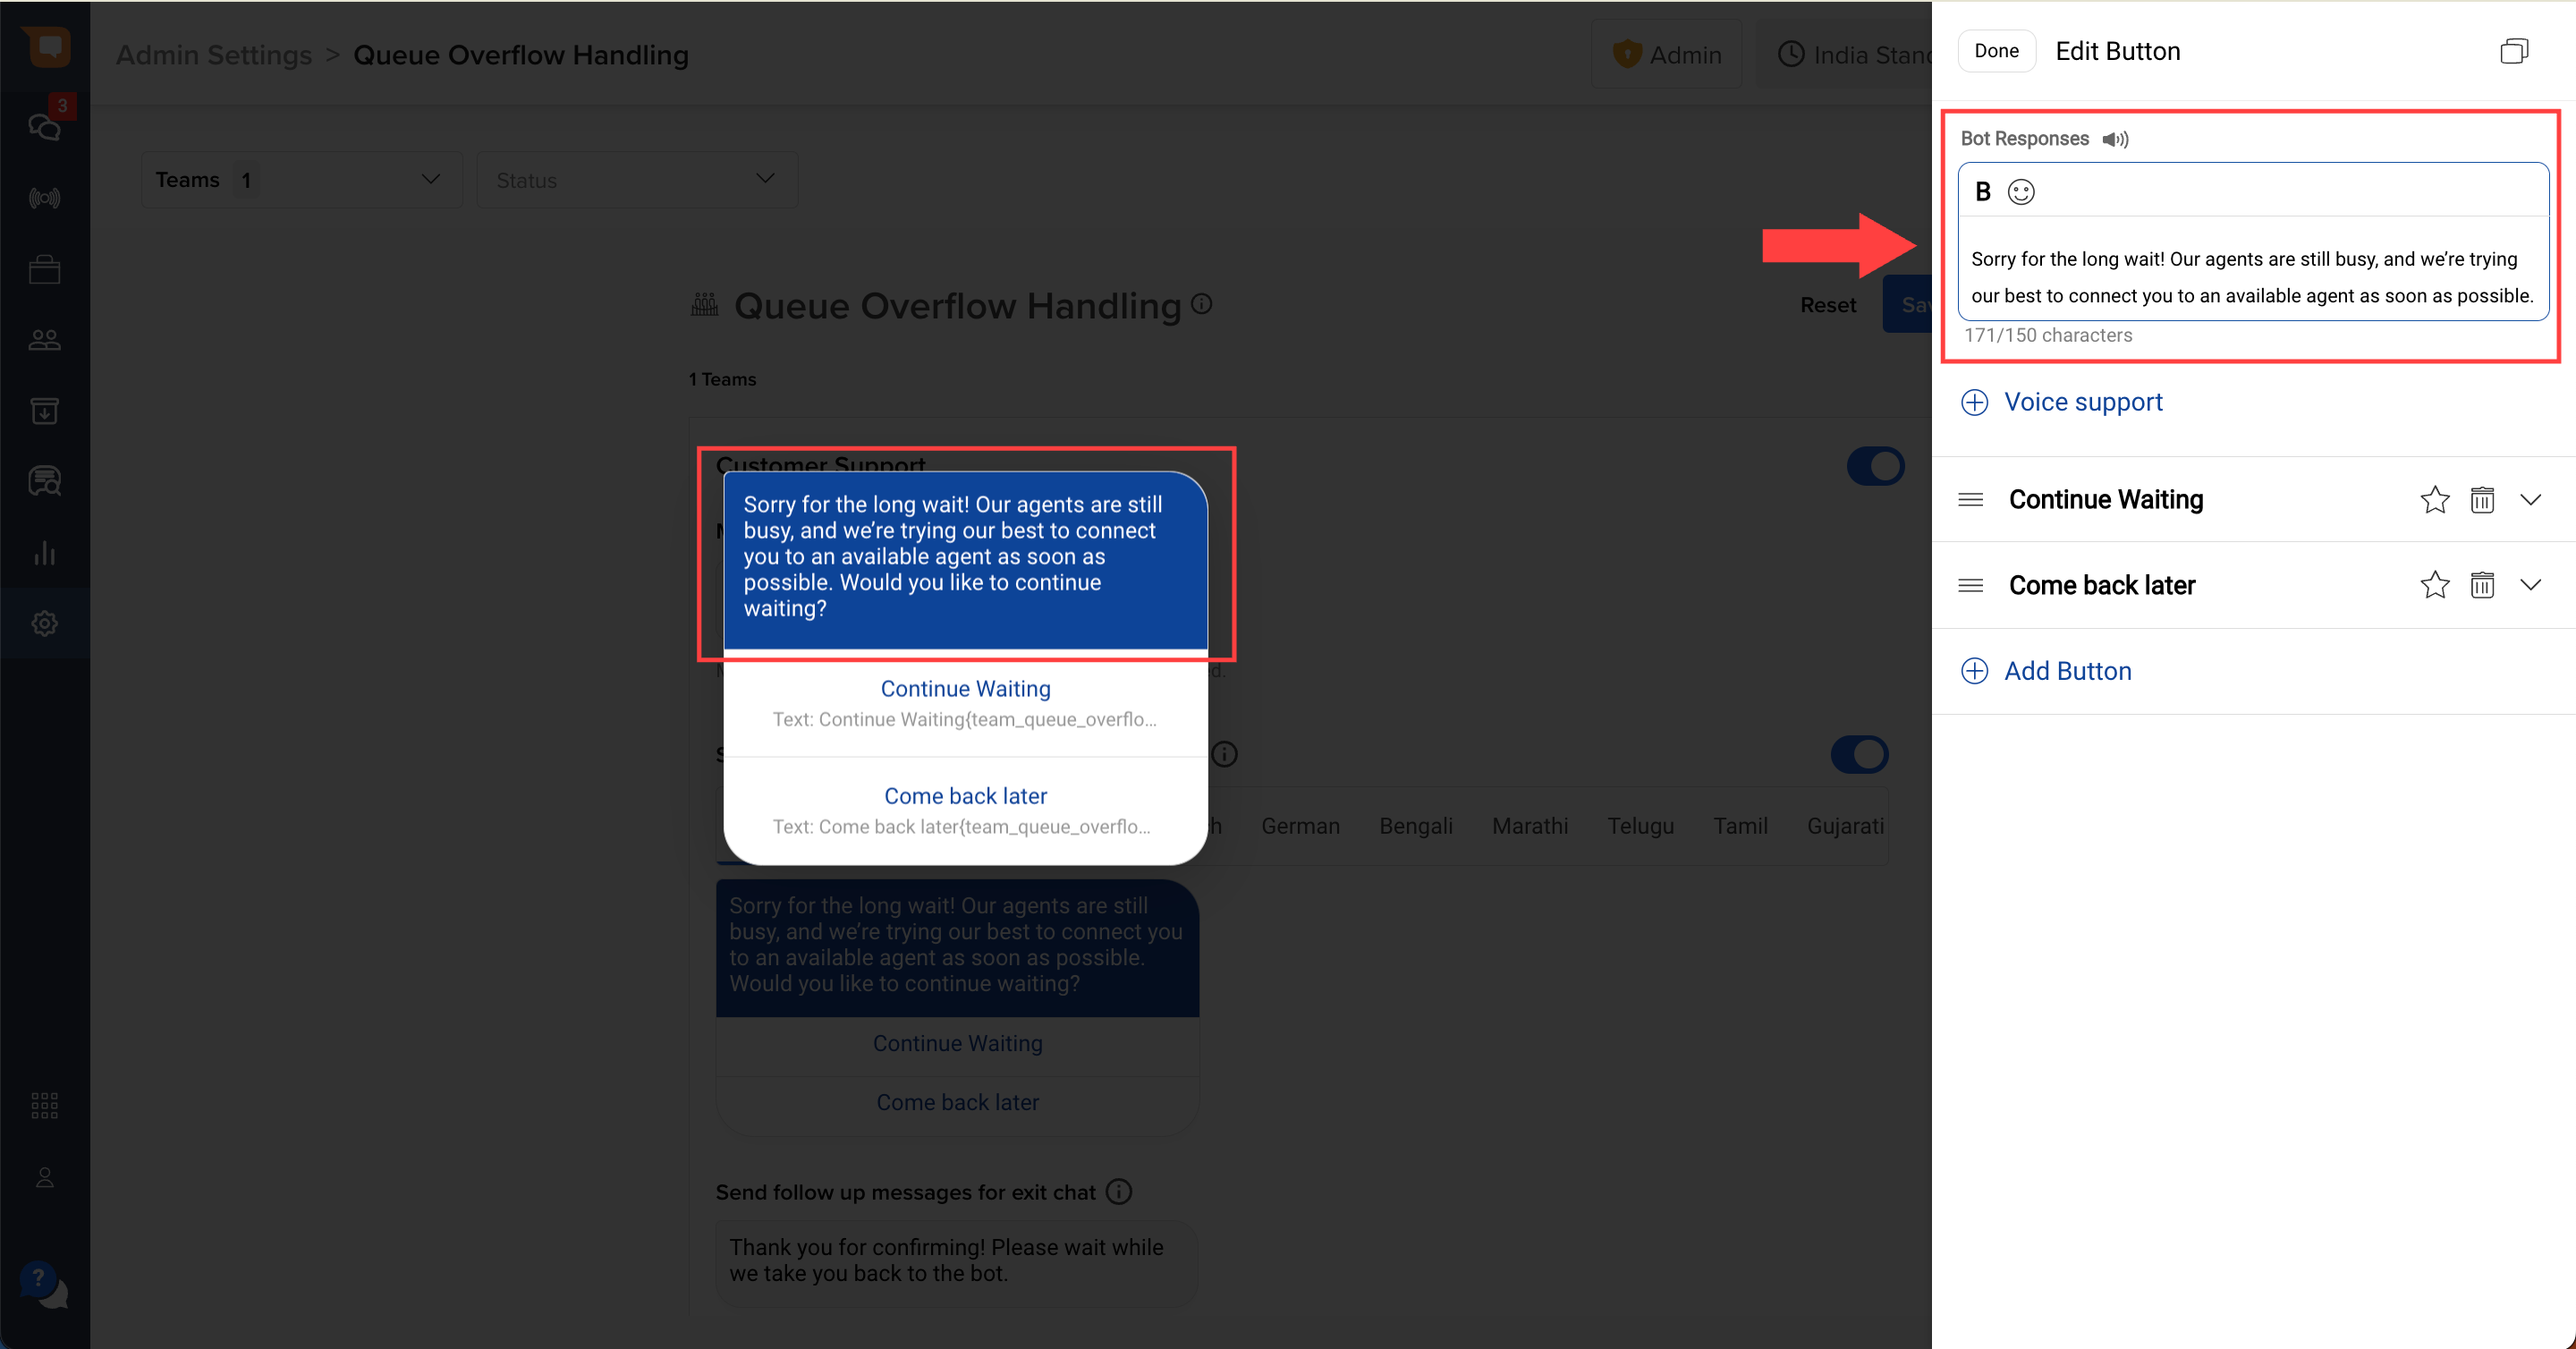
This message has 3 components that can be configured:
-
Message Body: This is the text that is shown to the customer when presenting them with the option to either continue waiting for an agent, or exit the queue.
-
CTA 1 (Continue Waiting): Clicking on this button confirms to the system that a user wishes to continue waiting till an agent is assigned. You can customise the ‘Button text’ (i.e., the CTA text), but cannot customise the ‘Button Type’ and the ‘Message to send’, as these impact the feature's functionality.

-
CTA 2 (Exit Queue): Clicking on this button confirms to the system that the user wishes to exit the queue. You can configure both the ‘Button Text’ (i.e. the CTA text), and the ‘Message to Send’ (i.e., the CTA payload) if you also wish to directly trigger a chatbot flow.

- While the CTA text is editable, CTA 1 will always function as “continue waiting”, whereas CTA 2 will always function as “exit queue”. The order of these CTAs cannot be changed.
- The CTA 2 payload ('Message to send') must be written carefully to ensure that it triggers the relevant chatbot. In other words, the chatbot skill that needs to be triggered must be trained to understand the payload configured for this CTA.
- The CTA 2 payload ('Message to send') is not visible to the user, but is sent to the system in the background to trigger a chatbot intent.
- By default, the CTA 2 settings result in a chat being re-assigned to the chatbot, without triggering any intent.
Follow-up Message
The follow-up message is sent to the customer, if they opt to exit the queue. This is a holding message that is meant to communicate to the customer that the chat is getting re-assigned to the chatbot. This message can be customised to suit your specific use-case, or the intended action once a user opts to exit a queue.

Analytics and Reporting
Agent Chat Sessions Report
New metrics such as "Max Queue Wait Time" and "Count of Queue Overflow Actions" are tracked to provide deeper insights into queue management efficiency.
Missed Chats Report
Reasons for missed chats, such as team unavailability or customer drop-off, are clearly categorized to aid in workforce management and operational planning.
