Chat Assignment Rules
- Getting Started
- Bot Building
- Smart Agent Chat
- Conversation Design
-
Developer Guides
Code Step Integration Static Step Integration Shopify Integration SETU Integration Exotel Integration CIBIL integration Freshdesk KMS Integration PayU Integration Zendesk Guide Integration Twilio Integration Razorpay Integration LeadSquared Integration USU(Unymira) Integration Helo(VivaConnect) Integration Salesforce KMS Integration Stripe Integration PayPal Integration CleverTap Integration Fynd Integration HubSpot Integration Magento Integration WooCommerce Integration Microsoft Dynamics 365 Integration
- Deployment
- External Agent Tool Setup
- Analytics & Reporting
- Notifications
- Commerce Plus
- Troubleshooting Guides
- Release Notes
Table of Contents
Introduction
Chat Assignment Rules enable you to automatically assign chats to specific Teams, using available information related to your customers. This document outlines how you can use Smart Agent Chat (SAC) to configure Chat Assignment Rules.
This feature can be helpful in enhancing your contact centre's operational efficiency, and will allow to to make quick changes to your chat routing logic as and when required directly using the SAC interface.
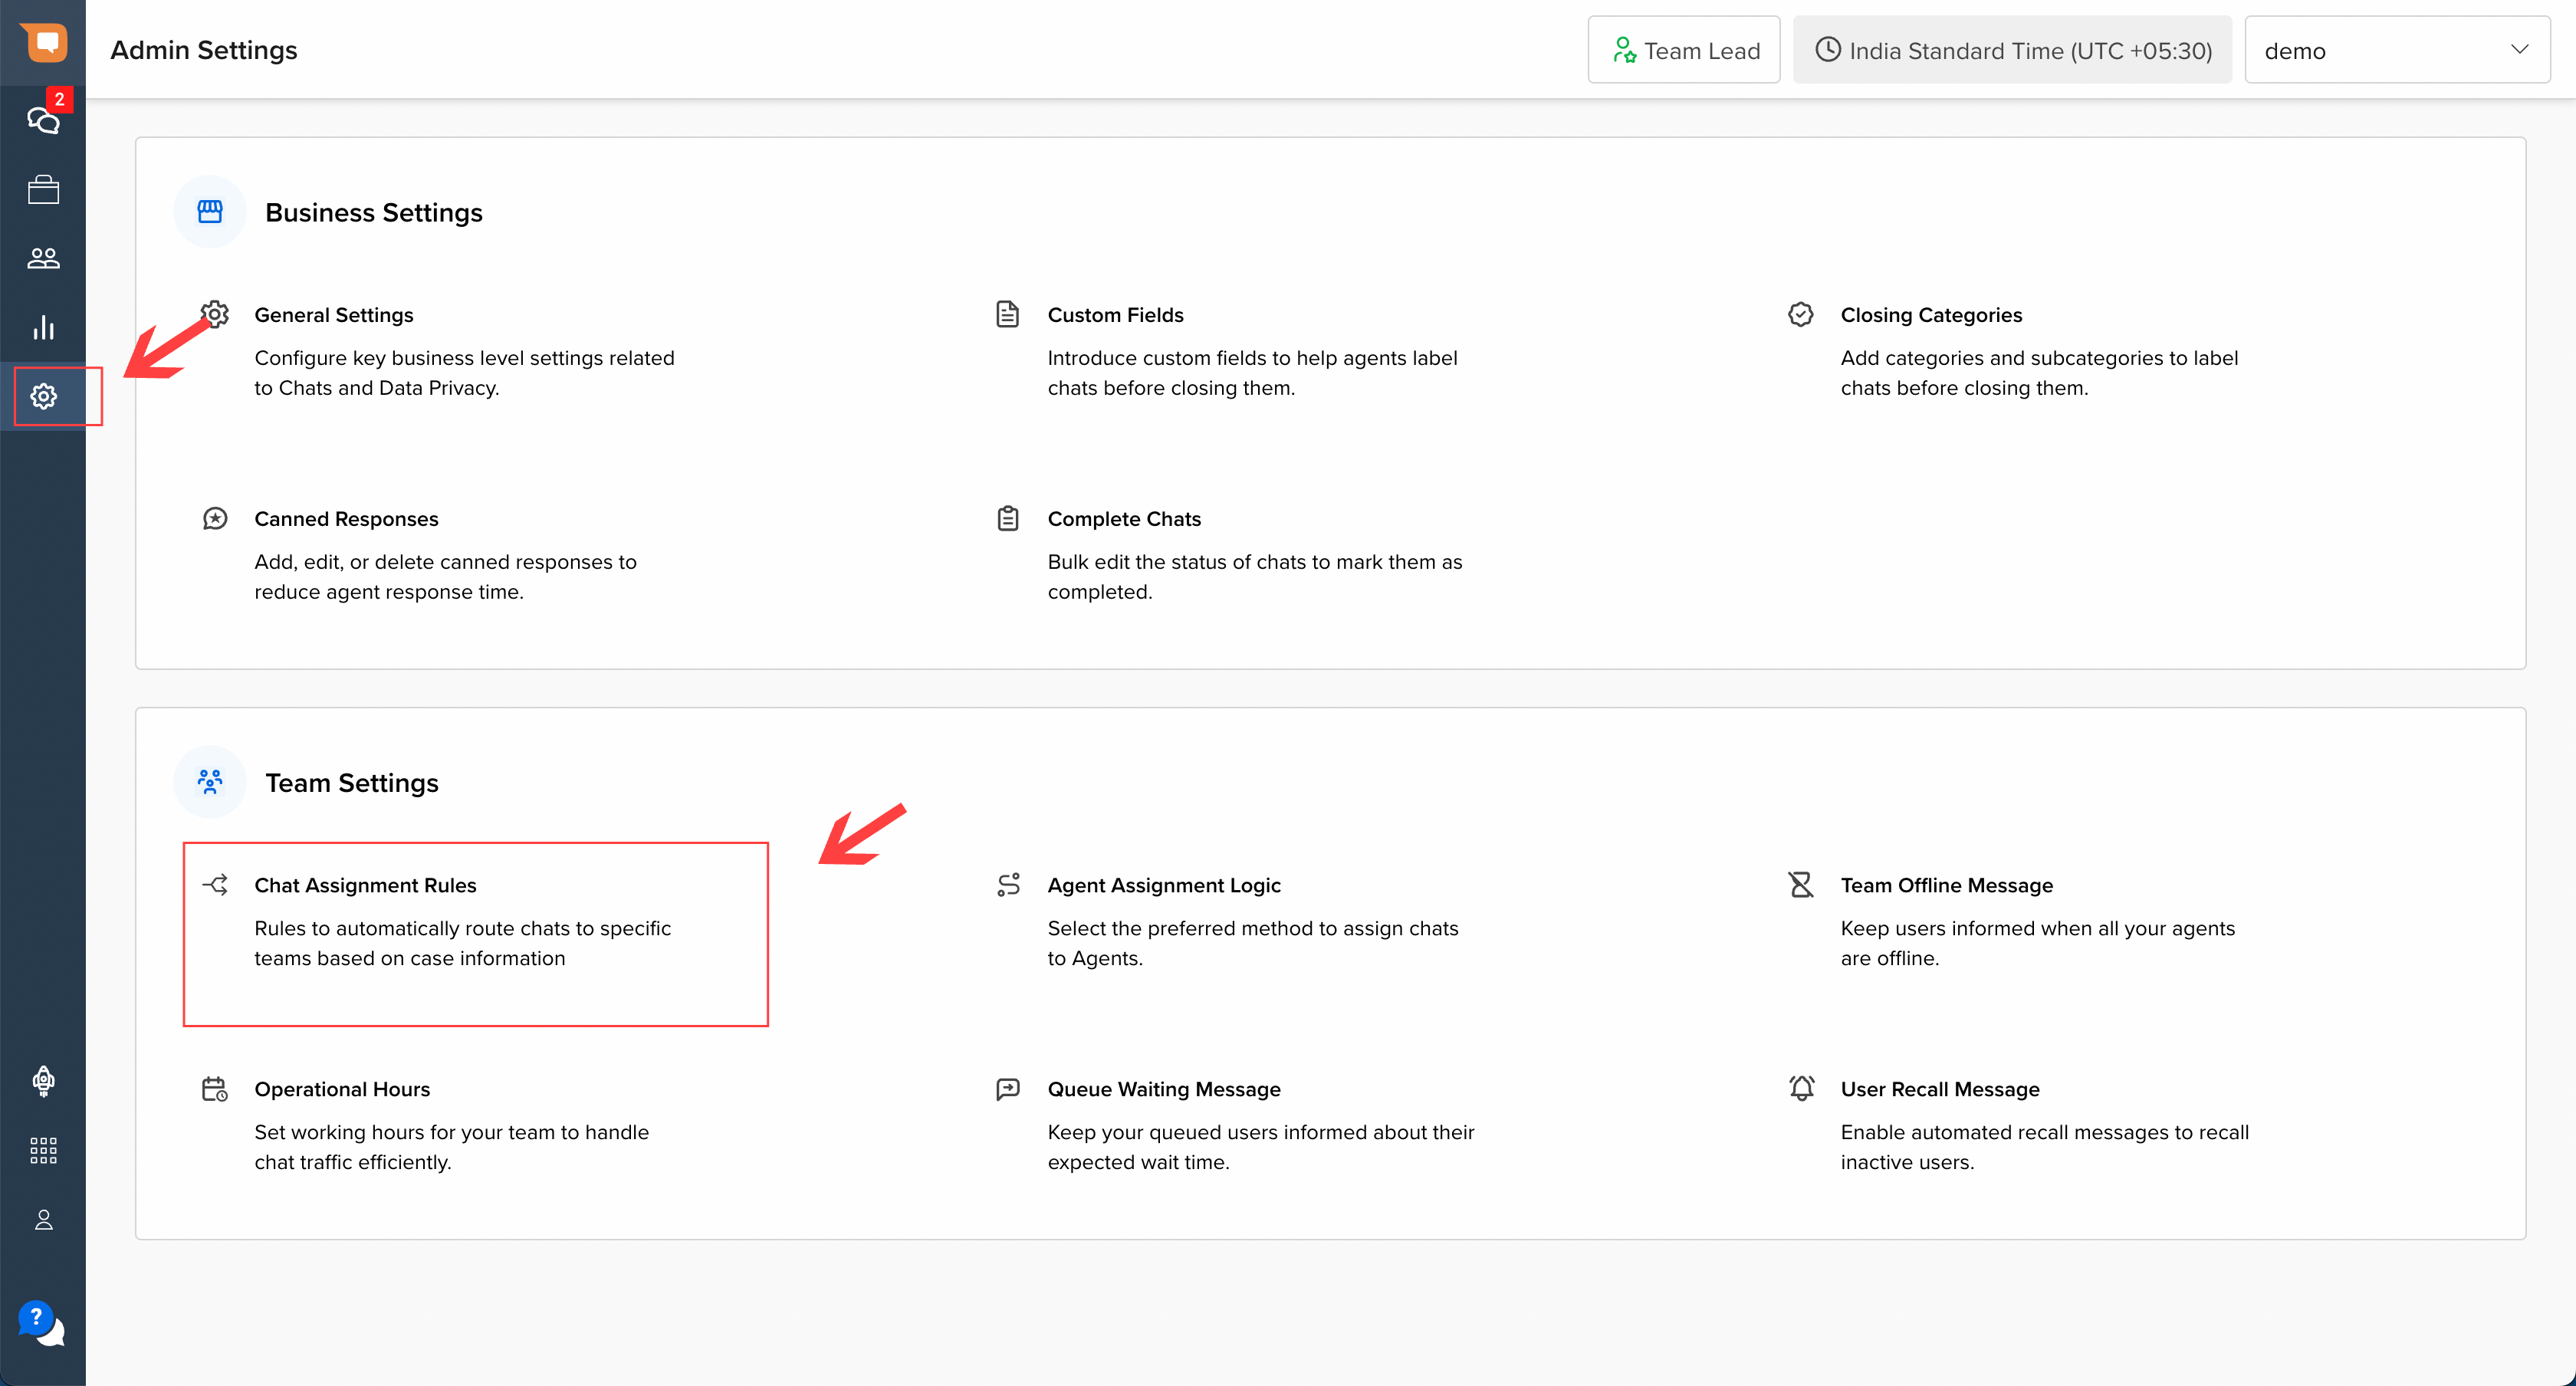
To access this feature, navigate to Admin Settings, and click on “Chat Assignment Rules” under Team Settings.
Permissions: This feature is only accessible to users to Admins and Team Leads.
Workflow Overview
While routing chats to teams, the SAC system applies 3 checks while assigning chats, in the following order:
- Team Assignment Rules - The system first checks the Assignment Rules in the priority order set out for the rules (described in greater detail below). Once the relevant Team is determined, the system proceeds to the next step.
- Team Availability Checks - After an Assignment Rule is triggered, the system then checks whether the relevant Team is available. If the Team is unavailable (i.e. either the Team is Offline, or a chat is requested outside of the Team's designated Business Hours), the system triggers the applicable workflow to inform the customer.
- Agent Assignment Logic - If the relevant Team is available, the system assigns the chat to that Team's queue. Once a chat is in the Team queue, the system enforces the Agent Assignment Logic selected for the Team to assign the chat to the next available agent.
Note:
- All rules will be enforced for chats that reach SAC after the rule is created (or updated).
- There is no upper cap on the number of conditions that can be set out.
How to set up Chat Assignment Rules
Step 1: Add a Fallback Team
To get started, the first step is to set a Fallback Team for your account. This is the Team to which all chats are assigned when none of the custom assignment rules are triggered.
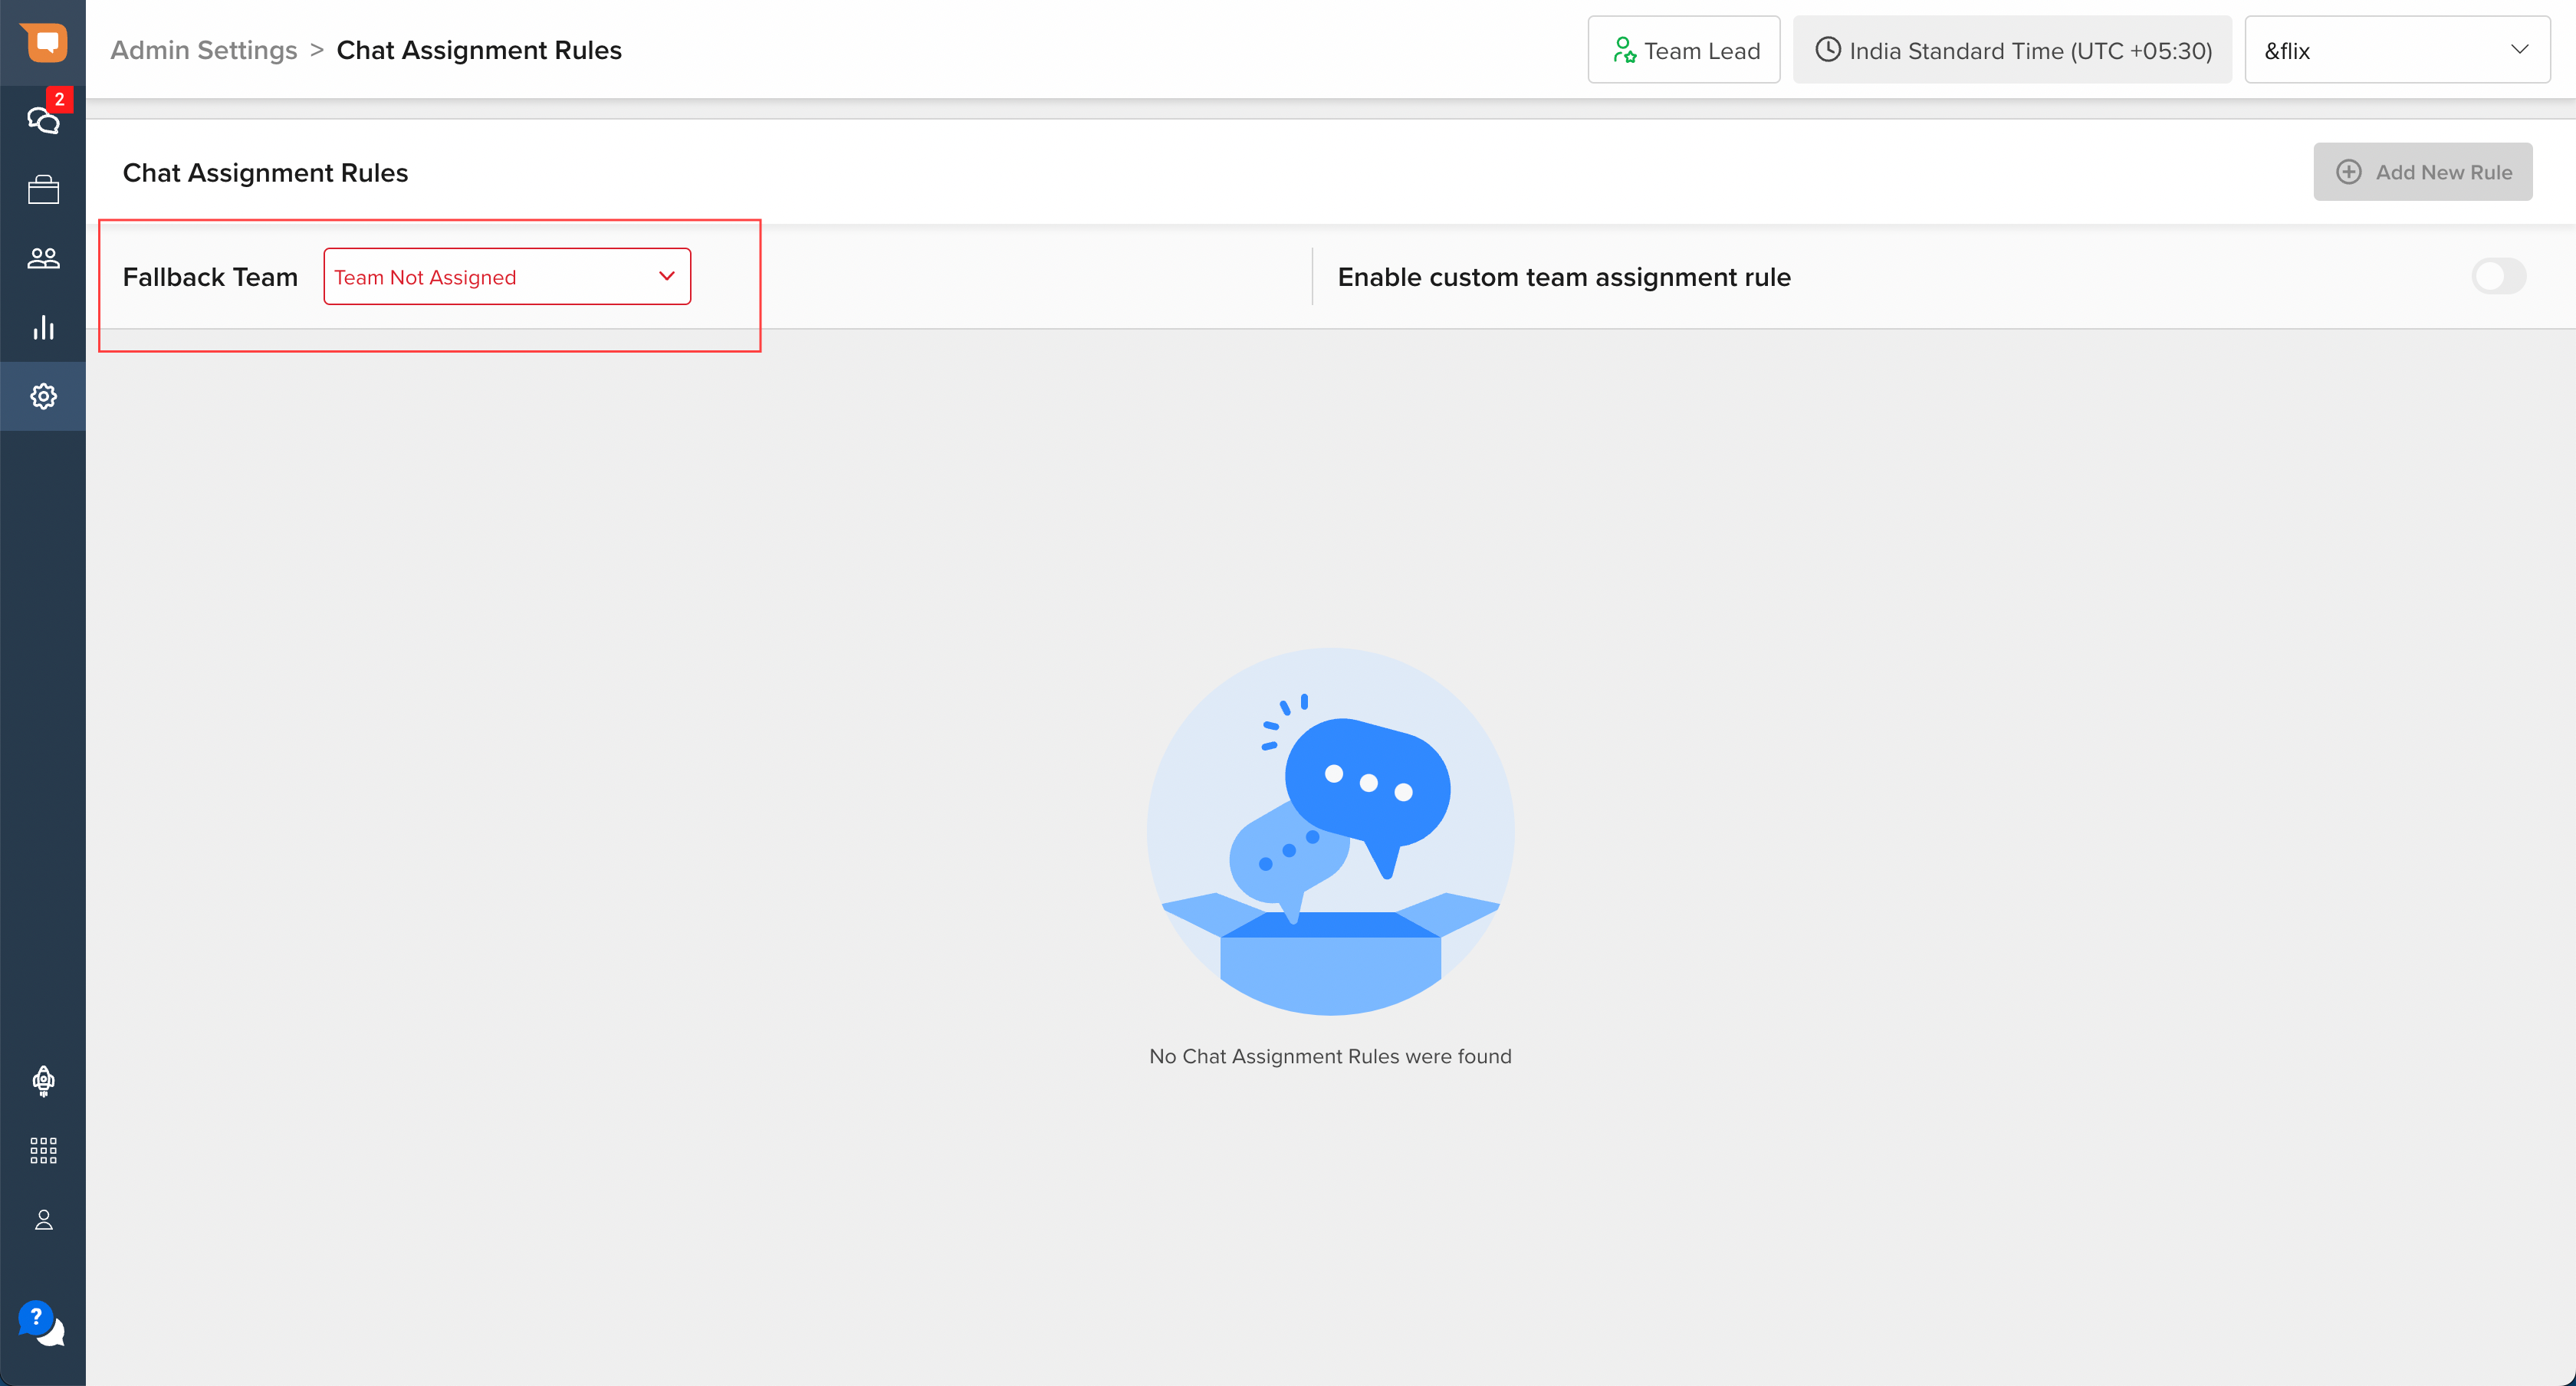
Once a Fallback Team has been assigned, you will be able to enable the feature, as well as start configuring new assignment rules for chat assignment.
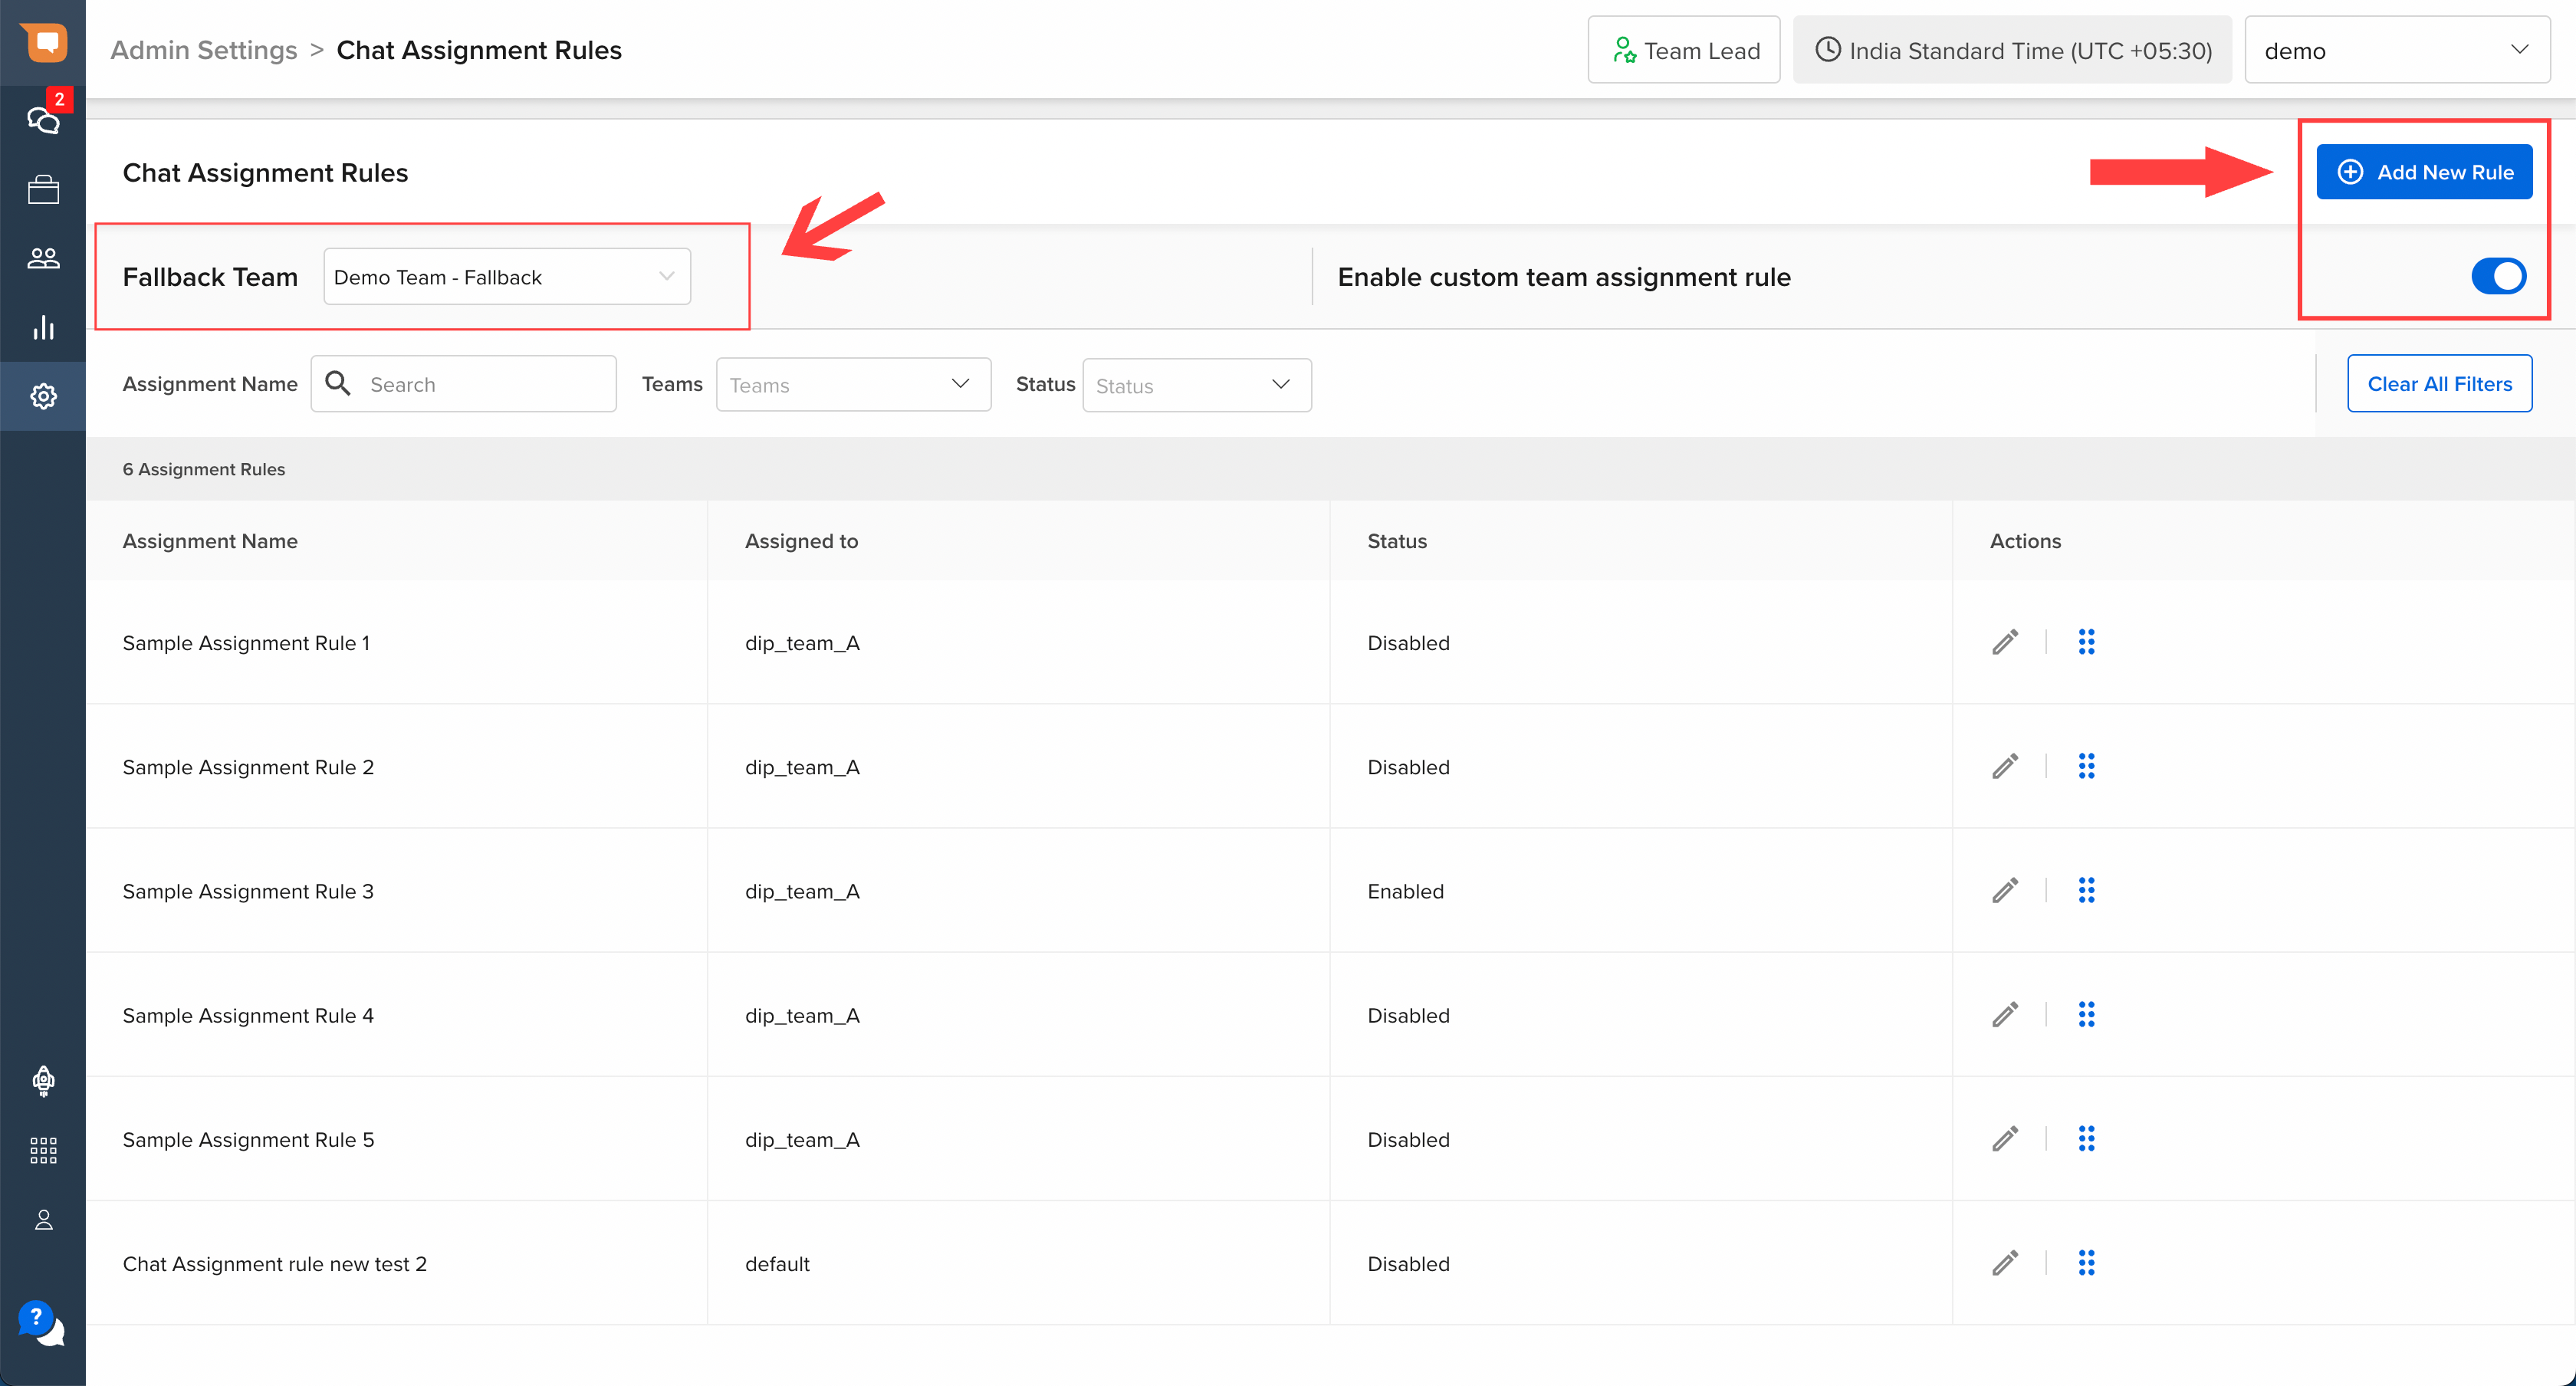
Note
The Team selected as the Fallback Team must be in the “Enabled” state, and comprise at least 1 Agent. Disabled / empty Teams cannot be added as a Fallback Team.
Once a Team is designated as the Fallback Team, and custom assignment rules are enabled for your account, you will not be allowed to disable that Team, or remove all Agents from that Team, without assigning a different eligible Team as the Fallback Team.
Step 2: Add a New Assignment Rule
Once a Fallback Team is set, you can start creating Custom Assignment Rules by clicking on the “Add New Rule” button on the top right corner.
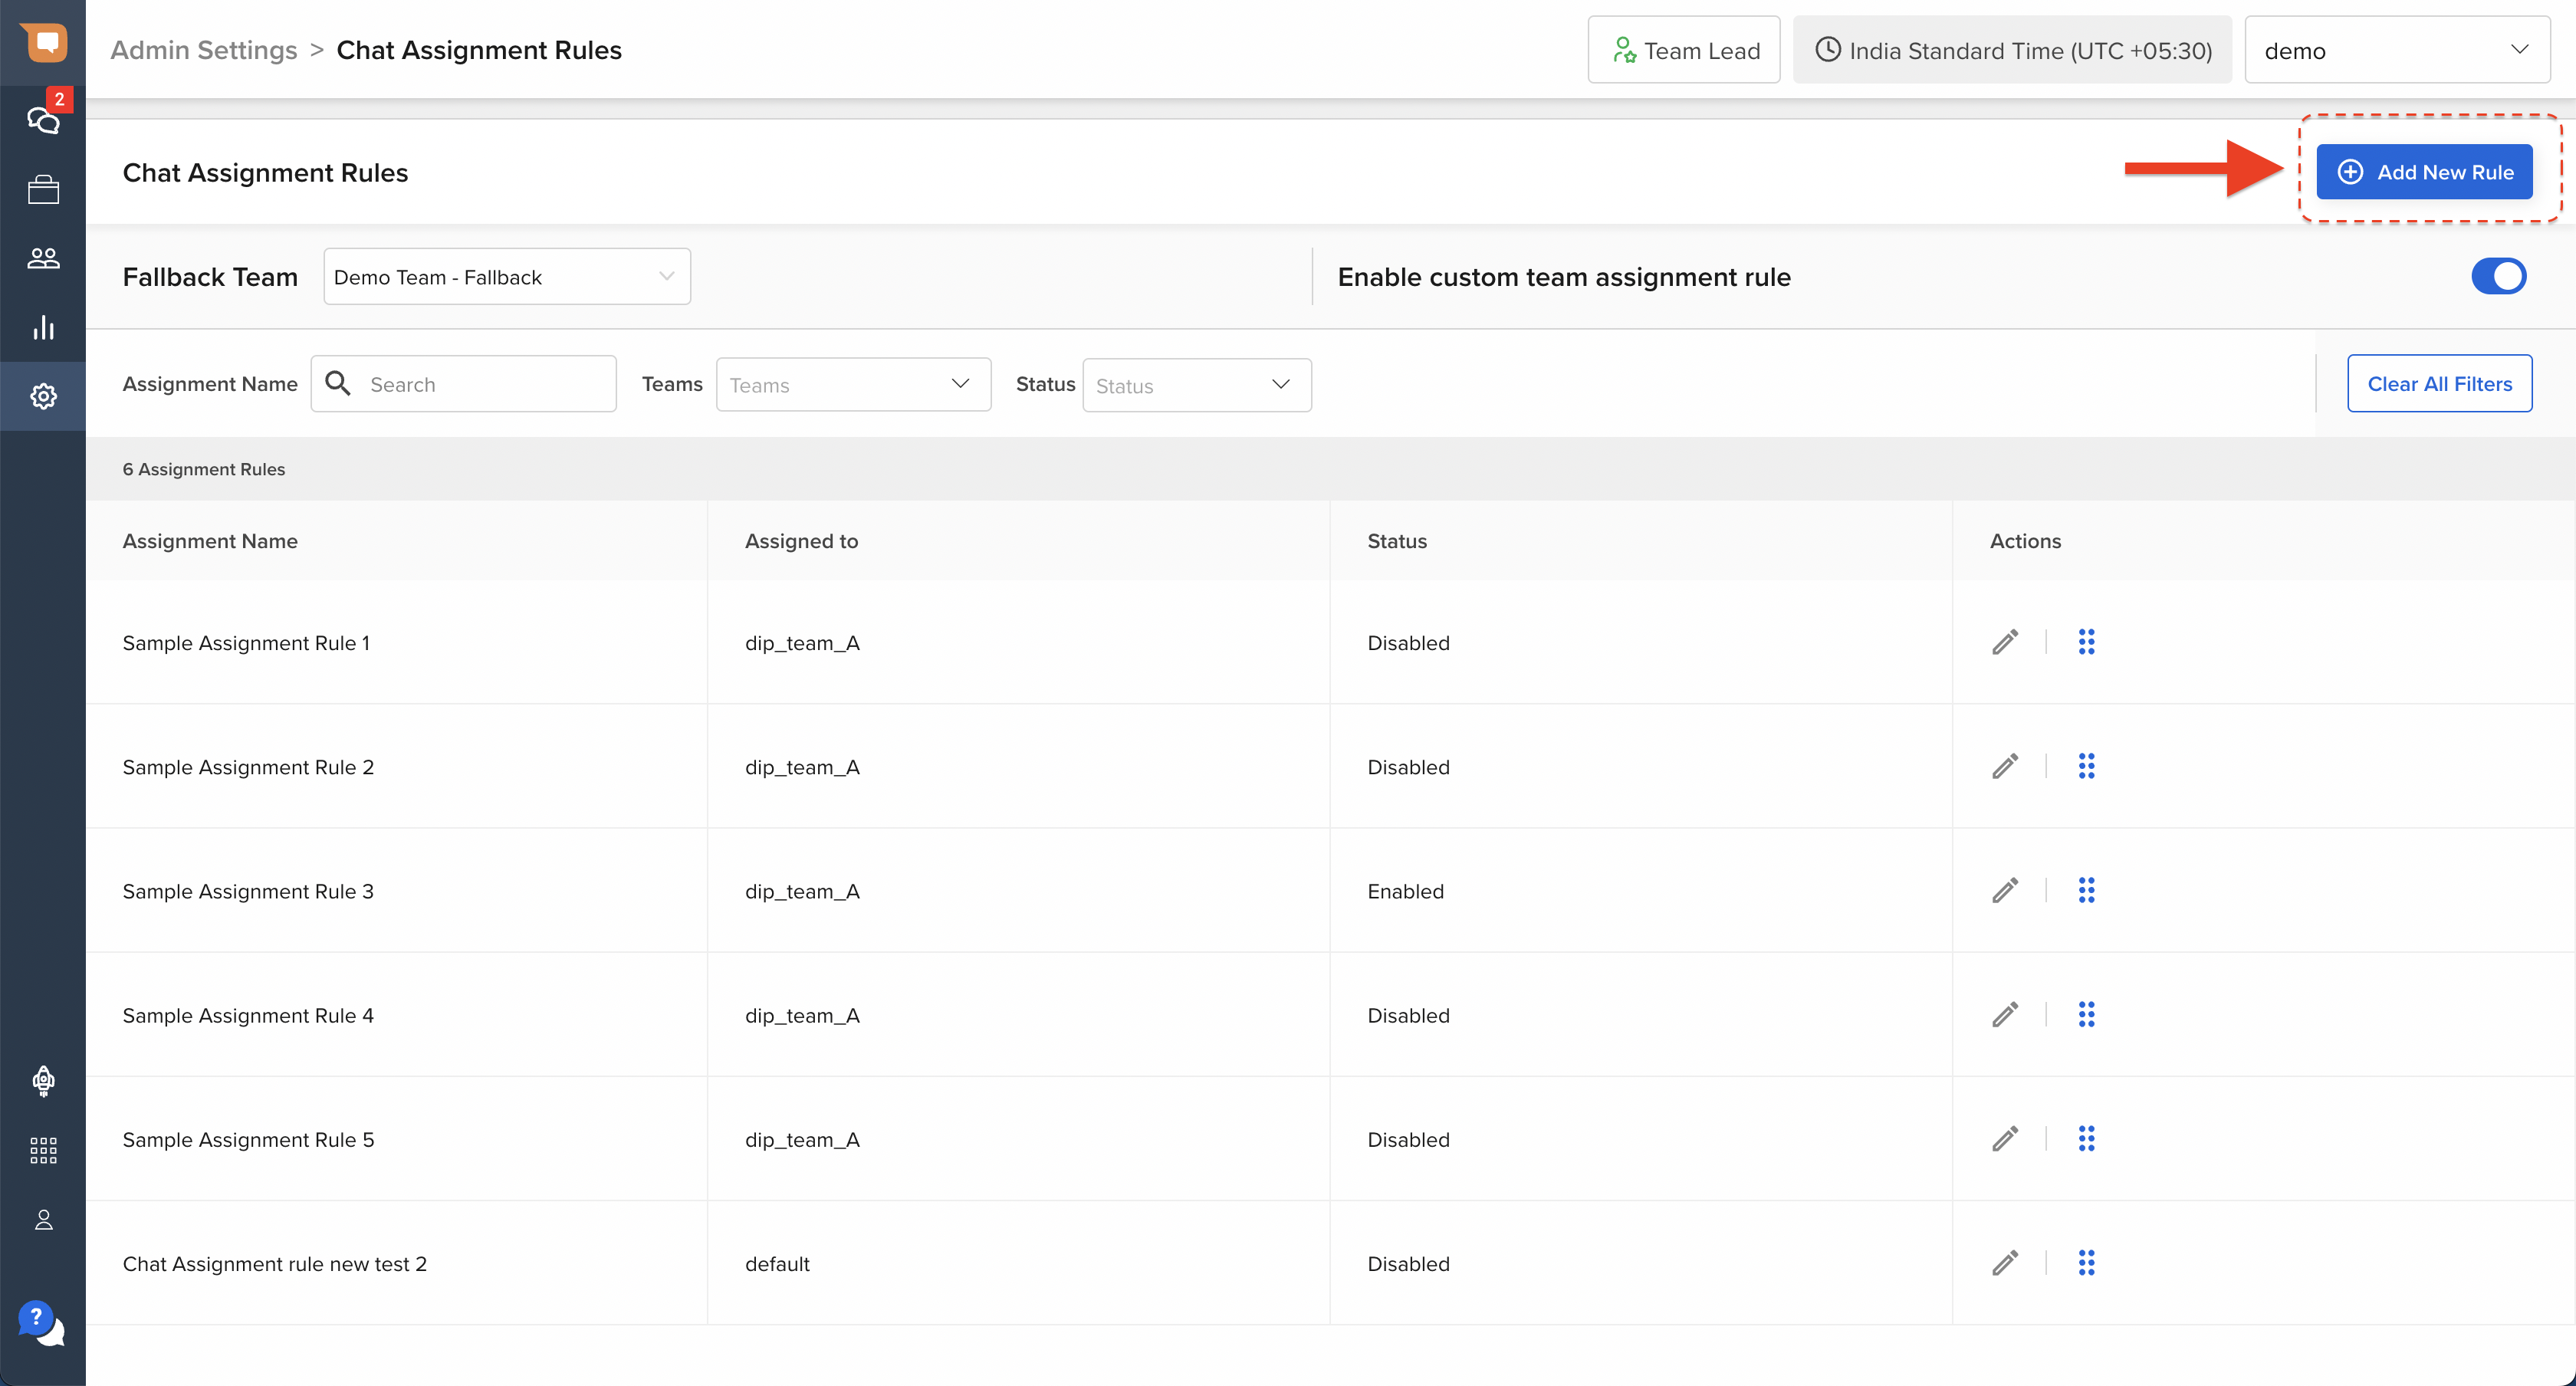
Once you click on “Add New Rule”, you will be redirected to the rule configuration page, as shown below.
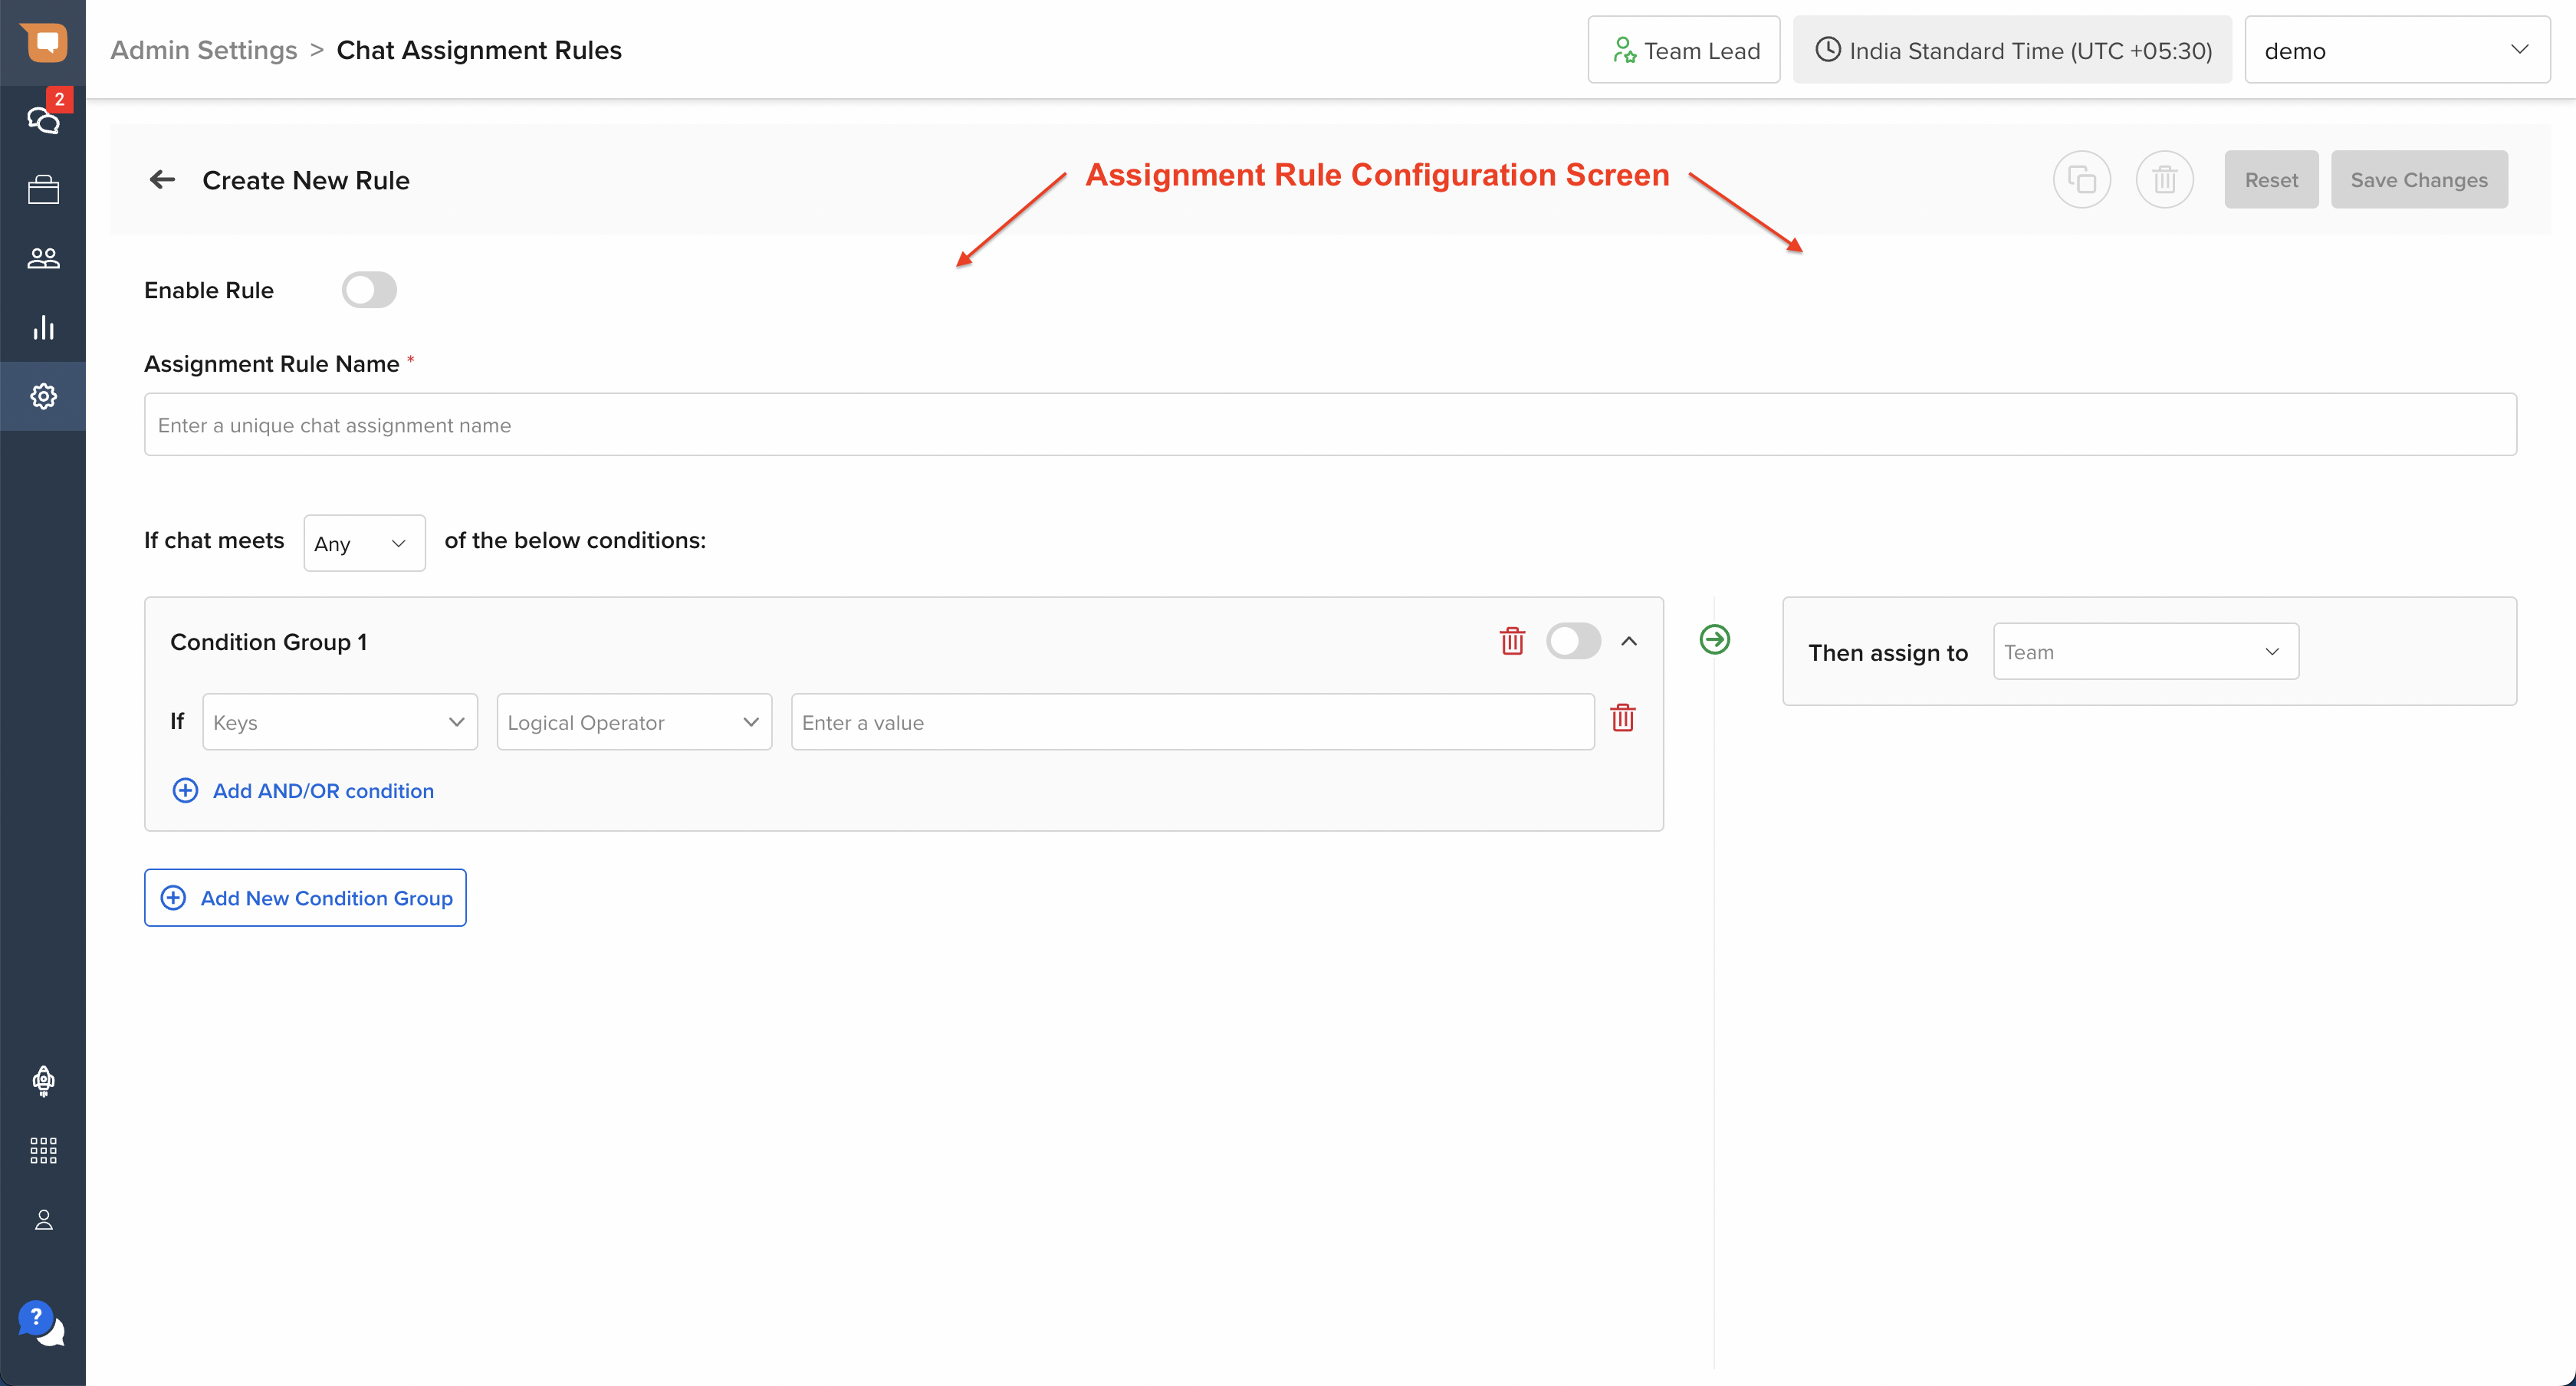
To get started, assign this rule a unique name that can be used for later reference. This is a mandatory field, and without assigning a rule name, the system will not allow you to save the rule.
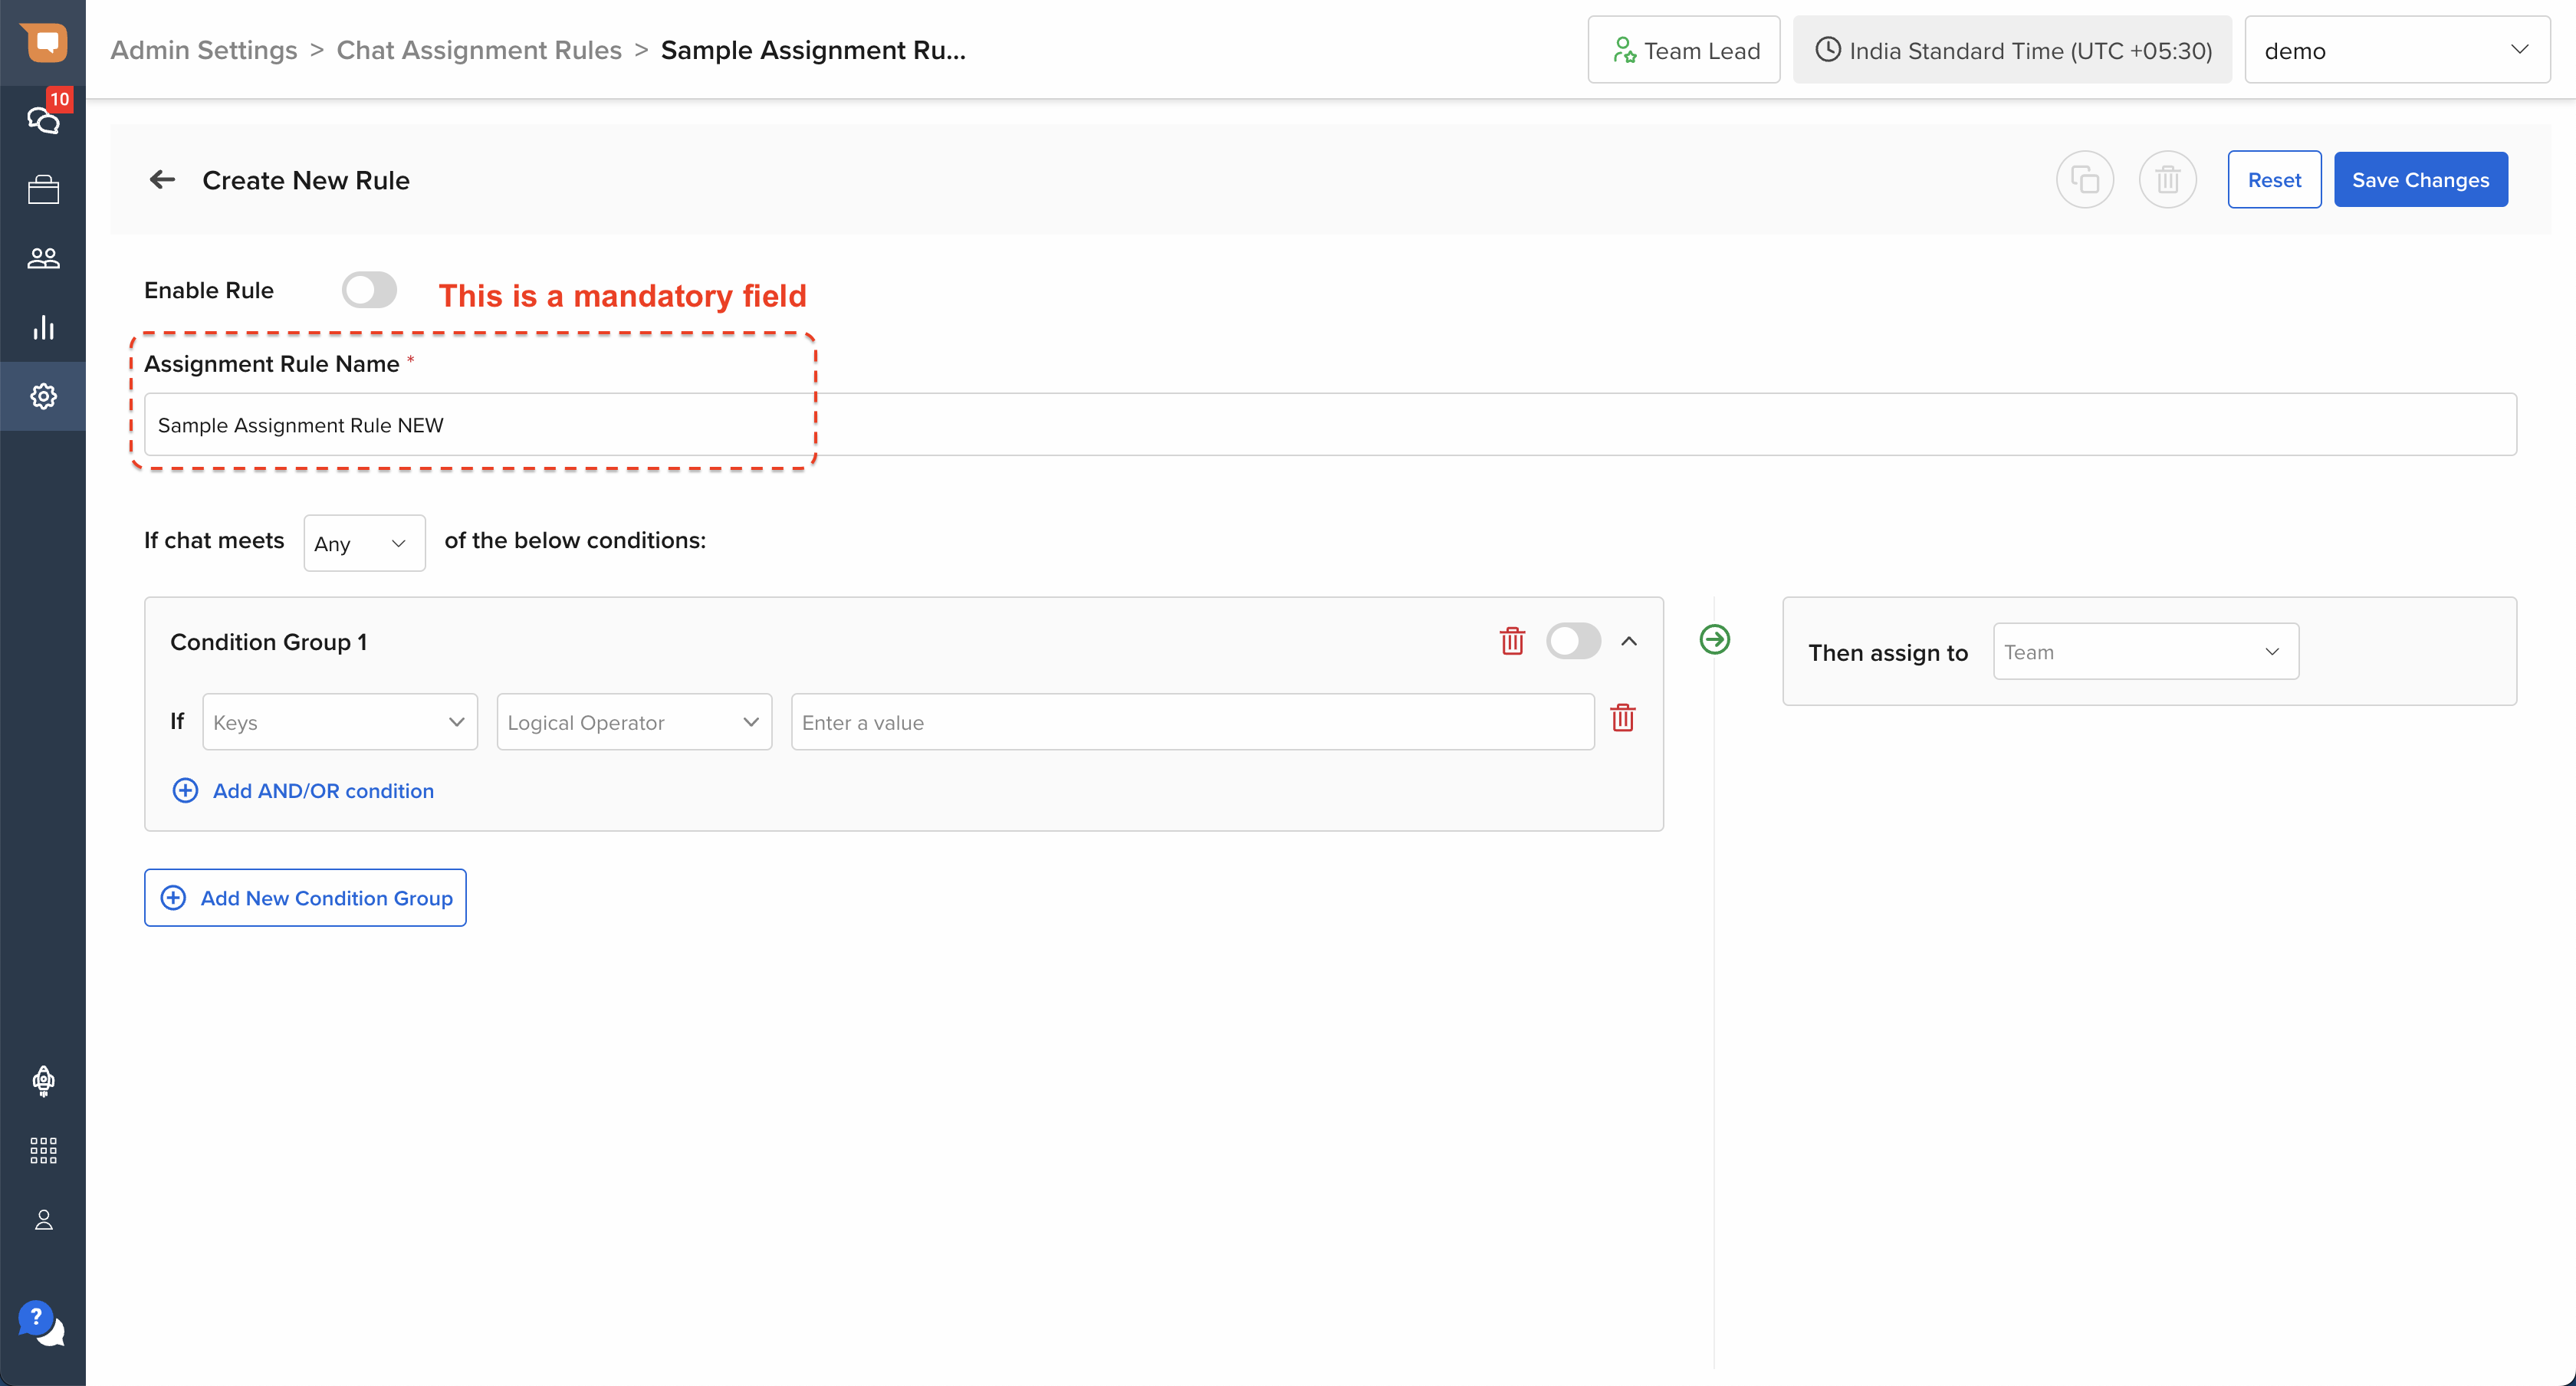
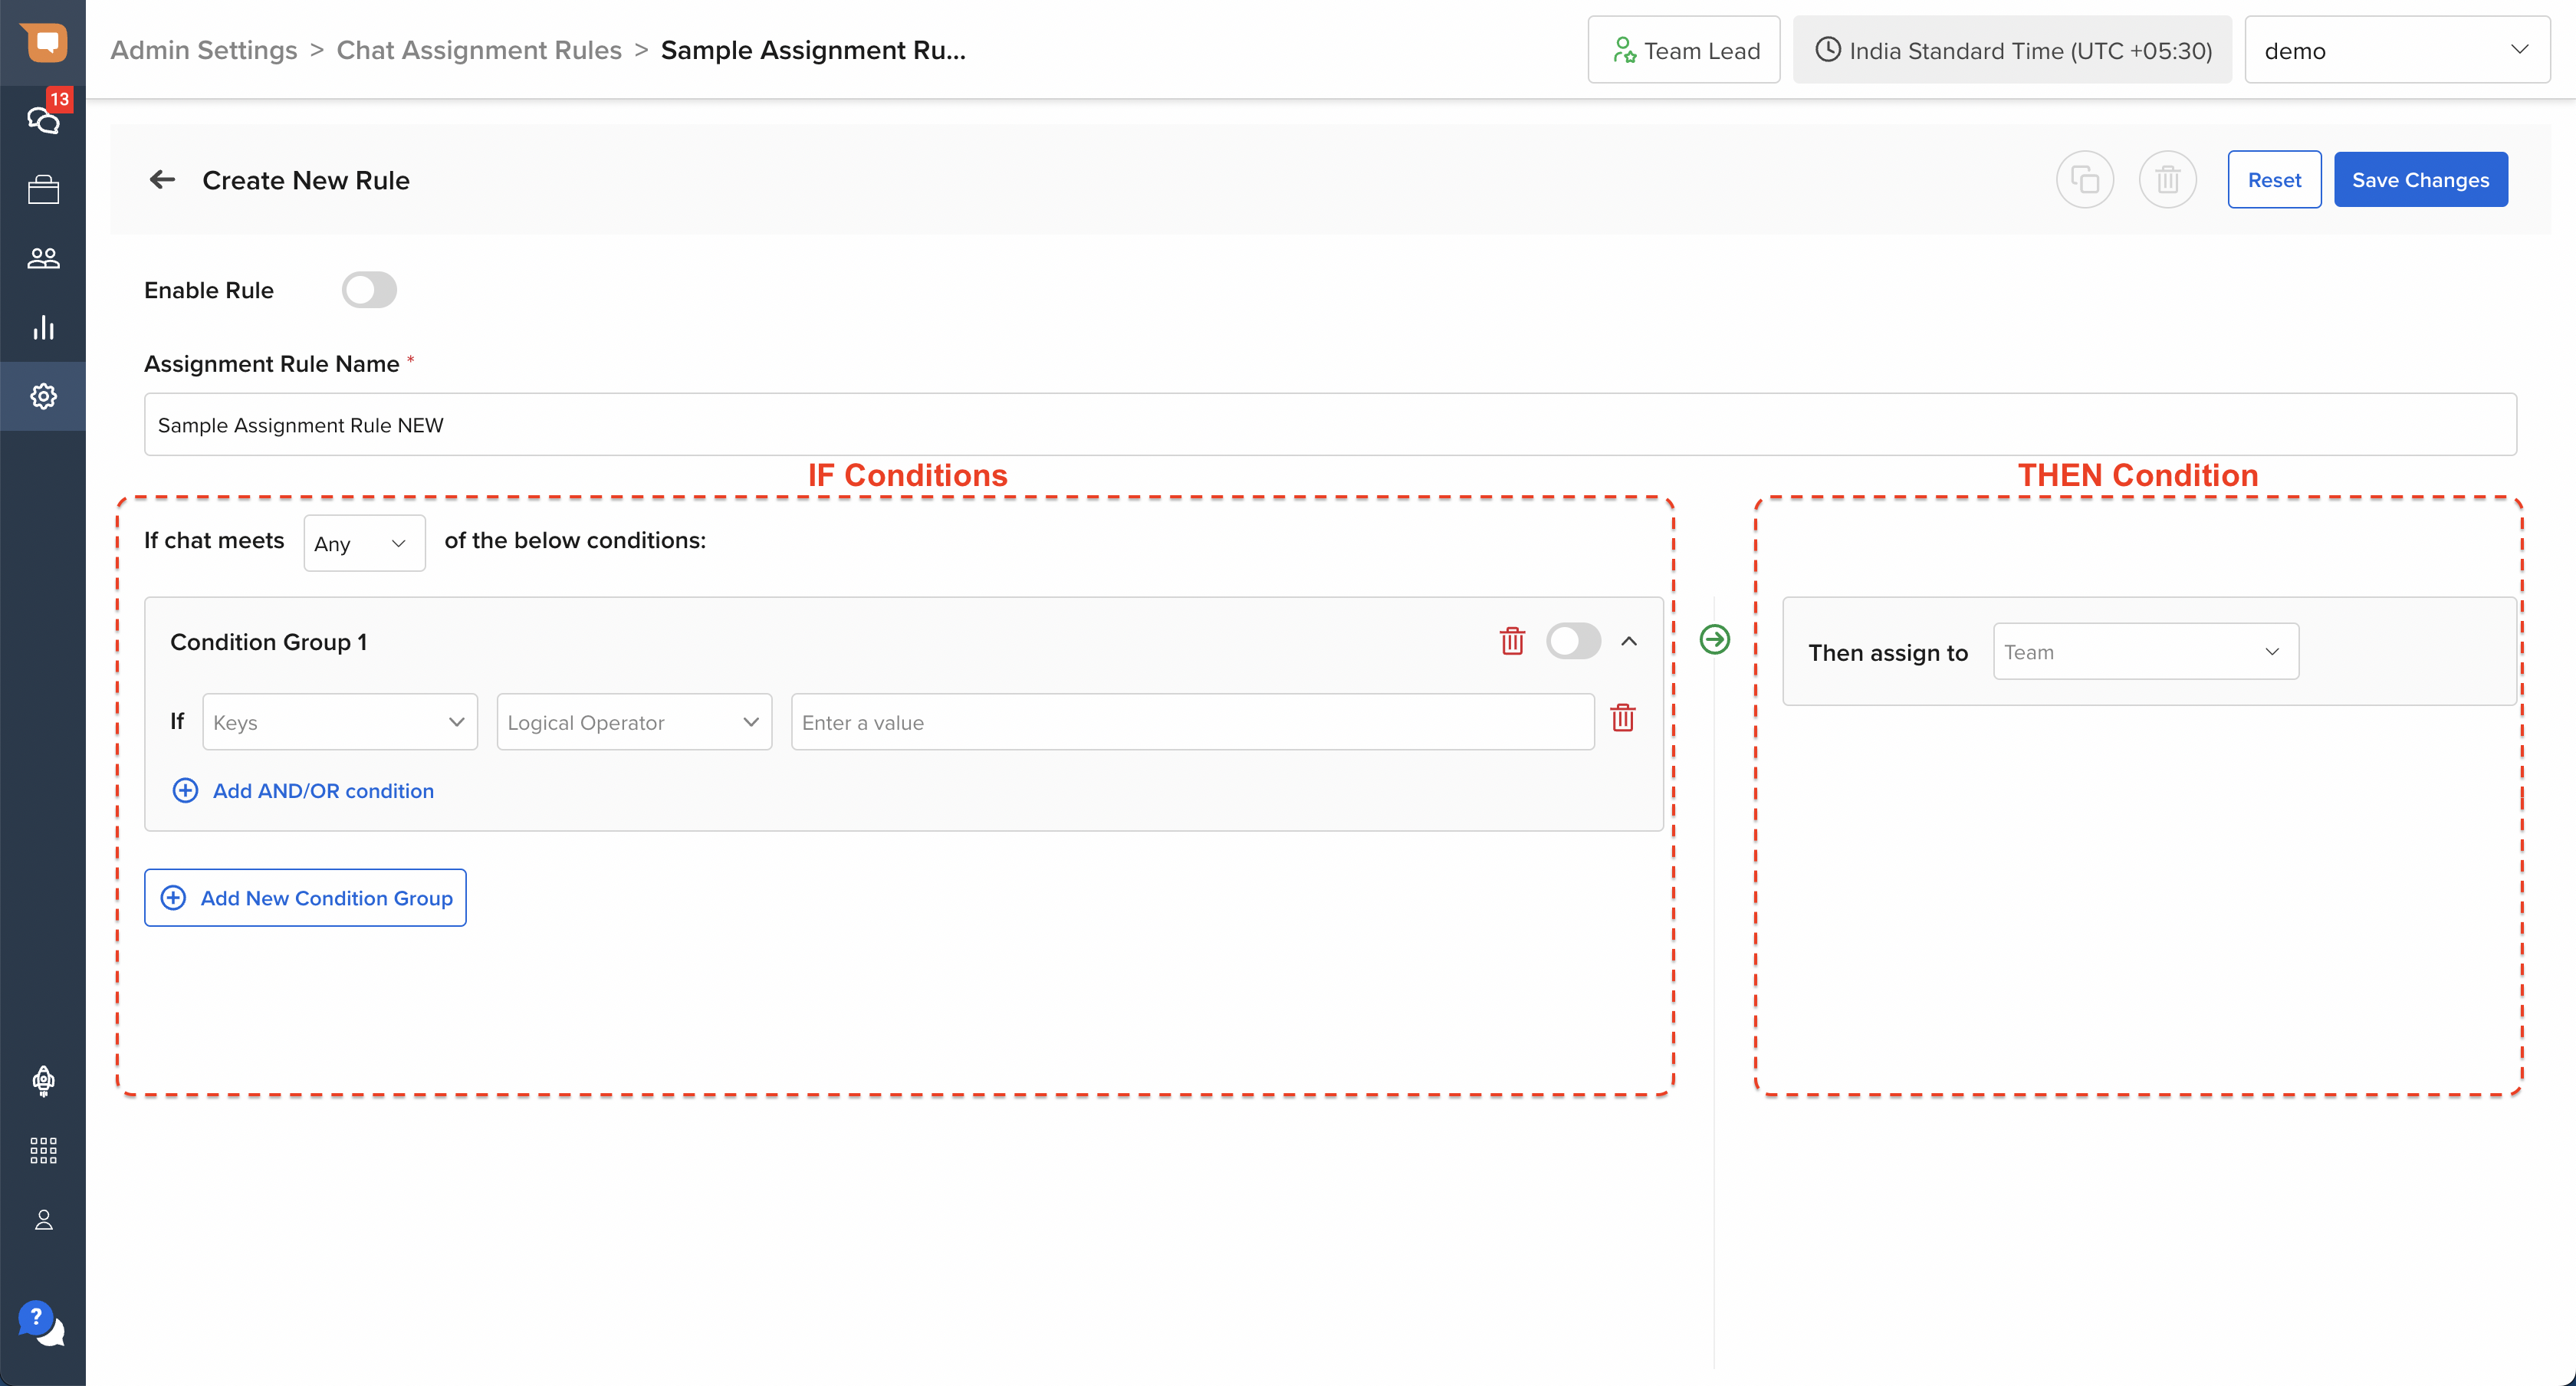
Once a name has been assigned, the rest of the configuration page has 2 important sections:
- IF Conditions - the left half of the screen contains all the IF conditions that need to be satisfied in order for the Assignment Rule to be enforced.
- THEN Condition - the right half of the screen contains the THEN condition, which determines which Team the chat must be assigned to, when the IF conditions are satisfied.
Set IF Conditions
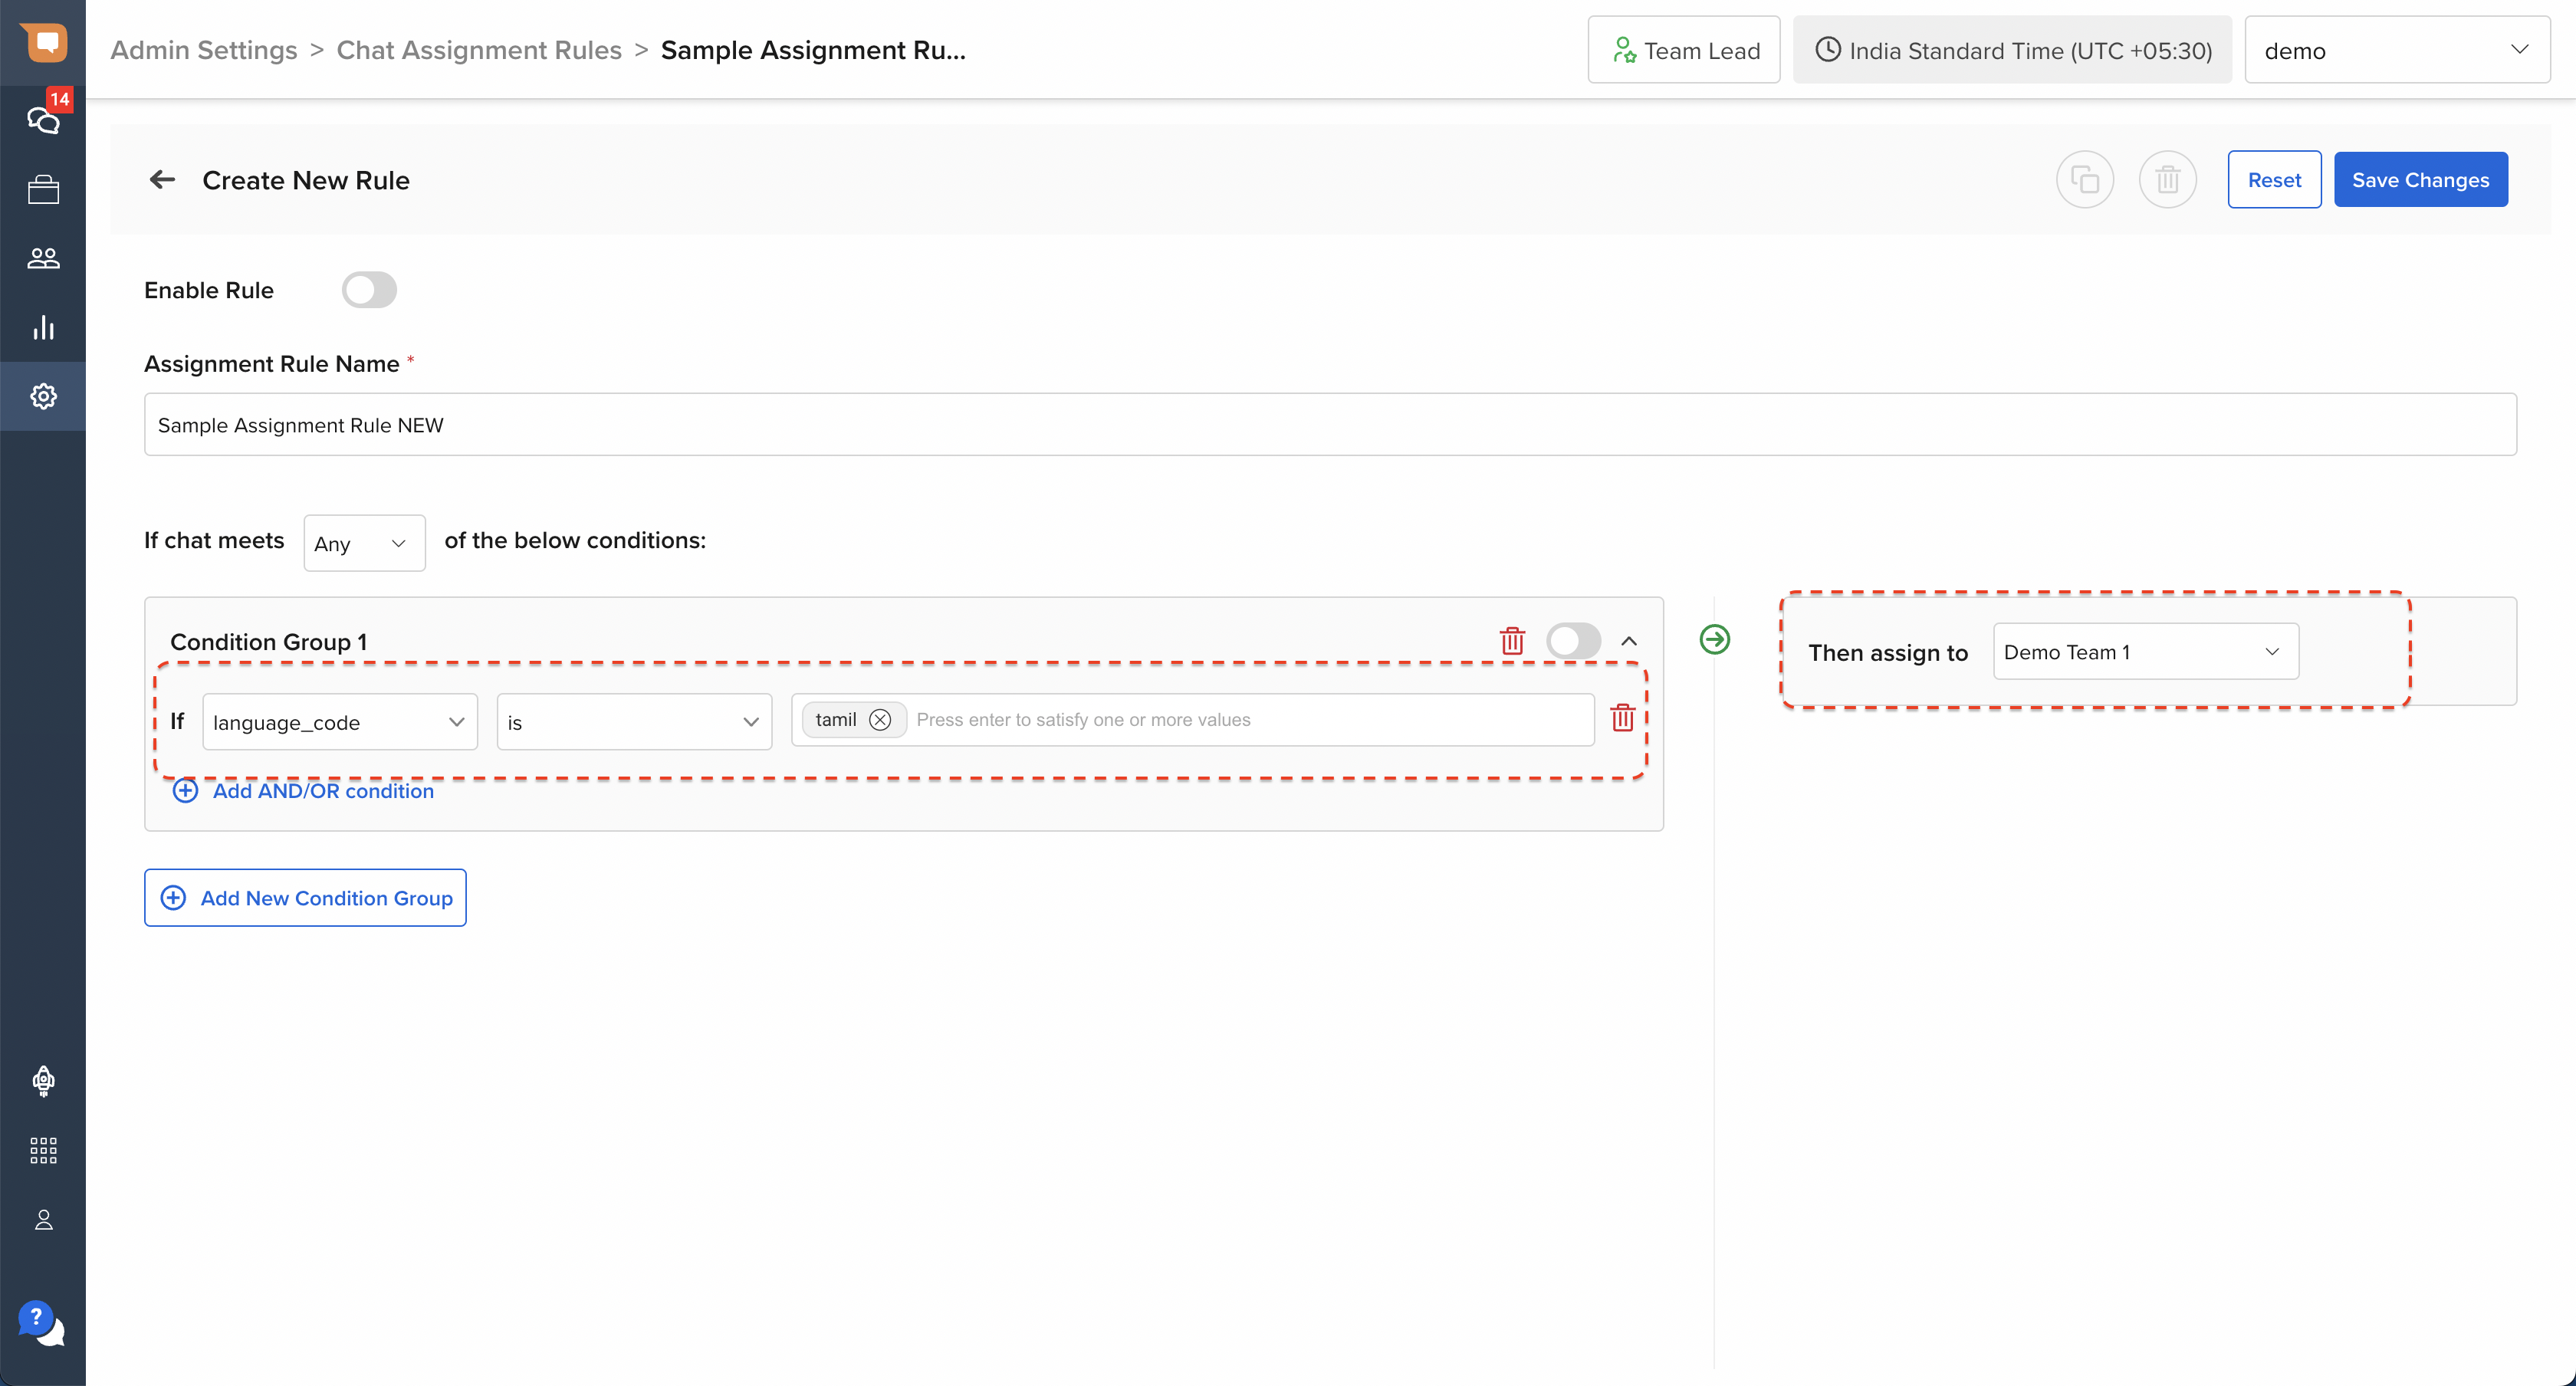
Every IF condition involves the following 3 elements:
- Key: these keys contain all the information captured by your chatbot as part of “user_details”, “entities” or “conversation_details” (which can contain any information about your customers, such as their country or email address).
- Operator: Depending on the type of key being used, the operator applies a logical condition to be satisfied with respect to that key.
- Value: The value input sets the condition to be met.
Example
If you wish to assign chats where the customer's language preference is Tamil, you can define a condition wherein, IF “language” (Key) is (Operator) “Tamil” (Value), THEN assign such chats to “Demo Team 1” (which has Agents trained to converse in Tamil).
Notes on Using Keys
- In order for the Assignment Rule to work properly, the values that are added must match exactly with the values that are received from the chatbot at the time of an agent handover. For a more detailed explanation, refer to the section below on “How to add Keys”.
- For any Keys that contain date values, the value field must be provided in DD-MM-YYYY format (e.g. for 15th August, 2024, a valid input would be 15-08-2024).
- For any Keys that contain time values, the value field must be provided in HH:MM:SS format using the 24-hours convention (e.g. for 5.30pm, a valid input would be 17:30:00).
Once your first condition is set, you can either add additional conditions as part of the same Condition Group, or add a new Condition Groups.
- A Condition Group is a collection of multiple conditions, and is satisfied when all the conditions within that Group are met.
- While adding new Conditions to a Condition Group, you can opt to set either AND or OR relationships between each Condition in the Group.
- AND implies that each condition must be met for the Condition Group to be satisfied.
- OR implies that if any 1 condition is met, the entire Condition Group is satisfied.

-
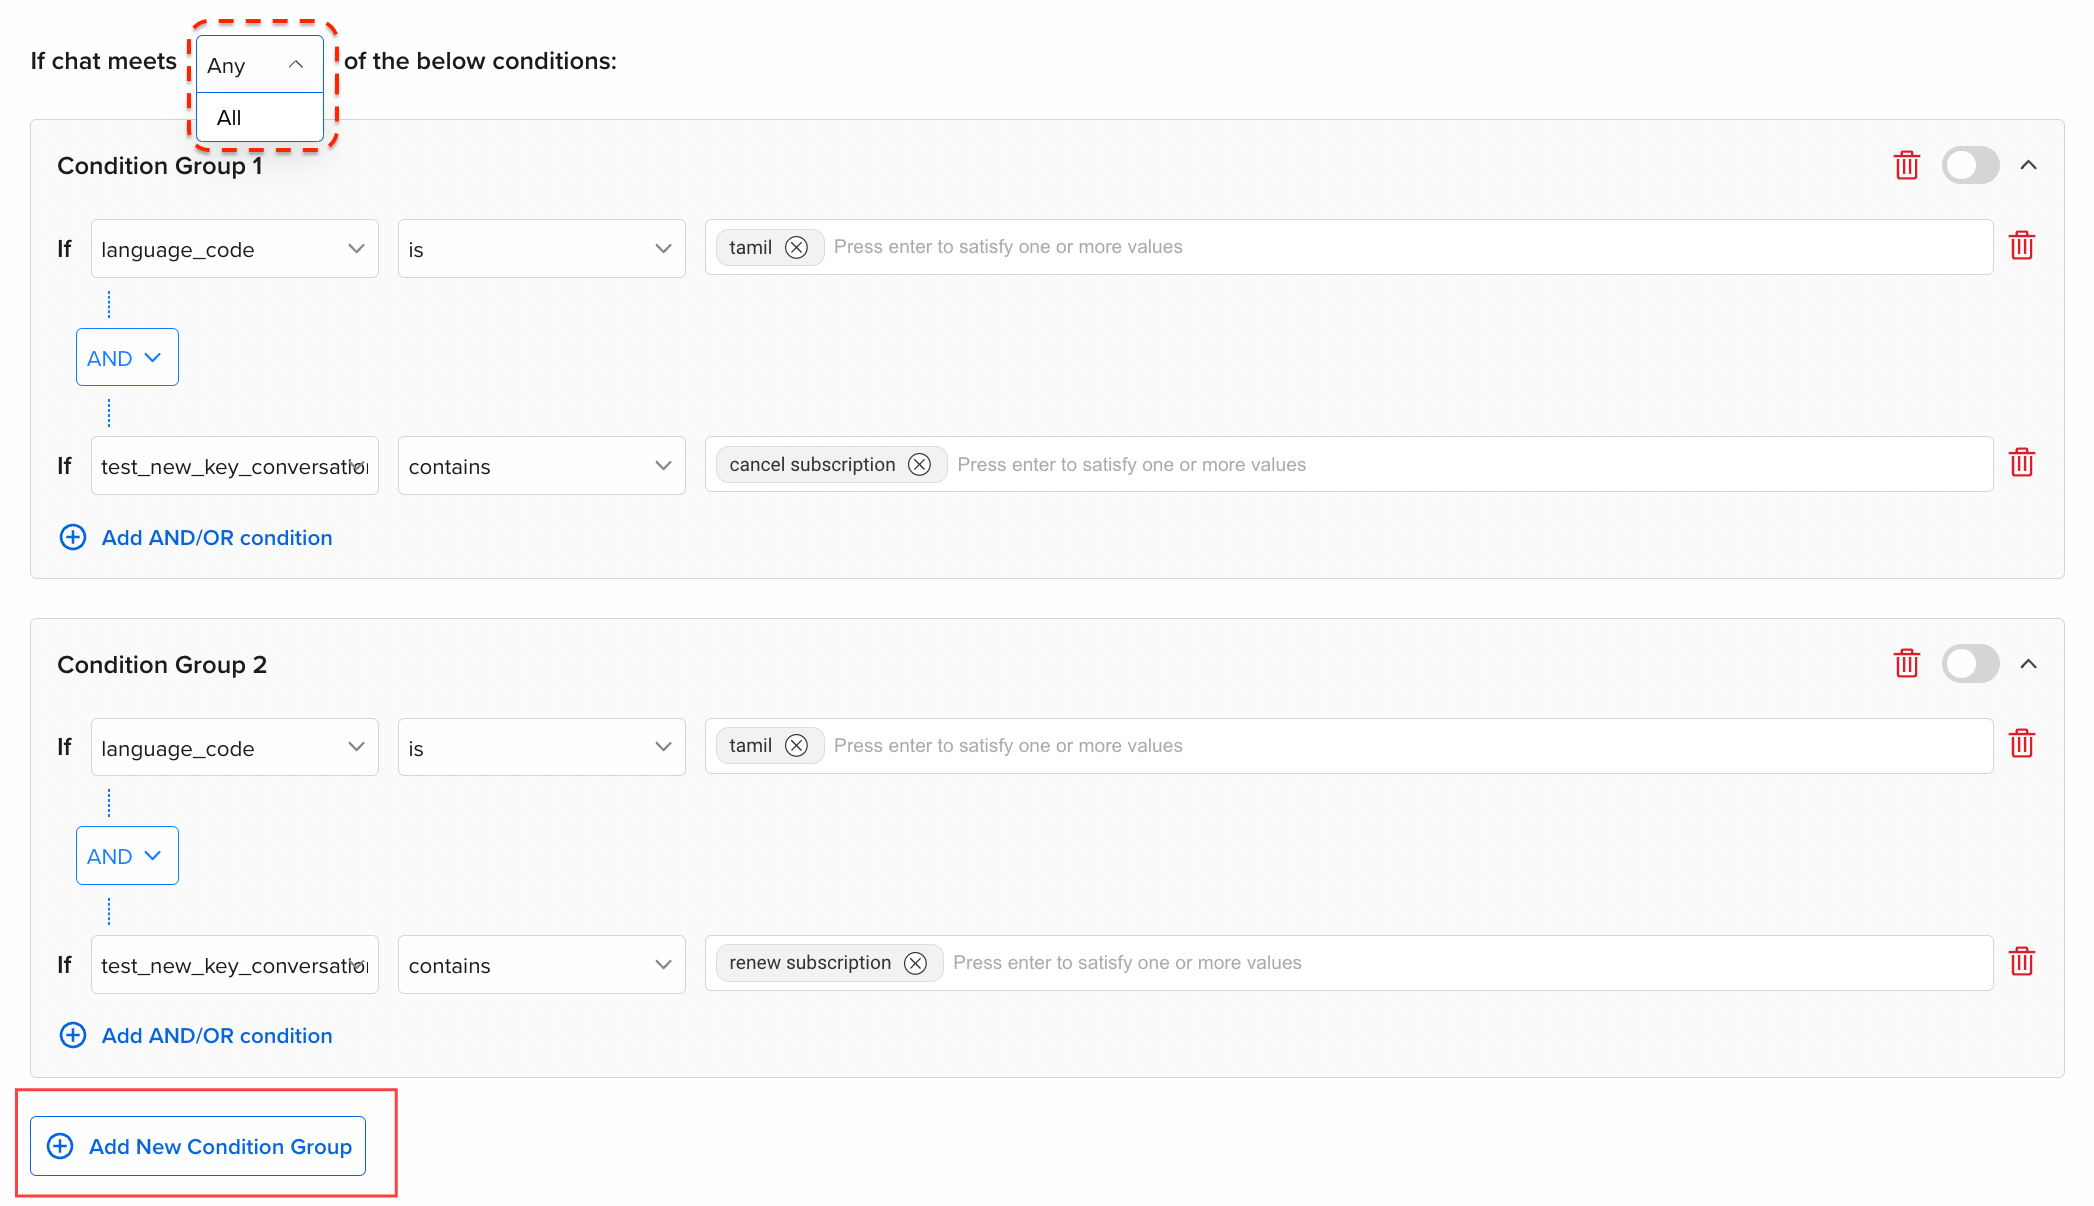
You can create multiple Condition Groups. While doing so, you can separately decide whether to satisfy “All” or “Any” of the Condition Groups.
- “All” indicates that every Condition Group must be satisfied for the Assignment Rule to be triggered.
- “Any” indicates that as long as any 1 Condition Group is satisfied, the Assignment Rule will be triggered.
Set THEN Conditions
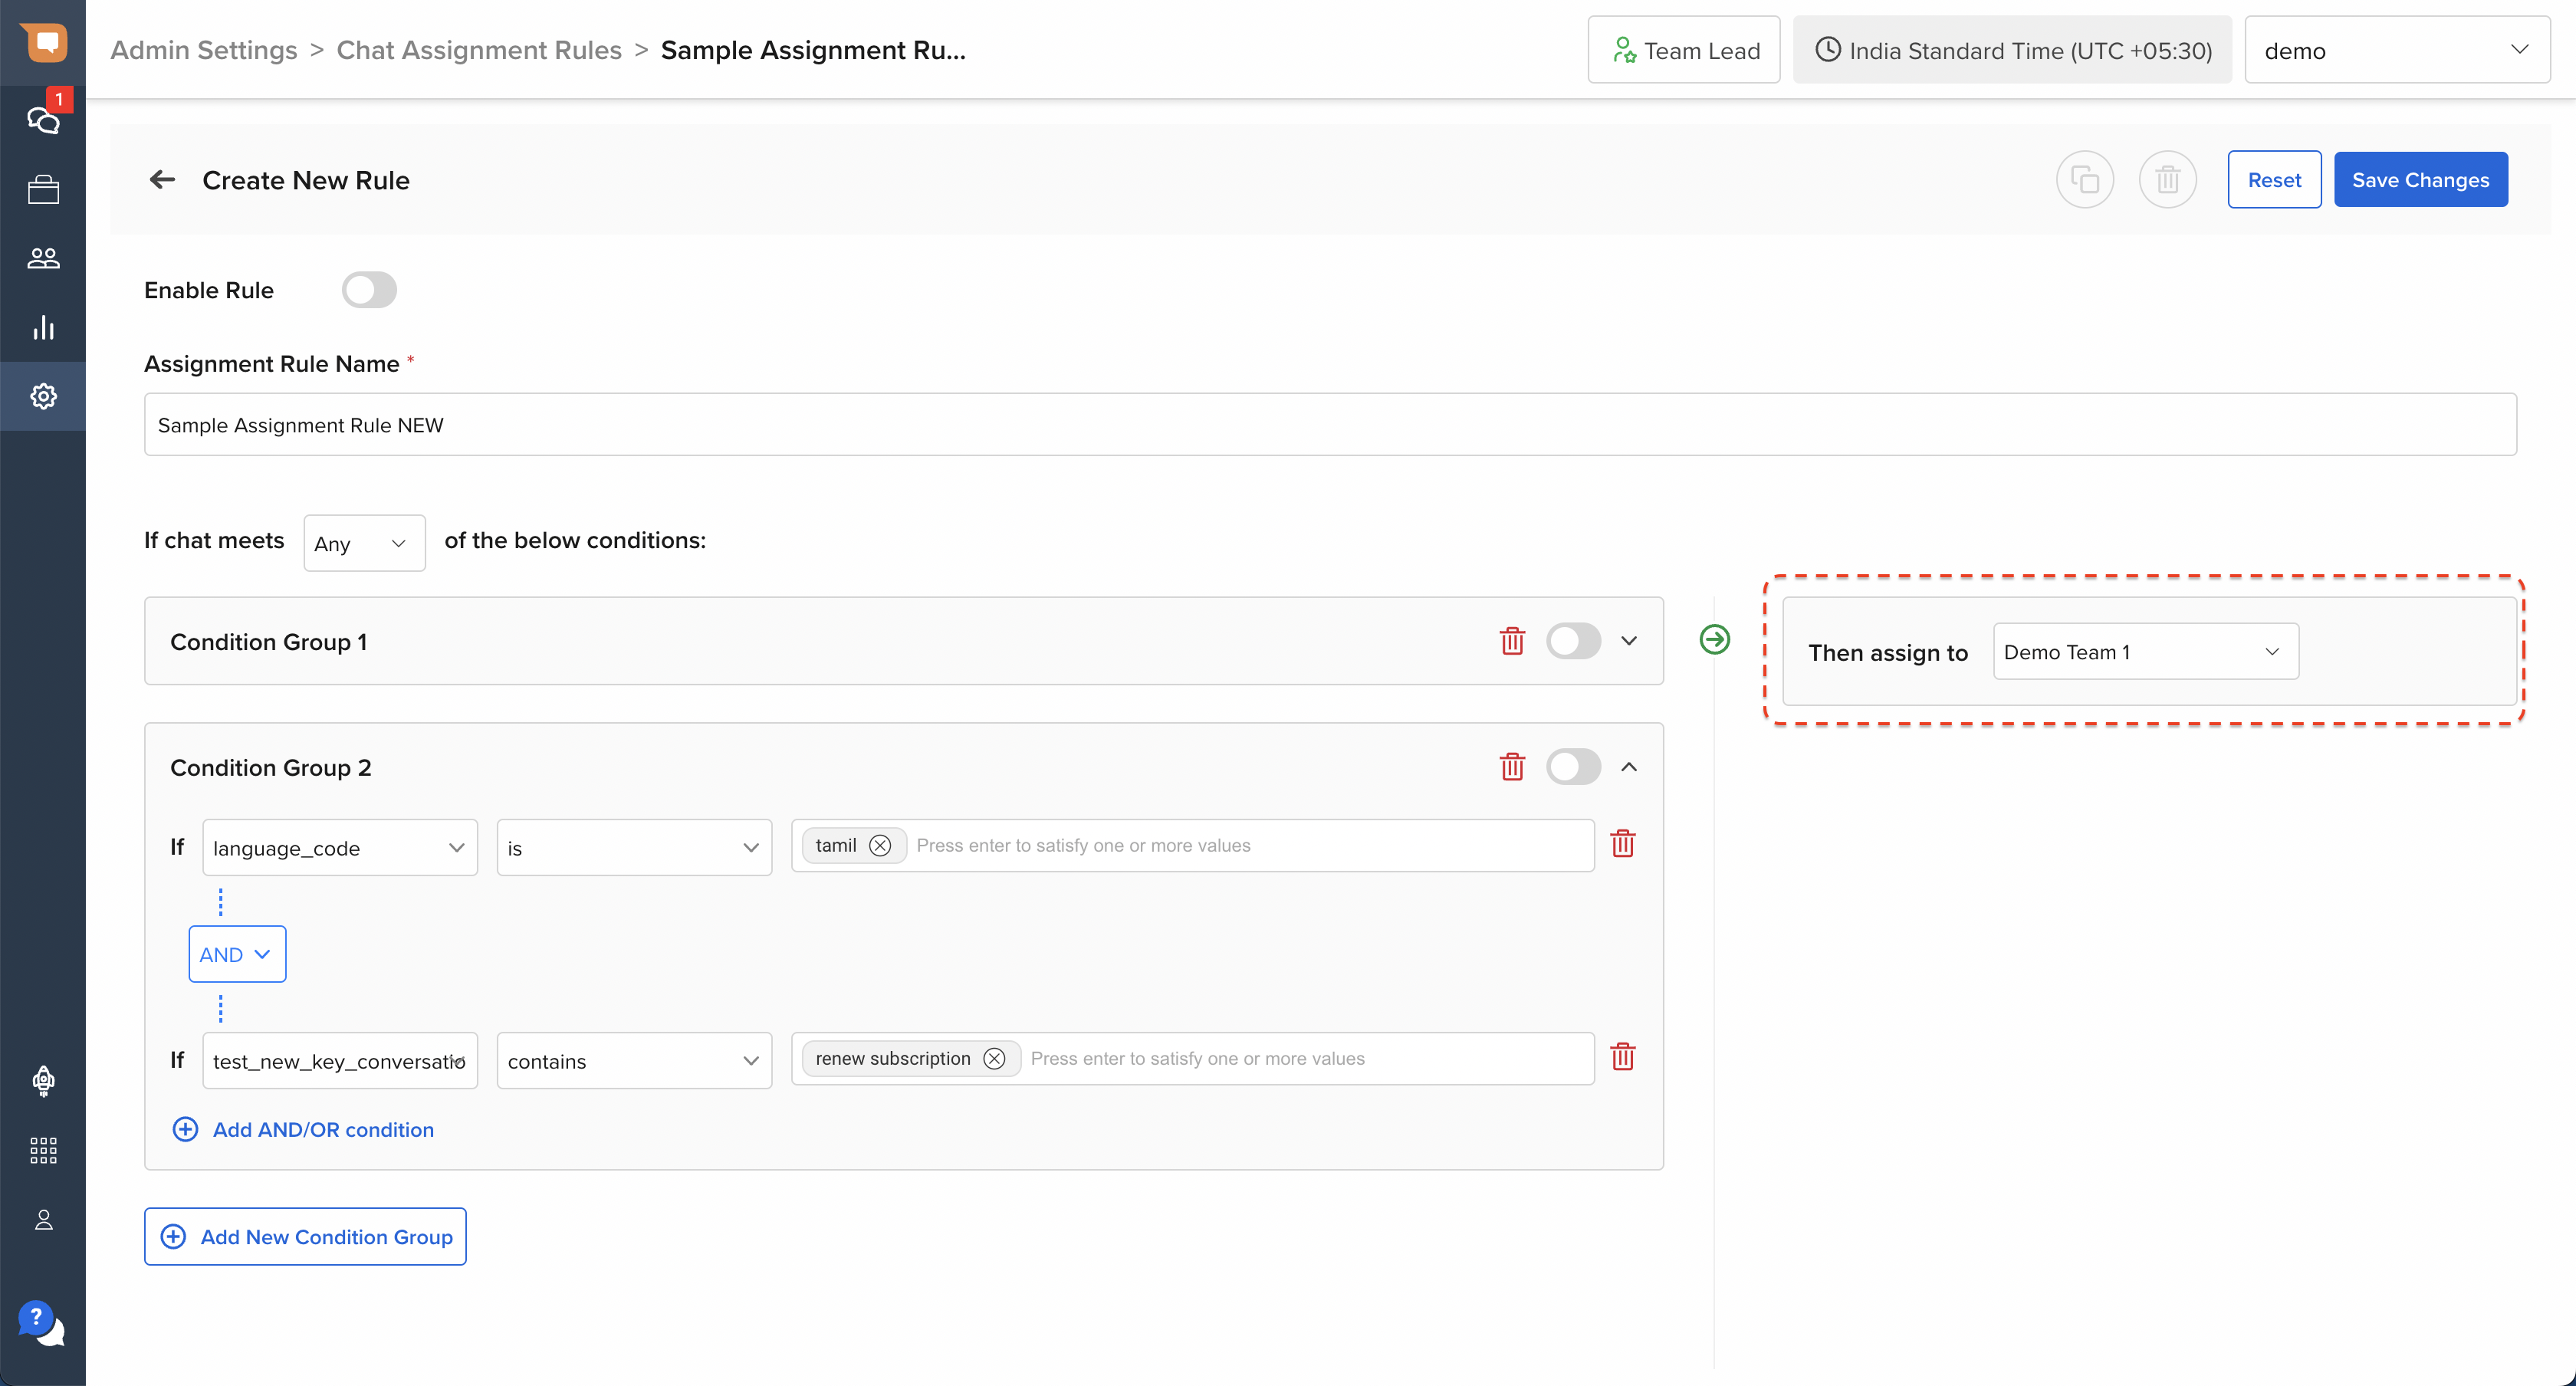
Once your IF conditions have been configured, select a Team on the right hand side section. Chats that satisfy all IF conditions will be assigned to the Team selected in the THEN condition.
- An Assignment Rule can only be linked to a single Team.
- You can set multiple Assignment Rules that route chats to the same Team.
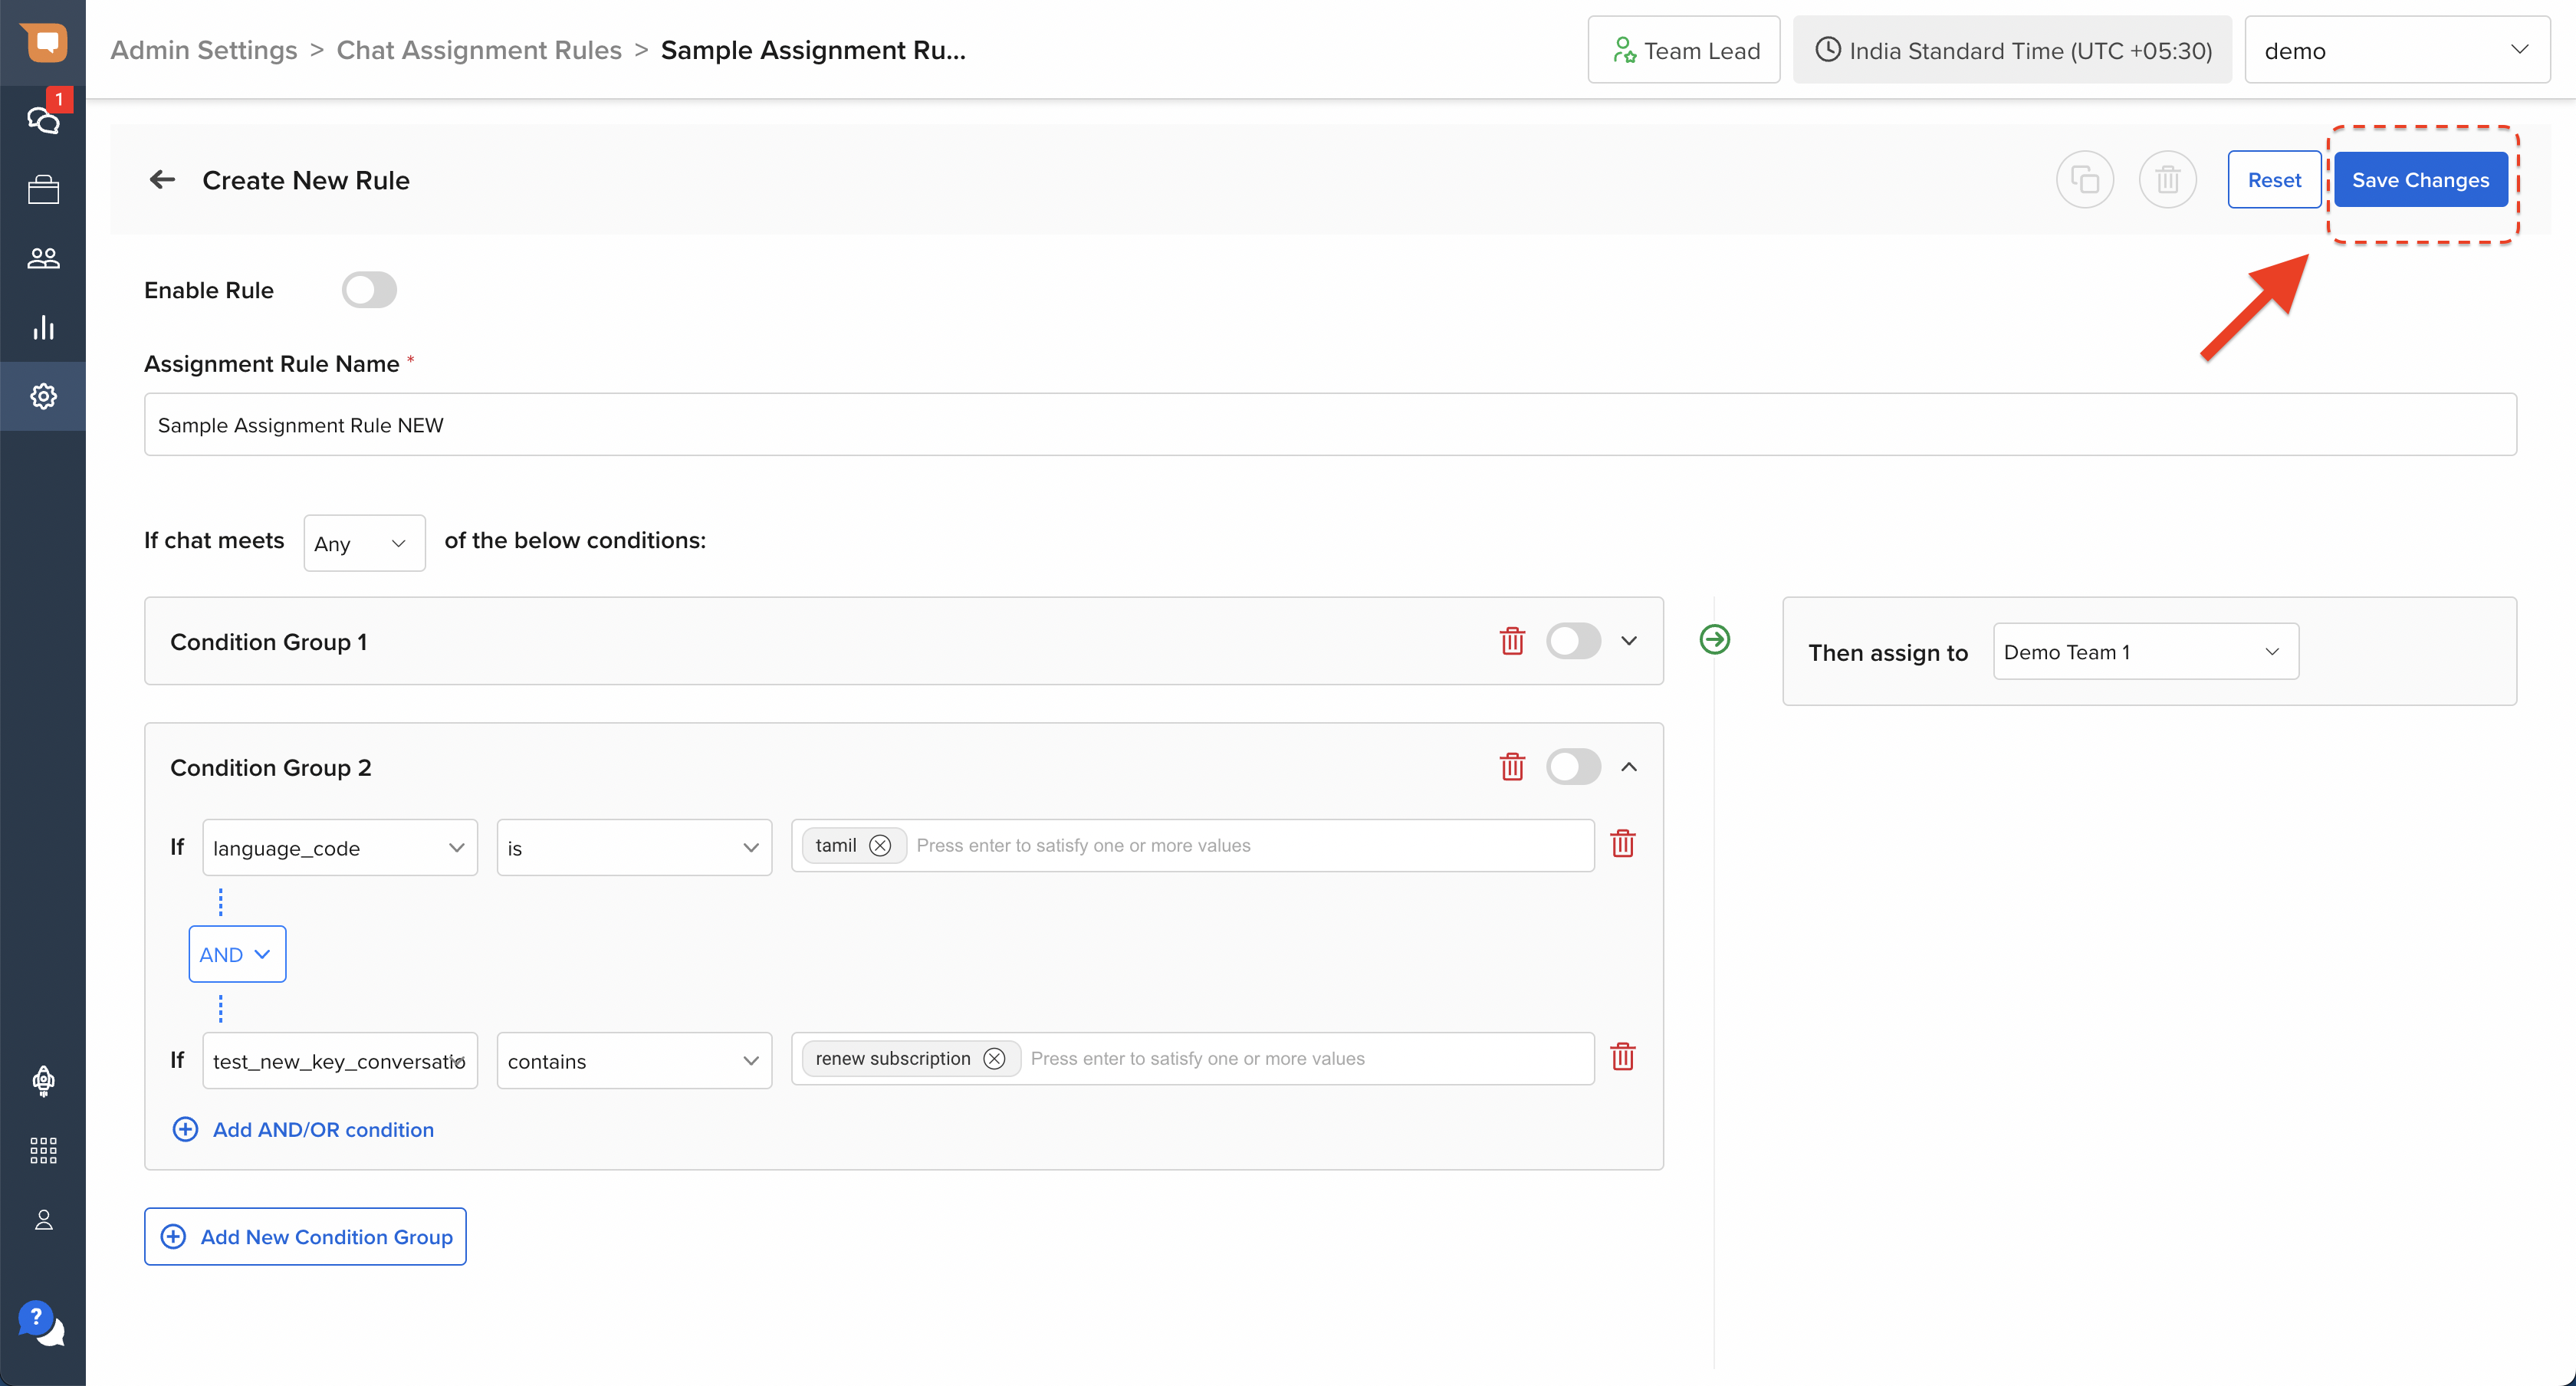
Once all the conditions have been set, click on the “Save” button on the top right corner to save the Assignment Rule.
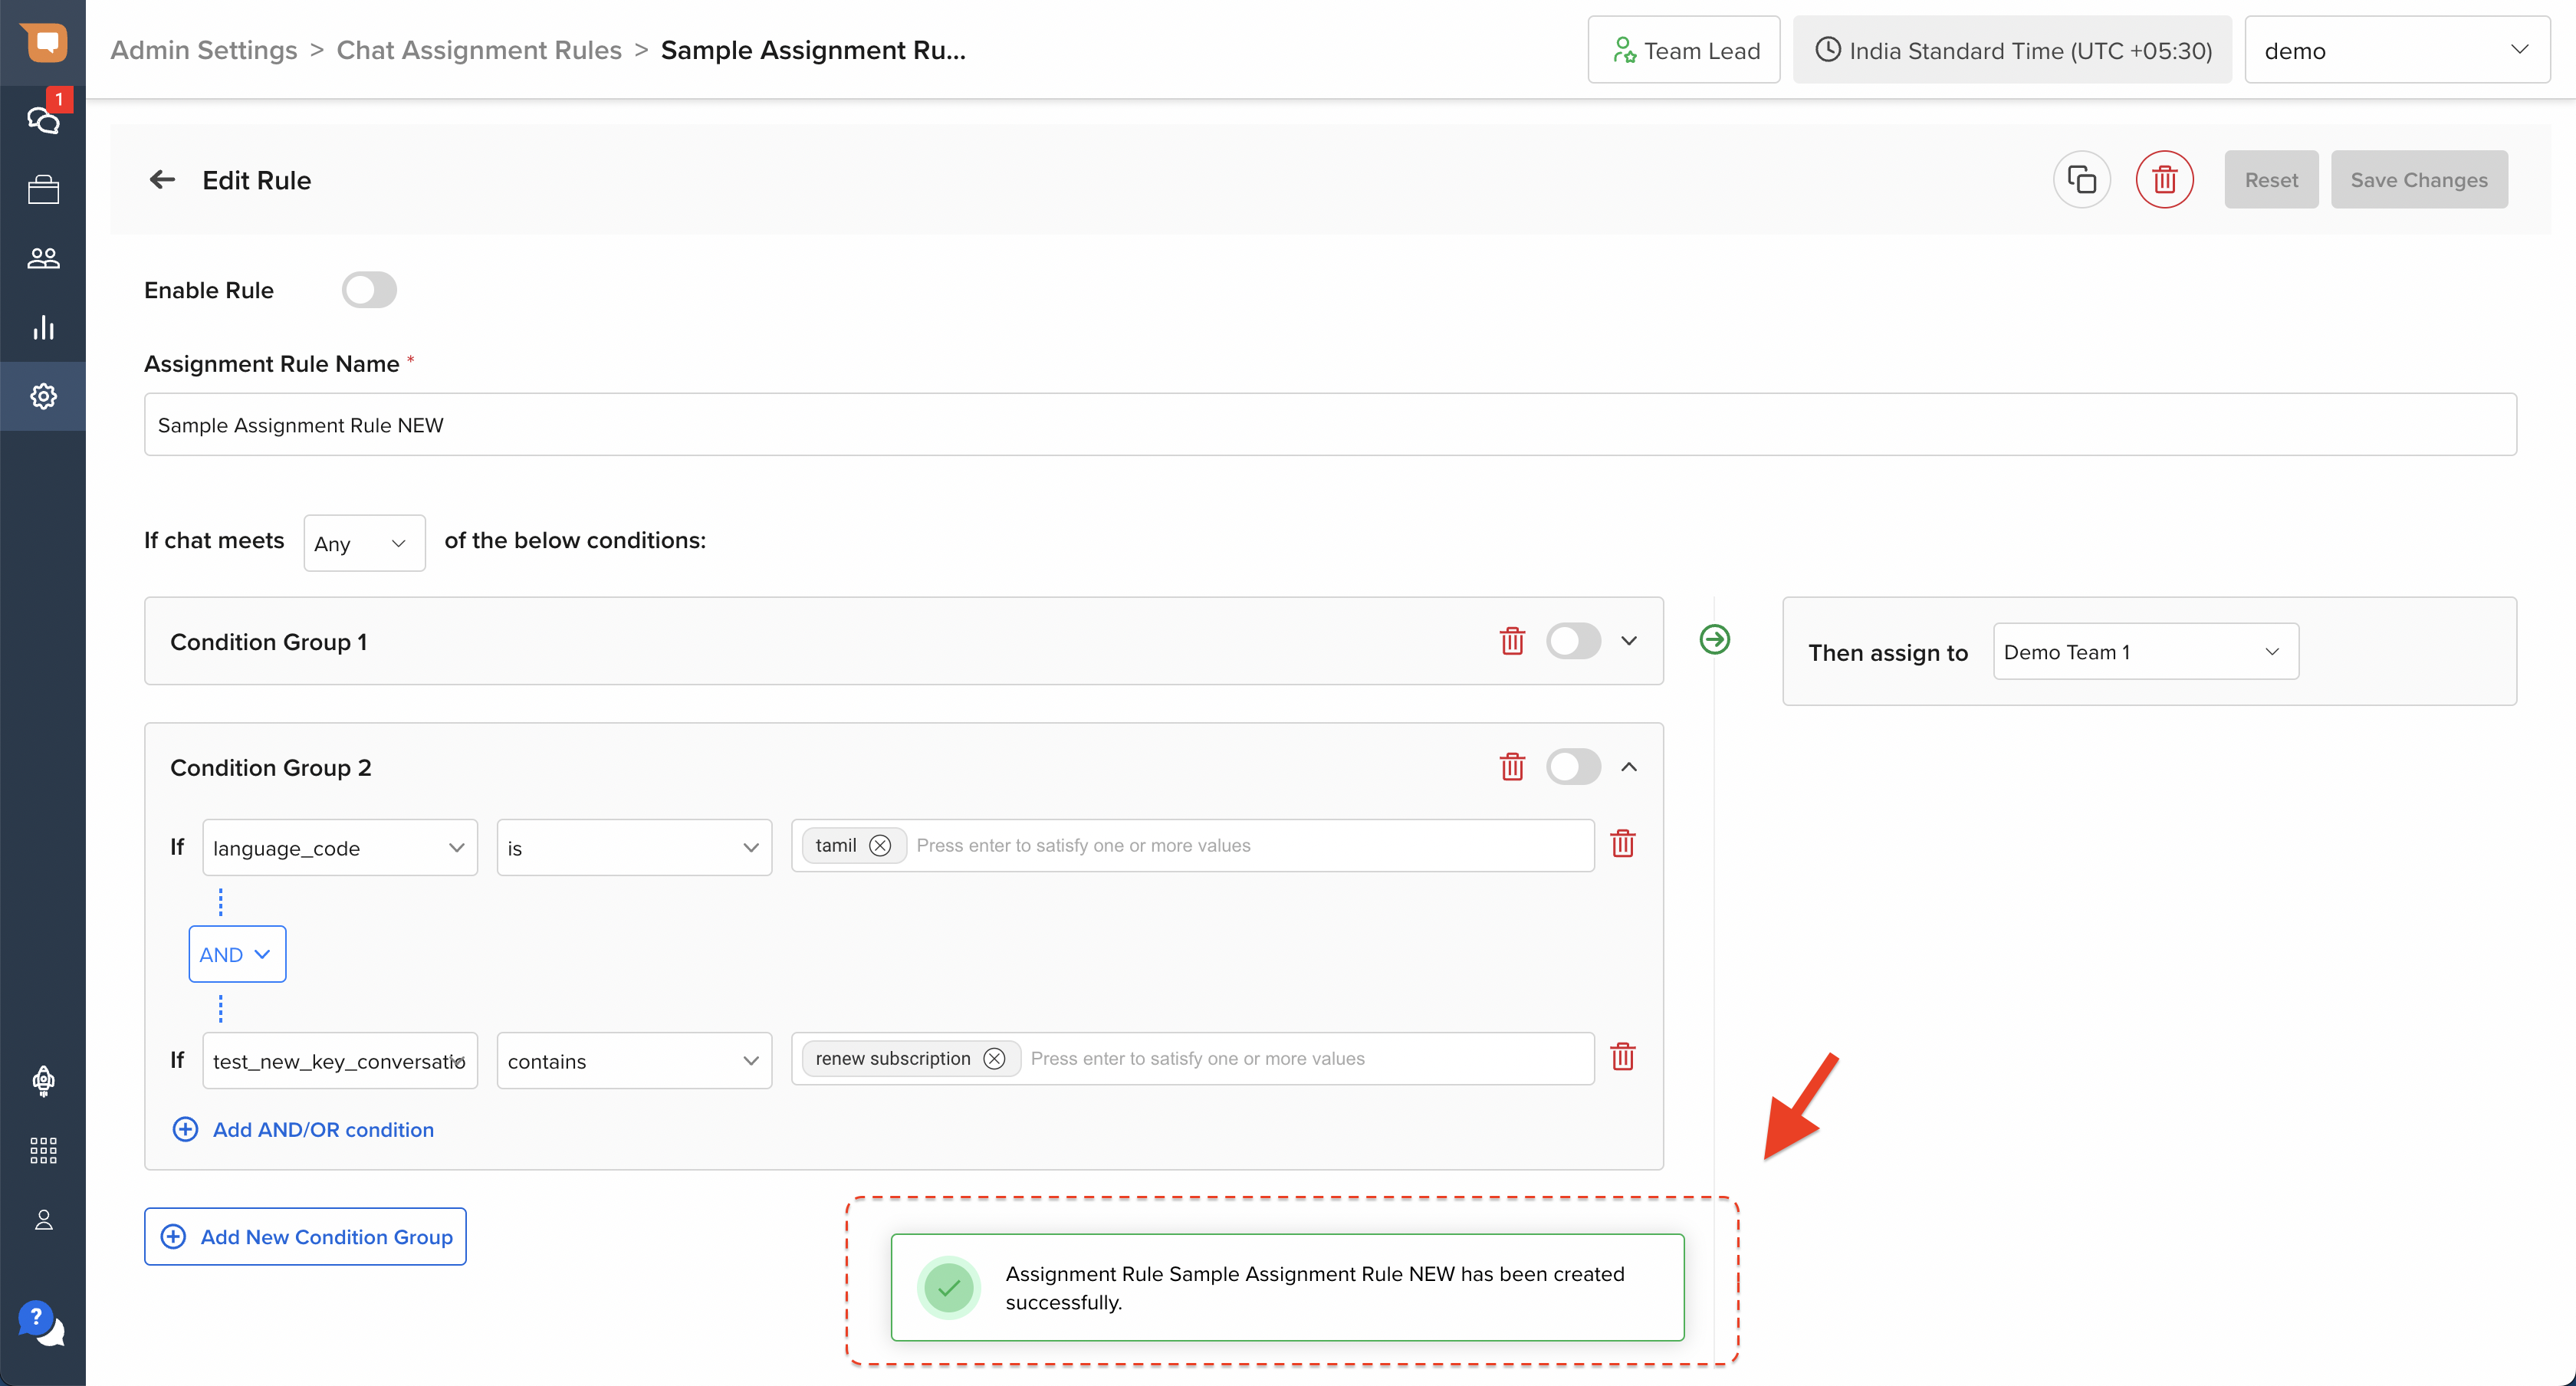
Once successfully saved, you will receive a system confirmation popup on your screen.
Step 3: Enable Assignment Rules
Rules are enforced only after they have been enabled. By default, any newly created rule is in the disabled state. To enable a rule, once your rule has been finalised:
- Click on the “Enable Rule” toggle to activate the rule
- Click on “Save” on the top right corner
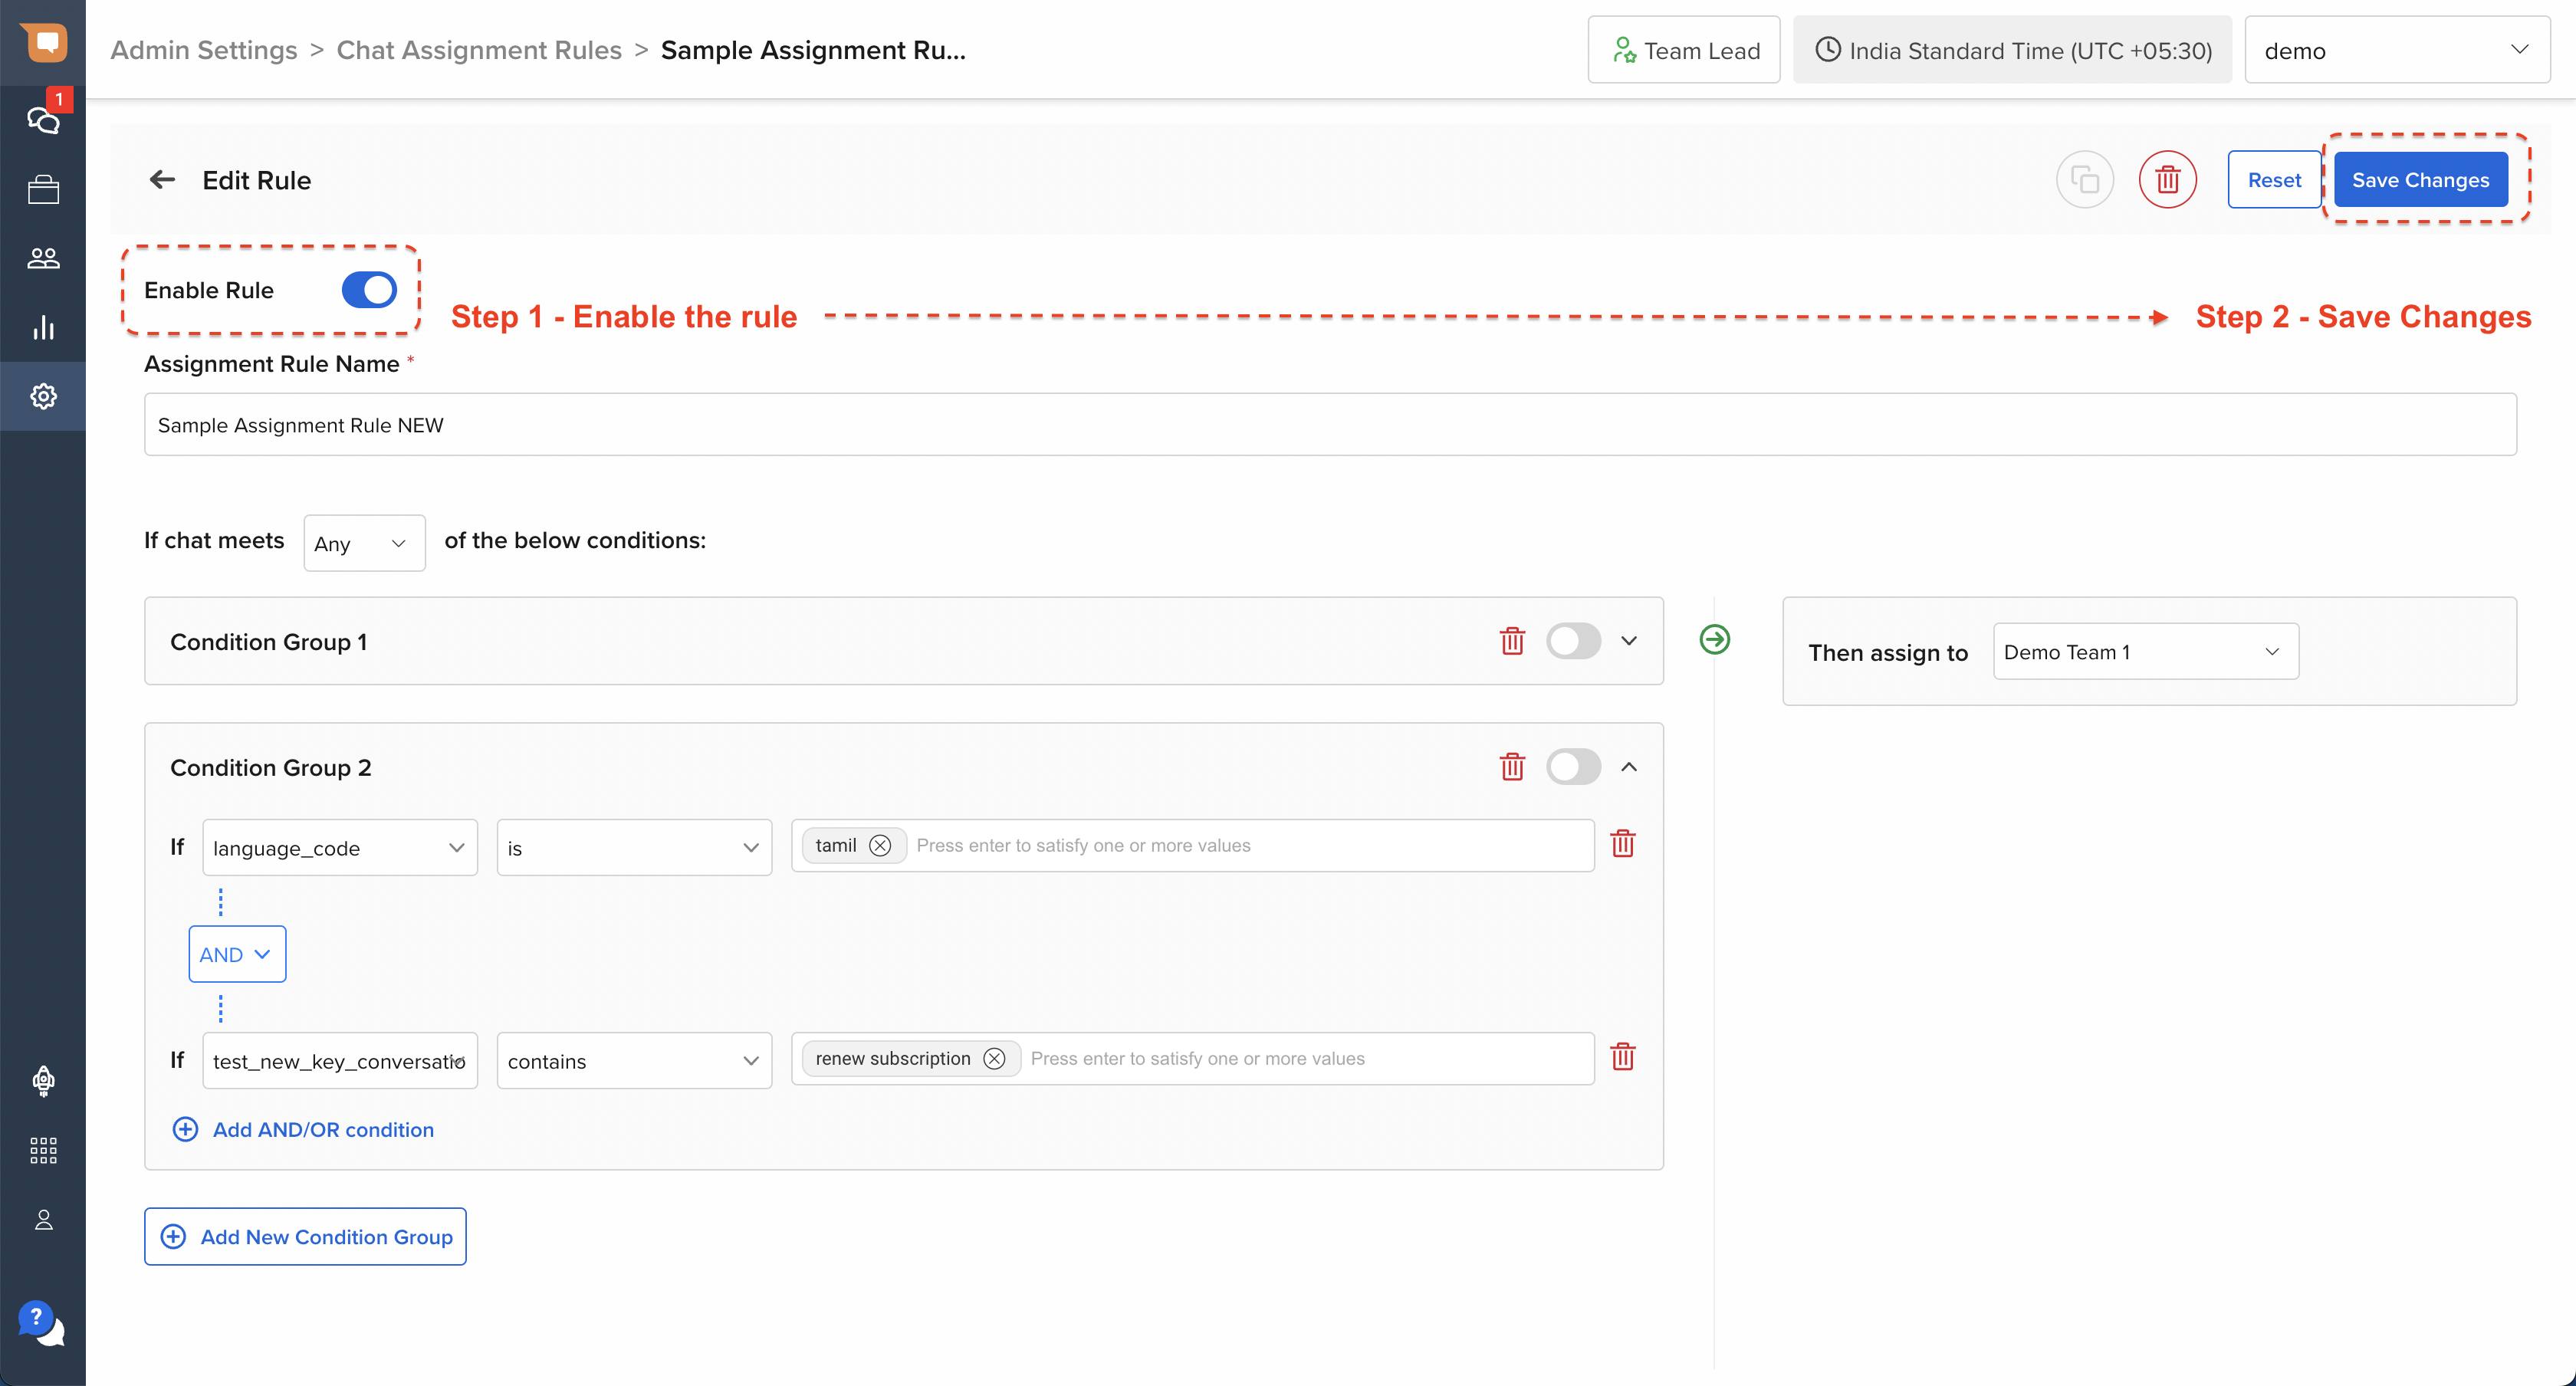
Once the Rule is enabled, you will receive a system confirmation message indicating the same, as shown below.
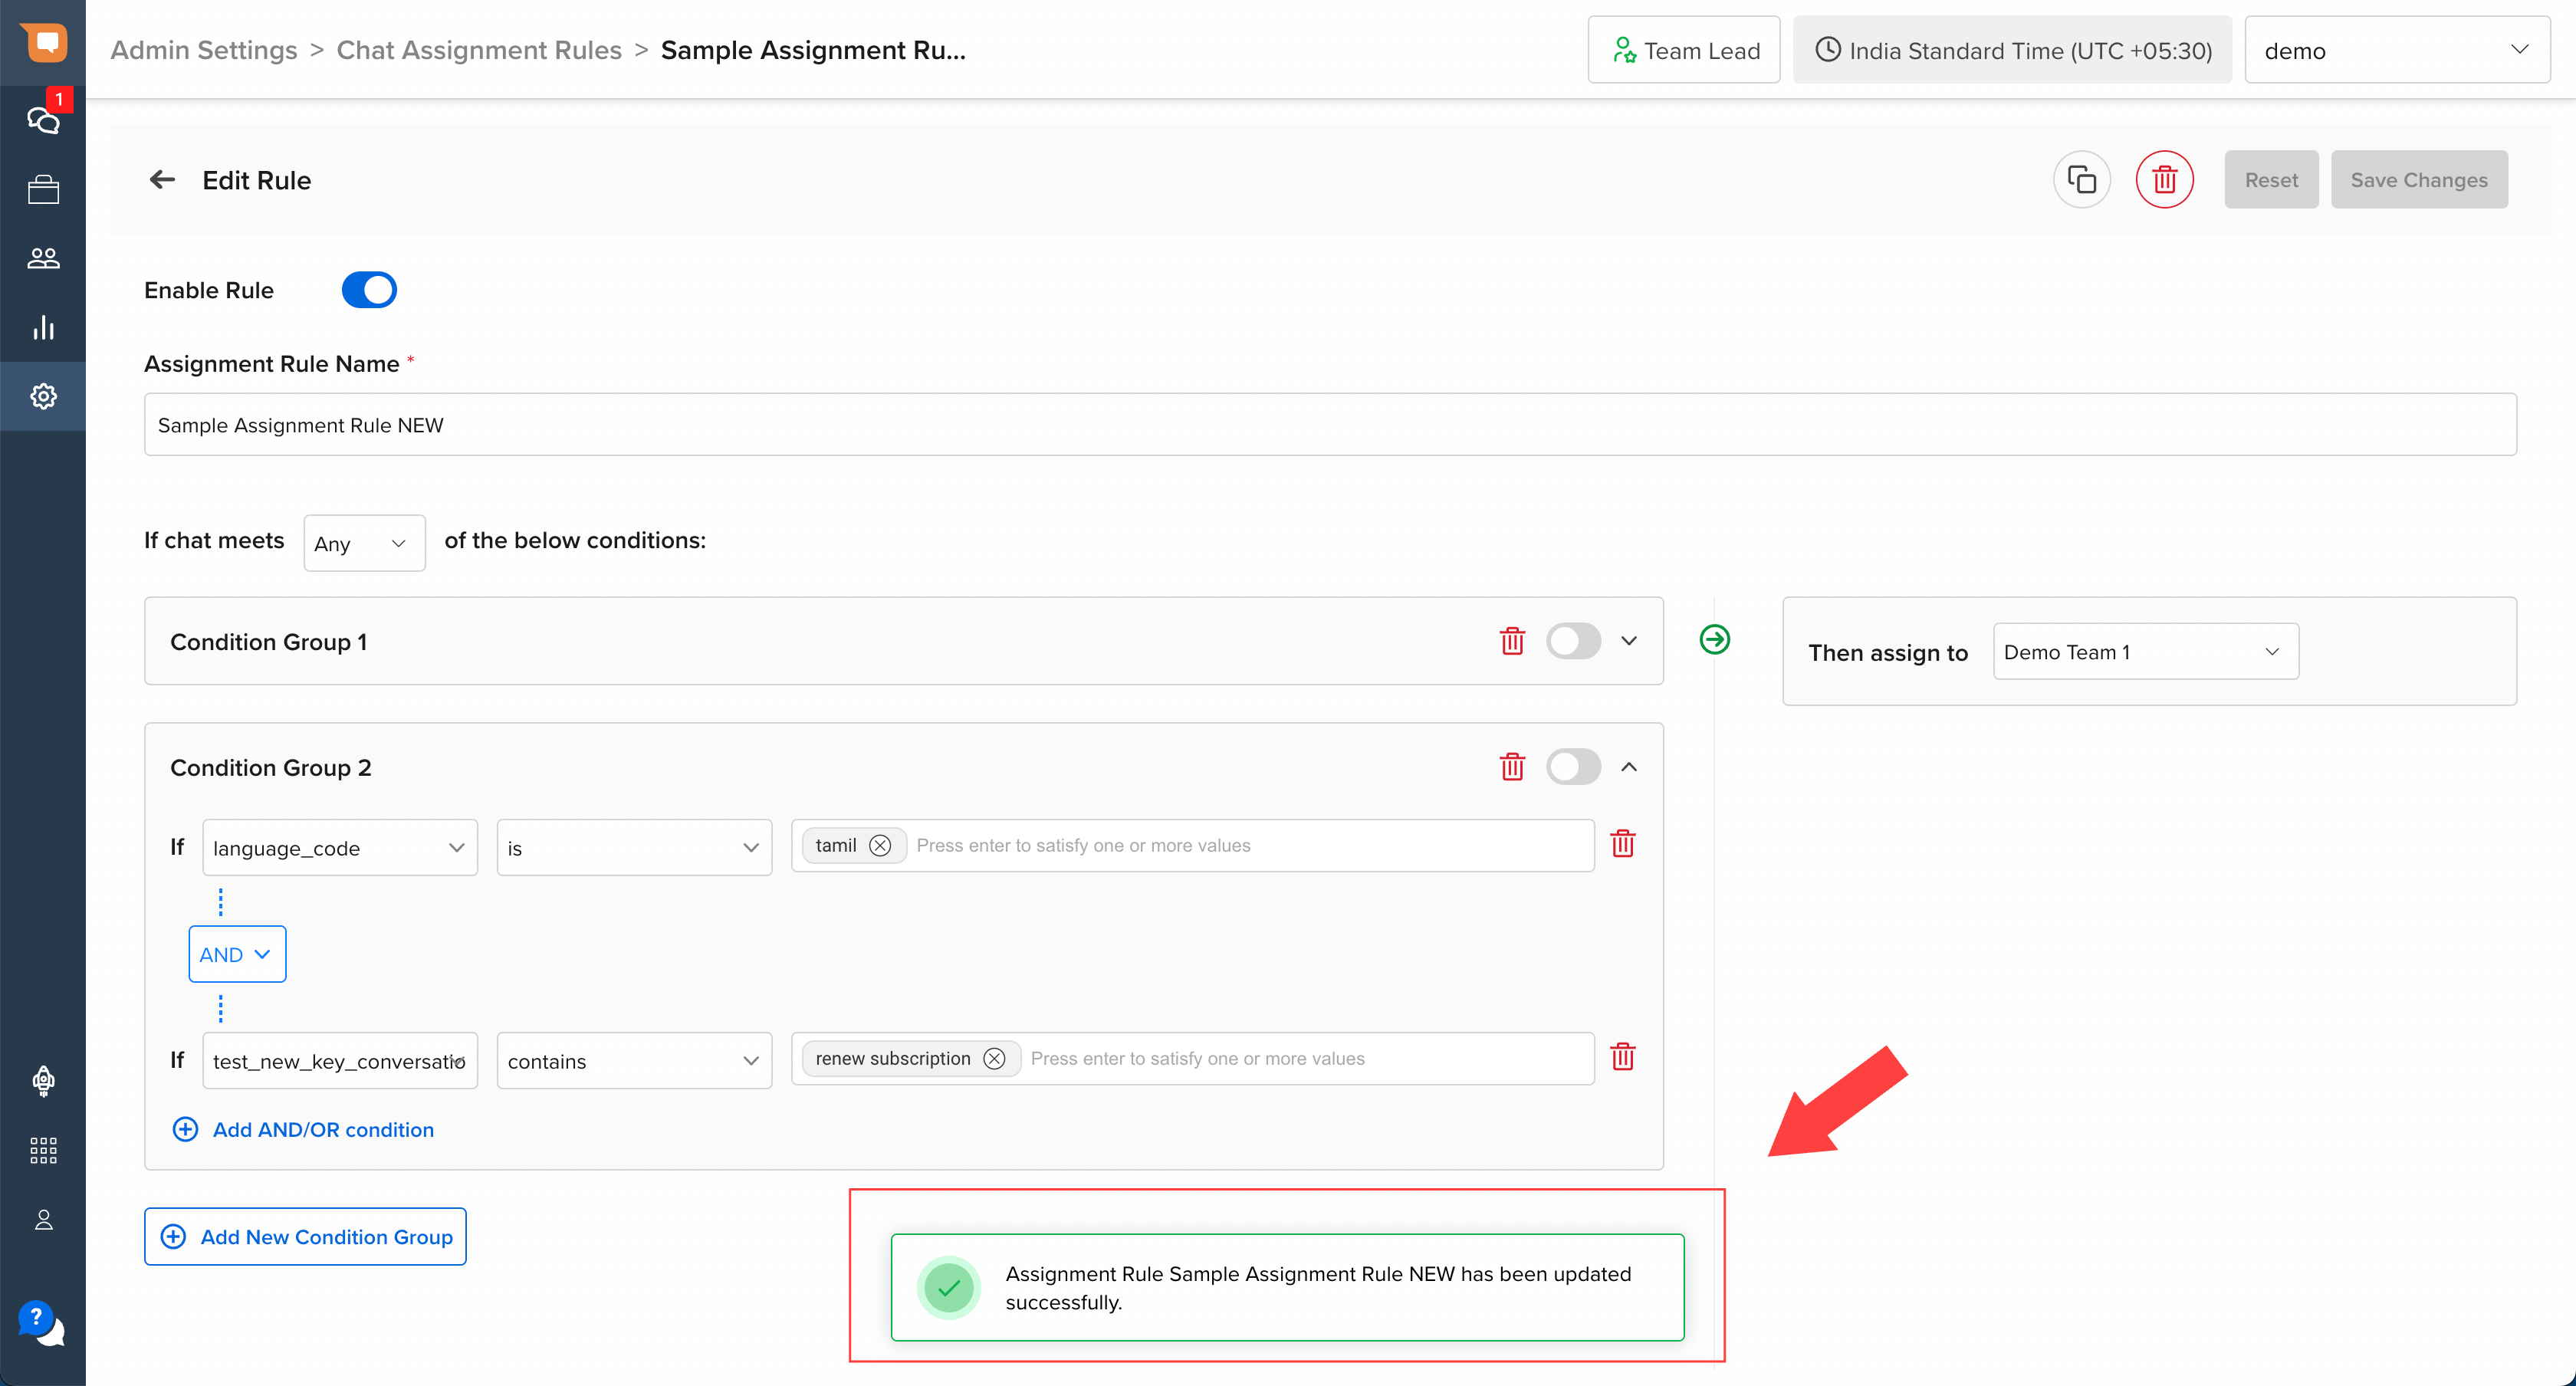
Note on Conflicting Assignment Rules
A rule cannot be enabled, if an existing rule with the exact same IF Conditions is already enabled. In such cases, the system will throw an error.
To avoid this, ensure that either the new rule has unique IF conditions, or the existing rule with identical conditions is first disabled.
Step 4: Set Assignment Rule Priority
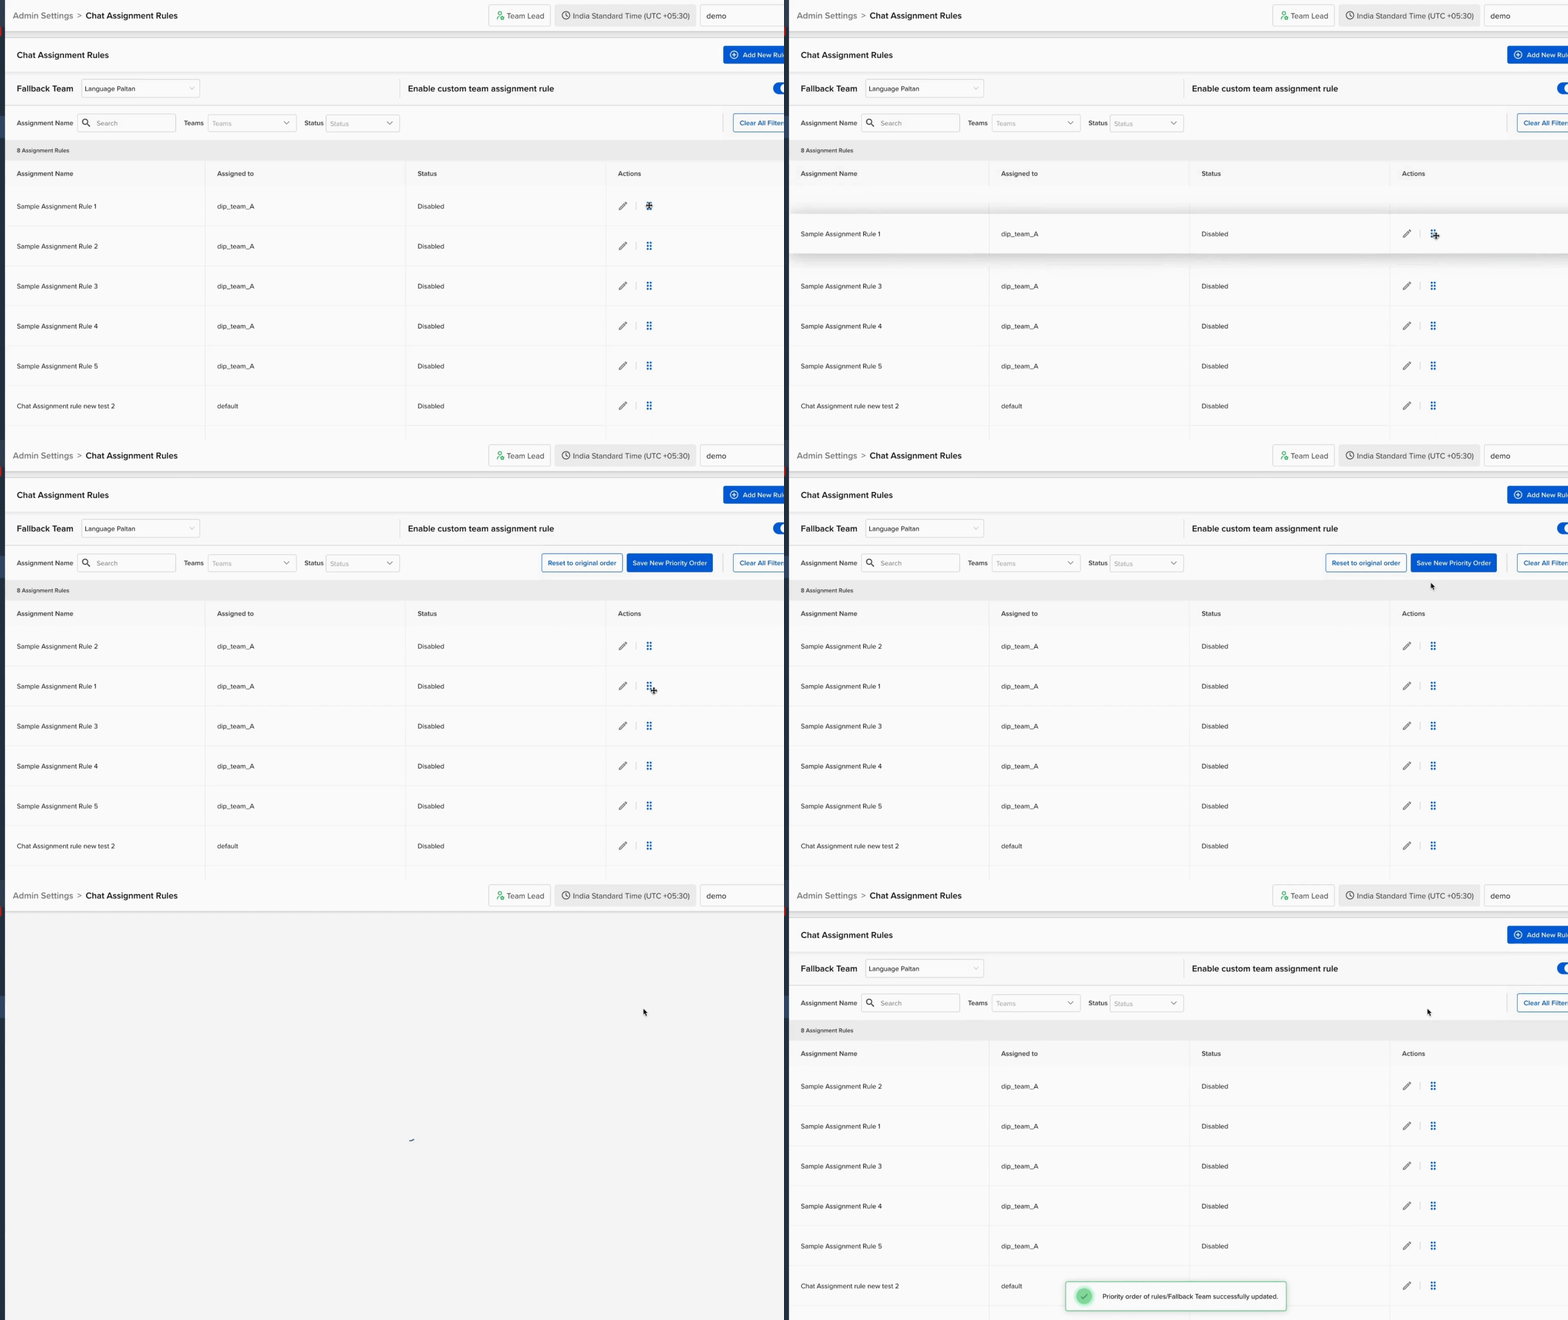
Assignment Rules are enforced by the System in the sequence in which they are organised on your screen. Whenever a new Rule is added, it is automatically designated the lowest priority, and inserted at the bottom of the list.
In order to edit the priority order of an assignment rule, you can use the drag-and-drop functionality by clicking and holding the drag-icon at the right edge of each Assignment Rule row on the main screen, as shown below.
Once the new priority order is set, don't forget to save the priority order by clicking on the “Save New Priority Order” button.
How to edit Team Assignment Rules
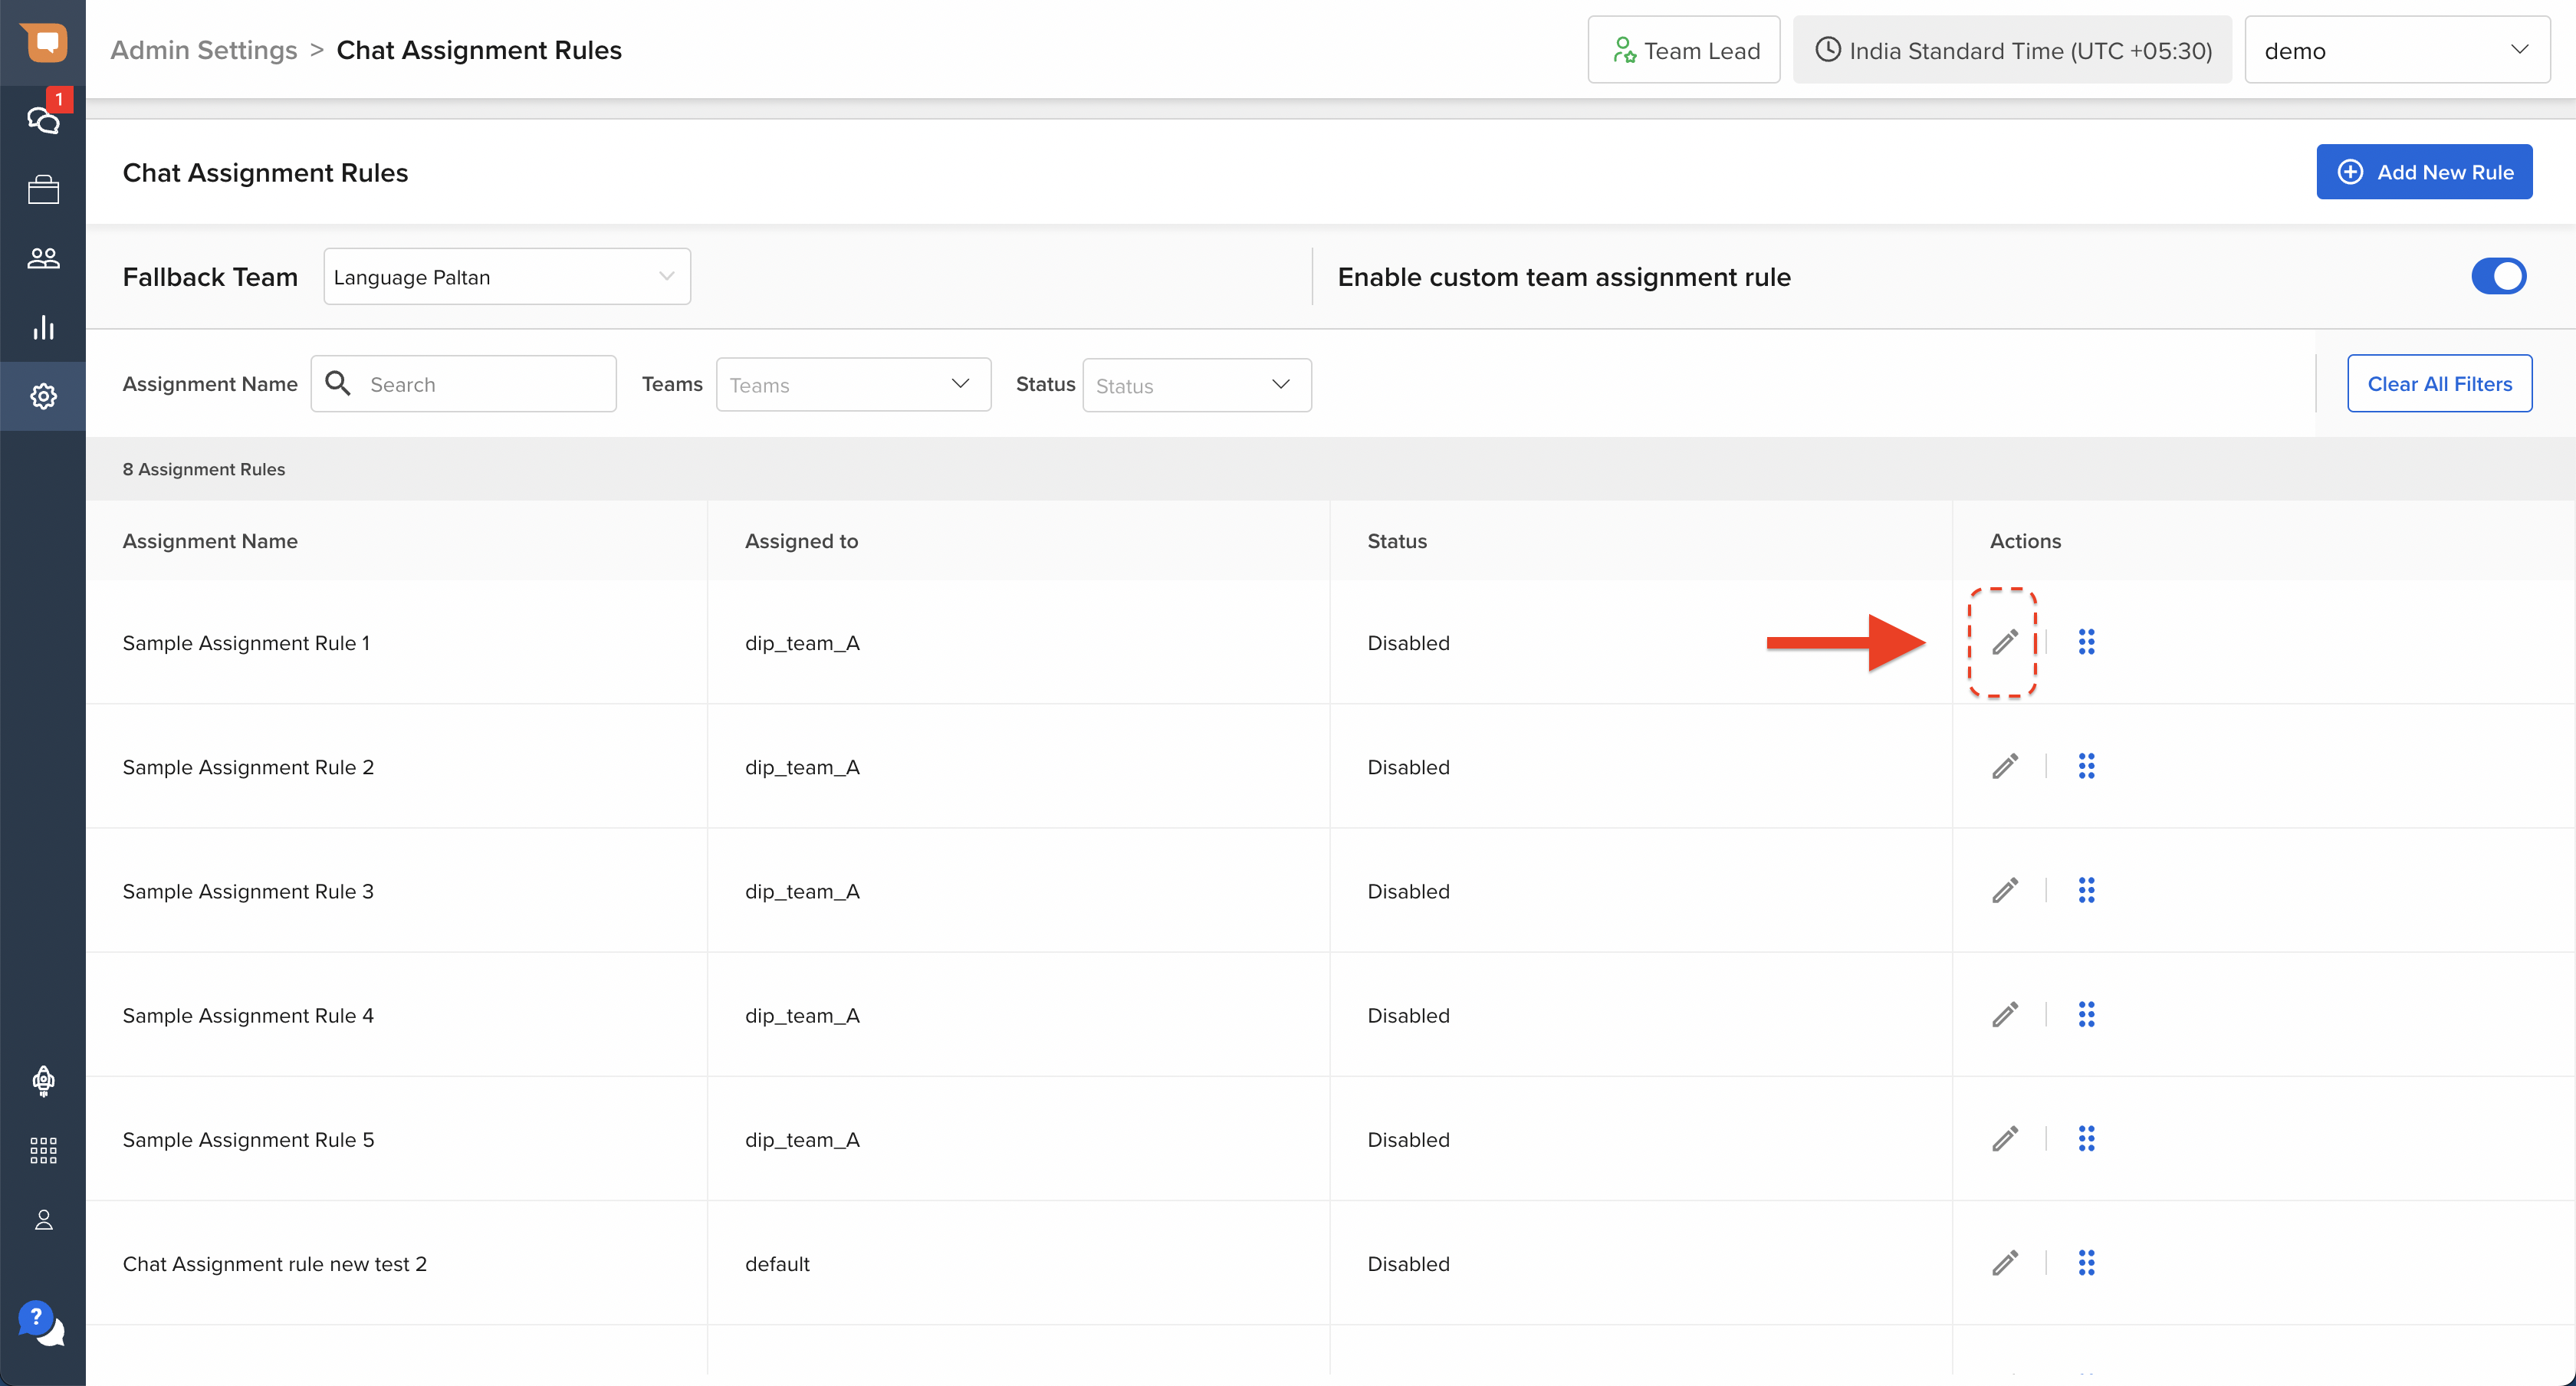
In order to edit an Assignment Rule, click on the edit icon for an Assignment Rule, as shown below.
- To save any changes have been made, click on the “Save” icon on the top right corner.
- To revert any changes, click on the “Reset” button to revert to the last saved settings.
Enable / Disable a Condition Group
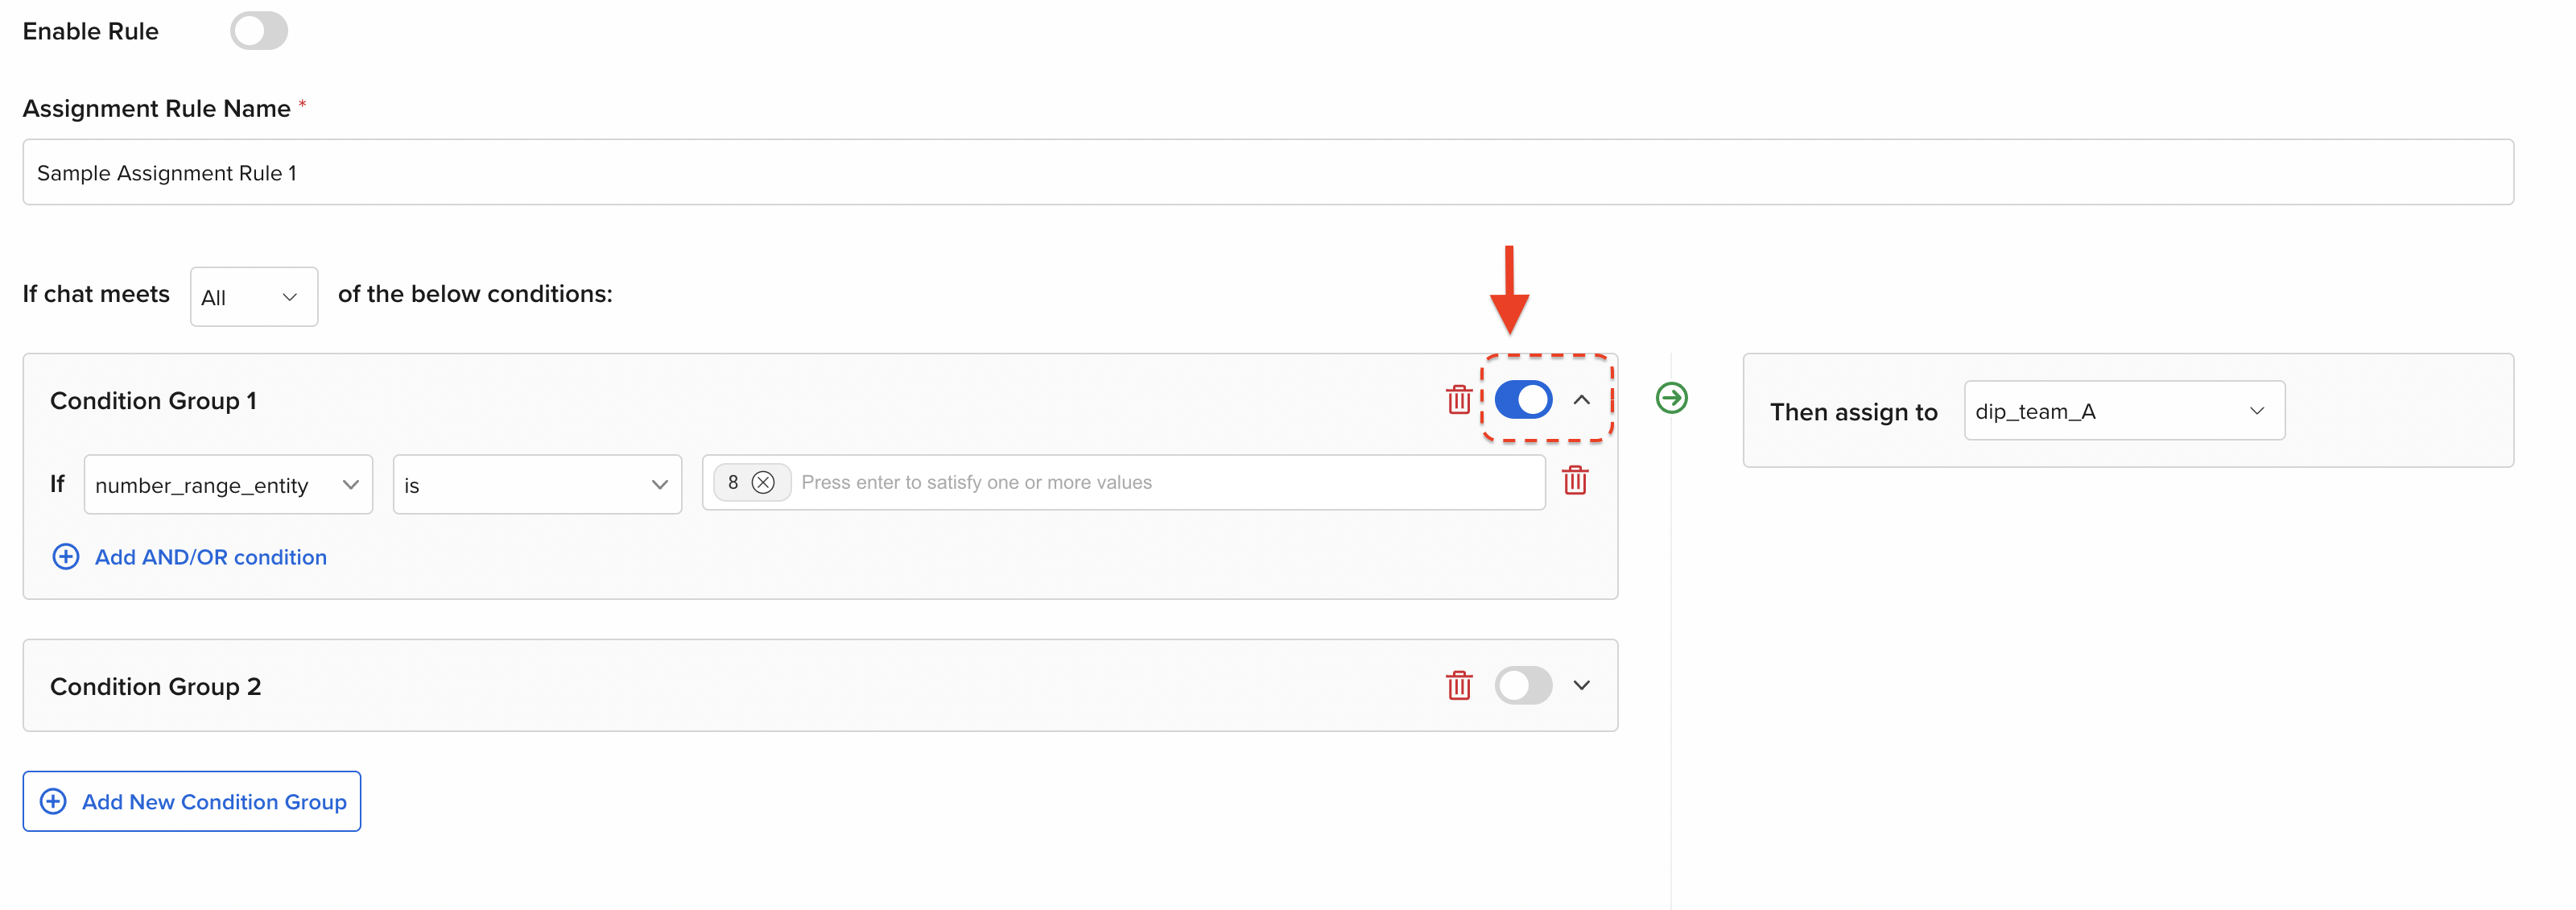
When a condition group is disabled, the system skips that condition group while checking whether that Assignment Rule is satisfied. This makes it easier to iterate between multiple condition groups while making any changes.
To enable or disable a condition group, use the toggle present on the top right corner of the condition group block, as shown below.
Delete a Condition / Condition Group
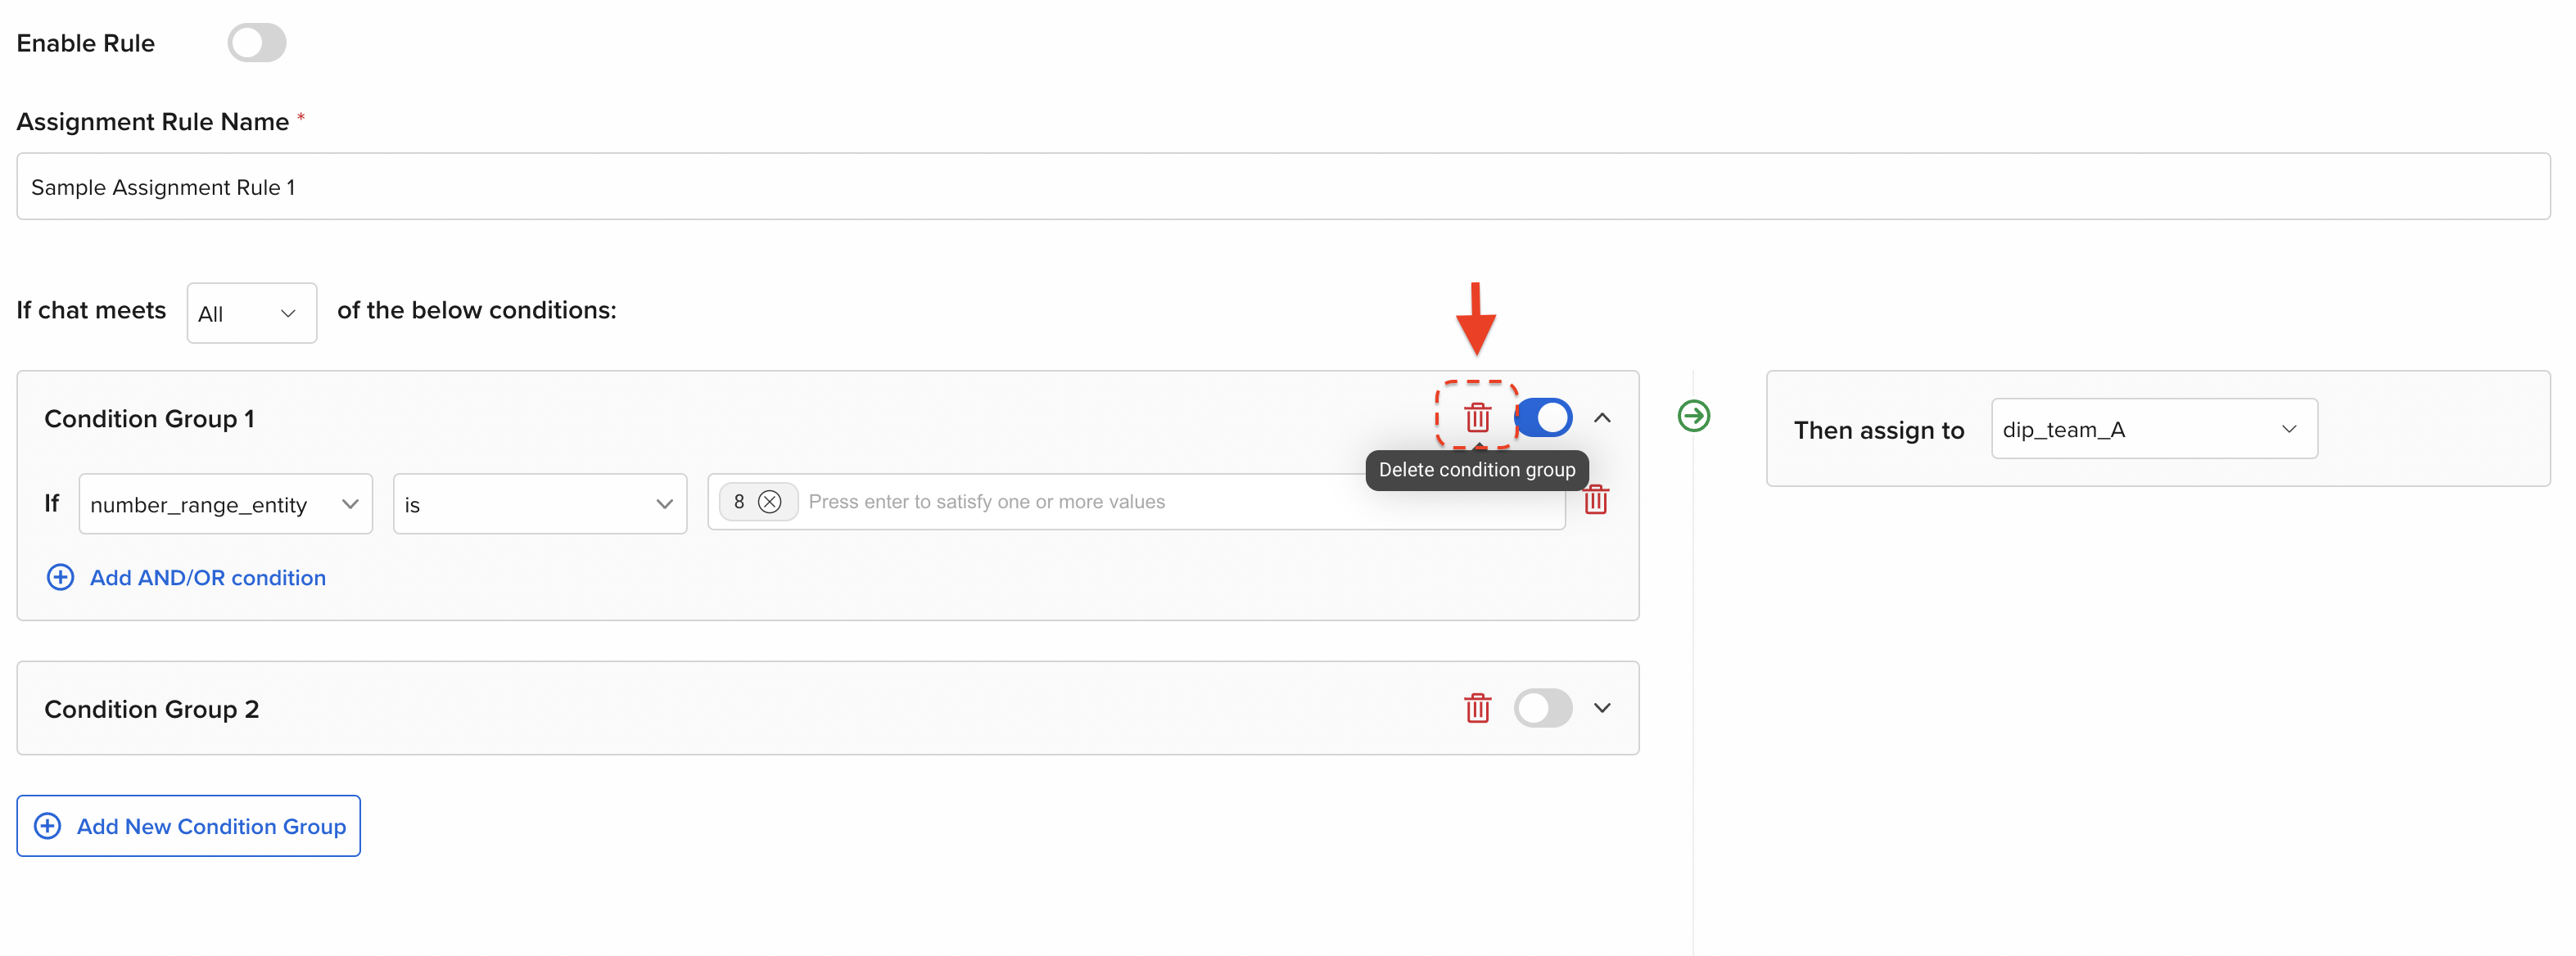
Deleting a condition / condition group permanently removes that condition from your Rule. Once a configuration is deleted, it cannot be recovered later on. Hence, it's important to be careful while deleting any condition. For temporary changes, we recommend disabling a condition group instead.
To delete an individual Condition, or an entire Condition Group, by clicking on the “Delete” icon as shown below.
Delete an Assignment Rule
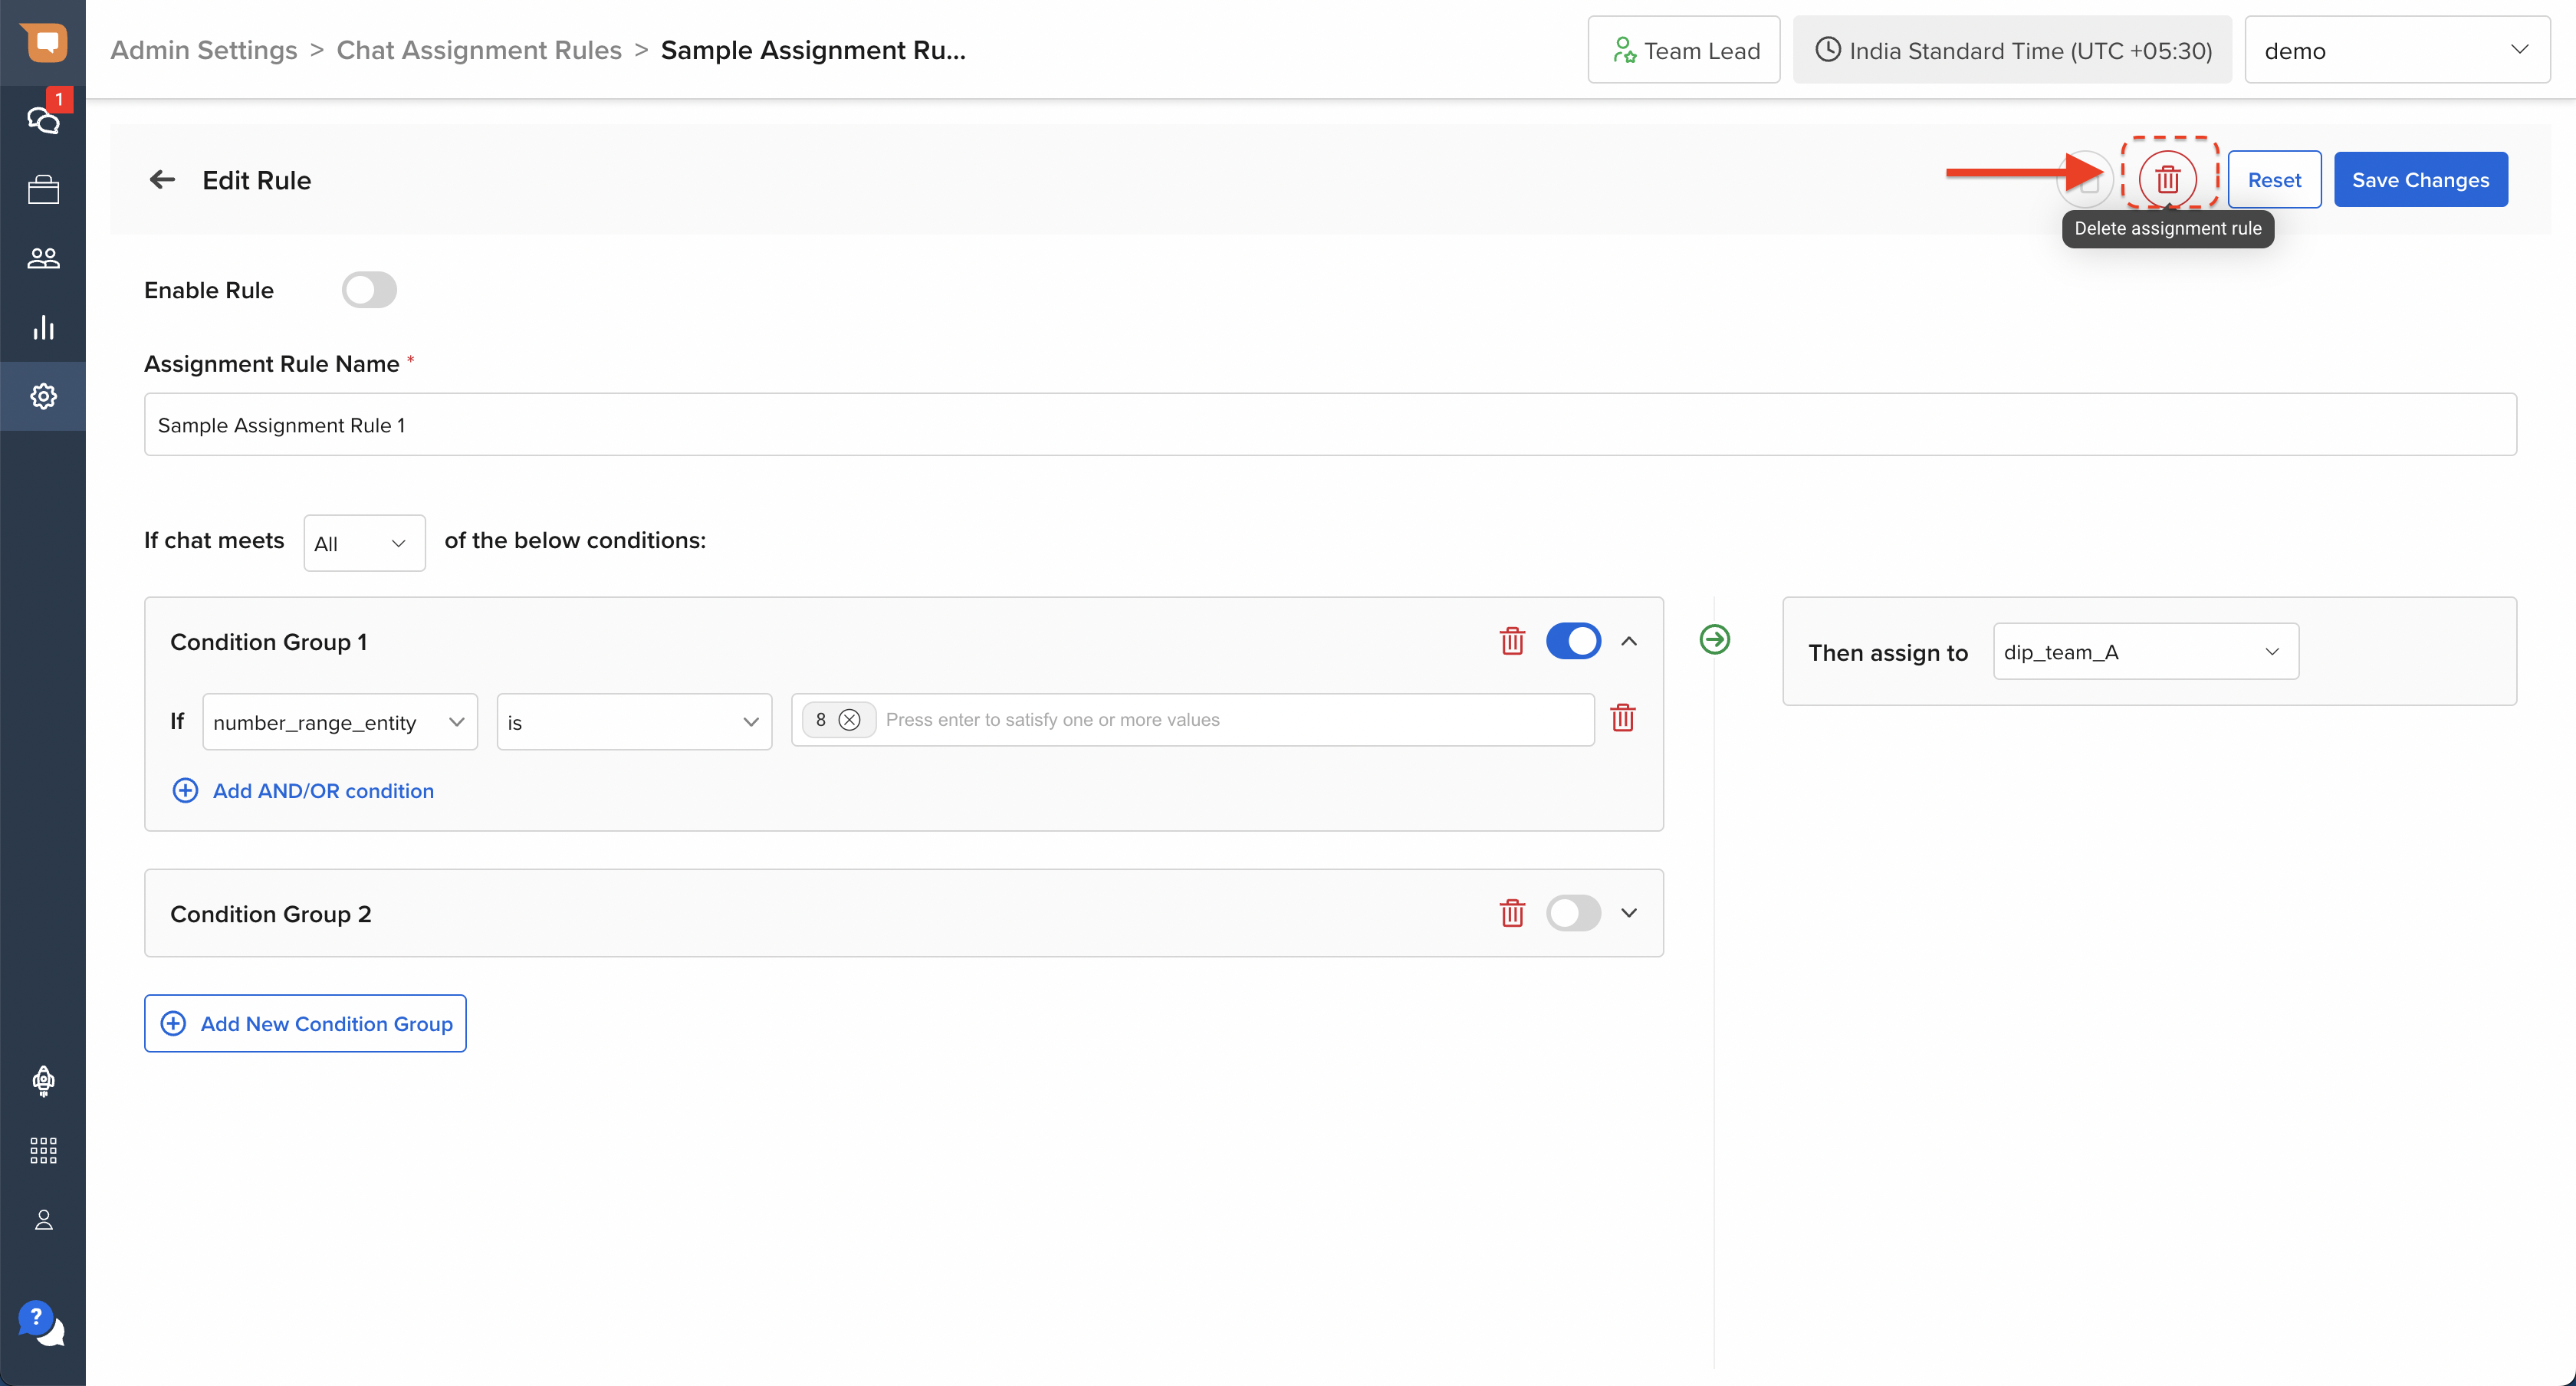
Deleting an Assignment Rule permanently erases the entire Rule from your system. Once a Rule is deleted, it cannot be recovered later on. Hence, it's important to be careful while deleting any rules. For temporary changes, we recommend disabling a rule instead.
To delete an Assignment Rule entirely, click on the “Delete” icon on the top ribbon of the rule configuration screen, as shown below.
Create Duplicate Assignment Rules
To simplify the process of iterating through improvements in your assignment rules, you can simply duplicate an existing rule to work on top of, instead of directly making changes to an existing rule that is being enforced.
To create a duplicate of an existing rule, click on the edit icon, and then click on the “Duplicate” icon, as shown below.
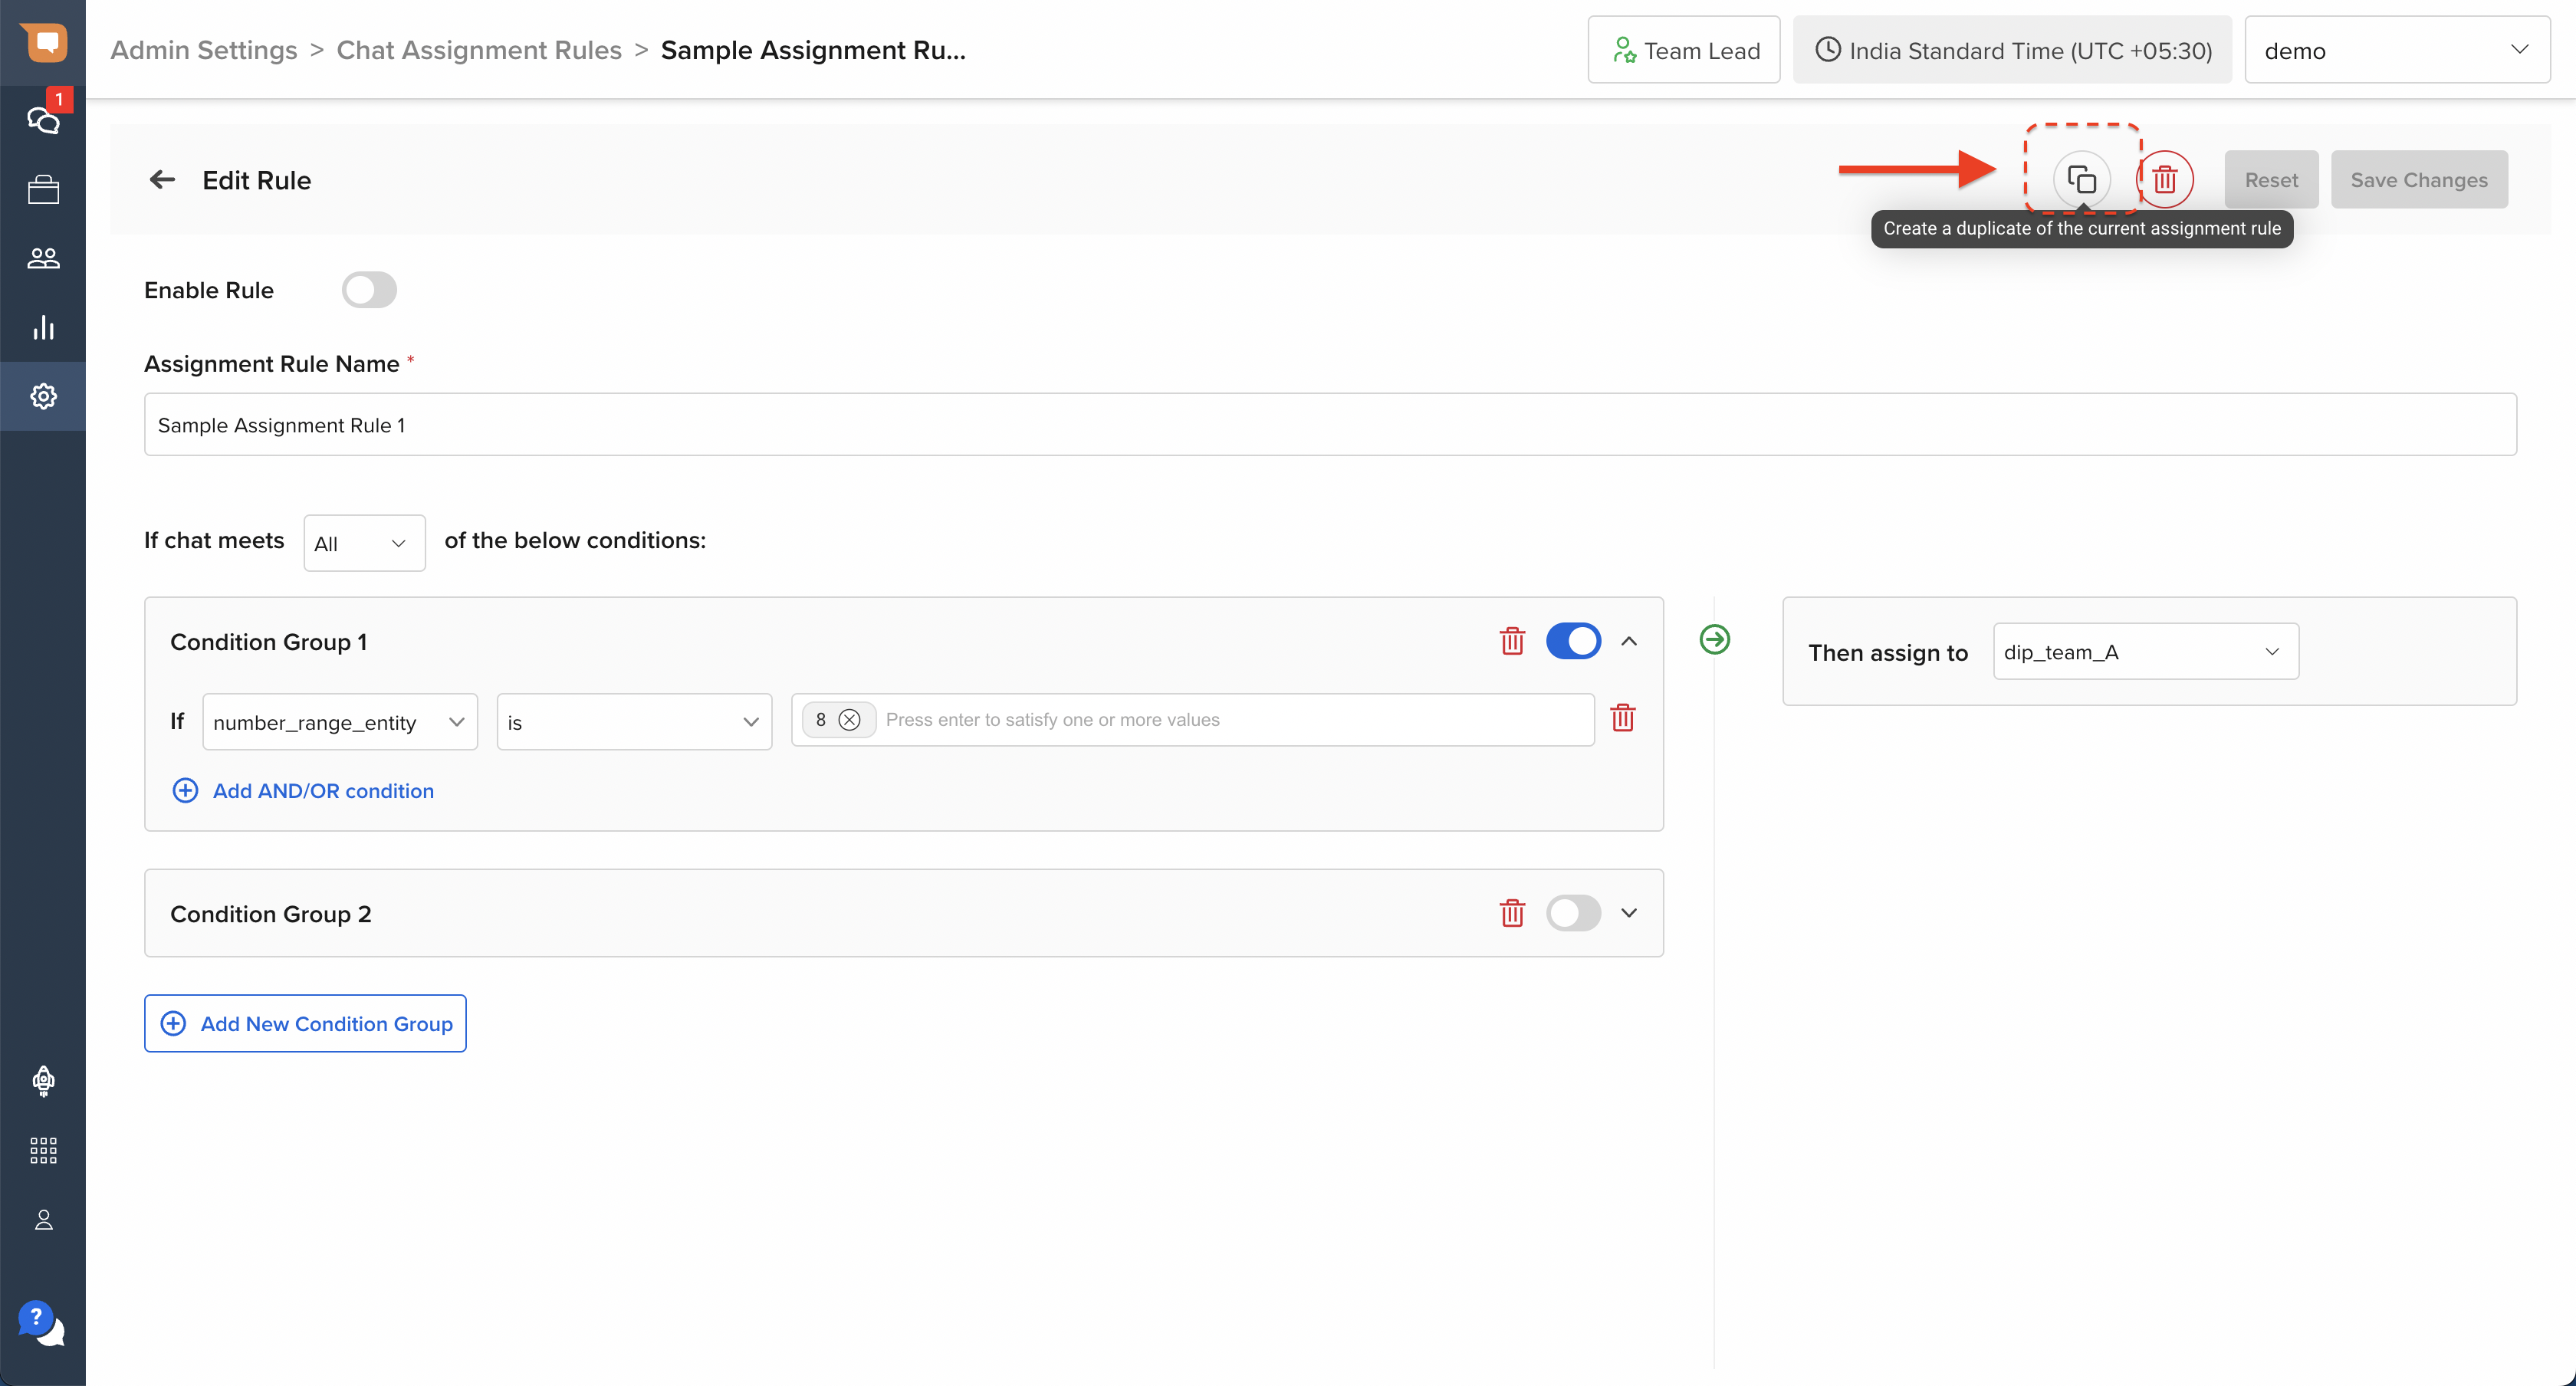
Once you click on the Duplicate button, you will be prompted to confirm the step, as you will be redirected to a new screen to configure the duplicate rule (show below).
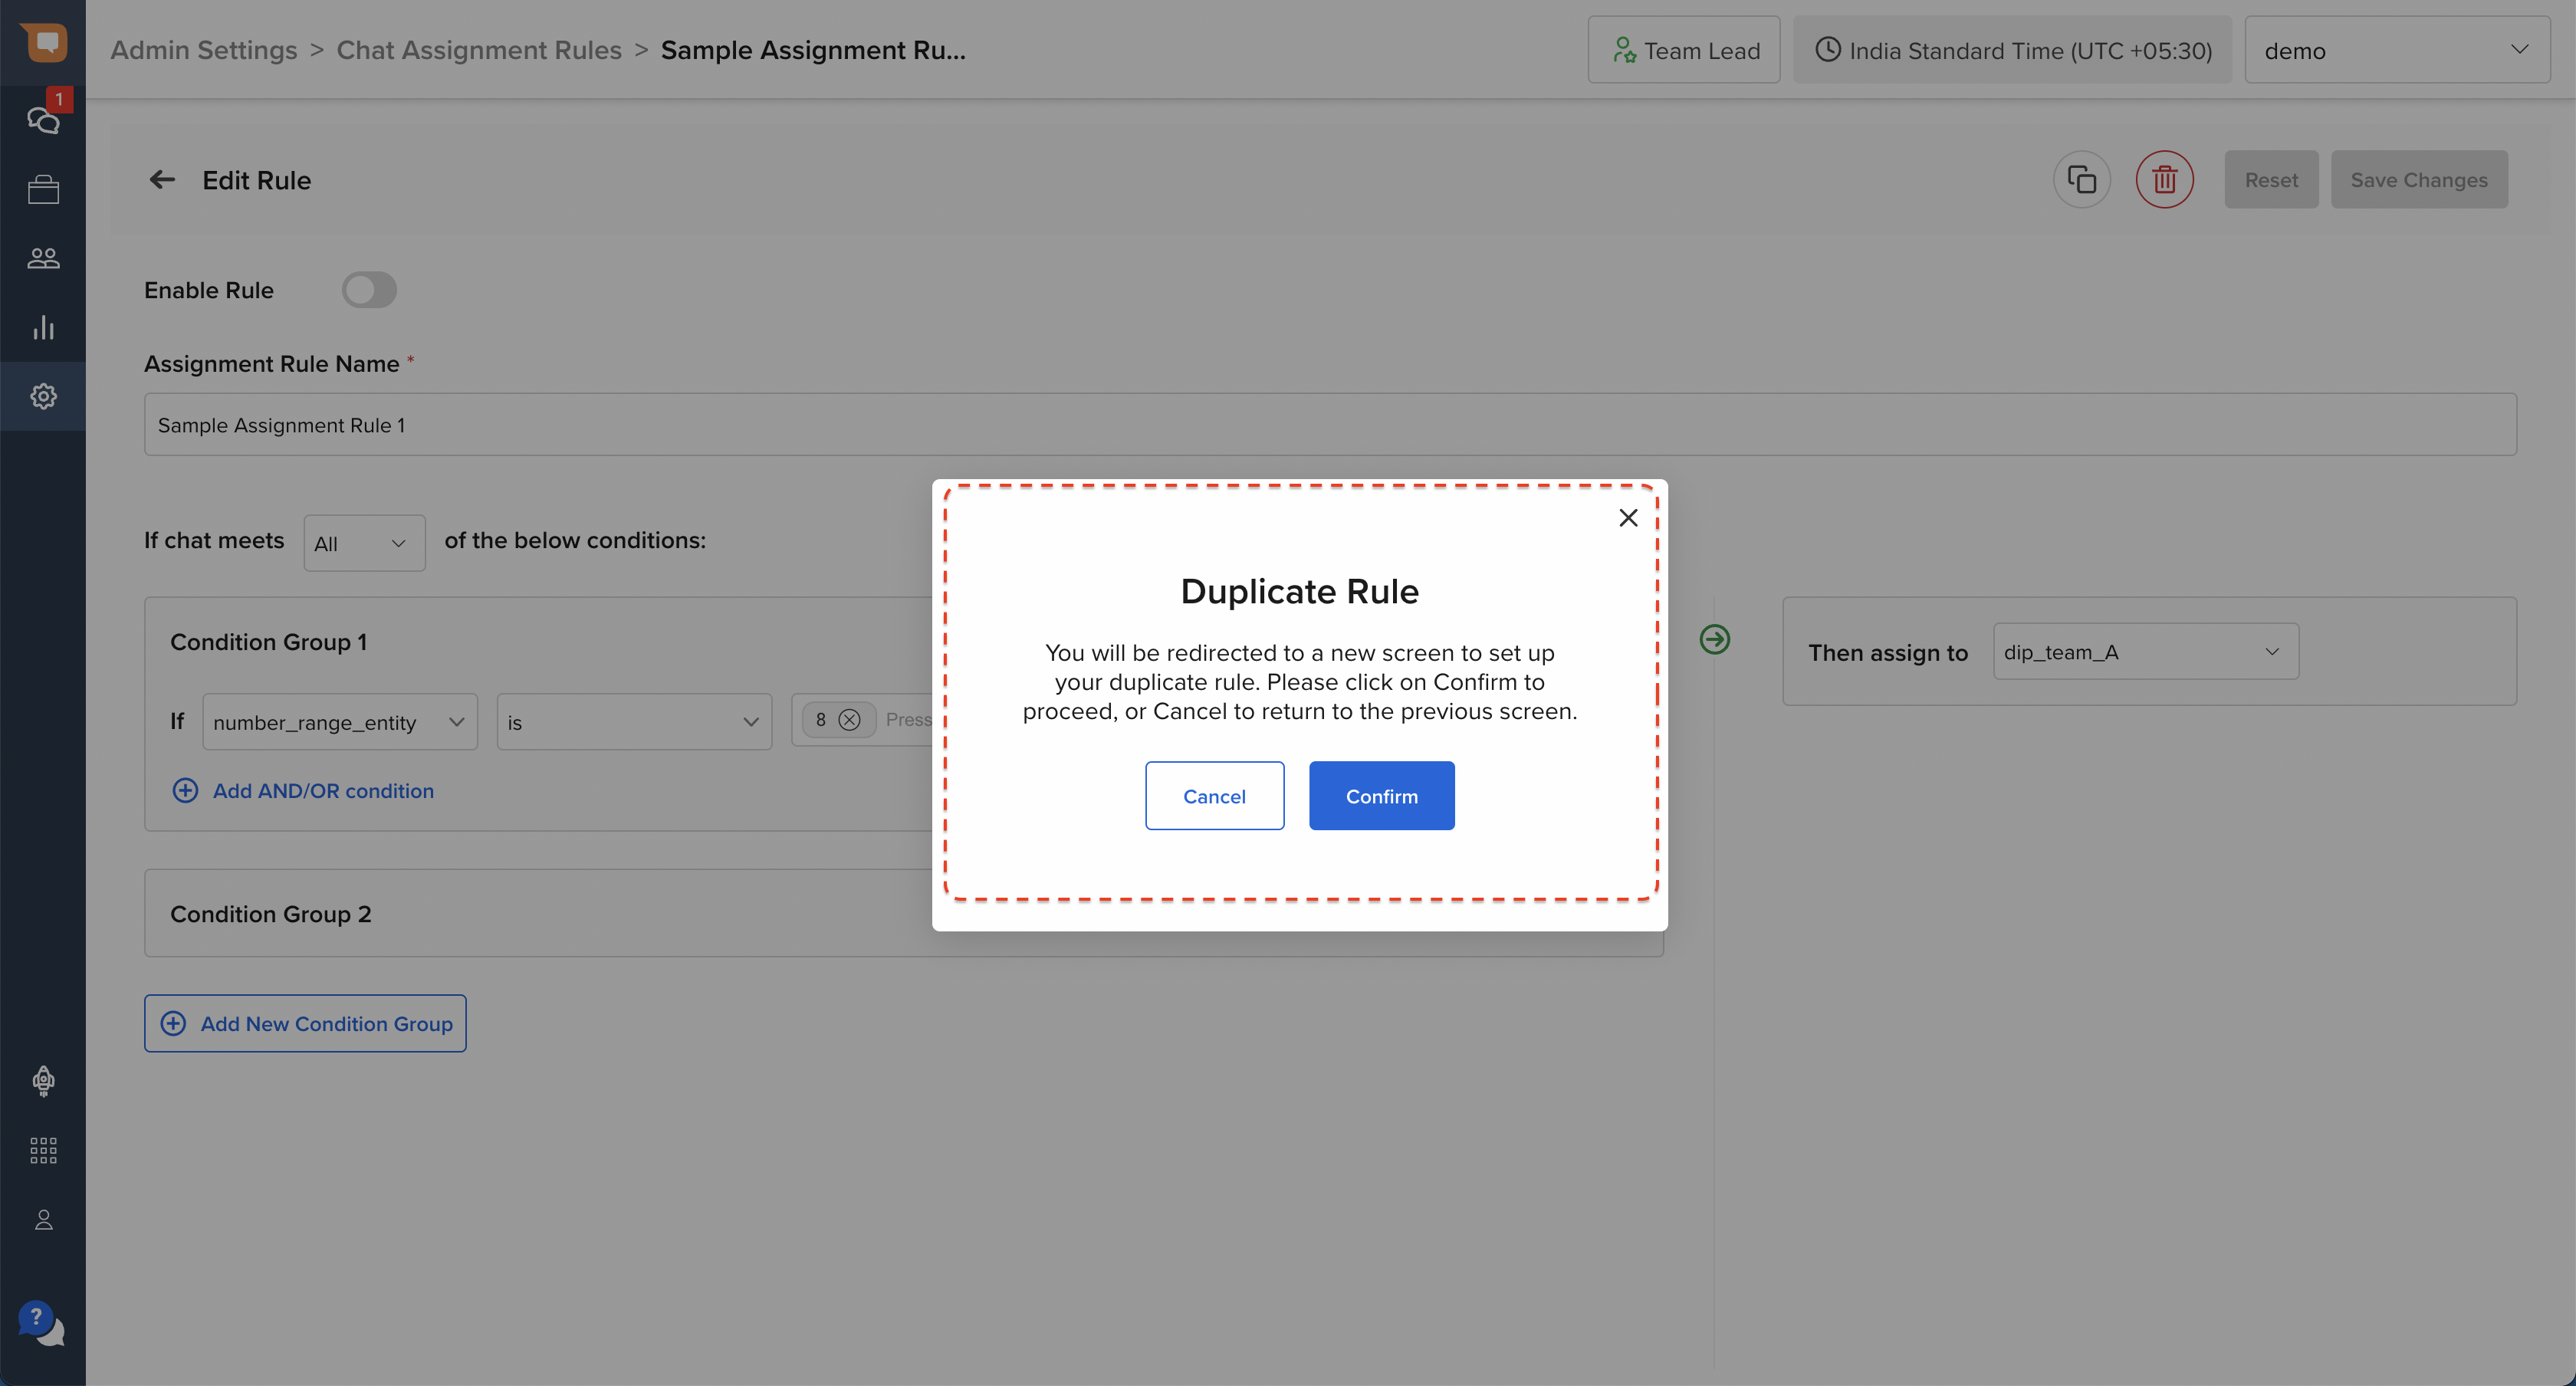
Note: The duplicate rule will only contain changes that have been saved. If you have any unsaved changes on the existing rule, you will be prompted to either Save or Discard those changes before a duplicate rule is generated.
Once the duplicate rule is created, you will be automatically redirected to the configuration screen of the duplicated rule, and see a system confirmation message confirming the creation of the duplicate rule, as shown below.
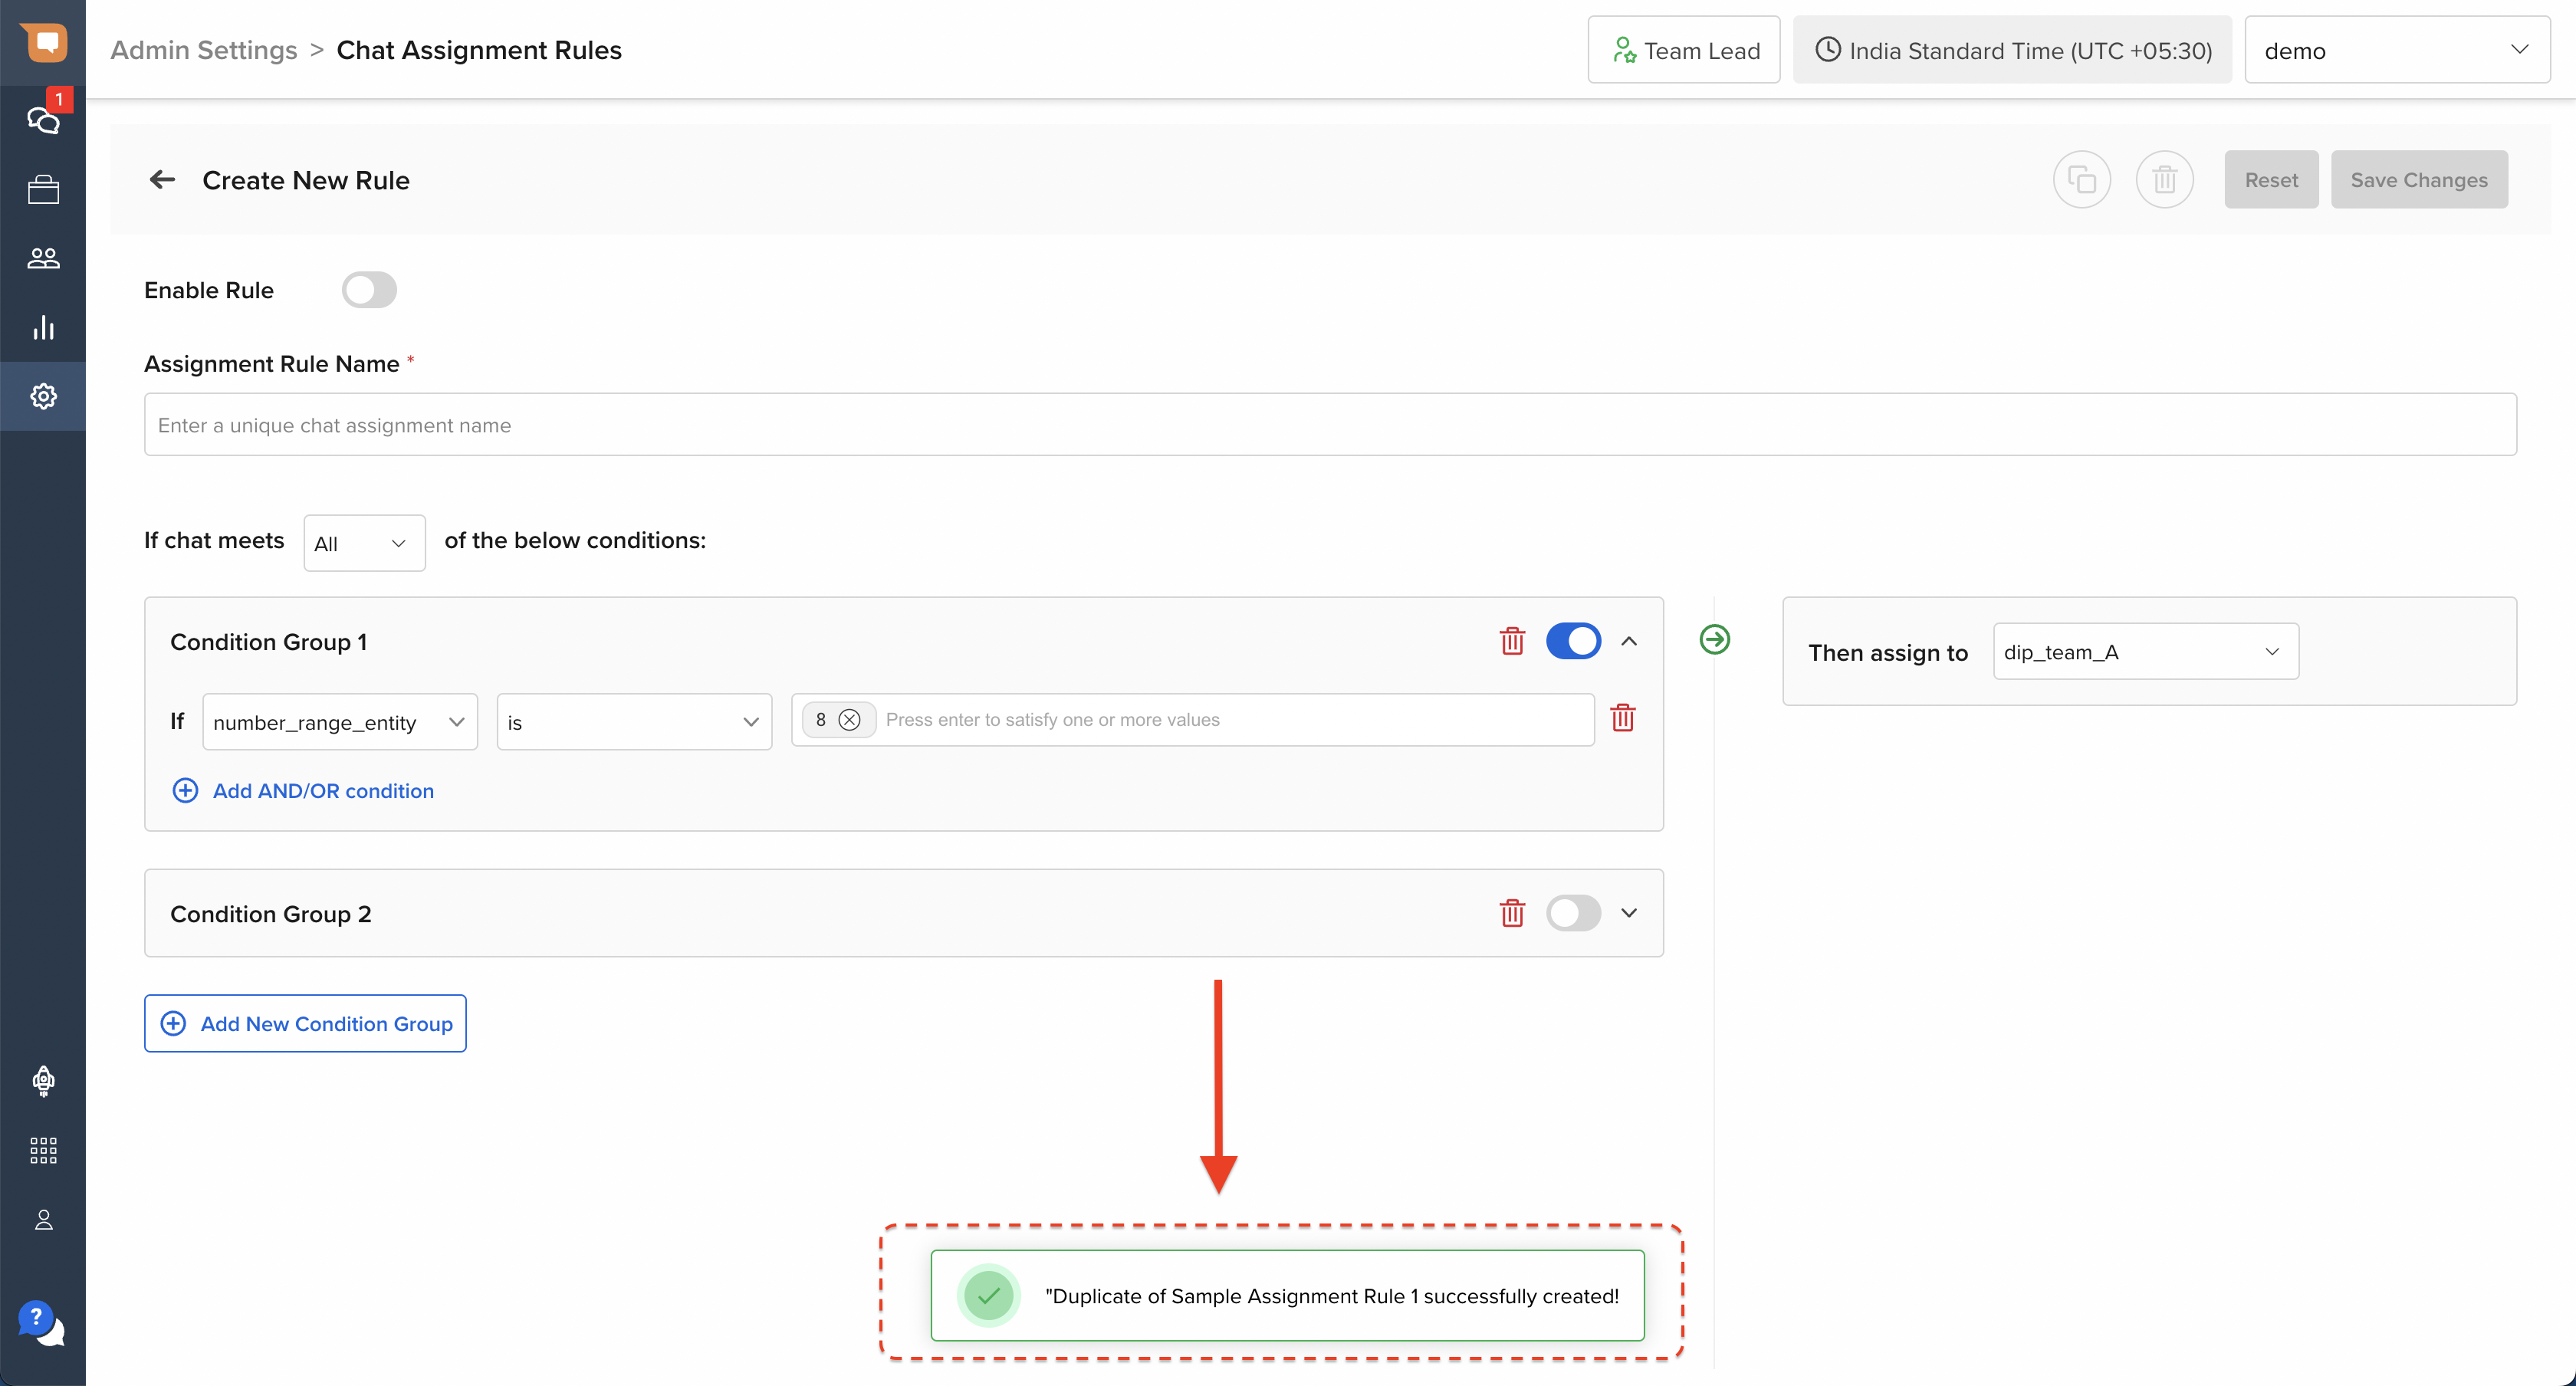
To save this rule, assign a unique name to this rule. By default, this rule will be in the disabled state.
Note: A duplicate rule cannot be enabled directly, as it will conflict with the original rule. To enable a duplicate rule, ensure that either the duplicate version has been modified, or the original rule has been disabled.
Analytics & Reporting
Once chat assignment rules have been enabled on your account, you can find a log of how each chat was assigned in the following columns of the Agent Chat Sessions reports (also present in the chat_data_report).
- Assignment Rule Applied: This column will contain the name of the Assignment Rule that was applied while assigning the chat. This is only applicable for Agent Sessions whose Session Origin Type is “Bot Handover”.
- Case Information: This column will contain a nested object reflecting all the parameters in relation to the chat, that were available and considered for the purpose of chat assignment. This can be used to audit if your assignment logic is functioning as expected.
Read this article for a more detailed explanation of how to access and interpret analytics reports available on SAC.
How to add Keys
There are 2 sources from where the “Keys” are fetched for the purpose of configuring Chat Assignment Rules:
Using Entities
Entities are information collected by the chatbot from the user during a chat. This information could be user-specific data (such as their email address), or information particular to their query (e.g. the topic of the query).
- To learn more about Entities on Contakt, refer to this article.
- To learn how to add new entities, refer to this article.
Using User Details
User Details contain certain key user-specific information collected from the user by the chatbot. This includes information such as Name, Email, Phone, Country, etc.
- To understand how the User Details database is set up, refer to this article.
- To learn more about how User Details can be used, refer to this article.
Using Custom Data
It might happen that your business would require some additional information from users, as part of Feedback collection. This additional information can be collected from the users, in the form of questions asked at the time of feedback collection, with the help of custom_data.
- To understand how to collect custom data, refer to this article.
Limitations of using Custom Data
Information stored in Custom Data (conversation_details) as explained here, are only added to the list of Keys if they are stored as an independent key-value pair. Any keys that are stored as nested key, will not be available as a Key for the purpose of configuring Chat Assignment Rules.
